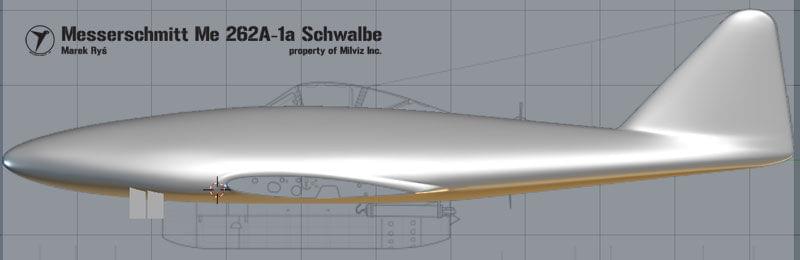
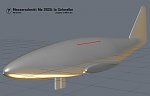
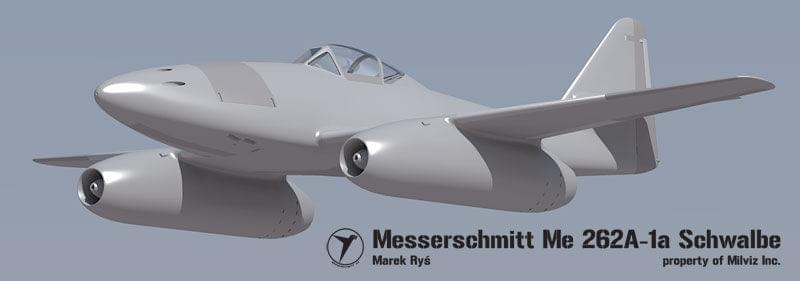
After short break I started with next model. This time something that everybody love: Messerschmitt Me 262 Schwalbe. Few shoots from first day of work.
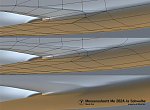
And wires of fuselage and wing’s root. In this plane it is a little tricky part, especially in front and aft part, where it is attached to fuselage.Need to be carefuly with curvature of this element.
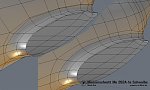
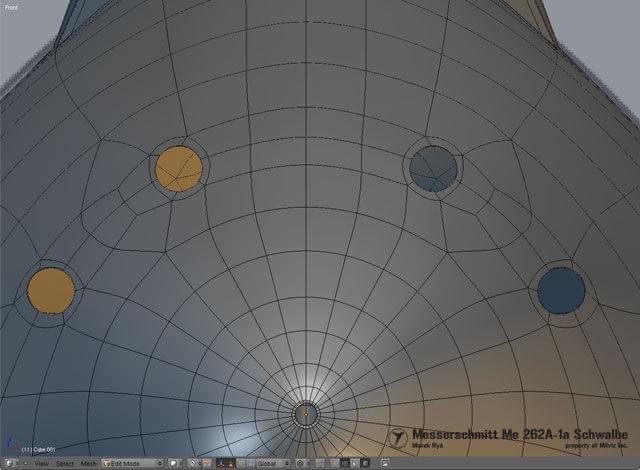
In front part of fuselage you can see two boxes. They are there only temporary as mock up of shell ejection holes. It is my method for setting up crossections. I’ve never found any drawings with perfect crossections and as long time draughtsman I know how difficult is to draw them perfect. So I use crossections only as second level references. For checking their shape I use mock ups of elements, that intersections with fuselage. Observing intersections lines I match them to seen on photographs as close as possible.
It is a little timeconsuming method at the beginning, but gives good results and help in detailing model in next stages of work.
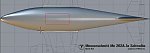
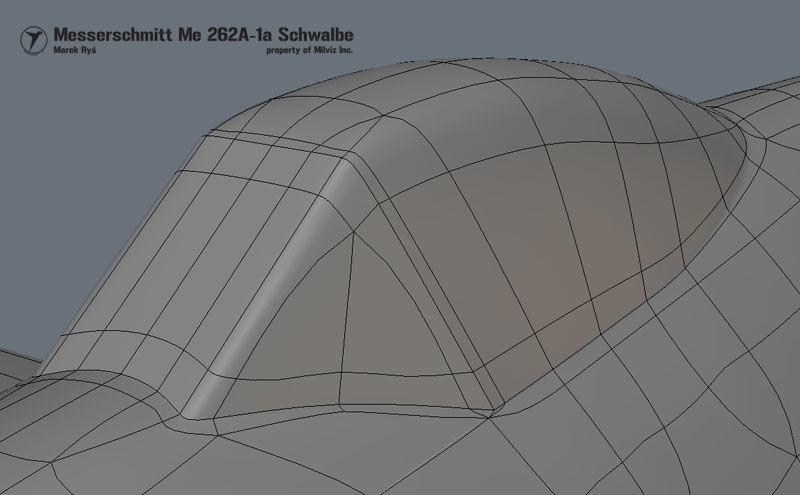
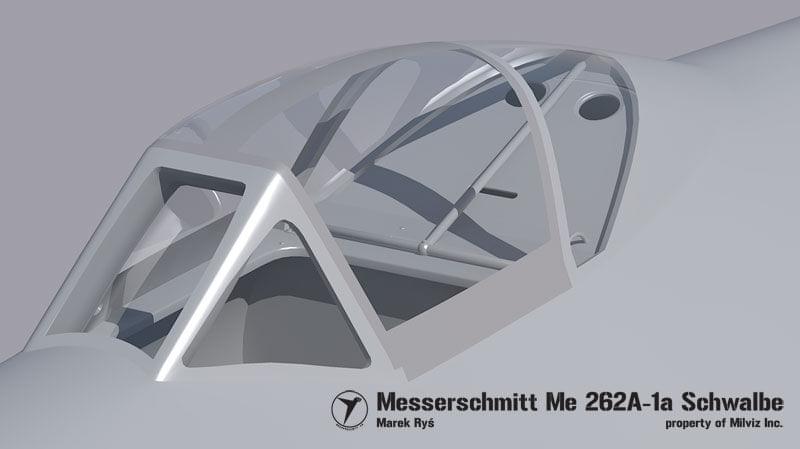
In case of Me 262 most important element from which I started was hole
for cockpit. It has rectangular shape (marked red on next shoots). It is mean, that all crossections in this area on the same height should be the same wide. In subsurf method it is easy to lost this regularity (all start to be curved) and in canopy mount phase will be problem.
Dammit, I hate you.
Your models always turn out nice.
Wants to make me make high poly models too.
Nah, very nice, I’m sure this turns out nice, just as the others
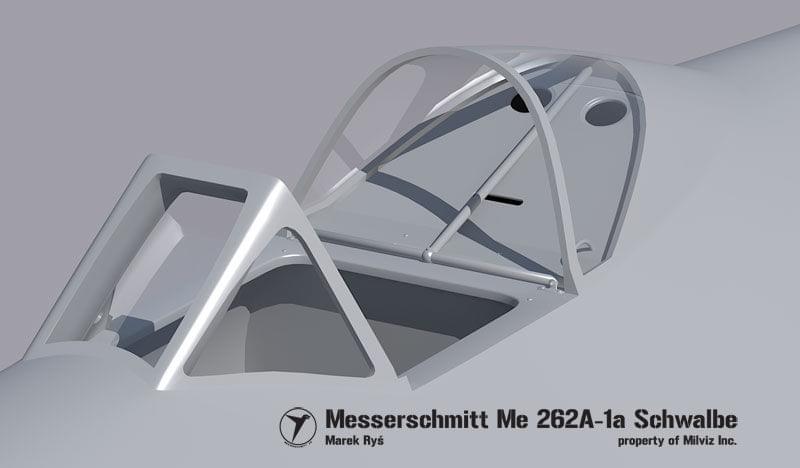
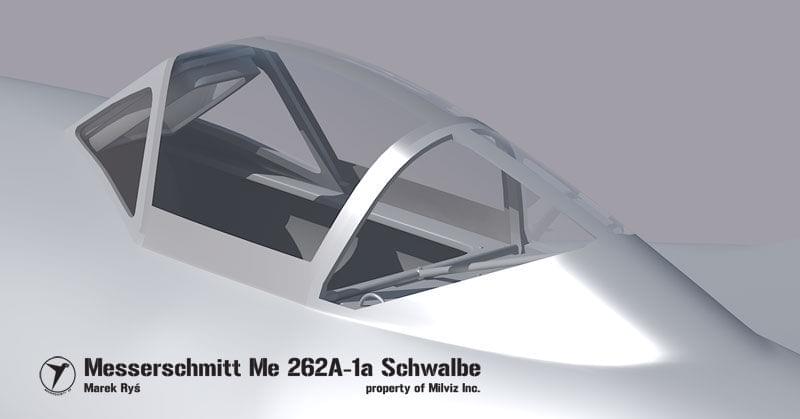
Main works were in cockpit canopy and gun holes area. In last case I was not too keen with existed drawings, especially front views. So I start to correct positions of gunholes in “hardcore” way. I build simplified mock up of MK 108 gun and placed four copies as they should be in weapon bay. It was the base for setting up positions of gunholes. And photographs of course.
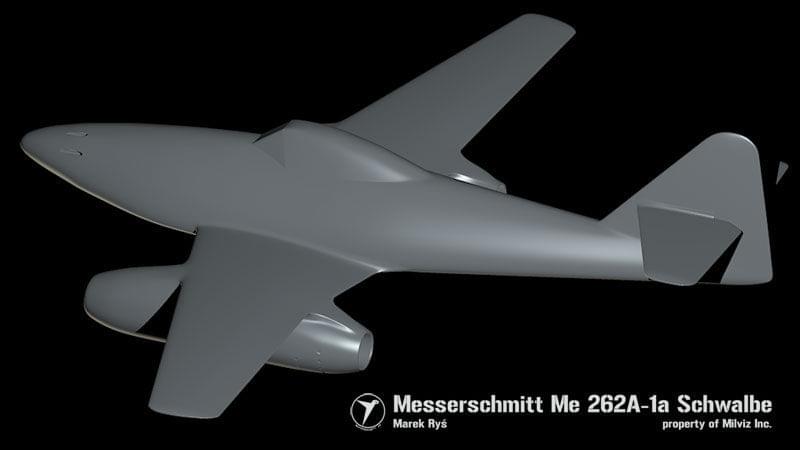
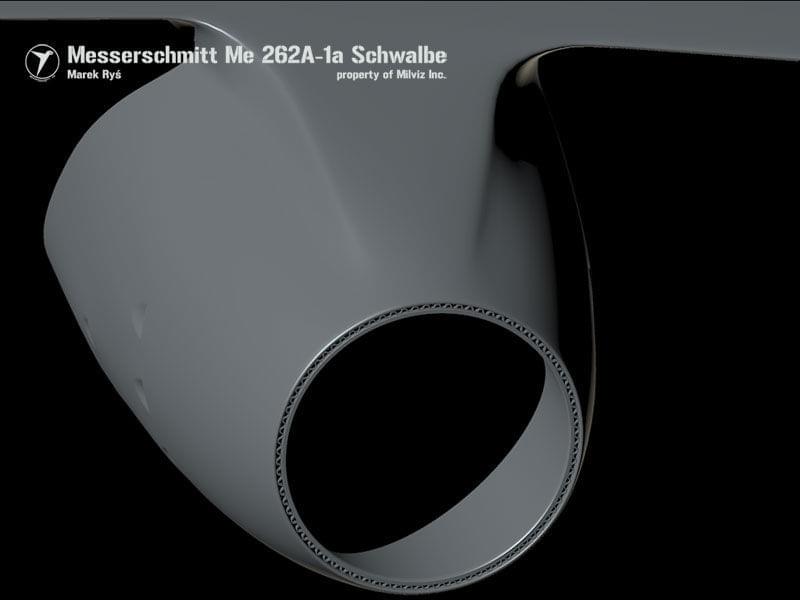
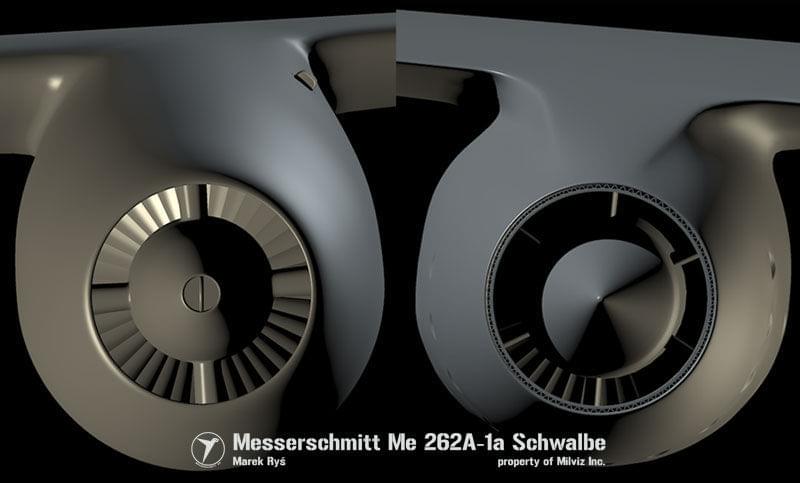
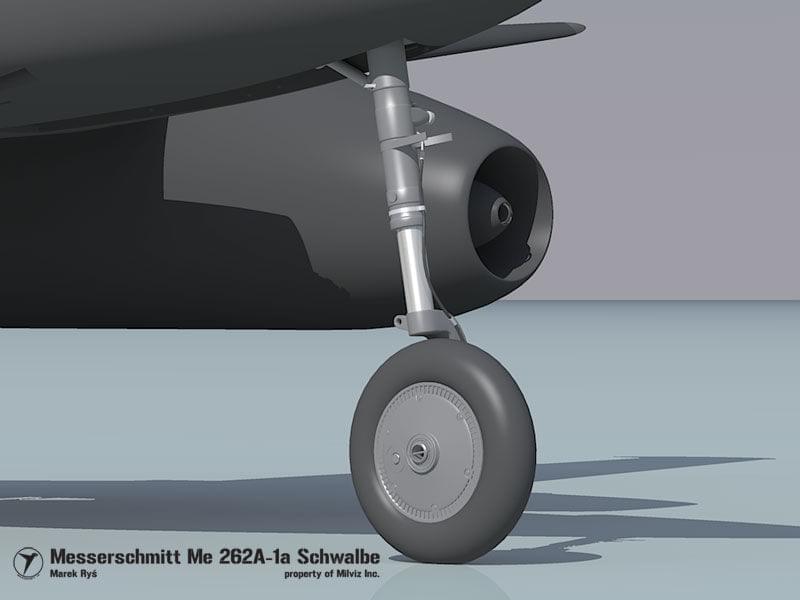
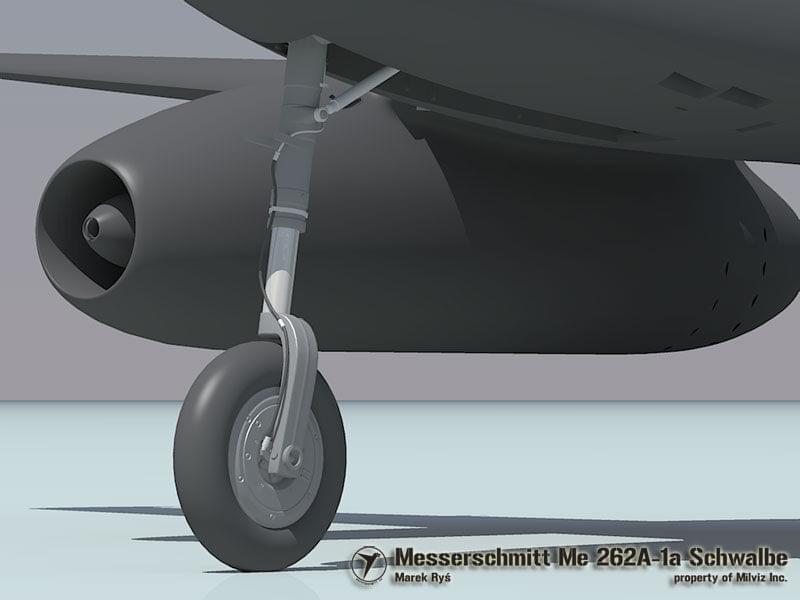
And next update. Airframe is ready from geometrical point of view - time to start detailing. The most difficult part was this rings of small air vents on aft parts of engine’s cowlings. To cut them and preserve curvature of rest of surface I need to hours of hand tweaking. Some small bumpies are still there, but looks as natural bumps on metal surface, so I decided to leave them.
On last shoot you can see the ring of waved metal plate. Rare visible datail. It is layer for separate hot nozzle itself from cowling.
Small bumps that are can be very hardly avoided when modelling with subsurf doesn’t matter on aircraft. It looks more realistic I think, aircraft are a bit more bumpy (especially in war conditions and from 60 years ago) than shiny cars. You are crazy with that detailing…
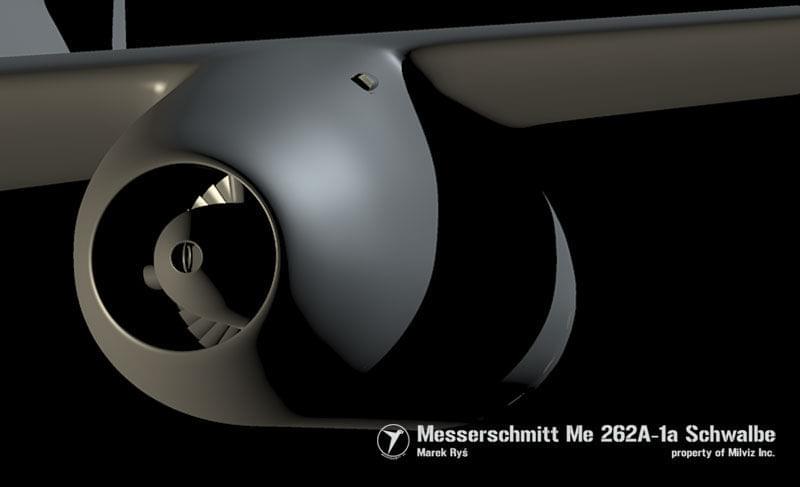
I finished detailing engine. Here is full inlet’s cone and moveable aft nozzle cone. It was moved forward and backward for increasing or decreasing exhaust hole area. Small ring in inlet’s cone front is Riedel starter part.
You mean cockpit as place for pilot or canopy? Hmm… It is hard to tell it in words (images are better) When I start to model cockpit I will send some updates with wires for clearing my method.
Looking very good.
Sometimes, my faith in how professional this program is, can be a bit low.
However, if people, like you, put a good amount of time in it, the finished result can be fantastic.
Perhaps, if you have finished and textured the model, you can put it in a real life situation, like in the air or in the hangar, but that is just (perhaps wrong) advice in advance.
I usually made my models for scenes of course (older works you can see on my web), but lately had no time to finish it. In results few my last models are waiting for my spare time
I used many programs for 3D graphic creation - Blender is not my first - and probably my point of view on this soft is more “professional” (it is not meaning, that I’am more advanced user then other but that I was lucky to work on for exacting clients) then hobbiests. And have to say that as modeller it is great soft - not best, but great. Personaly I prefere to work in Blender then in for example Max. Blender is faster, more flexible and more funny. There is no thing, that you can do with Max and can’t with Blender. Sometimes it is harder way, but result is similar.
So if clients usually requires from their collaborators knowledge of: Max, XSI, Lightwave etc has nothing against guy who works in free Blender - it is mean, that Blender is not only for hobbiest.
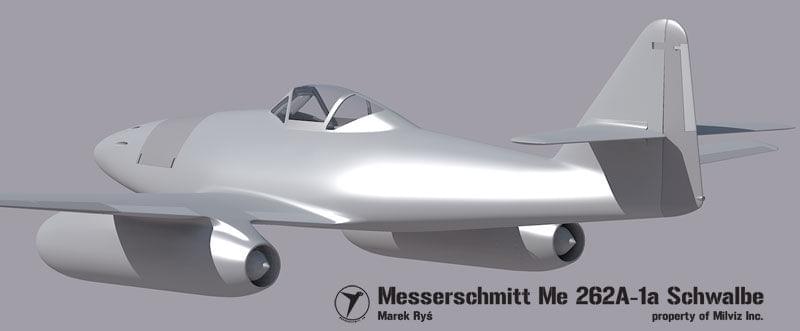
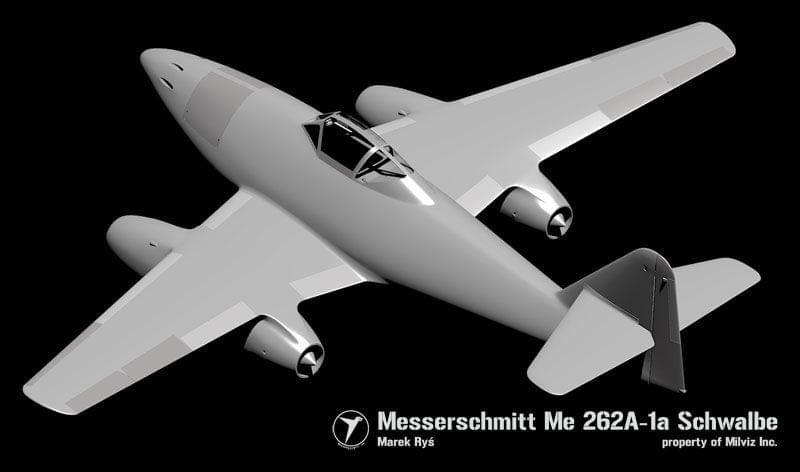
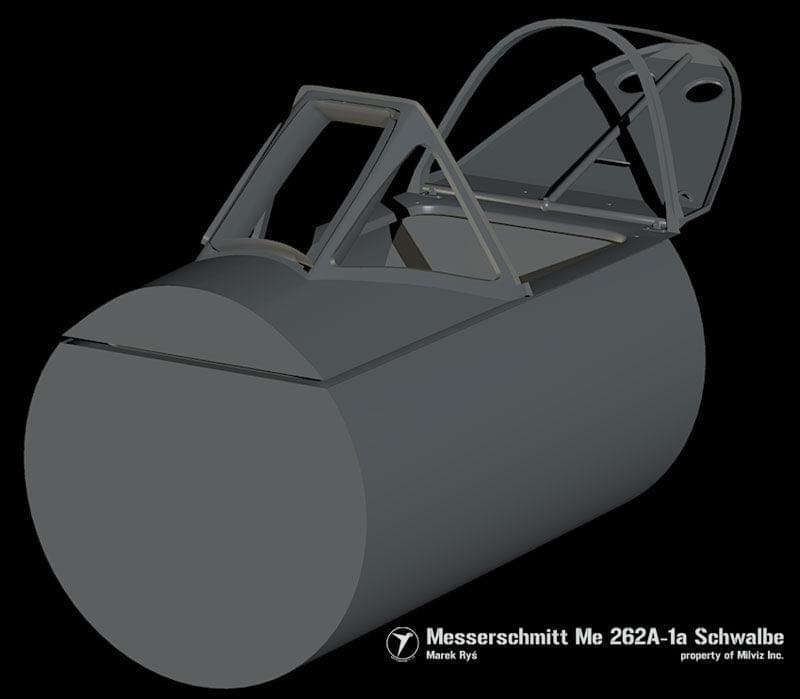
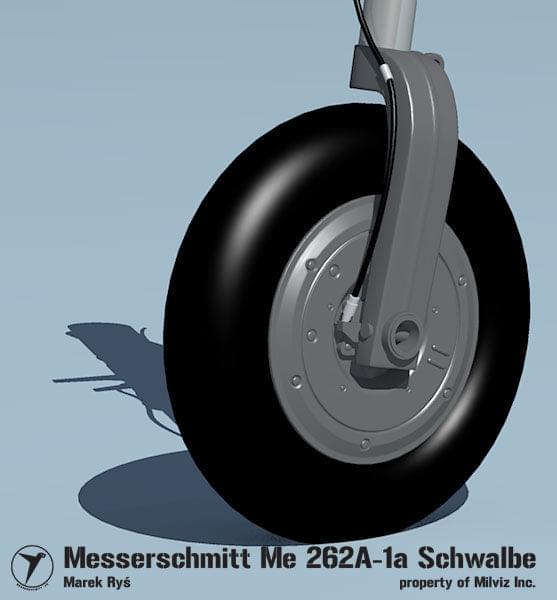
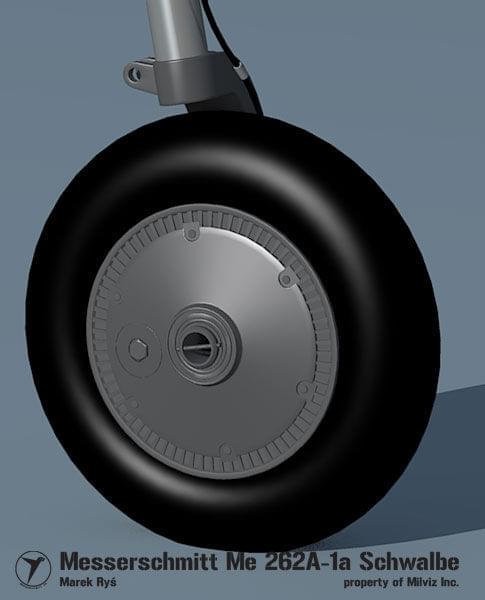
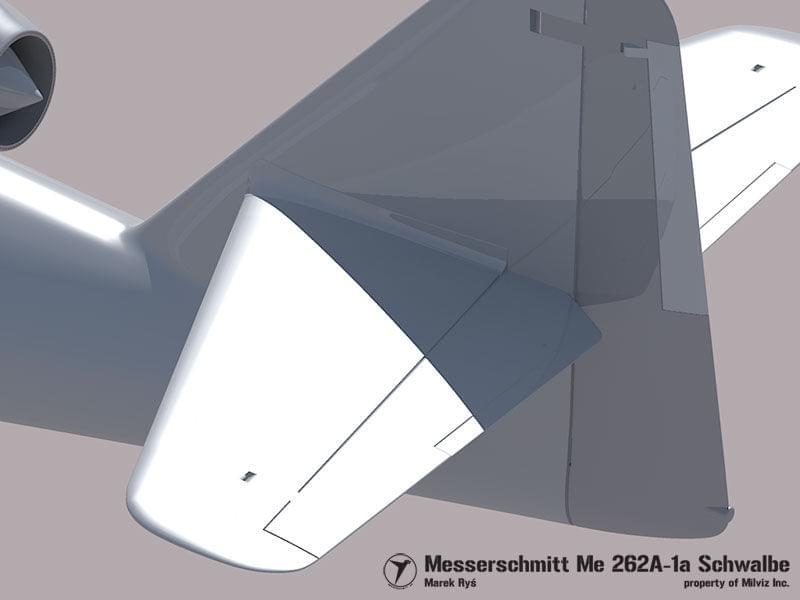
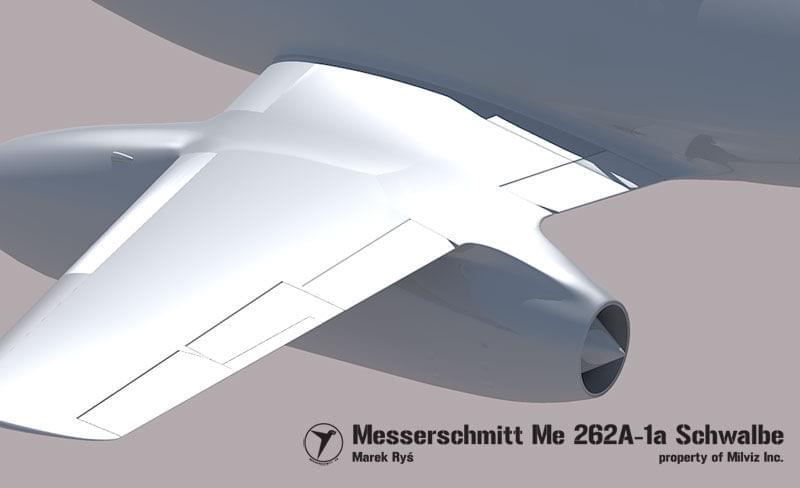
OK, time for new update. Airframe have cuted off main holes: gears bay doors, weapon bay doors, canopy… On weapon bay’s door you can see modelled hinges :). Hard part was to cut off slots, flaps and ailerons from the wing. Slots are 100% ready now, rest wait for finishing modeling. And cockpit: pit cylinder is ready, also aft part behind pilot’s head. Windshield has frame for armoured glass. Most renders was made in Kerkythea - IMO far better then Yafray…