I haven’t got any experience of Blenders armature or constraint systems so I thought it would be good to have a go at some mechanical rigging. To get a feel for the armature system I am modelling an excavator, the back actor (rear hoe) has enough pistons and a linkage arrangement that should offer more of a challenge than simple piston operated leavers.
I have started by making 2D cut-outs of the parts to set up the armatures and constraints. I will add the 3D models to this when I am happy it does what I need it to.
This is all new to me, I could do with an in depth tutorial on rigging and constraints my self. The bucket mechanism is probably simple for someone who knows what they are doing but was a struggle for me, still its a good way to learn.
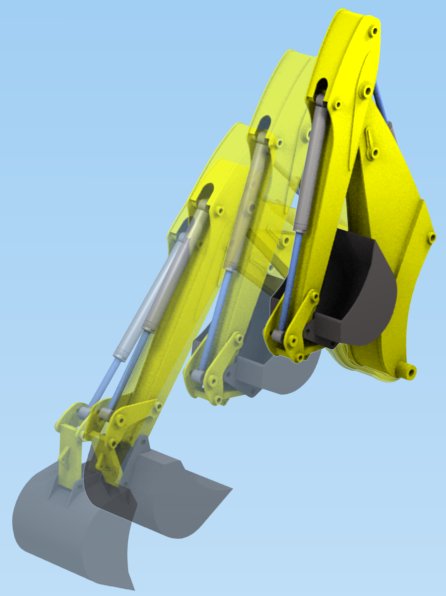
I have progressed a little tonight adding the first arm.
The pistons are simple track to constraints, make sure the object centres are on the rotation point, add an empty at the same location then track the piston to the cylinders empty and the cylinder to the pistons empty.
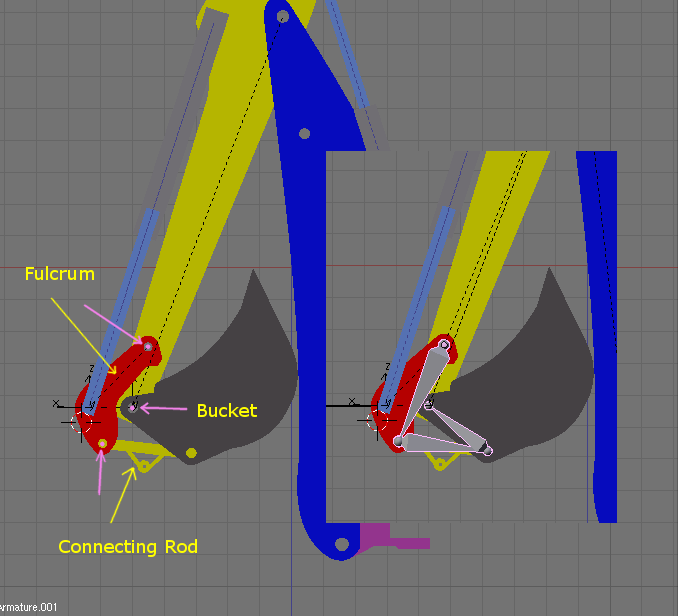
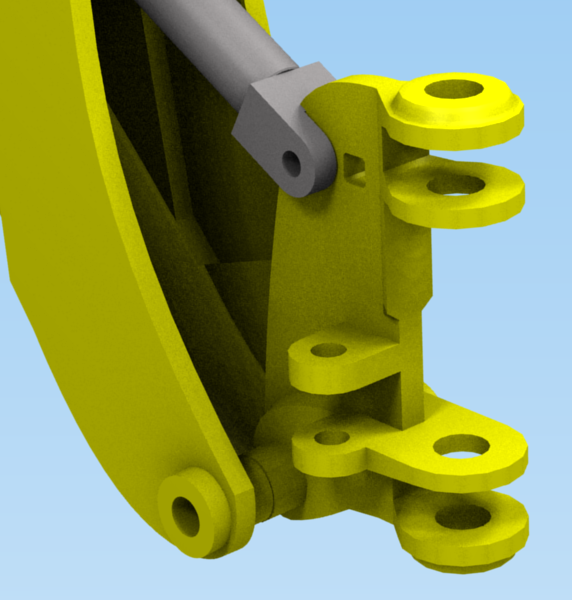
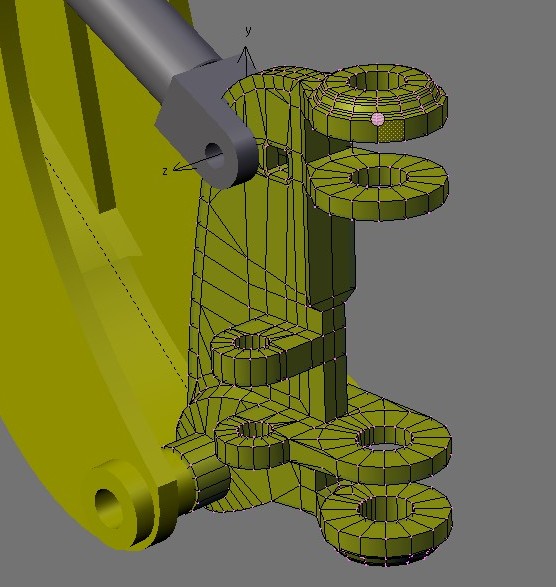
The bucket required an armature, set up the fulcrum connecting rod and bucket with the object centres as shown in pink.
Snap the cursor to the fulcrum object centre and add an armature, snap the toe of the armature to the connecting rod object centre and Ctrl-N to remove the bone roll. Extrude another bone and snap the toe onto the bucket/con rod joint again Ctrl-N then extrude the final bone and snap the toe to the bucket object centre. Add an IK solver constraint to the last bone with the target as bucket and Use Tail activated. Parent the objects to the bones. When you rotate the 1st bone (fulcrum) the bucket and con rod will follow.
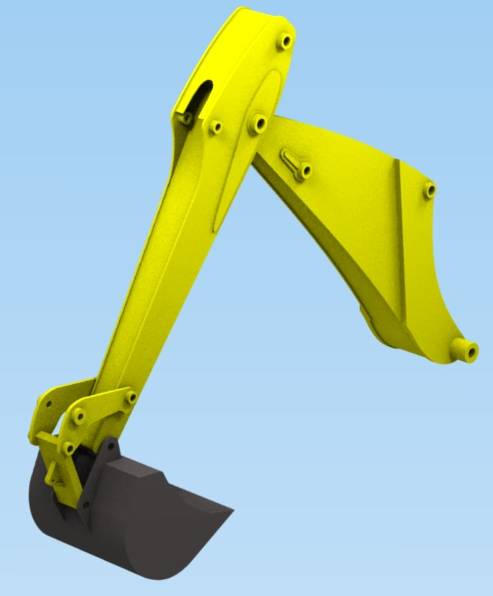
I am progressing slowly with this, the bucket and linkage is now added.
One benefit of modelling from copies of the 2D shapes used to test the rig is that the parts are already parented to the armature. It makes setting up the rig so much easier.
well happy learning. Every project you seem to start at works out great, and this will be no exception.
What you are trying to get done is very easy to rig metinks, but I haven’t time to tinker with it right now.
For this purpose, think of bones as nothing more than pivots to rotate around. The root being the main thing. the tip is more or less just a helper, and the roll of the bone is how the axis for the rotation (localY) is set)
some track to constraints, limit rotation constraints and/or IK with limited rotations and this puppy should fly.
well, if it were a puppy and if puppies could fly anyway.
Thanks FreakyDude I have used key framing in previous animations but never played with constraints or armatures. Luckily as with all areas of blender its pretty intuitive, I mean once you have learnt one area of blender the knowledge carries over and helps in others. With regards to rigging, compared to your “Little Fella” this is quite basic and just something to learn from.
well happy learning. Every project you seem to start at works out great, and this will be no exception.
That’s because I only commit to putting thing in public when I am determined to follow them through. I have got gigabytes of dross and unfinished projects on my PC.
I noticed your link to Metalotherm, does that mean you are also in the chimney / flue business?
RickyBlender: I have about sorted the bucket mechanism as described in post #5 only that gave a fault as you repeatedly animated it everything rolled out of position. I had targeted the IK Solver constraint to the bucket which was parented to the constrained bone. I found you needed an empty on the same location as the bucket centre with the IK targeted to the empty, it works now.
yes I am, though I’m no engineer or something. I just make all the pretty pictures, folders, and documentation. I do get to know a little about it because I work there, and I’ve just finised renovating my own chimney and fireplace last week. which is cool. But I’m not an engineer like you. They make drawings in inventor/autocad/mechanical desktop, and I remodel them in blender to make pretty pictures.
The good thing about using armatures instead of plain old parenting and keyframing is that you can easily reset the pose and store poses, and you don’t have to worry that clearing a loc/rot/scale will bork up the pivot points for all your preciously placed parts.
If your model isn’t all to complex (like this) I would just join everything into one object and weight paint all the seperate parts to bones. Leaves you with a much cleaner end rig. One mesh, one armature, and possibly an empty with widgets (bone display objects) parented to it.
try not to use empties, use another “dummy” bone instead. the reason for this is that you will have a refresh issue with the constaints that depend on them where you will have to skip a frame to refresh the new pose. This is because the empties are taken into account after the armature object has done it’s “calculations” in pose mode.
try not to use empties, use another “dummy” bone instead. the reason for this is that you will have a refresh issue with the constaints that depend on them where you will have to skip a frame to refresh the new pose. This is because the empties are taken into account after the armature object has done it’s “calculations” in pose mode.
It’s little snippets of information like this that are pure gold dust.
I really like the concept and the idea of getting it all rigged to work properly.
I was wondering if you could post some wires of the latest image. I am working on a project with similar style parts (squares with round ends) and I am having some trouble keeping it clean and I would like to see how you accomplished this; if you don’t mind.