I posted the following to the Tutorial forum earlier this year, but it never showed up. So here is another attempt:
The earlier discussions of rigging a crank and piston system that I have found online all seem to end up with direct or indirect mutual constraints between the connecting rod and the piston. Typically, the rod tracks to the head of the piston, and the piston copies the location of the tail of the rod. That is a natural model of the physics, but in the context of Blender’s animation means that at least one is always chasing the previous instead of current position of the other, and so the connection between the rod and piston wobbles.
But using a simple but cunningly constrained IK setup, everything can be done with no cyclic dependencies.
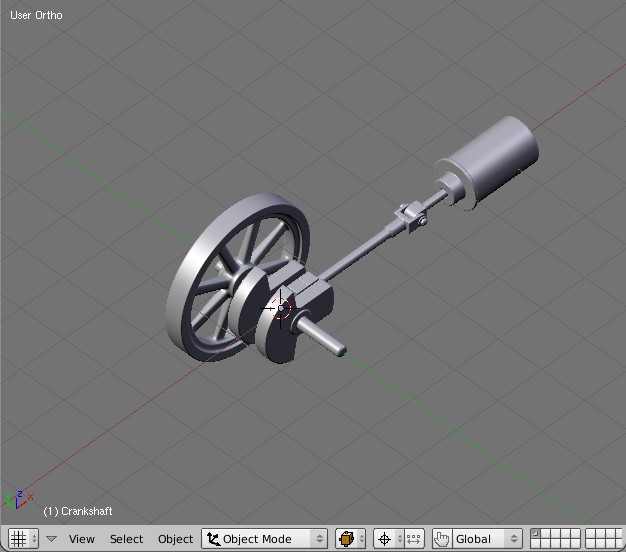
Start with a model to be rigged:
The aim is to connect things so that rotating the flywheel works the piston smoothly.
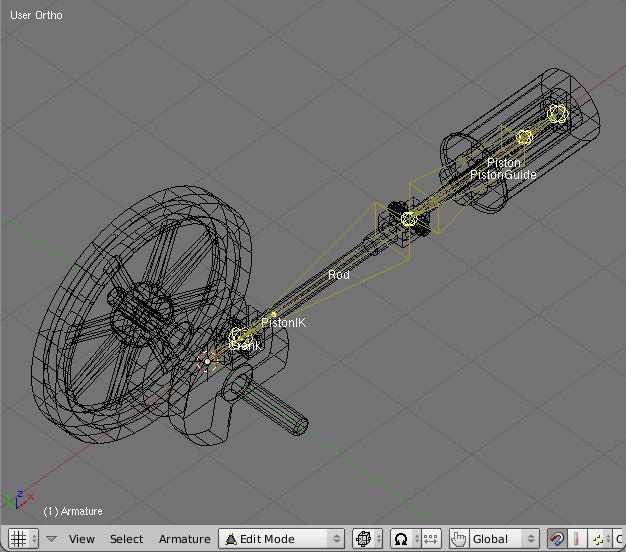
Add an armature, and extrude the obvious deforming bones, one each for Crank, Rod and Piston:
Now flip things round ready for IK:
- disconnect the Rod and Piston bones from their parents;
- reverse the direction of the Rod;
- copy the Piston bone, rename the copy ‘PistonGuide’ and reverse its direction;
- remove PistonGuide’s parent, and make it the parent of both Rod and Piston;
- reconnect Rod and Piston to their new parent, and make them hinges;
- extrude a ‘PistonIK’ control bone from the Crank.
The result looks something like
;
I’ve moved the head of the PistonGuide to the middle of the cylinder, but it doesn’t really matter where it is along the axis.
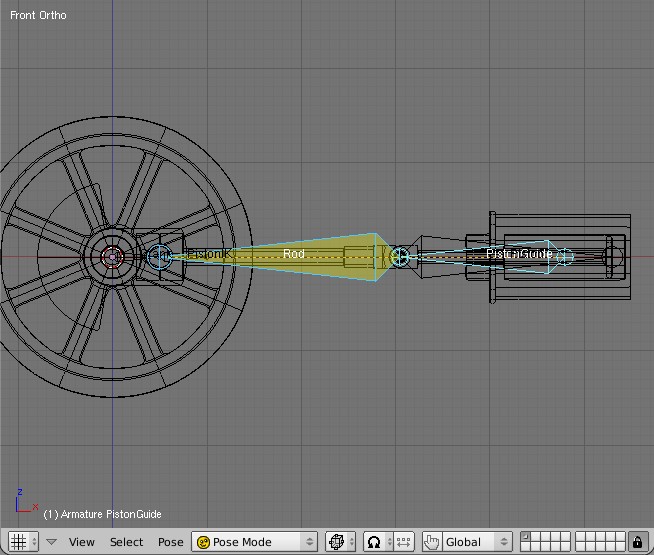
To add the IK constraint, switch to Pose mode, and make PistonIK the IK target of Rod, with a chain length of 2:
(Minor grumble: if the IK constraint had a head/tail parameter for the target bone, as some others do, we wouldn’t need the PistonIK bone at all, but could just target the tail of Crank directly.)
Now comes the trick. The rod can just be allowed to rotate, in the usual IK fashion. But we don’t want the piston to rotate, we want it to slide, and IK doesn’t do slides. Fortunately, it does do stretches. Of course, we don’t want the piston itself to stretch, which is why we need the extra guide bone. PistonGuide has all three rotation axes locked, but the stretch parameter set to maximum:

With the IK in place and appropriately constrained, rotating the Crank bone makes Rod and Piston bones move exactly as desired:
Finally, we can hook up the mesh. Give the Crank bone a ParentTo constraint to the Flywheel, and the Crankshaft, Rod and Piston ParentTo constraints to their respective bones. Rotating the flywheel now drives the piston.
Best wishes,
Matthew