i was hoping someone knew if it is possible to make cell shading for the game. i tried to make it using the edge button but that only works in rendering. any ideas?
The best way to imitate the effect you want is to set the materials on the object to Shadeless, then duplicate the object, scale it up slightly, invert its normals, and give it a shadeless black color.
wow…ok, well i guess that will work. srry for DP but do nodes work in GE?
Material nodes do, except for the “Dynamic” node.
EDIT: Here is a demo of the technique I described before. Hope this helps! 
Attachments
demo.blend (148 KB)
omg thx 
this 2D filter do the job, ou just need to configurate its variables, if you want
/**
- Toon Lines shader by Jose I. Romero (cyborg_ar)
- Based on blender’s built-in “prewitt” filter which is free software
- released under the terms of the GNU General Public License version 2
- The original code is © Blender Foundation.
*/
uniform sampler2D bgl_RenderedTexture;
uniform vec2 bgl_TextureCoordinateOffset[9];
void main(void)
{
vec4 sample[9];
vec4 border;
vec4 texcol = texture2D(bgl_RenderedTexture, gl_TexCoord[0].st);
for (int i = 0; i < 9; i++)
{
sample[i] = texture2D(bgl_RenderedTexture,
gl_TexCoord[0].st + bgl_TextureCoordinateOffset[i]);
}
vec4 horizEdge = sample[2] + sample[5] + sample[8] -
(sample[0] + sample[3] + sample[6]);
vec4 vertEdge = sample[0] + sample[1] + sample[2] -
(sample[6] + sample[7] + sample[8]);
border.rgb = sqrt((horizEdge.rgb * horizEdge.rgb) +
(vertEdge.rgb * vertEdge.rgb));
if (border.r > 0.2||border.g >0.3||border.b > 0.3){
gl_FragColor.rgb = 0.0;
gl_FragColor.a = 1.0;
}else{
gl_FragColor.rgb = texcol.rgb;
gl_FragColor.a = 1.0;
}
}
Great filter! works very well. Storing it away for future use =D
One thing to note is that you need to use flat or toon shading with it because smooth shading causes artefacts. but you’d be doing that anyway so it’s epic
I used some nodes for the materials in conceptRPG. I didn’t get around to an outline, but it seems you may have that covered. Here is a link to the main page:http://sites.google.com/site/conceptrpgbge/news. You can find some old screenshots there as well as a download link. The player materials are in the blend file /Libraries/Players/players.blend.
ah, what a good filter, thank you leonnn
how can I make to disable a filter on the hud?
so the game level is with filter but the hud is not
leonnn is right, the proper, faster and better looking way is using 2d filters; usually getting normals data from the model(relative to the camera), coloring them depending of the angle and giving black fragments(pixels) where there is a severe color difference between 2 pixels; but the code I could examine in cg about that gave ugly results; instead I assigned single color textures to each mesh I wanted to receive ink and coded the cg to use the texture layer instead of normals; basically I did a manual ink effect(better results, but still incomplete). I have no knowledge how to do that on GEGL
Also thanks for the code leonnn, I knew something about cartoon effect and cg, but nothing regarding cartoon and GEGL, will study the code you provided.
I personally suggest you play around with the Nodes. Using the Mathmatics “Round”, “Greater Than/Less Than” and several others can often cause the shading and Lighting of your Surfaces to become pretty toony, you can get some awesome effects this way and have best Control over how each and every Texture and Model’s Shading actually shall look. Also, if you play around with the Vector Mathematics of Dot Product and Cross Products, you may accomplish some fancy Rim Lighting or Rim Shading – now if you then modify that Rim Shading to be very thin and very strong at the same Time, you can get some elegant Cell Shading. I generally dislike Cell Shading, but with such Rim Shadowing Nodes it can look great, because you can modify it to be whatever you imagine it to be like. Ô, and you will not have the Problem of a cellshaded HUD anymore. ;D
EDIT:
Very simple Examples for what I have described. Though it is just about the Cell Shading.
https://docs.google.com/uc?id=0Bx2y0ltoeC2aNjQ3Mzk3OWQtN2I4Yi00YjExLWI0ZjctMWYxNjE1MGRmZjM0&export=download&hl=en_US
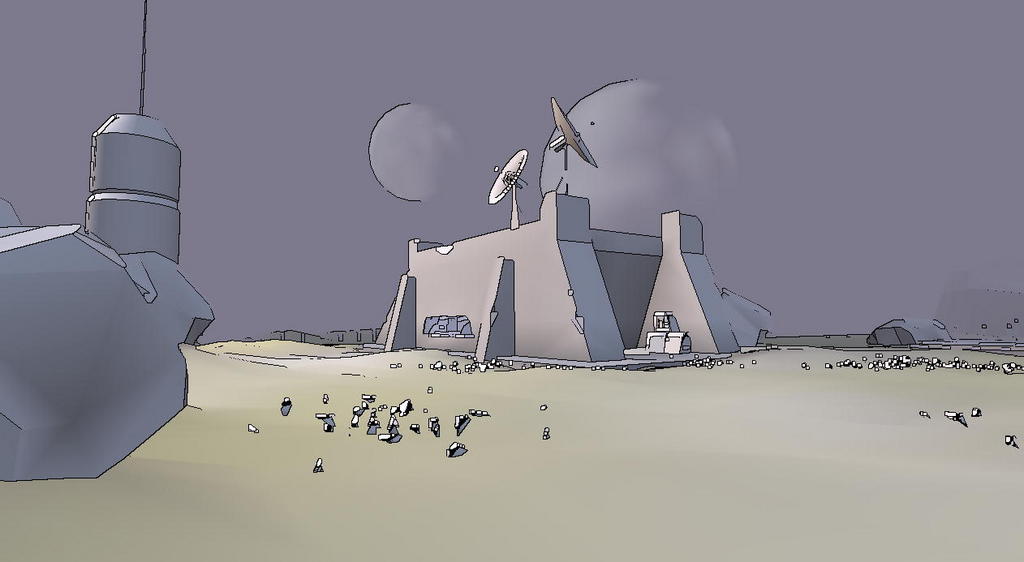
I am working on a new scifi game, with simple and artistic graphics.
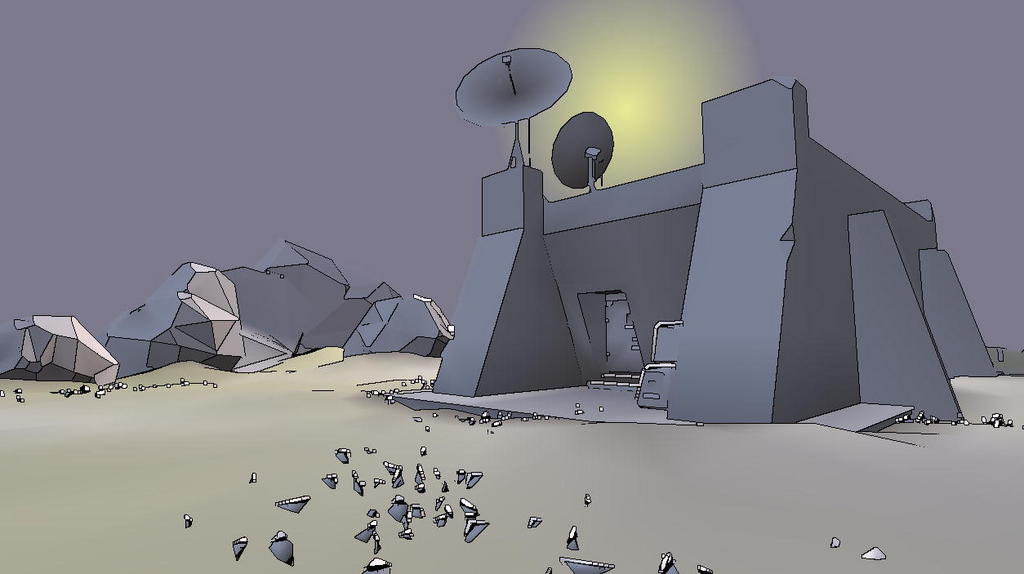
I modified the effect for thinner lines. I think the result is good. 
Attachments
@ abc: w00, that really looks like a Comic! (So did XIII, but it’s Gameplay was Crap…)
Hey, does anyone think that Filter could be modified so that the Lines were accompanied by some Line-Randomness so it actually would look as if drawn with a Pencil?
here is the modified/simplified filter, but! for thin lines you must put a Dilation filter before this (use the pass numbers)
/**
- Toon Lines shader by Jose I. Romero (cyborg_ar)
- Based on blender’s built-in “prewitt” filter which is free software
- released under the terms of the GNU General Public License version 2
- 0 1 2
- 3 4 5
- 6 7 8
- The original code is © Blender Foundation.
*/
uniform sampler2D bgl_RenderedTexture;
uniform vec2 bgl_TextureCoordinateOffset[9];
void main(void)
{
vec4 sample[9];
vec4 border;
vec4 texcol = texture2D(bgl_RenderedTexture, gl_TexCoord[0].st);
for (int i = 0; i < 9; i++)
{
sample[i] = texture2D(bgl_RenderedTexture, gl_TexCoord[0].st + bgl_TextureCoordinateOffset[i]);
}
vec4 horizEdge = sample[3] - sample[4];
vec4 vertEdge = sample[1] - sample[4];
border.rgb = sqrt((horizEdge.rgb * horizEdge.rgb) + (vertEdge.rgb * vertEdge.rgb));
if (border.r > 0.03||border.g >0.05||border.b > 0.05)
{
gl_FragColor.rgb = 0.1;
gl_FragColor.a = 1;
}
else
{
gl_FragColor.rgb = texcol.rgb;
gl_FragColor.a = 1;
}
}
Hi, I tried to test your shader. I know nothing about GEGL, but had made some things on cg(in panda3d); running this shader gives the following error:
ERROR: 0:30: Incompatible types (vec3 and float) in assignment (and no implicit conversions in GLSL 1.10)
I have a AMD Radeon HD 6770, I heard there some differences in writing a shader for it and for a NVIDIA card, what changes I would need to make in the code above for it to work(as it seems to work for abc123)?
Also if someone can explain me how this GEGL code works I would be grateful, but I will look for answers on my own too.
Thanks for any info regarding this
My Error were of another Sort, but I also had to rewrite the Code: the Integer at gl_FragColor.a had to be a float (1.0) and the one “gl_FragColor.rgb = 0.1” in the IF before had to be separated into
gl_FragColor.r = 0.1
gl_FragColor.g = 0.1
gl_FragColor.b = 0.1
Then it worked for me. Already played around with it, and there are several ways to make the Lines thinner. Though using Dilation with it still adds to the Beauty, enormously.
Hey, that worked! Why is that? Does in GEGL you can do calculations with .rgb values as a whole, but to assign a value to it one needs to split that into .r .g and .b? But the float number issue was expected, as I heard somewhere here in the forum which it is the most common problem for new people coding for AMD radeon, as it expect strict stuff, so one cannot write 1, but need to write 1.0 even with 1 being enough for you and other video cards.
Also the results were very ugly, as it did like the standard cg shader in panda3d, it apply the ink to any color difference(texture and even lighting), as a result a lot of my character parts became black, but that sure is an improvement! I can modify this shader later after some GEGL study.

Play around with the Values and, important, as abc mentioned, you should put one Dilation Filter in the Pass before this Custom Filter (Dilation on Pass 0, Custom Filter on Pass 1). And really, take each and every line apart and look what the Values actually do – this way, you can understand the whole thing very fast! 
The Problem with that particular .rgb Line was that .rgb is a vec3 Vector (r, g & b) and “1.0” is just a float, not a vec3 Vector.
BUT I just replaced that whole Line (or the whole three Lines^^) with this:
gl_FragColor.rgb = texcol.rgb/1.5;
… or /2, makes it darker. Now, what does that Line?Pretty easy and pretty pretty: The Lines are not purely black but rather the Color of what they actually are outlining, but darkened. That looks way smoother (if that is an adequate word in the first place…) and has much a lighter Feeling to it. Try it out, felipearts, also might help a bit with your described Problems!
EDIT:
Ô! Or use “-0.25;” instead of “/1.5;” !
That makes the Line Color more colorful! (more Contrast)
Abc123 really saved me time by digging this thread out(I would eventually find it as I really needed this shader!); and you two already started to make some much welcome improvements on it.
I think I understood what you did, instead of assigning black with 0.1 at the final fragment result, you divided the texture color fragment, so the texture color gets darker at some points and everywhere else it just is the color it was initially.
But I think I will go the texture layer method way(which I said way above) for now, which is the only way I found on panda3d to give a controlled ink effect(and probably will work on BGE too); even with it not applying the effect in the inner object fragments. The issue always was the need to control where the effect is applied, it would most likely involve a combination between the texture layer method or something else for outside edges, and something for interior edges at specific points. The last time I really got into it I was using two textures channels to mark where exactly I wanted the effect to be applied in the object inner and outer fragments(one texture channel for each).
I have dug an old thread of mine about the idea(but in cg)
http://www.panda3d.org/forums/viewtopic.php?t=10492&highlight=
If I remember correctly for the edges only at the object corners I had to make the ink shader above look only at a defined texture channel, each object had a texture channel with a single color texture, objects with the same color on that texture channel would be considered a single object for corner ink effect, while object with different colors would be considered separated for the corner ink effect(there would be a black line where they intersect). Also if the texture was of a defined color the object would not appear to the ink shader. One channel just colored the whole object, while other channel colored white the specific parts I wanted.
Not sure if I explained clearly; I will go back with the experimentations. I will let you know when I have restored my texture channel method shader.
EDIT:
Hey! As soon as I started studying blender shaders I saw I was using the wrong word. Instead of GEGL I should be saying GLSL. The SL are initials to “Shader Language”. GEGL is related to nodes. The official link I found for GLSL study are the ones below:
http://www.opengl.org/documentation/glsl/
http://www.opengl.org/sdk/docs/tutorials/
And non official
http://nehe.gamedev.net/tutorial/cel_shading/25001/
http://www.gamedev.net/page/resources/_/reference/programming/140/lighting-and-shading/cel-shading-r1438
http://en.wikibooks.org/wiki/GLSL_Programming/Blender
http://prideout.net/blog/?p=22
http://zach.in.tu-clausthal.de/teaching/cg_literatur/glsl_tutorial/index.html
http://www.opengl.org/wiki/Main_Page
http://www.blender.org/documentation/blender_python_api_2_58_1/bgl.html