md3/mdm/mdx import/export quake-style-models and etxreal(otc6-mod)

md3-import of single objects and quake-style-player-models

! this is useless for anyone without some knowledge about those pk3-files !
and
the shown models are (mostly) copyright by others, this is only a display/test
of the import of this python script for blender-2.61.

The blend-file is only with the script and you have to set the proper path+filename
for the import

If anyone tries it, i did the import of the players tags to an armature and trigger the change of the mesh-shapkeys with one bone to switch on/off. But the different fps-rates of the animations makes it impossible to scale those and display with a bezier-curve-like movement. It might have to use some kind of staircase-fcurve, but the import was not to use those animations, it was only to check the settings (and there are a lot of models with some quirks).
The video proves some of those animation-problems. The scaling of the nla entry of the moving models (special the skelett-like-cowboy) breaks the switch of the shapekeys at some points (then some parts of the object will move weired …).
The easy way is to use the same fps-setting in blender like for the animation, but most every player uses different fps-settings for the single shape-animations …

(code is based on the old blender-2.4x md3-importer)
a lot of quick changes to run it with python3.2
and one bad like this to convert a “bytes-object” to the new string-object:


def asciiz(s):
#    print(s)
    ns = ""
    #return s
    n = 0
#    print(s[n])
#    return s
    for n in range(len(s)):
        if s[n] == 0: return ns
        ns += "%c"%s[n]
    return ns #s[0:n]

the usage of the conversion with “%c” is … (the only idea i had … anyone with a hint how to do it better …)

Attachments

md3in.blend (106 KB)

this md3 testing was only the first step for the mdm/mdx importer/exporter.

after ID opened the source for et/rtcw/doom3, there is still the need to get the graphics to a gpl-like version too (same problem like with openarena, urban-terror …).

Now i can partly read (there are still some errors/missing links) the mdm/mdx format and can try to get an exporter - first for an replacement mesh of the player-model.
Later it should possible to generate the whole thing with its needed frame-animations.

the try on reading the bones-animations:

and for “fun” how the first blender-imports looked like (some days ago),
a picture uploaded to pasteall:
http://www.pasteall.org/pic/26665

Attachments


another step,
import of first texture settings and bones.

Missing is still tags and i still have no clue about the bone-rotations.
Next in progress is a first dirty export to check whats the sense of the
vertex-normals – blender has no vertex-normals …

Attachments


Am I reading this right? You are working on scripting mdm/mdx import and export scripts for Blender?! If you are, that is sooo crazy!! I’ve been waiting for something like this for years and you’ve come along and you’re actually doing it!

I will be eagerly watching this thread for more progress :stuck_out_tongue:

yep, your right. I have waited since 2006 for the opening of the engine-code.
This are 2 more screenshots from the slow progress - even the source is available does not help to get a glance what its used for.

The legs are working with the old animation, but the torso is still a riddle …
I can post the state of the python-coding for import/export, but this makes no sense
if no one else wanna browse thru the ID-sources and solve those puzzles …
I will now take more effort for the tags-import/export, maybe i get a hint why the torso looks like “parented to the wrong bone-parents at some animation-parts”.

Attachments


a bit better working, but with a new mesh i still find some wrong settings.
This is a lower-body + upper-body mesh (and a suzanne on the shoulder)
and a screenshot of the control-export-import-tool.

like already noted, i can post the python-coding, but it is still not working out of the box and only if someone else likes to understand the background of the mdm/mdx
processing in tr_model_mdm.c and tr_animation_mdm.c (of the gpl-ed etxreal/id-et-codebase).

Attachments


next step, got the clue about the disappearing vertices of the model.
The lod did cut off some vertices. Now the lod is set to all vertices
until i set up list of those vertices to collapse. But first will come
the duplication of the seam-vertices. A exported vertices can have only
one uv-texture setting and at seams they have to be duplicated.

the balls in front of the body are no mistake, this was to test that the lod does not delete such a part and they are parented to the thighs.

a blender file with simple upper-body, lower-body, head and backpack
is in the otc6-branch for etxreal. It has a py-script to export the mesh
and another script to patch the body-mesh with the tags and the mdx-skeleton
to an mdm-file. There is a simple bash-script too, to create a directory structure
and copy the files into it, including the skin-files and create a pk3-file for a quick test. It replaces than the player model of the normal et-paks.
location:
> http://otc6.svn.sourceforge.net/viewvc/otc6/branches/otc6_etxreal01/otc6/blender/

Limits at the moment are: the tags and the skeleton is fixed to the one of the original mdm/mdx-files and the vertices of the mesh are only weighted to one single bone. (the mdm-format can use up to 4 bones for the animation of one vertices)

Next there are the usual limits for such kind of models, like only triangles … so one has to has to take care not to convert the model to triangles and losing the original with its quads. Seams have to be set carefully, because every seam will need to create duplicate vertices for the exported mesh and increasing the count of vertices. And last, the possible usage of LOD has to be done by hand (but this is only necessary as a last step and is only for the in-game-performance).

… next will be the replacement for the mdx-skeleton and animation.

two screenshots of the red/blue-robot-like player-models with hit-boxes and trails of bullets - the helmet is still the old et-helmet.

Attachments


This is awesome test-dr!

I’m definitely gonna have to test this out in the next few days and see if I can put some of my models in. It looks like you’ve done an excellent job in getting every (or atleast most of the base features) working properly. Thanks a ton for doing this, you are the man!

a performance test of this simple player-mesh,
more than 50 players (as bots) on old alleys-map.

The displayed fps-rate is not the one the game did run. Its the fps-rate of the video-creation out of etxreal - the game did run with over 50fps with all players. The most time-consuming thing is my bad bot-coding, when the bots try to check the line-of-sight to enemy-players … – so i wonder if the limit of 64 players is not limited by performance any more (with newer computers).

a zipped blender-2.61 file is in the otc6-etxreal branch:
> http://otc6.svn.sourceforge.net/viewvc/otc6/branches/otc6_etxreal01/otc6/blender/

its for exporting the animations and the meshes to an python-pickle format
and the including “3dturtle.py” prog is used to build the mdx and mdm files from it.

The 3dturtle.py is a standalone prog and can used to view the animations and meshs
and to write those to a mdm or mdx file.

What is missing: there are not replacement animations for all old actions, the created mdx-animation file has over 5000 frames but for the missing ones there is only the restpose of the armature (the T-pose). There are no finger-animations, only body, legs, arms, head. Its the default rigify-biped and can therefore used with rigify.

For the meshes there is only the weighting to one bone, there is no LOD at the moment and the clipping is not corrected.

fixed (hope so) the calculation of the bounding-box for in-game cull
and next update in svn will include this in the 3dturtle-prog.

screenshot of all three: blender-2.61, exported blender-data in the 3dturtle to create mdm/mdx from it and the etxreal-engine with mod otc6 and the running model.

Attachments


another milestone for this very old project (from 2006)

now a version with no use of the standard et-paks.

Most textures and images are made as quick replacements.

Better ones, like fire, explode, puff sequences were made with blender
(thanks to the quick-smoke shortcut).
The ak47 is from the old Free-gun-pack-for-et
and the old alleys map was made by Rikard “Drakir” – (some very old
days back in 2004…) but i still like the map for the short loading time
and the different game capturing six flag-positions. The crappy
flagpole with flag without cloth-simulation is made in blender too
and i still got no clue why in one state the whole flagpole is clipped
out of player-view.
Normaly there are no red-bullet-trails and no hitboxes drawn, but
this is to check the differnt shooting positions and … if the hit-boxes
are really nearly in sync with the player-animations and mesh.
Suzanne got its place on a crappy helmet too … :wink:

a next step, with normal/bumpmaps
and fixed for animated md3-models
like the weapon re-load in first-person-view.

and last, cause this pure python (for blender-2.61)
the little script, that created the skeleton like player-body-parts:


# -test-dr april-2012
# howto
# activate user-preferences rigify
# add human meta rig
# if not wanted the double-twist-bones for legs, arms
# in pose-mode select each of arms, bones and change in 
# the bone-property -> rigify-type the marker/setting for twist
# then only one deform-bone will be created
#

import bpy
from mathutils import Vector, Matrix
from math import radians

def mk_meshdata_part(head, tail, matrix, faceoffset):
    a = 0.1
    verts = [ [-a,-a,0], [a,-a,0], [0,a,0], [0,0,1]]
    rot_90_x_axis = Matrix.Rotation(radians(-90), 4, Vector([1,0,0]) )
    edges = []
    faces = [[0,1,2], [0,1,3], [1,2,3], [2,0,3]]
    #scale length
    scale = (tail-head).length
    for i in range(len(verts)):
        for j in range(3):
            verts[i][j] *= scale
        #rotate and move
        v = Vector(verts[i])
        v = rot_90_x_axis * v
        v = matrix * v
        for j in range(3):
            verts[i][j] = v[j]
    for i in range(len(faces)):
        for j in range(3):
            faces[i][j] += faceoffset            
    return verts,edges,faces

def mk_mesh2armature(a_obj):
    if not a_obj: return
    if a_obj.type != "ARMATURE": return
    print("generate for ", a_obj.name)
    bpy.ops.object.mode_set(mode="EDIT")
    verts = []
    faces = []
    vg = {}
    for bone in a_obj.data.edit_bones:
        if bone.use_deform:
            print("generate mesh-part for:", bone.name, bone.matrix)
            print( (bone.tail - bone.head).length )
            v, e, f = mk_meshdata_part(bone.head, bone.tail, bone.matrix, len(faces) )
            vgroupverts = []
            for i in range(len(v)):
                vgroupverts.append( i + len(verts) )
            vg[ bone.name ] = vgroupverts
            verts.extend(v)
            faces.extend(f)
#    print(faces)            
    bpy.ops.object.mode_set(mode="OBJECT")
    mesh = bpy.data.meshes.new(a_obj.name+"_mesh")
    mesh.from_pydata(verts, [], faces)
    obj = bpy.data.objects.new(a_obj.name+"_mesh", mesh)
    bpy.context.scene.objects.link(obj)
    for vgroup in vg:
        if vgroup in obj.vertex_groups:
            pass
        else: #add it
            v = obj.vertex_groups.new()
            v.name = vgroup
        obj.vertex_groups[vgroup].add( vg[vgroup], 1., "REPLACE")
        
mk_mesh2armature( bpy.context.active_object )

and for the history-book-keeping,
the part about the et/etxreal-weapon.cfg animation file:

a try to write down - what its all about

the file with the animation-frame-data has entries
in a fixed table for every possible animation-part.

the lines start with

framestart the_length_of_animation_part fps the-looping-range -anim-bits- animated-weap-file draw-bits

the framecounting starts at 0,
so if i do an animation in blender, i try to start at a simple offset.
For example at frame 100, then this is 0 and an animation length of 10 frames
goes up to frame 109. Then the first frame of the next animation is framestart=10
in the config-file and in blender it is frame 110. This is my way to get not easy
confused from the different countings.

fps is the speed - but i have to check if it is now adjusted in the same way for animated-md3-mesh-files too -

the looping-range, if not 0, it sets the frame-range from the end of this animation, that should be looped
over and over. For example for the shooting-animation, this would be the whole length of the shooting.
For the nade-animation, this is only possible if there is a last part of the pull/activate of the nade,
that can be used as a looping - trembling part.

the anim-bits, are still mystery to me

the setting of the animated-weap-file, this has to be 1 for my animated body-parts or they will
only be used as static (=only the first frame).

the draw-bits should enable the disabling of the drawing of some parts in the animation-part of the line

and last,
the animation of an md3-mesh-file did not work with the old etmain-sources. In cg_weapon.c the offset
for the animated part was calculated in a way, i could never get the mesh animation in sync to the
animation of the tags (emptys in blender). I changed it to use the same frame-numbers like the parent-parts
and now my animated body-mesh is in sync with the exported empty-animations (on which the other weapon-parts
are attached).

for scaling and sizes,
last export of 3rd-view ak47 was made with scaling 48, and it seems still to big … but clip seems to be too small.
The player-view of the weapon in hand is not the same scaling like 3rd-view.
I need to find out the relation of this, it would be nice to work in blender in a smaller scaling and only set
it for the output to md3.

for compare, the video uses the same recorded game like the other videos before, the changes are the textures, player-models, … sounds … etc.
and !! the textures are only for testing it is working, thats why the little bump-map on the player-front-plate is nearly not visible in the video.

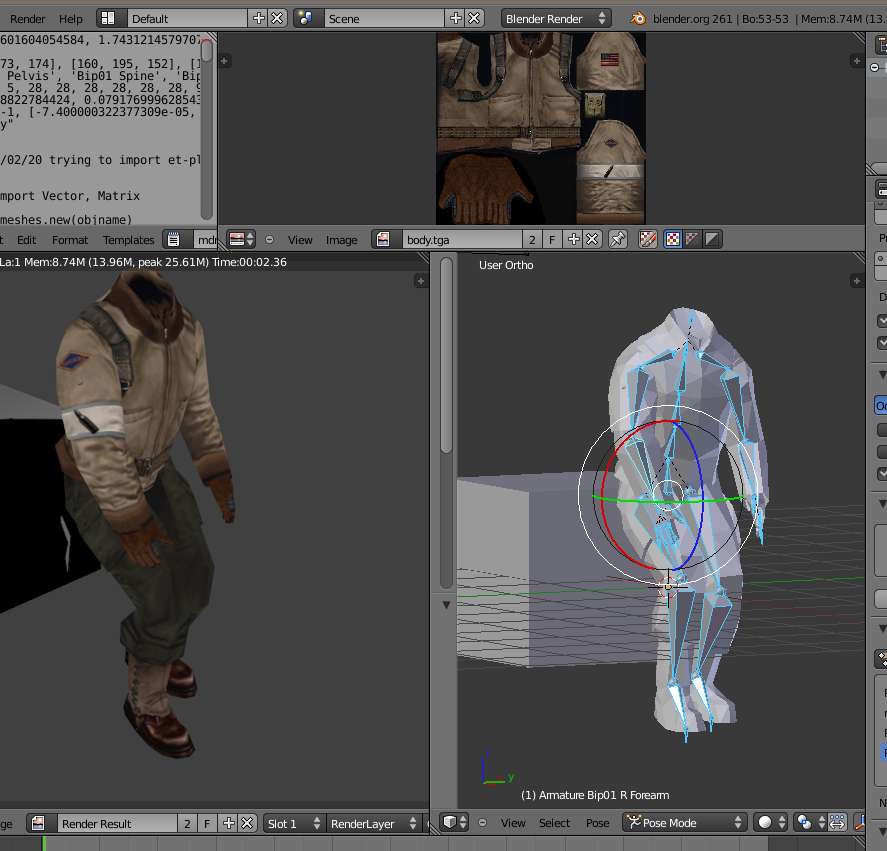
one small example how i use the export-to-md3 tool
to automate the things.


# test-dr /april-2012 -- need to automate this, (--for blender2.61--)
# cause every time some selected manual settings are missing after changes
#
# !!URGENT!! because this uses objects from different layers 
# !! all those layers have to be activated or the objects will not animated and
#  the export runs with no animations
#
import bpy
import os.path
import io_export_md3

#create an object with its first settings to be used for export
#MD3set = io_export_md3.md3Settings("w1/t.md3", "tt", "tlog.log")
# and
# this simply saves the settings for the active selected objects to an md3-file
#io_export_md3.save_md3(MD3set)

# things a need to set are, first select the objects to be used,
# then adjust the frame-ranges and set
# savepath = output-filename
# name = internal-md3-name (used for what?)
# scale = scaling factor

md3_file_contents = {}

def create_md3file_entry(md3filename, scaling, startframe, endframe, offsetobject, objectlist):
    md3_file_contents[md3filename] = [ scaling, startframe, endframe, offsetobject, objectlist ]

def process_md3file_entrys():
    for md3filename in md3_file_contents: #loop through all keys
        print("output to:", md3filename)
        print(md3_file_contents[md3filename])
        scaling, startframe, endframe, offsetobject, objectlist = md3_file_contents[md3filename]
        for obj in bpy.context.selected_objects:
            obj.select = False #set any selected objects to false (un-select)
        for obj_name in objectlist: # now select the objects to be exported to md3
            bpy.data.objects[obj_name].select = True
        #if bpy.data.objects[offsetobject].type == "EMPTY":
        
        if startframe > bpy.context.scene.frame_end: #then set first endframe
            bpy.context.scene.frame_end   = endframe
            bpy.context.scene.frame_start = startframe
        else: # its in the possible range to be set
            bpy.context.scene.frame_start = startframe
            bpy.context.scene.frame_end   = endframe
            
        bpy.context.scene.frame_set( startframe )  #set first frame
        bpy.context.scene.update() # and update settings ... and then get the possible offset of another object
               
        if offsetobject == "center":
            offset = [0., 0., 0,]
        else: # use the objects world-location
            offset = bpy.data.objects[offsetobject].matrix_world.to_translation()

        md3name = os.path.split(md3filename)[1]  # get the last part of the output-md3-file
        md3name = os.path.splitext(md3name)[0]   # remove the extension and use this as default inside the new md3
        
        MD3set = io_export_md3.md3Settings(md3filename, md3name, md3filename+".log")
        MD3set.name = md3name
        MD3set.savepath = md3filename
        MD3set.scale = scaling
        print("subtract offset:", offset)  # for visible compare, ... before the scaling is set
        MD3set.offsetx = -offset[0] * scaling
        MD3set.offsety = -offset[1] * scaling
        MD3set.offsetz = -offset[2] * scaling
        if startframe == endframe: MD3set.oneframe = True
        else: MD3set.oneframe = False
        # do the export
        io_export_md3.save_md3(MD3set)
        del( MD3set ) # delete the class-object to start with an empty, fresh one
                
# outputfilename -scaling-factor - framerange  -- offset-object(empty or mesh itself) or "center" for 0,0,0 
# carefull and always needs checking, the offset object may be the wrong one,
# for the main-weapon-body in game set to tag_weapon its only tag_weapon if at center loc tag_weapon is too at center
# and naturally the mesh too
layers_status = []
frame_status = {}
frame_status["frame_start"] = bpy.context.scene.frame_start
frame_status["frame_end"] = bpy.context.scene.frame_end
frame_status["frame_current"] = bpy.context.scene.frame_current

for i in range(20):
    layers_status.append( bpy.context.scene.layers[i] )
    bpy.context.scene.layers[i] = True

create_md3file_entry("w1/w1_ak47_body.md3",    32, 1, 70,  "center", [ "a_skeleton" ])
create_md3file_entry("w1/w1_ak47_animation.md3", 32, 1, 70, "center", ["tag_body", "tag_weapon", "tag_clip", "tag_barrel"])
create_md3file_entry("w1/w1_ak47_single.md3", 50., 90, 90, "center", ["ak47_skin1", "ak47_skin2", "ak47_clip_skin", "tag_brass", "tag_flash"])
create_md3file_entry("w1/w1_ak47.md3",        32., 90, 90, "center", ["ak47_skin1", "ak47_skin2", "tag_brass", "tag_flash"])
create_md3file_entry("w1/w1_ak47_clip.md3",   32., 90, 90, "tag_clip", ["ak47_clip_skin"])

#only one nade-type-object, is used for nade, smokenade, flashnade too
create_md3file_entry("w1/w1_nade1_single.md3",   50, 190, 190, "center", ["Nade_Ico"])
create_md3file_entry("w1/w1_nade1.md3",          32, 190, 190, "center", ["Nade_Ico"])
create_md3file_entry("w1/w1_nade_body.md3",      32, 100, 170, "center", [ "a_skeleton" ])
create_md3file_entry("w1/w1_nade_animation.md3", 32, 100, 170, "center", ["tag_body", "tag_weapon"])

# for the m4 i did adjust the clip-location and then its not tag_clip.
create_md3file_entry("w1/w1_m4_body.md3",    32, 300, 370,  "center", [ "a_skeleton" ])
create_md3file_entry("w1/w1_m4_animation.md3", 32, 300, 370, "center", ["tag_body", "tag_weapon", "tag_clip", "tag_barrel"])
create_md3file_entry("w1/w1_m4_single.md3", 50., 390, 390, "tag_weapon", ["m4_skin", "m4_clip_skin", "tag_brass", "tag_flash"])
create_md3file_entry("w1/w1_m4.md3",        32., 390, 390, "tag_weapon", ["m4_skin", "tag_brass", "tag_flash"])
create_md3file_entry("w1/w1_m4_clip.md3",   32., 390, 390, "m4_clip", ["m4_clip_skin"])

create_md3file_entry("w1/w1_m16_body.md3",    32, 200, 270,  "center", [ "a_skeleton" ])
create_md3file_entry("w1/w1_m16_animation.md3", 32, 200, 270, "center", ["tag_body", "tag_weapon", "tag_clip", "tag_barrel"])
create_md3file_entry("w1/w1_m16_single.md3", 50., 290, 290, "tag_weapon", ["m16_skin1", "m16_skin2", "m16_clip_skin", "tag_brass", "tag_flash"])
create_md3file_entry("w1/w1_m16.md3",        32., 290, 290, "tag_weapon", ["m16_skin1", "m16_skin2", "tag_brass", "tag_flash"])
create_md3file_entry("w1/w1_m16_clip.md3",   32., 290, 290, "tag_clip", ["m16_clip_skin"])

create_md3file_entry("w1/sm_shell.md3",      32,    0,    0, "center", ["shell"] )
# at frame 93 the flash is at center-position (parent-constraint influence = 0.)
create_md3file_entry("w1/w1_ak47_flash.md3", 32,    93,   93, "center", ["f_machinegun"])

process_md3file_entrys()

for i in range(20):
    bpy.context.scene.layers[i] = layers_status[i]
bpy.context.scene.frame_start = frame_status["frame_start"]
bpy.context.scene.frame_end   = frame_status["frame_end"]
bpy.context.scene.frame_start = frame_status["frame_start"]
bpy.context.scene.frame_set( frame_status["frame_current"] )
bpy.context.scene.update()

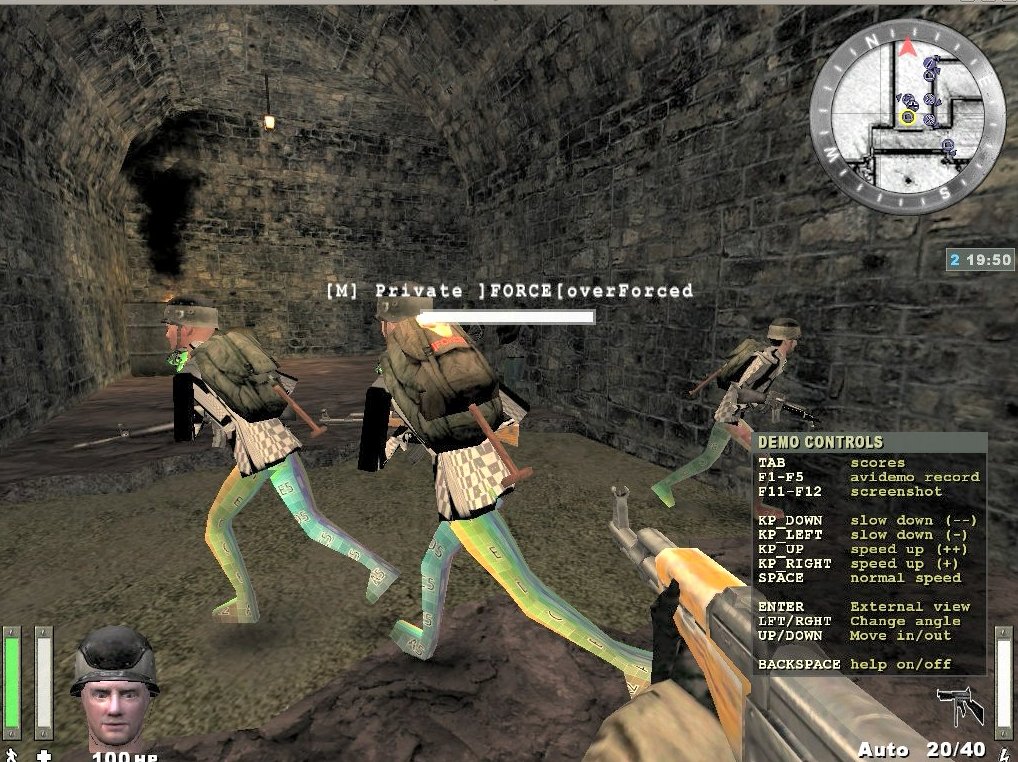
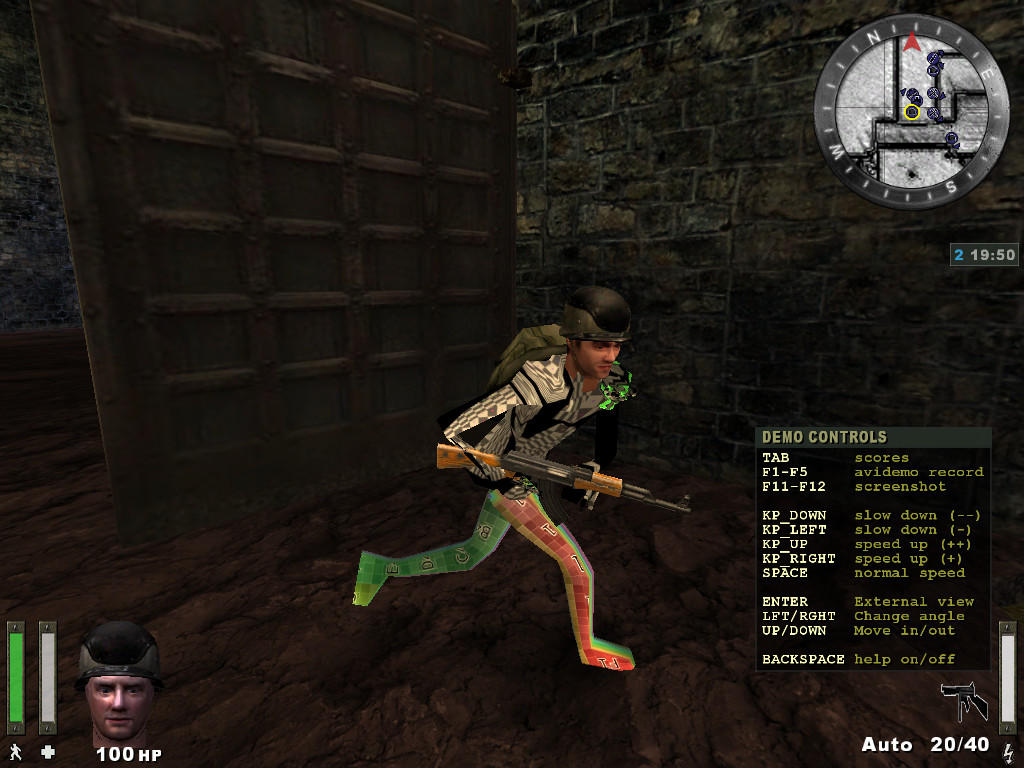
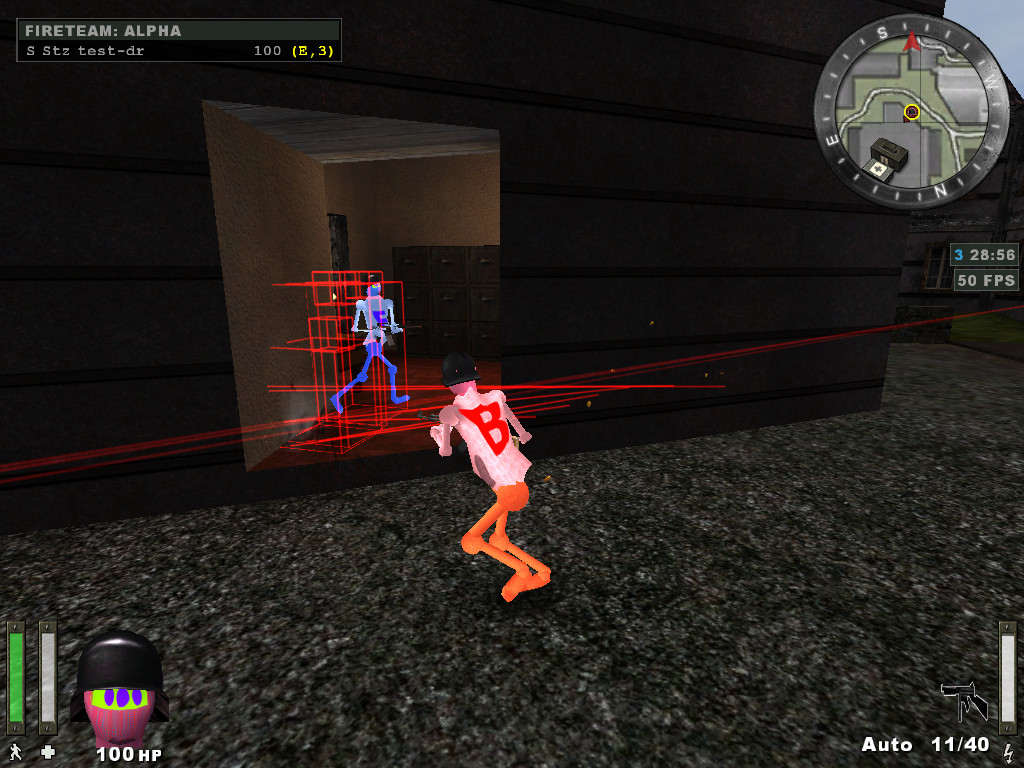
this is, because it happened often to me i had not all necessary layers selected
and/or did not set the correct scaling-factor and then ended with not-working md3-exports and some errors were only noticed if those models were seen in a game-run.
Like visible from the other videos in this thread, the models are only for my tests of the working coding, therefore those blend-files are not in the svn-repository.

this version was compiled for linux-64bit and made in ubuntu-10.04.
A 7z-zipped package is at
> http://otc6.svn.sourceforge.net/viewvc/otc6/branches/otc6_etxreal01/otc6/builds/
its size is 140MB so read first the readme.

this is the readme there:


this is
compiled for linux-64bit under ubuntu-10.04
-
start in the etxreal1 directory with the run1.sh
(or check the commandline of this file)
like this:

./run1.sh 1

you need to create a profile first,
enter a player-name and
the speed of the online-connection (old et-users
may know this procedure)

then to load the only map in this package,
pull down the console-window (key: ~)
and enter:

/devmap alleys

this will load the map and then press "L"
for the limbo-menu, click on the team-icon (otc6 or gun-barrel)
and confirm your player.

to add some bots, first the 
/bot_enable 1

and to save this setting you have to quit the game
and start it again,
then you can add bots with:

/addbot
repeat the console-command multiple times to get more 
of this simple bots.


there is the setting for a minimum of bots like this:
/bot_minplayers 40
would automatically add up to 40 bots after a few
/addbot commands.


---- if you want to build from the source --
you first need the big etxreal package, compile it
(its big because the pk3 there is over 1GB and here is
only a reduced version to keep it smaller)

then for otc6 you need to pull the source from the otc6
branch and compile it with the default setting for linux-64-bit
or .. you have to manually change the makefiles for other setups.
---------------------------------------------------

why the js05 with old-style player arms/hands?
This was the first weapon made for otc6 in 2006 and
to keep this old blender-2.4 export from this time is just for some
retrospection.
Bugs? Many, starting from missing textures ... to sounds
and for example no 3rd-player animation for the throw of
the smoke-nade and so on. Models and textures are
for sometimes only placeholders for better coming things.
and so on...
same goes to the old greetings for the old contributers ..

“bugs” like this, where the healthbox dont shows the bump-map it has:
http://img17.imageshack.us/img17/9642/etxreal20120427195842al.th.jpg
i have still put a lot of time in this glsl-shader-setups (and still only got a first clue about it).
Up to now the map-textures can show some kind of normal-mapping, like the
logo on the door in the background here:
http://img834.imageshack.us/img834/6708/etxreal2012042816110200.th.jpg
and
the player mdm/mdx mesh too. And still very good fps-rates
with 60 player-meshes, here around 30 running from the start-placeses
and still over 50fps
http://img213.imageshack.us/img213/7857/etxreal20120427200554al.th.jpg

a lot of textures, graphics, models, sounds are only placeholders, but even then the size for the otc6-pk3 files is around 50MB and the basic etxreal core-pk3 is around 90MB. The original etxreal core-pk3-files have over 1.4 GB and i did reduce(=delete) most of it to get a smaller package. There are a lot of high-resolution textures with normal/displacement maps, but as long as i cannot create the fake-deluce-lighting in the glsl-shaders the usage in the engine is “poor”.

On the sourcforge-otc6 branch for etxreal are too some blender-files for blender-2.61 to create the player-meshes and weapons with animations.

sounds were made with the help of audacity and music with abc+timidity, graphics with gimp and blender. A few gfx-files are from the openarena-resort and some weapons based on the free-gun-pack-for-et.

another little step - better visible normal-mapping -
its still not real normal-mapping like it should be, but
it displays the blender generated normal-maps and so
i can go on with more modelling and concentrate on the
other things. I would have been totally frustrated to model
a head and end up with a normal textured thing like before.

Cause there is no vertex-lightdirection-map (deluxe-map) in old style
et i use the calculation from the view-direction with the modell-normal-map
in the glsl-shader.

Some simple pics to show its visible:
http://img851.imageshack.us/img851/8807/etxreal20120502182239al.th.jpg
its only a cubic-box and the nuts/bolts are baked normal-mapping made in blender.

and here it is in a darker area, in front of the supply-stand and its not visible very much … 8-(
http://img189.imageshack.us/img189/5123/etxreal20120502182604al.th.jpg
and the pulled up flag,
it has a slight mapping too (was only to test if it is visible in animation)
http://img233.imageshack.us/img233/3586/etxreal20120502183058al.th.jpg

and a view from prone in the mud
http://img713.imageshack.us/img713/7094/etxreal20120502183000al.th.jpg

and with some higher-resolution textures (incl. normal-mapping) from the core-etxreal-pk3 for the wood floor and top
http://img513.imageshack.us/img513/9825/etxreal20120502183042al.th.jpg

after those first working normal-mapping in otc6/etxreal
i made a bit more complicated object: a skull
as a head for the players.

the first two in game pics show the normal-mapping with
and without the display of the triangles.
Export of the low-res-skull was made in blender-2.61 with the md3-export-script.
The images for normal-map and displacement-map and specular-map were baked
from the high-res-skull to the uv-unwrapped low-res-skull.

And i think the result is acceptable for me (even so the forced normal-mapping without the delux-light-maps could be much better).
http://img201.imageshack.us/img201/5733/etxreal20120503122012al.th.jpg
and without r_showtris:
http://img706.imageshack.us/img706/8218/etxreal20120503122047al.th.jpg
and two pics from some shooting action (the helmet is still the old, now to small with suzanne on top)
http://img641.imageshack.us/img641/2233/etxreal2012050313345500.th.jpg
this one with red-lightning of the shooting
http://img805.imageshack.us/img805/3568/etxreal2012050313352300.th.jpg

after a few hopeless tryings with old … older . or to new map-editor software
i used the quake-map-exporter plugin for blender-2.61
to generate a simple map. It was not the first, but the first
without the players exploding at spawn, … … blasted out of the map
or with big “holes” in the map-walls.
Did not use a proper grid-snapping for this test, but if i get used to this kind
of “modeling” it could be a first step to generate more simple maps.
I had to change the quake-export-map plugin a bit to use the custom-properties
of the emptys to write out some necessary map-entitys. It uses the rotation
of the empty to write out the “angle” to.
Then changed the writing of the texture (mmh… there is no more this single/double-side option of the active uv-face-setting) to use the pathname
substituted with my setting for the in-game-path. So i can use the same diffuse texture in blender for the uv-mapping and the map-compiler (used the etxreal one) will set for the right in-game texture shader.
What is missing is the scaling and rotating and positioning of the texture for a face,
but i dont know if it would be better to do such things with a really good map-editor.

The changes for the quake-map-export script and the blend-file for this simple map is not on the sourceforge otc6 storage … but it will come. I want the map with a bit more things - more blender generated brushes and the setting for sounds (would be easy, cause this entity is simple) and setting of md3-objects and moving objects (like a simple door).

a blend-file with the map to those images.

http://img542.imageshack.us/img542/9637/etxreal20120511133417ma.th.jpg

http://img215.imageshack.us/img215/4618/etxreal20120511133514ma.th.jpg

http://img849.imageshack.us/img849/4785/etxreal20120511133616ma.th.jpg

http://img705.imageshack.us/img705/9974/etxreal20120511133534ma.th.jpg

http://img535.imageshack.us/img535/8650/etxreal20120511133733ma.th.jpg

and from the README inside of this blend-file:


i dont use the export-quake-map plugin because
i did change some settings and most important,
i was tired to click thru this gui-stuff all the time.
So there is only this script: export-map
its most the same like the export-quake-map-plugin,
but it has a short function-call at its end
to store the selected objects with the settings
to the named export-file.
Now i only have to click the "Run Script" with this script
selected .. no need to click thru the gui-options .. etc.

Next i tried to add a scaling for the textures and noticed
i did not know enough about the rastering used for
the etxmap tool(its a decendent of q3map, q3map2) and to
compile the exporte map3.map i did use:
    for a quick-compile without lights:
        etxmap -v -bsp map3.map
    for a quick-compile with some shadow/lights:
        etxmap -v -light -fast map3.map
    and for a very long compile (20 minutes ... or more):
        etxmap -light -lightmapsize 2048 -shadeangle 160 -bounce 2 map3.map

maybe some high-prof.mappers will laugh at this ... but i know i am only at the beginning.

While trying to adjust the texture scaling i noticed the usage of the scale-matrix
to re-scale every mesh for the map output and was wondering why it did not re-scale
at all (for the original plugin one has to apply location,rotaion,scale for every object).
Did read over it a few times and did not notice that not all diagonal values of the scale
matrix were set. A 4x4-scale-matrix with onle the rotation-parts set ... does not scale
the location too.

Last, i still have not solved the mystery about the point-snapping to avoid faces not to be
connected in the game. If a only use 90 degrees oriented faces it seems no problem, 
same for 45 degrees. But my tries with 60 degrees for the pillars - there are different ones-
show different faults.

Last, my script-changes do a replace for the path of the used texture-name, so the game
can find the textures and i can load such a preview-image as texture in blender.

for the last point … i have my pk3-stuff in a subdirectory called “pak”, but besides changing this manually, normaly someone has not the same textures and the compile will run without the textures but then the result is a map without textures, only the grey-base-texture with white stripes where the faces are.

Attachments

map.blend (260 KB)