So the other day I wanted to add a quarter to a scene for scale. Decided to quickly model one. Looked for bumpmaps of coins on google image search, didn’t find any. Realized the only good-looking US coin asset was $60 on turbosquid. Maybe I was not going to do this so quickly.
I tried scanning in a coin, and using the scan to make a bumpmap, but that didn’t work at first. Then, I found this tutorial: http://zarria.net/nrmphoto/nrmphoto.html
My scanner appears to light the coin directionally (for some reason) so I used the technique described in the tutorial. I created a normal map then used Crazybump to generate a displacement map.
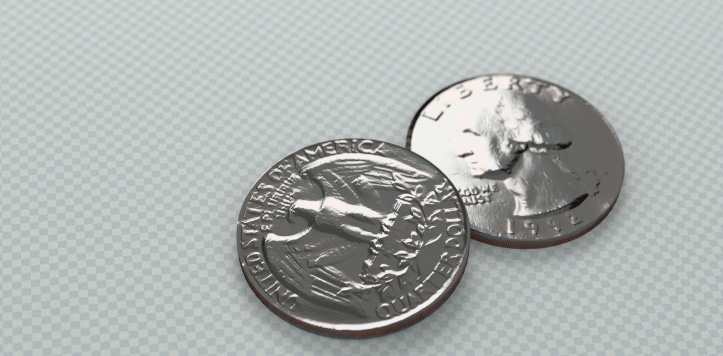
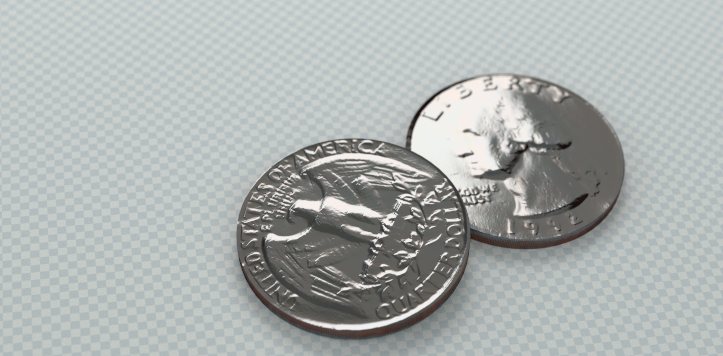
Anyway, after a few tries, you can see the results. It seems to work reasonably well, although I think if I were going to do it again, I would paint the coin with a flat color first. I think that glare from the shiny coin added some artifacts and reduced the detail in the scans.
I did the sides of the coins by hand, just displacement map and color.
The object is just a cylinder with glossy material and a displacement map.
Much easier than modeling the coin from scratch, anyway. If anyone is interested I will share the resulting textures and blend file.
I created a normal map then used Crazybump to generate a displacement map.
I’m in front of an issue here, crazybump may be a wonderful app but makes nor-maps seams visible. So, I get ugly displacements on seams areas. I was expecting this.
Oh will def. bookmark that site. as you say, way easier to fast get many coins into 3d app w/o modelling them (except for the different cylinder sizes which is pretty basic)
I will post a blend and textures soon, I just want to clean up the edges a bit. I need to get a lot of work done today, plus valentine’s day is tomorrow, so it might not be until later this week, sorry all
I posted the files I used, in the OP. I think that it’s possible to get better results, maybe if cycles supports normal maps, maybe by using a better height map, and by getting a nicer original scan by painting the coins a flat color first. Also, my scanner only goes up to 1200x1200 dpi, I think if you could get even higher resolution, it would look that much better.
I hope this helps somebody trying to put coins in their scene without actually modeling the coin.
Just a thought about making the coin normal map, but have you ever thought about trying to make the bump map via plastic toy coins? The object wouldn’t necessarily have to be a metal to get a good map, right?
I was trying myself in gimp and I think the tutorial is wrong (doing as he says gives a different result that he shows).
I think the correct way is this:
LeftTop Image: R:Left G:Top B: 255 (white)
RightBottom Image: R: Right G:Bottom B: 0 (black)
NormalMap: RightBottom image with layer mode Overlay 100% above of the LeftTop image with layer mode Normal.
And there is no need to adjust the images to ranges 0-127 and 128-255 as he does I think.
Could you try with the face for example to see if I am right? Or post the four scanned images and I will try myself and post here the normalmap.
The tutorial misses a step in which the blue channel should be set to black on both images to start, before combining the L/U R/D images. If you do that, follow all steps as written, and then add a medium grey to the blue channel at the end, it gives the right result.
It took me a few tries to get it though, because I didn’t know this at first.
As far as toy/plastic coins, I think that it would show in the final result that they had worse resolution and no realistic wear.
@duckcow: it looks like maybe your scans were not perfectly aligned as layers, some of the details of the coins are really blurry. What resolution did you use to scan? Really, the most tricky and sensitive part of the process is lining up the scans to create the normal map. It took me a few tries… and even at 1200 dpi and 2-3 tries I don’t think I got it perfect. Looks pretty good, but somehow not 100%… good example though, thanks for posting.


