This thread started first as a question but turned into a material playground.
Enjoy here are some good approaches.
This thread started first as a question but turned into a material playground.
Enjoy here are some good approaches.
Not yet… maybe in the future with TS1234’s mods…
In the meantime, render it twice, once with the low samples, one with high samples… either create a mask in gimp/photoshop for the car and mix between them or create a object mask in blender and use the compositor…
This will look horrible for animations btw.
Yep this might not be possible for animation but for stills.
I noticed that many car shader with build in flakes are not really very fast to render.
I just saw how a quick rendering with Cycles for one product I am working on actually just
gives a very good flake look - which is why I wrote this here.
It may seem to work at first, but then imagine if parts of the car or the material is in area that’s much slower to converge than the rest of the scene, by the time you need to stop the render to get a flaky effect, you would still have an undersampled area that would not look convincing at all.
I think a key work to look for here would be the ability to stop the rendering when a certain per-pixel sample density is reached in all areas where the material is seen, so areas that converge fast will stop rendering a lot more quickly and ensure an even distribution of noise for a convincing flake effect.
I also think the ‘flakes’ wouldn’t be consistent in size along the Z depth of the image. It might look like the flakes are getting bigger, the further back in the render you go.
I think the others are correct that it would look weird in an animation.
How about something like (meant to be nodes, excuse my crude way of showing it):
Voronoi (intensity, scale 500) > Invert > Gamma (10) > Gamma (10) > Glossy (GGX, to roughness)
Mixed 50/50 with another: Glossy (Beckman)
Mix that whole thing with a Diffuse node for color for the final output.
Good points Ace and Bliz distance to the cam is actually as well as less occluded areas a problem for consistency.
I did one product shot and the main object was pretty much perpendicular to the cam and the stopped render result just looked terrific because the fine grain was so smoothly transitioning from no to full highlight areas.
Monsterdog
hey nice trick with the gamma node to reduce the texture color levels to make the dots smaller.
Too bad roughness seems not work like a stencil / alpha map that would be ideal.
I am also not sure if it is possible in Cycles to mix a material in a way that you only copy
the bright glossyness.
For example currently with the mix nodes if you use a colored flake glossy material
and mix it with a white sharp glossy material the bright sharp highlight would show
the colored dots mixed in.
Also the mixing of materials seems to be a bit limiting when you want to have a diffuse based coated with a clear material and only add the strong highlights.
The following images are from Keyshot and you can see how strong the highlights are and how saturated the blue is.
Any idea how this could be done with Cycles nodes?

I think the difficulty I have right now is translating how Blender Internal or other engines worked where you define a base color and can get a mirror value and by hand also adjust the reflection color so you could get a red ball with a white reflection as an example and rebuilding this in cycles.
The cycles material seems to also have an interesting reflection amount as the bright highlights are burning but the world reflection itself is much more toned down.
Wow, nicely done!
I lied, I can get closer :eyebrowlift2: (slightly higher res : https://lh5.googleusercontent.com/-_8YgW_MlZmM/T3KEmJ529HI/AAAAAAAABzk/SqZ8XW1FMU4/s874/carpaintnodes02.png ):
I’m sure there is a way to simplify this setup and saturate the specks even more, but its getting late :spin:
Edit: Actually it looks really bad with more light in the scene, let me try again…
Wow! That’s some good cycles node skills you got there! What is the gamma node used for?
Looks incredible!
Monsterdog
pretty sweet setup without those render artifacts - a drastic improvement compared to mine 
I just turned up the ambient light and it looked REALLY bad, I’m trying to improve it now 
yah thats the issue when the flakes are raytraced and like cycles work mainly stenciled surface reflections.
In BI the flakes are generated by the light specular input meaning it is not linked to the env reflection and thus
can you restrict the area where flakes will only show up with BI.
I am not sure if maybe there might be a way with a light path thing to establish a connection between a light emitting material surface and the glossy reflection of a sphere.
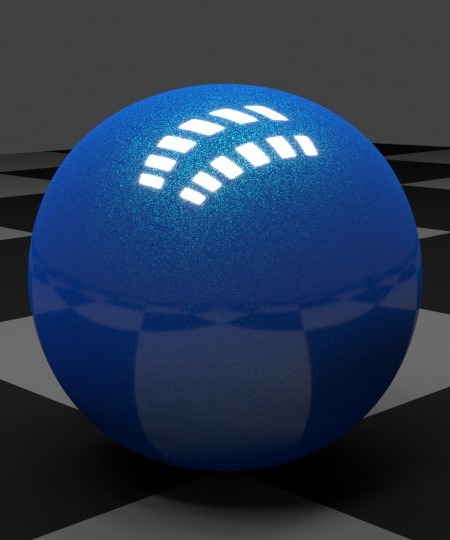
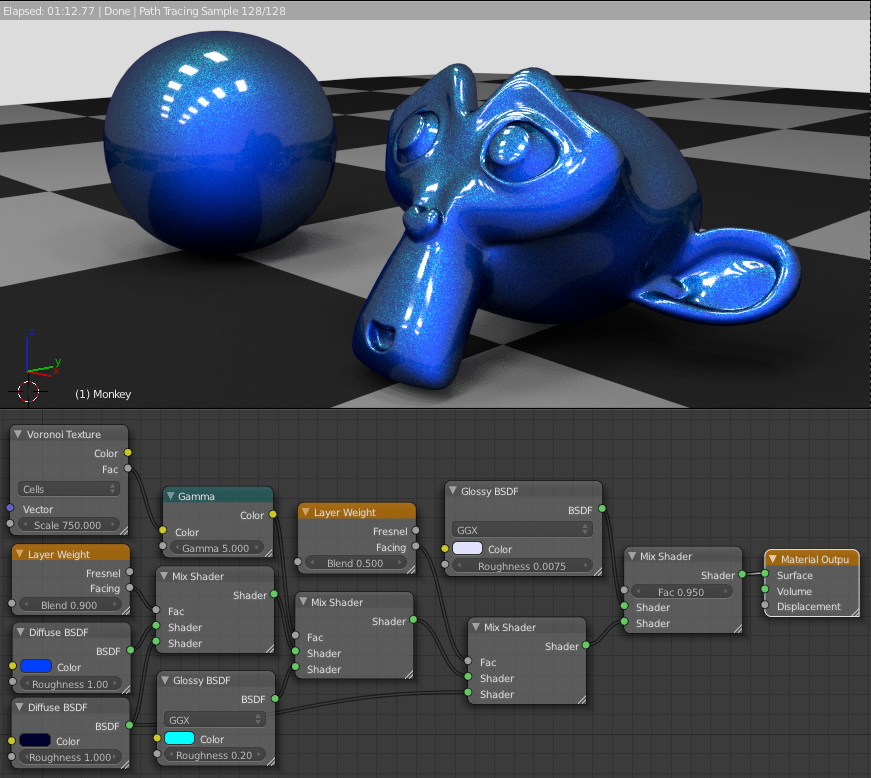
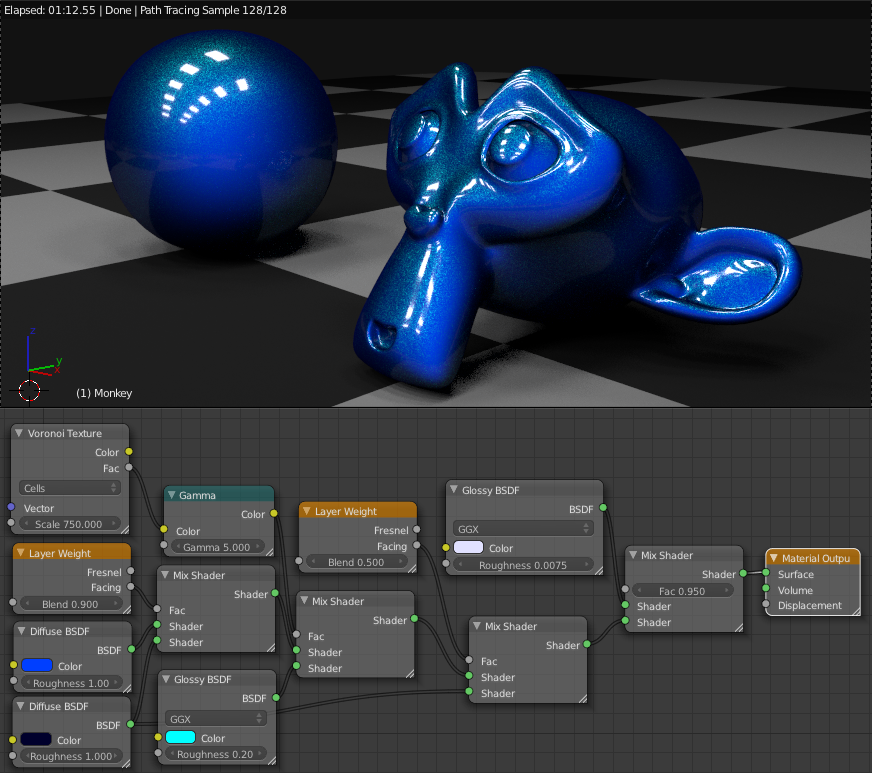
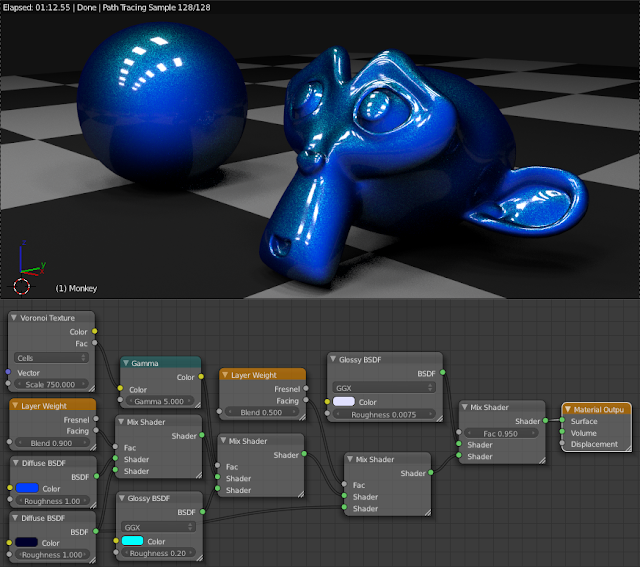
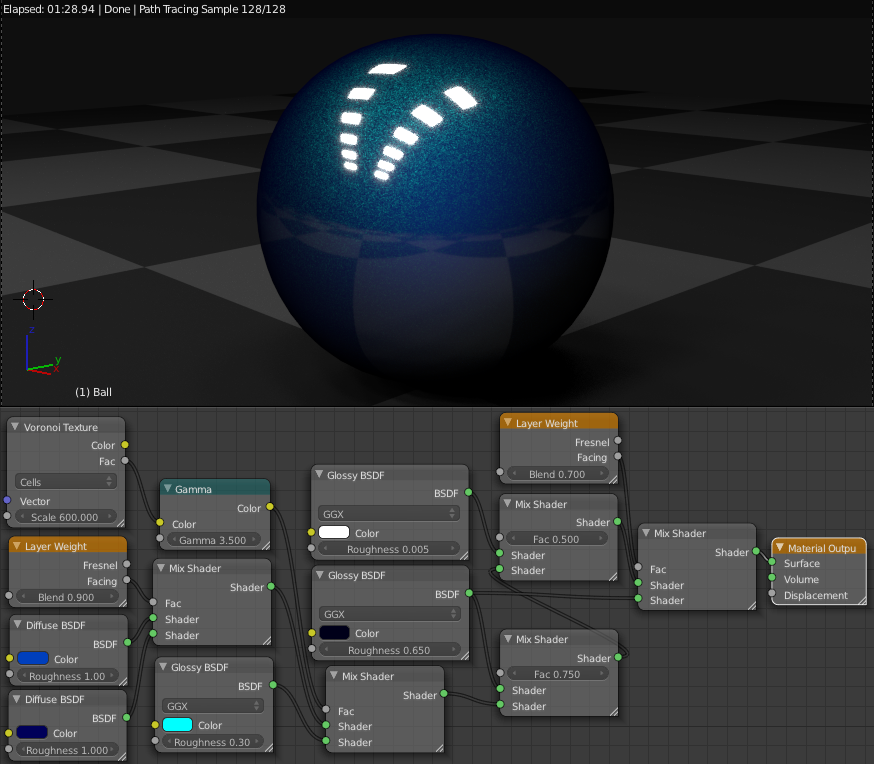
OK, I think this is much better, and it renders faster. I had to add the Suzanne to figure out what it actually looked like on something other than a sphere.
Color values are:
Light diffuse: #003FFF
Dark diffuse: #00002C
Glossy specks: #00FFFF
Overall glossy (slight blue tinge to keep colors at high light levels): #E1E1FF
Lots of ambient light:
Almost no ambient light:
Thank you, but it was flawed and I had to change it ![]() It looks less pleasing now I think (but possibly closer to the reference image), but with the ambient light up high it became too reflective and the color disappeared.
It looks less pleasing now I think (but possibly closer to the reference image), but with the ambient light up high it became too reflective and the color disappeared.
The gamma node just separates the colors in the voronoi texture so dark is darker and light is lighter, basically it just generates tons of little white dots on a black surface. I then use the dots to mask the cyan reflection shader.
EDIT: At this point I should probably apologize for thread hijacking ![]() Sorry
Sorry
monsterdog that rocks man, I gotta try this out
Man, I have to learn how to use the color ramp, could probably simplify things a lot more! Thanks for this node setup ![]()


