hi, i’m having issues with the deforming of what should be a simple rig and mesh.
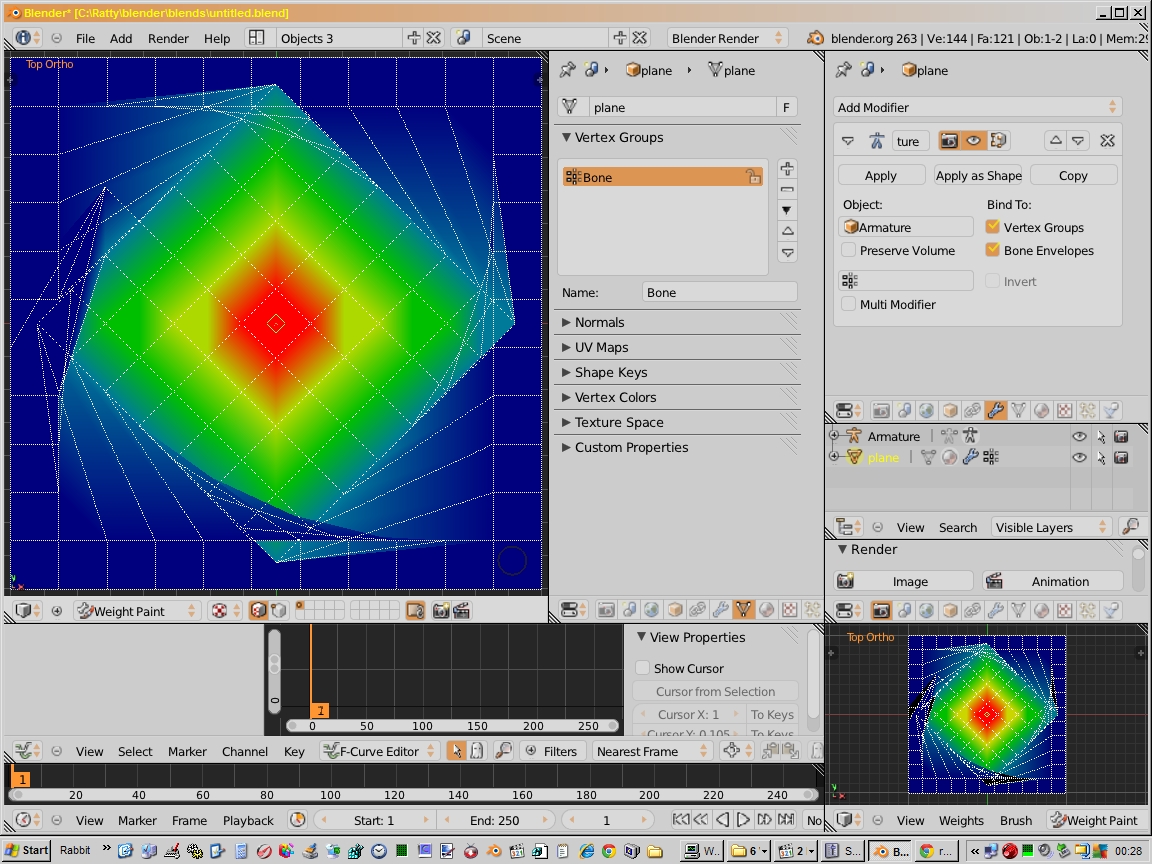
in the first image i’ve managed to get the falloff working as i would ideally have for all deforming bones, but only by selecting the same vertex group in the armature modifier as the selected bone is using.
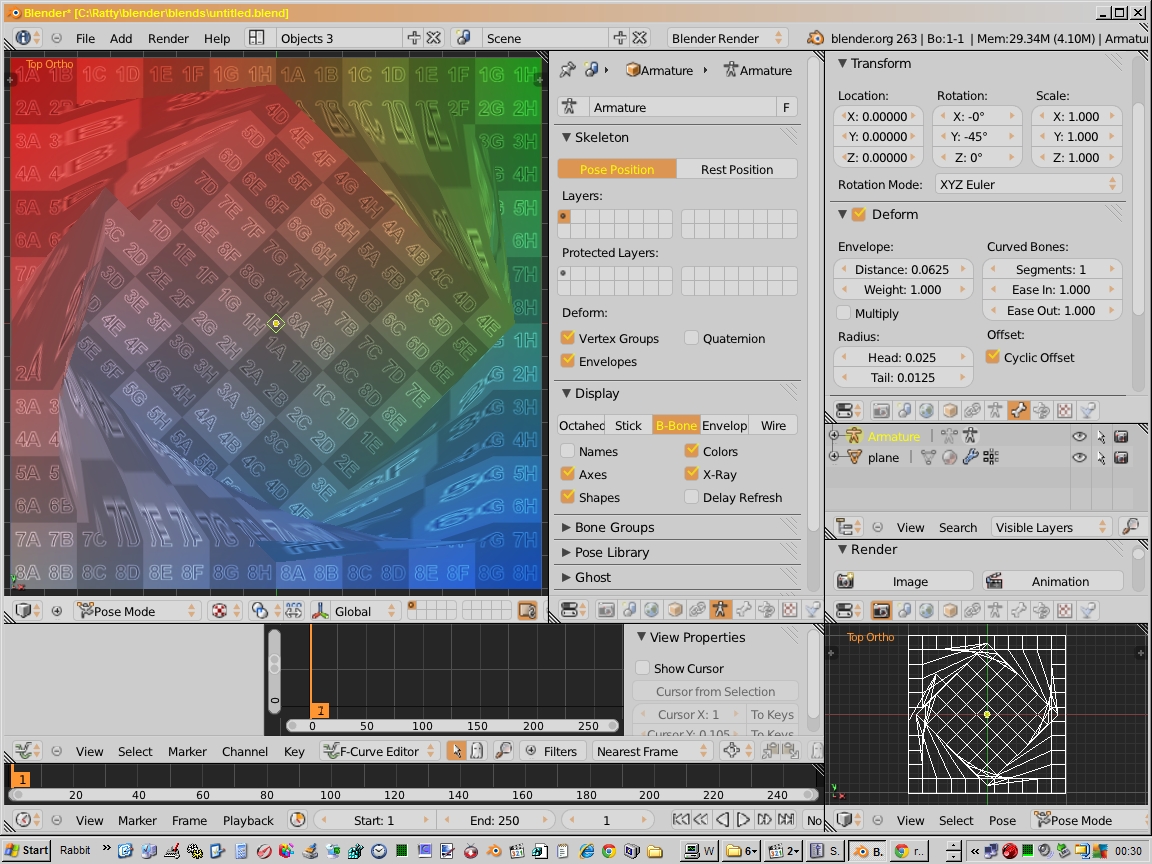
if i try to use any other vertex group, like for example, one that includes all the verts in the mesh with the weights set to 1, then the falloff stops working for the bone specific groups, and in this case of the bone being rotated 45 degrees, the whole vertex group is rotated which is confusing me why the gradient weights aren’t being used?
if i try to use just bone envelopes for deforming they produce the same undesirable results, ie will only use falloff if i enable the specific vertex group in the modifier. no combination of the two methods seems to work for all bones at the same time, but i admit i might be missing something obvious. i hope this isn’t another bug?
If i understand correctly this is for two or more modifiers. Otherwise the deform will only be via the vertex group with the same name as the deforming bone.
batfinger, thanks very much for replying, and for the link. i’ve read that page and i think i have a better understanding of the options for the armature modifier. but i’m still confused how to get the weights falloff, ie from blue to red, to be used with my deforming bones. i have tried both parenting the mesh to the rig with automatic weights, as well as manually creating vertex groups and hand painting the weights, but in both cases the falloff isn’t working. surely this is wrong? and that either i’m missing a step, or there is a bug in this version of blender?
i’ve just tested this with a new blend file, containing only a subdivided plane and a single bone armature. i hand painted the vertex weights but tried to leave most of the other settings at their default. the same issue/bug is happening. again in the first image we can see what the falloff should look like, but when the armature modifier is on it’s default settings without the vertex group listed in it’s panel then the falloff stops working.
i’m aware a decent amount of people have seen this thread already. so can someone please confirm if this is a bug? and if not, then what am i doing wrong?
this issue/bug is very frustrating for me, and holding me back from completing work on a commercial collaboration project, where i’ve been trying to convince my colleague that blender is the tool i should be using.
i registered today at blender artists because i thought there must be someone here who can explain the results i’m getting. am i the only one experiencing this issue/bug?
do most people simply not care if it’s not something directly affecting their own work or hobby projects? i would of thought that any potential bug like this could adversely affect anyone using blender’s armatures, so surely it’s in the best interest of the community if this is fixed/explained to those of us less experienced with rigging.
i’ve just tested this with a new blend file, containing only a subdivided plane and a single bone armature. i hand painted the vertex weights but tried to leave most of the other settings at their default. the same issue/bug is happening. again in the first image we can see what the falloff should look like, but when the armature modifier is on it’s default settings without the vertex group listed in it’s panel then the falloff stops working.
i’m aware a decent amount of people have seen this thread. so can someone please confirm if this is a bug? and if not, then what am i doing wrong?
I’m thinking you missed this part about Vertex Groups in the wiki: ‘Only meaningful when having at least two of these modifiers on the same object, with Multi Modifier activated.’
Just because something doesn’t work the way you expect doesn’t mean it’s a bug or ‘most people simply not care if it’s not something directly affecting their own work or hobby projects’, it just means you’re probably using it wrong.
And, just for the record, here’s a link to the bug tracker since most (all) blender devs don’t search this forum looking for bug reports.
thanks very much for replying uncle entity. i think i misunderstood about the vertex weights in general, as i was assuming that quote only referred to the armature modifier panel options, and not the effect the bone/vertex group pairings would have on each other. kat from katsbits.com has also help me understand this more today.
and for the record i never said it was definitively a bug, i was merely asking someone to clarify if it was, or if i was using the modifier wrong, now i know it’s the latter, i can work around this i think. so thanks again for helping point me in the right direction. at least you bothered to take a few moments to help a fellow blender user in need, that i can respect.
i literally minutes before reading your post did some tests with adding additional bones around the perimeter of my sub divided plane test, in the hope they would act similar to pinning uv’s in the uv/image editor. this ‘work around’ seems to be exactly what i need for my main project, although i didn’t fully understand it until you explained it in detail.
if it wasn’t for you guys who posted here as well as kat over at his forum, helping point me in the right direction, i might of been stuck on this indefinitely. prior to asking for help, i spent days trying to figure this out on my own.
i’ve read your linked page which also helped, and i do have another question. is there a way to copy all the weights from one vertex group to another on the same mesh? so for example, could i have four bones in the corners of my plane all have the same gradient range of weights? i know i could paint them manually, just wondered if their is a ‘copy to selected’ type tool?
There’s some (selected object) vertex group copy features in Properties > Object Data > Vertex Groups > the little black down-arrow on right of panel is a menu. Copy Vertex Group will make a copy of the selected group with vertex weights intact. Then you can rename the copy with a different bone’s name.
I think that will work but I’ve never tried it. You’ll have to experiment.
There’s always a way with Python of course. There is a 2.49 bone weight copy addon ported to 2.5x+. I don’t know if it still works 2.6x and I haven’t ever used it so I don’t know what all it does.
The copy to selected tools in both of these look like they’re for copying over to separate objects. Maybe the copy vertex group thing works the way I think it will, but I’m outta time now and can’t experiment.
There may be better newer different ways to do what you want… as usual with this beast of an app.
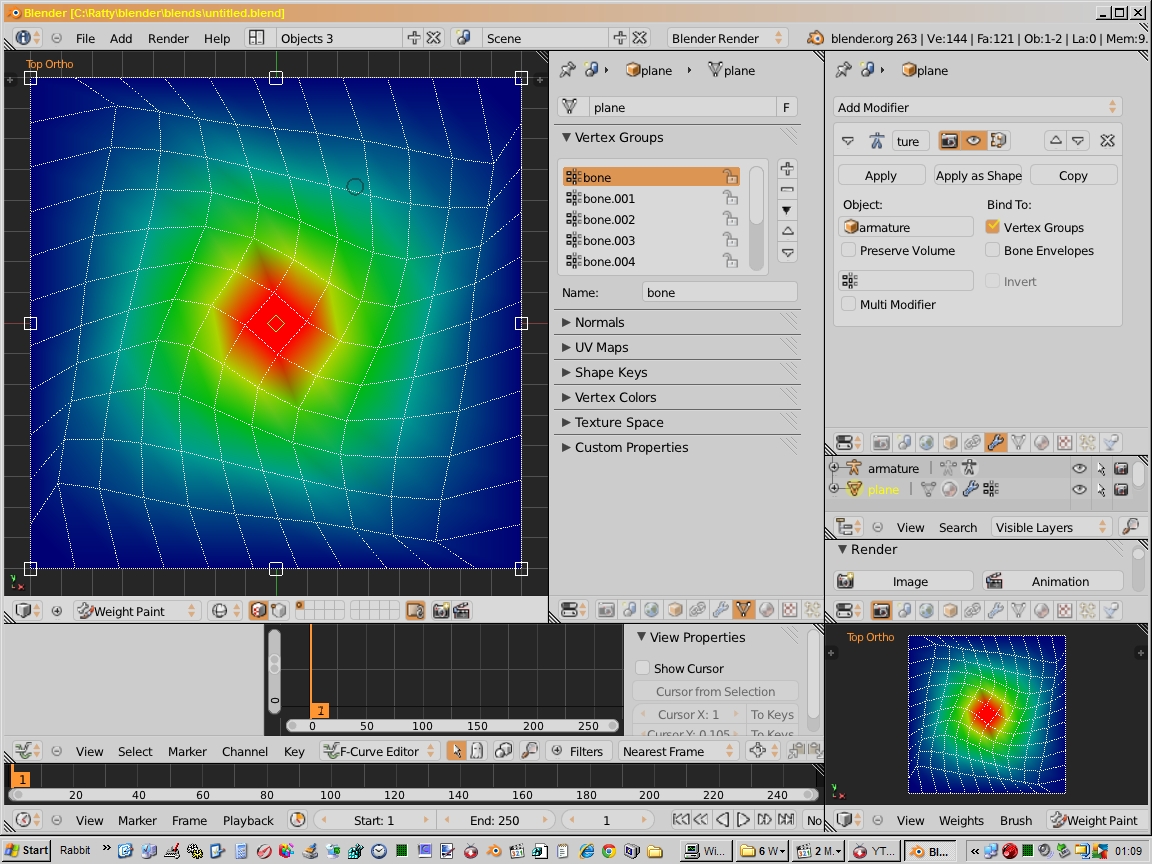
thanks again larry, and your first suggestion works perfectly. i had previously tried the + button to copy weighted vertex groups but it just created empty ones, or with all the values set to 0.
here’s an image of my now functioning test. it was simple once i understood what i was doing.