im trying to model some ramps but the problem is that when I use the content aware grab tool it twists all of the ramps so that the surface bends round like a velodrome. i need the ramps to be flat on the x/y axis. is there a way to do this?
“Content aware grab tool”? What is that? Next question: How do you model the ramps? By curve or by hand? With what tools?
Details! To help yourself, help those to whom you ask questions, Little Grasshopper.
Anyway, here is some food for your brain.

1 Build the profile of your ramp, just vertices and edges. Make sure that the origin of the object is at the 3D cursor and the geometry on one side.
2 Extrude without moving. Rotate the extruded loopcut on the Z axis around the 3D cursor. (Be precise!) Here, I rotated by 20 degrees.
3 Lower the extruded loopcut. (Be precise!) Here, I lowered it by 2 sub-units.

4 Add a empty. Rotate and lower it exactly like you rotated and lowered the extruded loopcut. (That’s the moment you regret you worked with your feet instead of the grid.)
Add an Array modifier to your ramp. Use Object Offset: Empty and activate Merge. Increase the count. Your ramp is building itself…
That’s all. (You can apply the Array modifier… or not.) Add a Subsurf modifier, tighten your mesh and… Admire! 
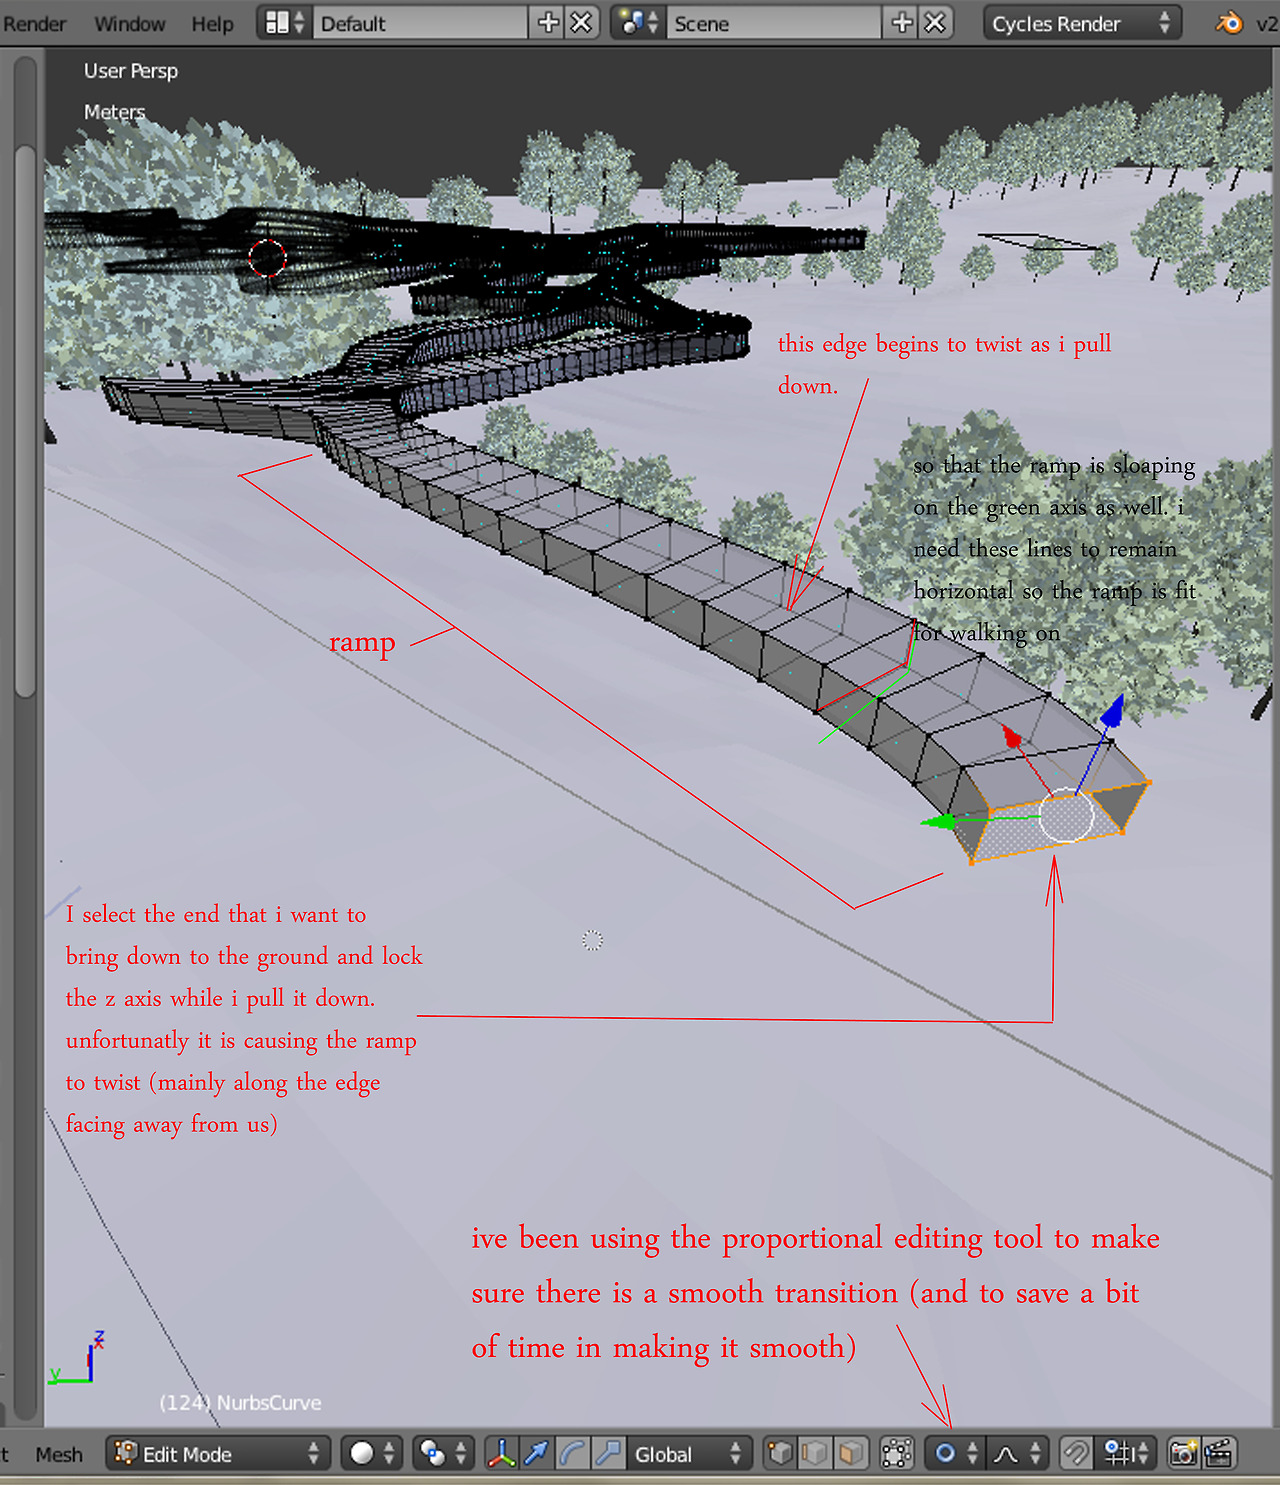
hey, thanks for getting back to me  sorry im not very good at explaining things. the ramp youve made is almost what im talking about. but the ramps im making are more like a building made of ramps. so ive modeled the building from the top using a square profile and nurbs curves and then converted them to meshes. then i joined all the ‘snakes’ together and now im trying to model the ramps on the z-axis (ie bring the ramps down to the ground and raise some parts of the building up)
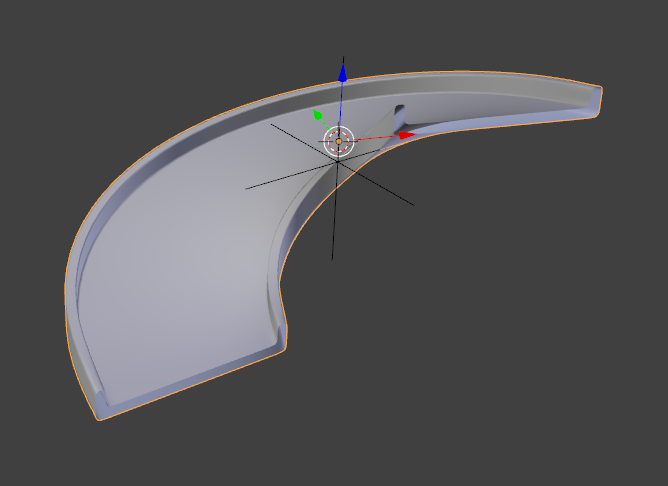
ive done a small illustration to try and show what i mean
i was wondering, would it maybe be easier to model the z-axis movement while its still a nurbs curve and then convert it to a mesh and then join the meshes?
The step that you did wrong is the conversion to mesh.
WHYYYYYYYY? (Can you hear the despair in my voice?) Why did you do that? That was really… sub-optimal. 
The curve can be prevented from twisting with Twisting: Z-Up… and forced to follow the ground with a Shrinkwrap modifier (which can be set to act on the points of the curve only). So you can tune it at will, subdivide problematic segments to stick better to the ground, etc, etc.
Then, much much later, when you’re really satisfied, you convert it to a mesh to join the different pieces.

Now, the big question: Where did you put that backup blend file from before the conversion to mesh? 
I would make that using a curve and an array of one of the boxes.
thanks guys 