World Machine (WM) seems to be one of the more powerful terrain generators available. Unfortunatetly windows only and not free, it’s however affordable and can be used in Linux with Wine.
I’m glad to discover that it’s rather easy to import a generated terrain from WM to Blender following these steps:
From WM I suggest you set your output as high resolution as possible, balanced with the time you want to spend generating it.
- Export your terrain as a 16 bits TIFF heightmap.
- If you used the color generation features of WM, export it as a PNG color image.
- Use a Normal map creator from your terrain and also export it as a PNG image.
- If you have lakes or rivers in your scene, create a mask map from them.
In Blender:
- Create a grid with a reasonable size, say 32x32 or more. Ungrap the UV.
- Create a material and import all images generated by WM mapped to UV.
- Add a Displacement modifier to your grid and use the heightmap as input. As the heightmap is a highresolution 16 bits gray image, you will have to use a high strength, say 32.
- Use the color image as color texture.
5- Use the normal map image as, guess, normal map (I assume you know how to do it). - Use the mask map as Specular reflectio texture.
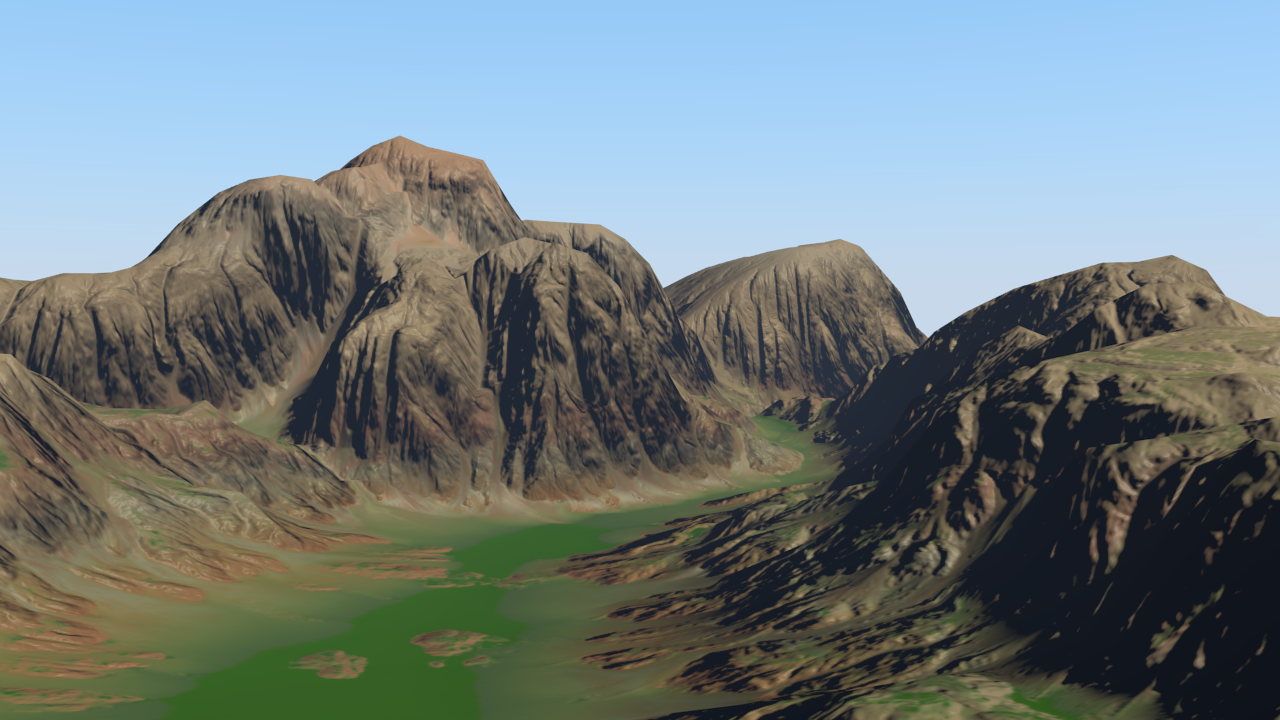
And that’s it. Now put your Blender objects and use your new scenary. An example of what you can get is this image, created in Blender as described here, using the WM example Zion Canyon.