You need to put a math node in between the image texture and the displacement port.
Then set it to multiply and use a setting of about .1 to start and adjust from there.
Also, you may need more geometry.
Displacement input is rather broken at the moment, I don’t recommend using it. Use the displace modifier until it’s fixed. Additionally, make sure displacement images are set to “non-color” since they are only used as scalar inputs. Also turn texture filtering to box and put the filter distance as low as possible to make sure you’re using the intended features of the map rather than blurred values from the filter process.
I use both normal and displacement maps all the time without any issues.
Maybe post a blend file with the image textures packed so we can take a look at it.
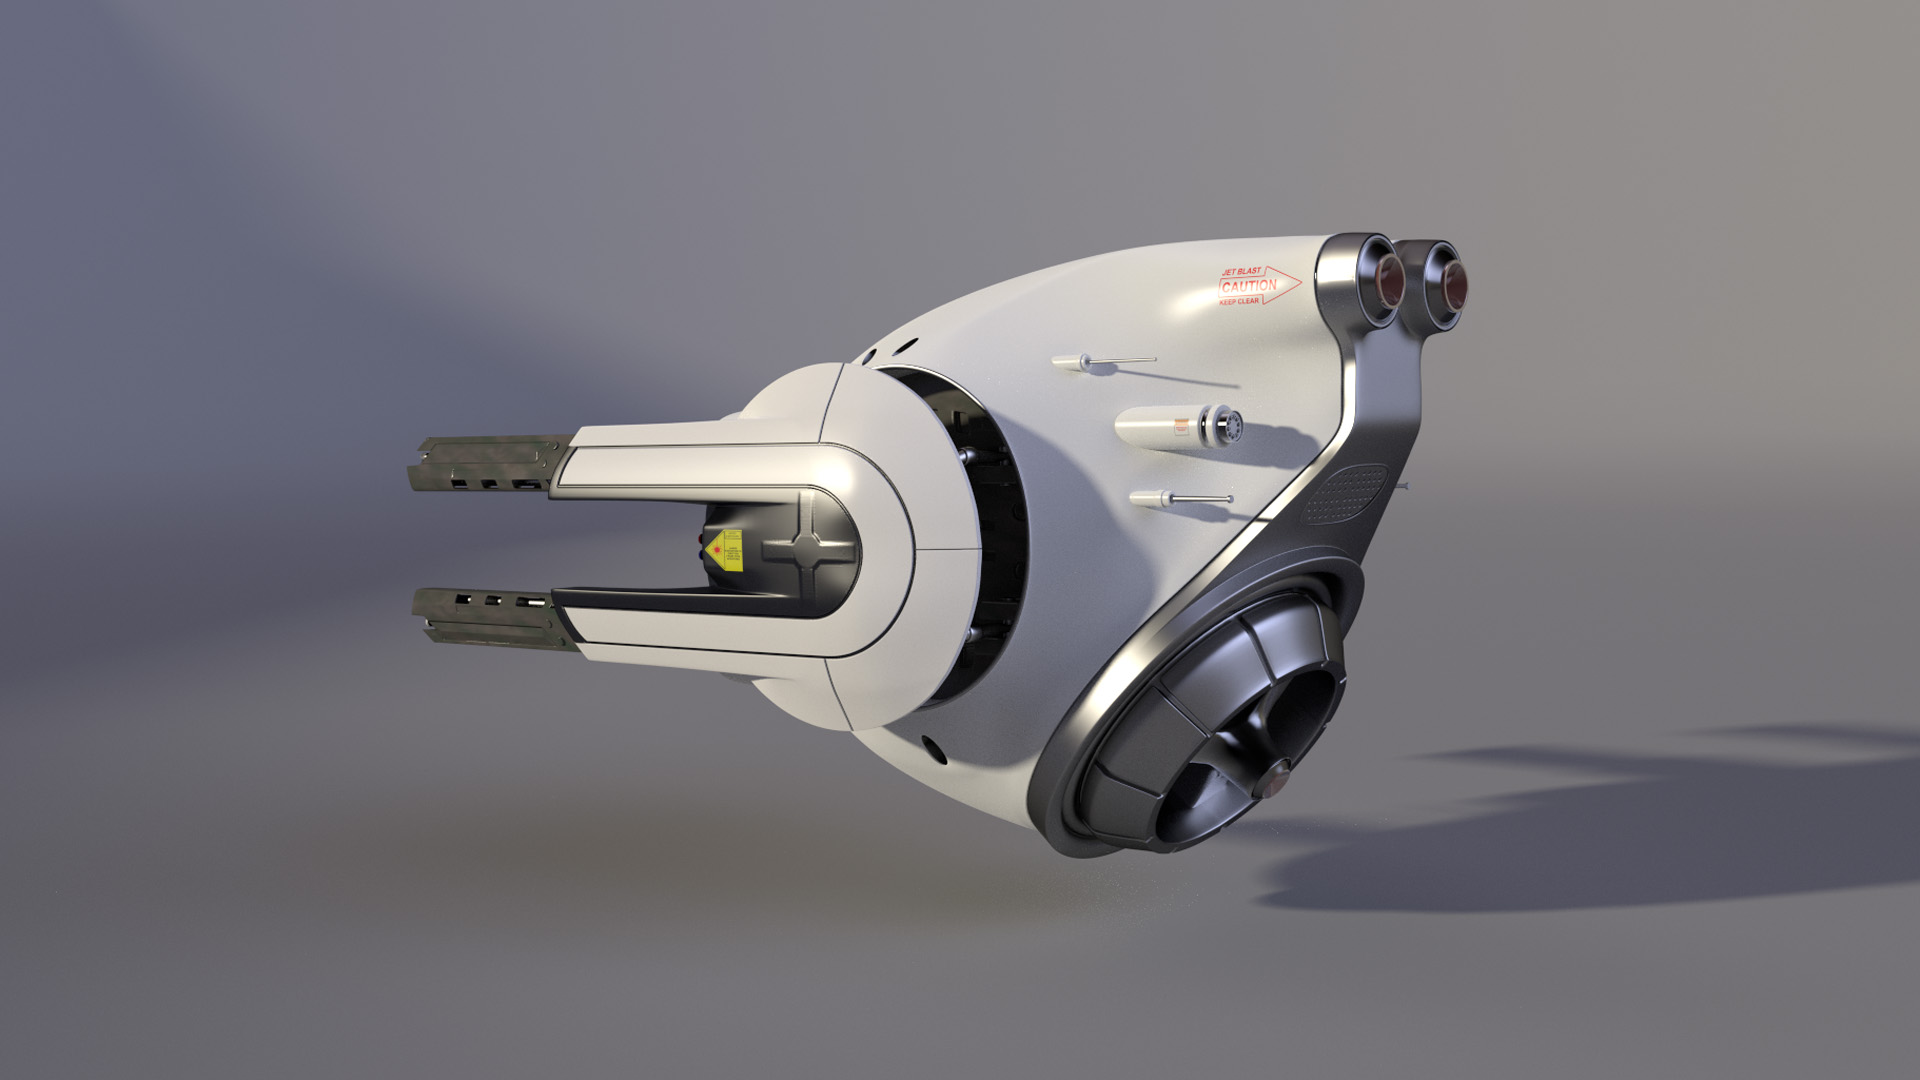
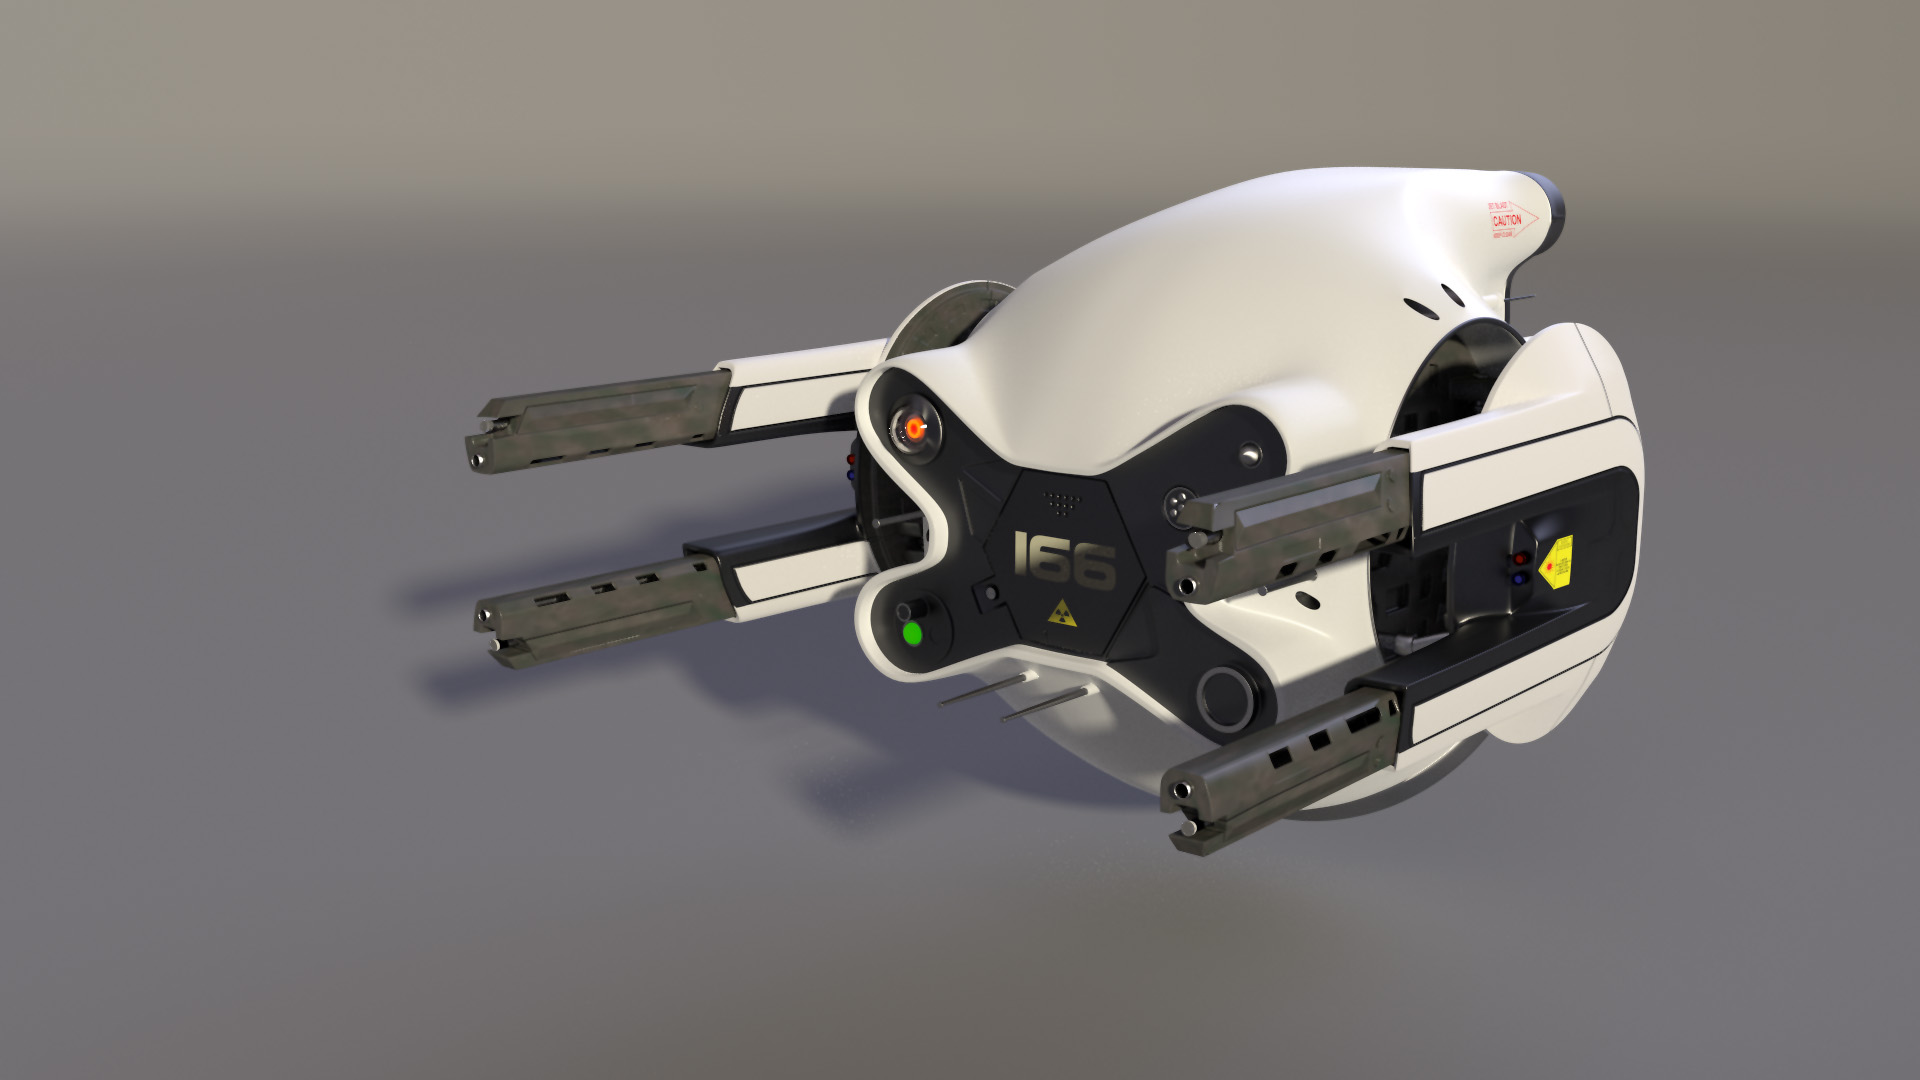
Almost all of the detail on the turrets in this image is using the displacement port on the material output node. The cross shape thing, the groove that runs around the center area and also the detail on the gun barrels themselves. Also on the face, the triangle of divots is using the same method.