Hey guys. This is my current project, and may the gods of CG smile upon it so that it might be complete.
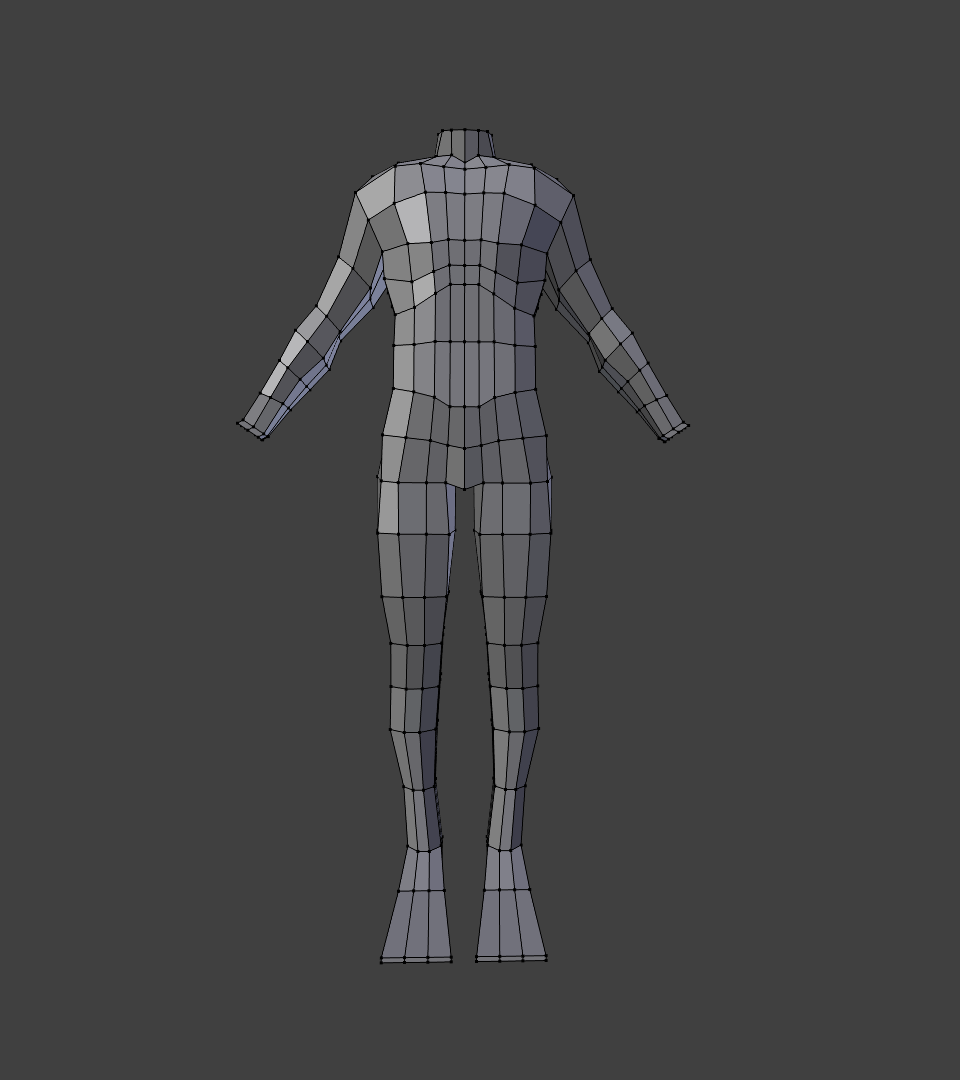
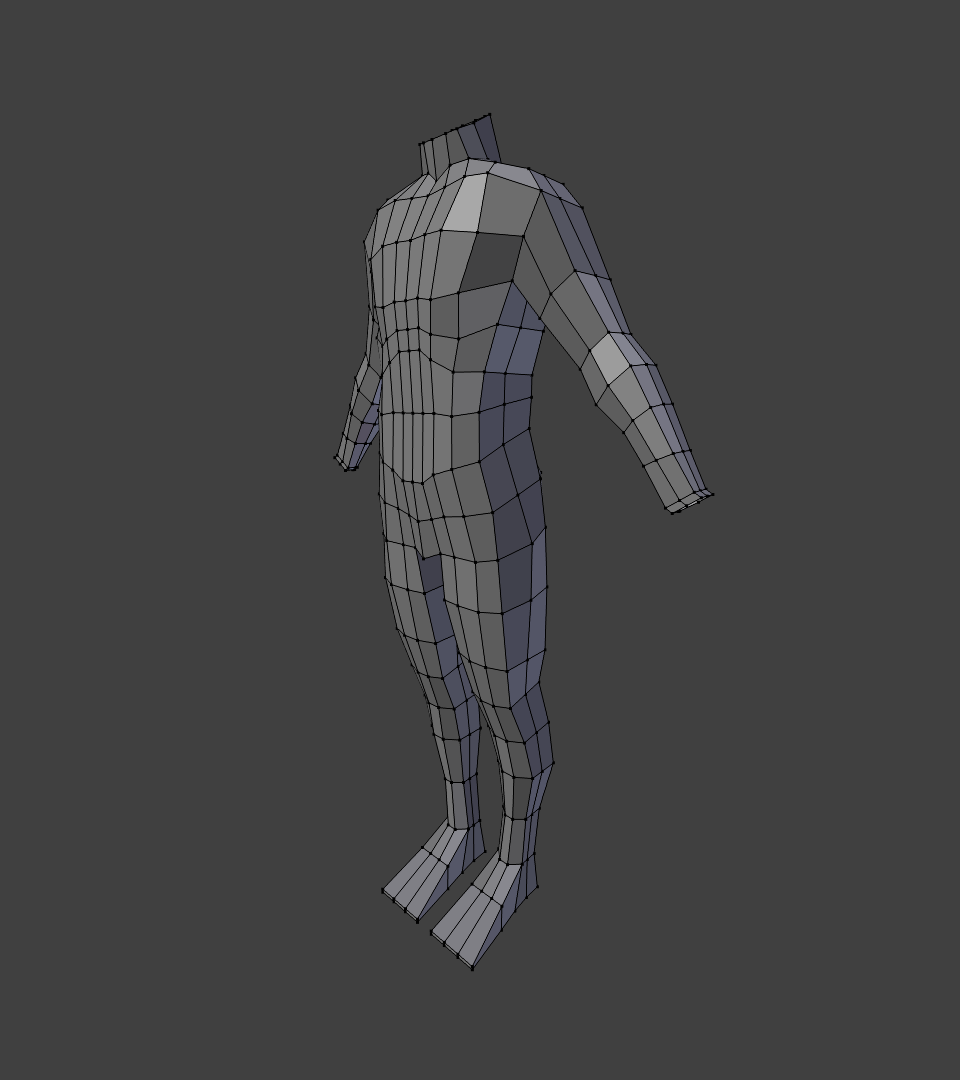
This is the beginning of the basemesh. No head or hands yet.
Box modeled. Forget how many verts. Something like 275.
For reference, using the male body drawings from Concept Cookie. Method adopted from Jonathan’s Character Modeling series. Idea is to create a fully nude, fully modeled mesh for the character so that various costumes can be applied, from t-shirts and jeans to pinstripe suits. Also, having a handy base around to do derivative works from for other characters.
With no previous experience doing this, I hope this method proves to be best and quickest for the result I want. I don’t really want to have to go through and model a whole new character each time the dude goes from t shirt to shirt sleeves, or changes his holster arrangement, but also, I imagine future nightmares when rigging different clothing. Hopefully masks work the way I think they do.
You will have problems, but your idea of creating a good base mesh for future modifications is a good one.
There are some nicely modeled and rigged characters available from Open Movies the Blender Foundation has produced. I recommend you go to BlendSwap, download Sintel, and study how the experts managed edge flow in their work. There are also some less sophisticated meshes, I think they are called things like “Woman A, Woman B, Istafarian Guard” and so on. BlendSwap has a whole ‘Durian’ section. Jonathan has also done a series on topology, but that might be behind a pay wall, I’m not sure. You might also look into MakeHuman, to see how those edges are put together.
The ‘landmarks’ in studying edge flow are ‘poles’ – those vertices that have more than four edges or less than four edges connected to them. Those are the spots that change edge loops from simple circles around a cross section of your body part, and are vital in getting the loops to follow musculature, which is needed to get a really good animatable mesh.
Problems: That’s what blending is all about! Overcoming obstacles!
I actually own the Sintel DVD set, and the topology series of which you speak. I’ll scope those MakeHuman meshes, too. I believe they’re higher poly than what I’m going for, but topology study can’t hurt.
I’ll watch Jonathan’s topo videos later today. Thanks for the tip on poles - and the definition. Stupid, but it was still driving me nuts exactly what a pole was.
The poles I can spot on my base mesh are at the underarms and crotch.
Extrude to the side… Presto: poles. You’ll notice Jonathan likes to color in the topology using multiple materials, which is a usefull exercise in itself, but can also help tame higher poly models by simply selecting several adjascent loops.
I mean, in the intro to character modeling, he really leaves the topology blocky and grid-shaped rather than flowing along with the muscles. There’s a modeling a female series that’s incomplete that looks like it goes over topo, so I’ll probably skim that or crack the blends. When I fiddled with making poles, I just ended up with tris all over the place, so there’s something that’s not jiving here.
I might just follow his example in the topo series and just remake the basemesh with all the edge flow, and dig out that ‘muscular male basemesh’ I downloaded somewhere and see what the edge flow is like there.
Thanks for pointing this whole thing out! I would’ve gotten up to my neck in my magnum opus here and then just thrown it all away because of ugly deforms much later down the road. Then eaten a lot of ice cream or something.
Oh, really, you don’t try to make poles. Usually you try to get rid of them, unless you notice that the edge loop must change direction or split in two and a pole is unavoidable. Then it’s a matter of moving the pole to somewhere you won’t try to deform too much when you are animating, because they cause problems.
(Actually you try to get rid of tris rather than poles, but tris lurk around poles, so it’s six of one, half a dozen of the other.)
Topo looks good for the basemesh. The female character series you’re talking about is the edge model an entire human. No sculpting, no retopo process. That’s one way to do it, I prefer the basemesh/sculpt/retopo method for characters. Edge modeling a human can be tedious and rough.
The poles you have in the armpits and crotch are unavoidable. Don’t worry about those, but be weary of any 6-sided poles. Those are a big no-no, and will drive you nuts in sculpting and animation.
The only thing I would add in this basemesh is the “rule of threes” at the joints. For good deformation, a joint should usually have 3 edge loops surrounding it.
Orinoco: That’s what I was thinking with - poles for the redirection of edge flow.
jblender: Okay, cool. I’m not familiar with retopo. I’m thinking something between the Basic Character Modeling tutorial with Kara (box modeling) and fixing topology now on the base mesh before I dive too deep in adding geometry. I’d prefer to just wrap with a detail sculpt (like with Kara), rather than do retopo afterwards. Partially because I’ve never done retopo and partially because it looks tedious as hell and generating a Normal map also isn’t in my pipeline right now.
Yes, edge modeling can be tedious. Like doing a wire exoskeleton and fitting it all together. Eugh.
Rule of 3: Noted. I’ll add those tonight. I think this basemesh is about midway at the moment to be called a real basemesh.
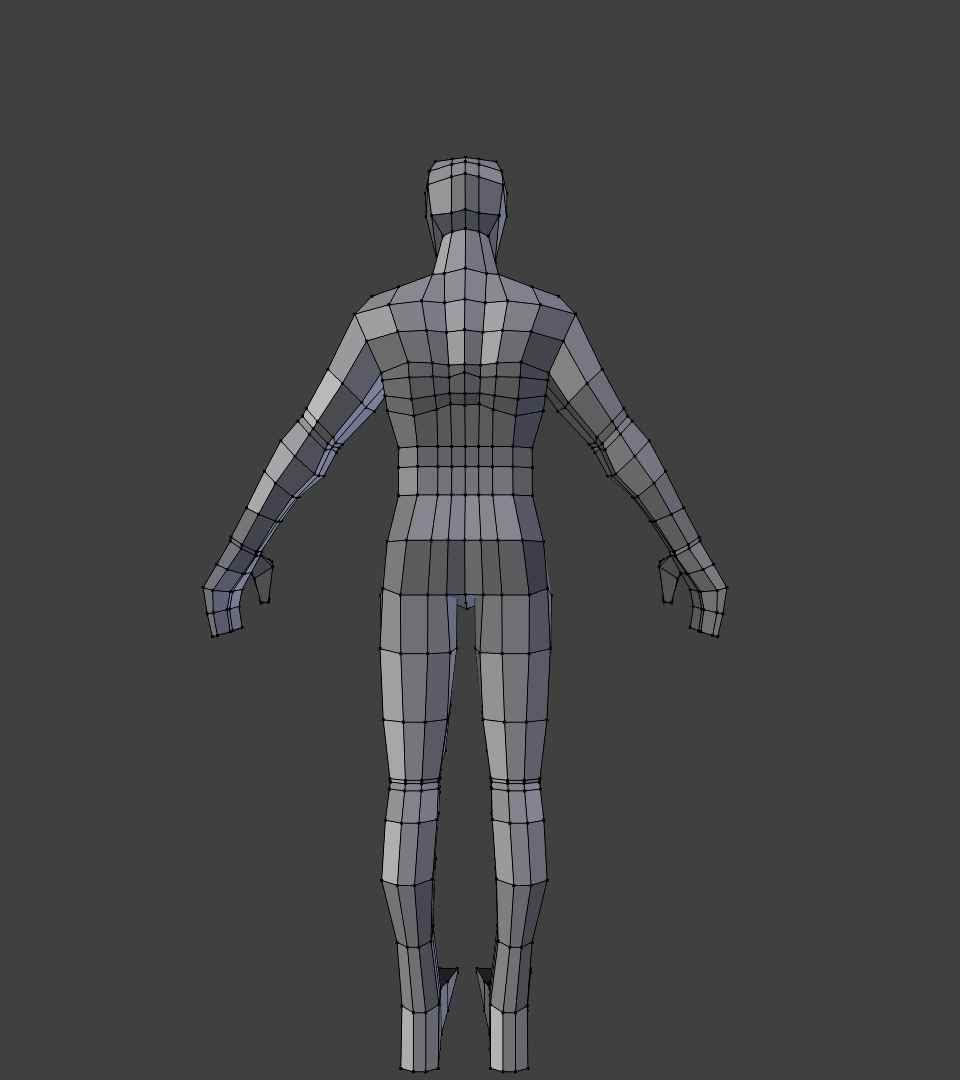
Did some work on the chest and joints, added hands and head (duh).
Before that, did topology study as gone over above: muscular male base mesh of which I spoke has grid topo, not flow topo.
Plan right now is to do everything short of detail sculpts on this basemesh; will be adding a bit more geometry, such as fingers and toes; smoothing some squished areas; then retopo; then detail sculpt (knuckles, fingernails, belly button, the lot), then repeat process with clothing.
I’m liking the level of detail on it so far.
Work clock: 2 hours, including previous basemesh that sits discarded on layer 20, for sucking.
The base mesh is still looking kind of blocky. Try cutting view cross sections (Alt+b) through the torso or thigh in side or front view, then look at the section from the top view. You’ll see a lot of rectangular shapes that can be rounded out a bit.
Did it! Looks better now. Will post images/links later tonight. I think I might be fcking up my geometry. Limbs always give me so much trouble - keeping that edgeflow decent after you’ve extruded off your model is harrowing and grief-inducing.
I’m running out of steam here, though, which blows because I really, really need to complete this project.
Well, hands are too wide from thumb to pinky. Feet soles are just a bit too tall. Other than that, looks good! Don’t run out of steam, you are practically done.