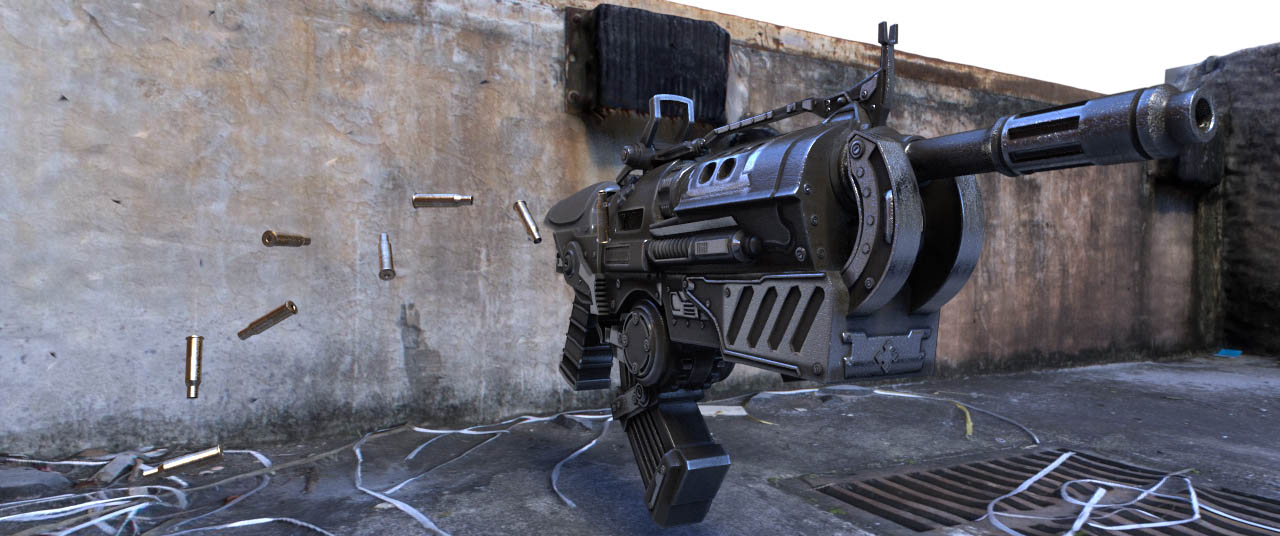
I’ve rendered out a small “Look Development” test and added it to my original post. I’ve not done this before, but I believe that by figuring out how things will look early on, I’ll be able to create a better final video.
Straight away, I know now that the gun needs more attention devoted to the fact that it’s basically serving as a character in this video. It could benefit from some sort of hovering movement, maybe a kind of light underneath it to act as a means of support. A laser sight could be added to the sides to serve as “eyes”. These lights should power up to indicate the gun is “waking up”. Whenever the gun points in another direction, it is basically moving it’s head. This could be used in a humorous way.
These are all little ideas, but they can add up and make a sterile and cold video more engaging and fun to watch. Do you have any ideas you’ve thought up from seeing this video test?
Atom - Thanks! I appreciate the encouragement! I’m hoping adding a “look development” phase to my workflow will produce better end results.
Frobenius - Thank you! One of the benefits to making these “all CG” videos is that you have no limitations with the camera or lighting or materials; you have all the control in the world, and money isn’t so much of an issue. Of course, time is an issue, and you have to keep things in perspective and know when you’re spending too much time on one piece of the puzzle. Your rocket engine tracking thread is coming along great, I’m enjoying watching it!
minoribus - I agree with you, I think this is better suited for the WIP section. I also decided to create a thread for it because I realized the sketchbooks section doesn’t get nearly as much traffic as this one does!
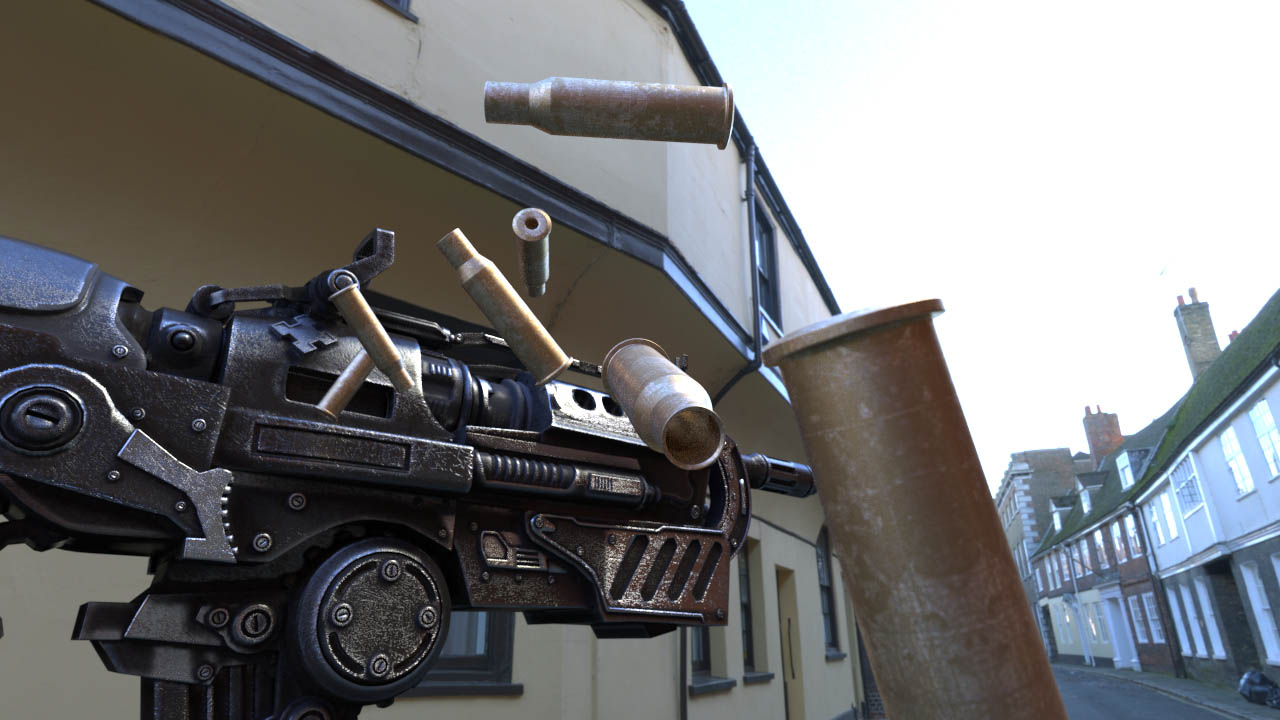
I was confused by that big, rectangular area on the side grip (or perhaps heatsink) part of the gun; there are cetainly limitations to the script, and the size and shape of different objects and areas of the mesh will influence the end result. There are a handful of settings that can be tweaked, which the creator of the script explains here, at this exact part of the video:
Are you can see, the script basically just uses Ambient Occlusion and inverted AO to define edges and cavities, and “neutral” areas, so that is why it is a good approximation, but not always perfect. In fact, I’m not even using the generated dirtmaps to their full potential - I’m only using them as factor inputs. I’ve not been able to find a .blend file which uses Nicolò’s script with proper material node setups, so I don’t understand how he is able to use the middle gray values in his dirtmaps to correctly define the base material areas. I think for this project, the gun looks “good enough”, so I will focus on other things, but in the future I’d like to learn how to use the dirtmaps to their full potential!
Nickersf - I’m glad the links may help you! I’m looking forward to seeing your sketchbook!
I’ve seen some works created with ddo2, and on multiple occasions have looked it up, but the official tutorials have not been easy for me to understand after the first 5 minutes (maybe because I have no experience with the interface). Would you recommend it? Also, do you have to supply all the textures it uses, or does it come with some? In one video, I saw that it created areas of chipping, water lines, and other interesting looking “grungy” sorts of texture. Is that an internal parameter that can be tweaked?
As I mentioned above, the dirtmap script works essentially like AO does, so your results may be a bit smooth. One trick I found is to take the dirtmap you’re using for a specific input (say, your edges material) and multiply it with another image texture of grime or scratches, whatever works. In my case, I’m using the white areas of each dirtmap as a factor for a mix shader. So this multiplied result of two images will be more random and less smooth than simply using the dirtmap by itself. I can upload an example of my current node setup if my description is too confusing! I’m using an older version of Blender (2.66 I believe); I found when I tried rendering the model in 2.69, by bump maps looked completely different (pretty much gone), so I’ll be sticking with my older version for this project.

 I think in the WIP section of the forum we can discuss the pros and cons more in depth, because your sketchbook is primarily meant to show your work.