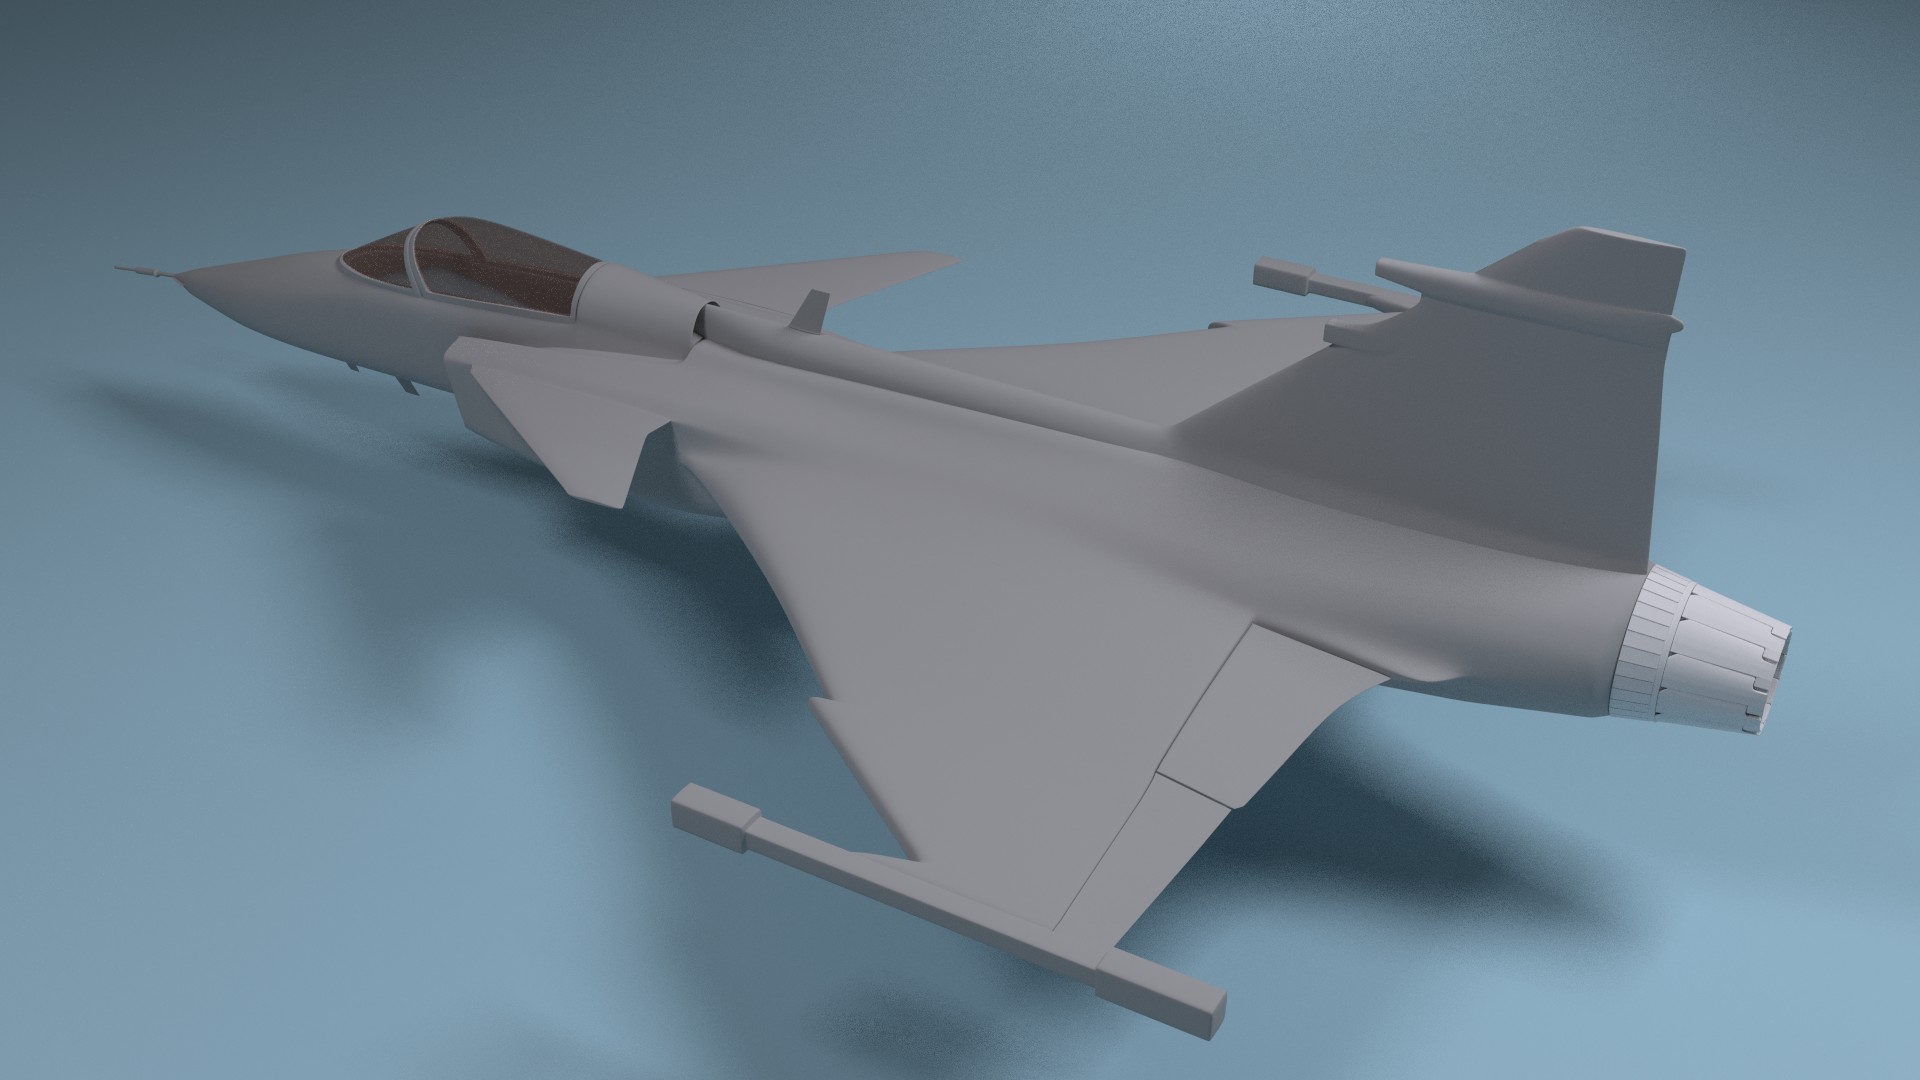
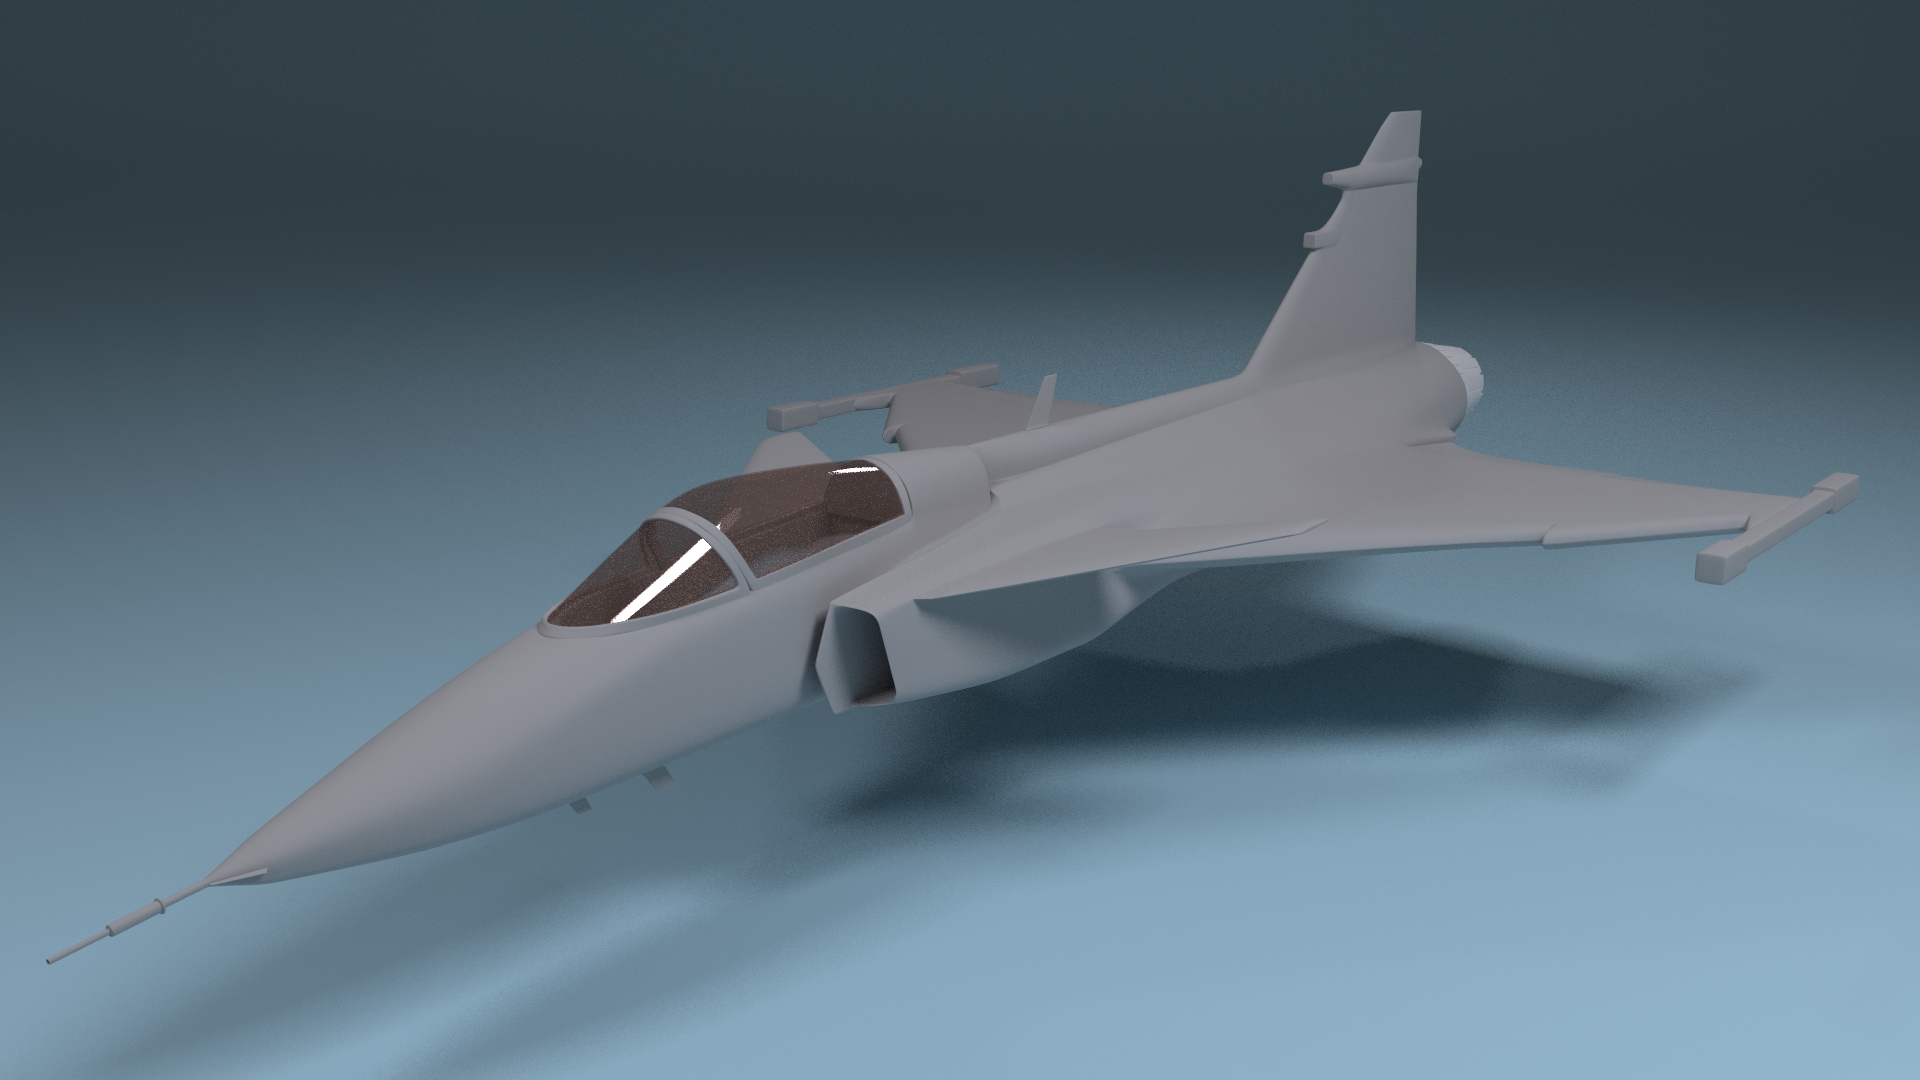
In light of the death of the Su-25T, I have decided to model a Saab 39. I already have plans for a render with this and a Saab 9-5 car, so after the Gripen is done this thread will become a car thread too. (I’ll change the title at that point)
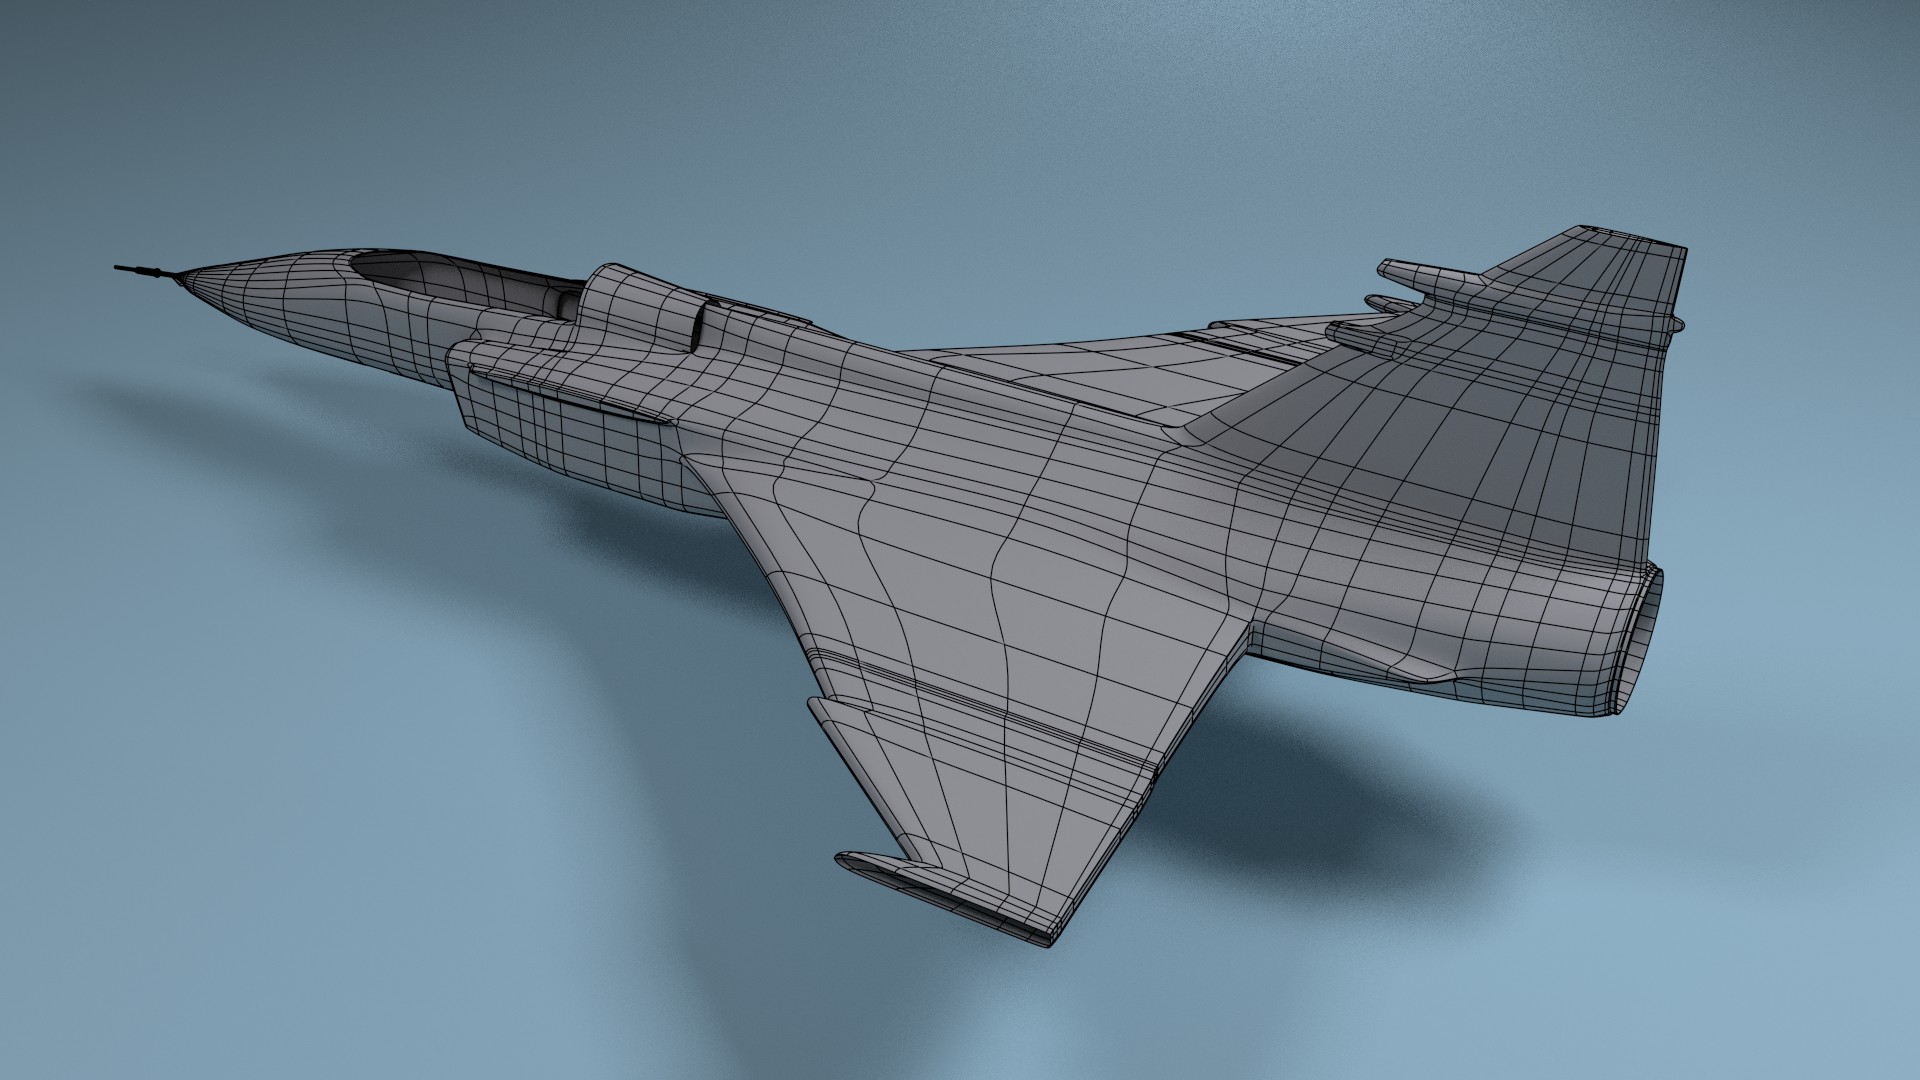
But for now, progress (Tried out freestyle, its a sweet feature.)
Niiice! although I’m guessing the missile rails on the wingtips will be reshaped as they are atiny bit “boxy”…unless is a new missile that only shoots Rubik’s cubes…LOL Kust kidding!!!
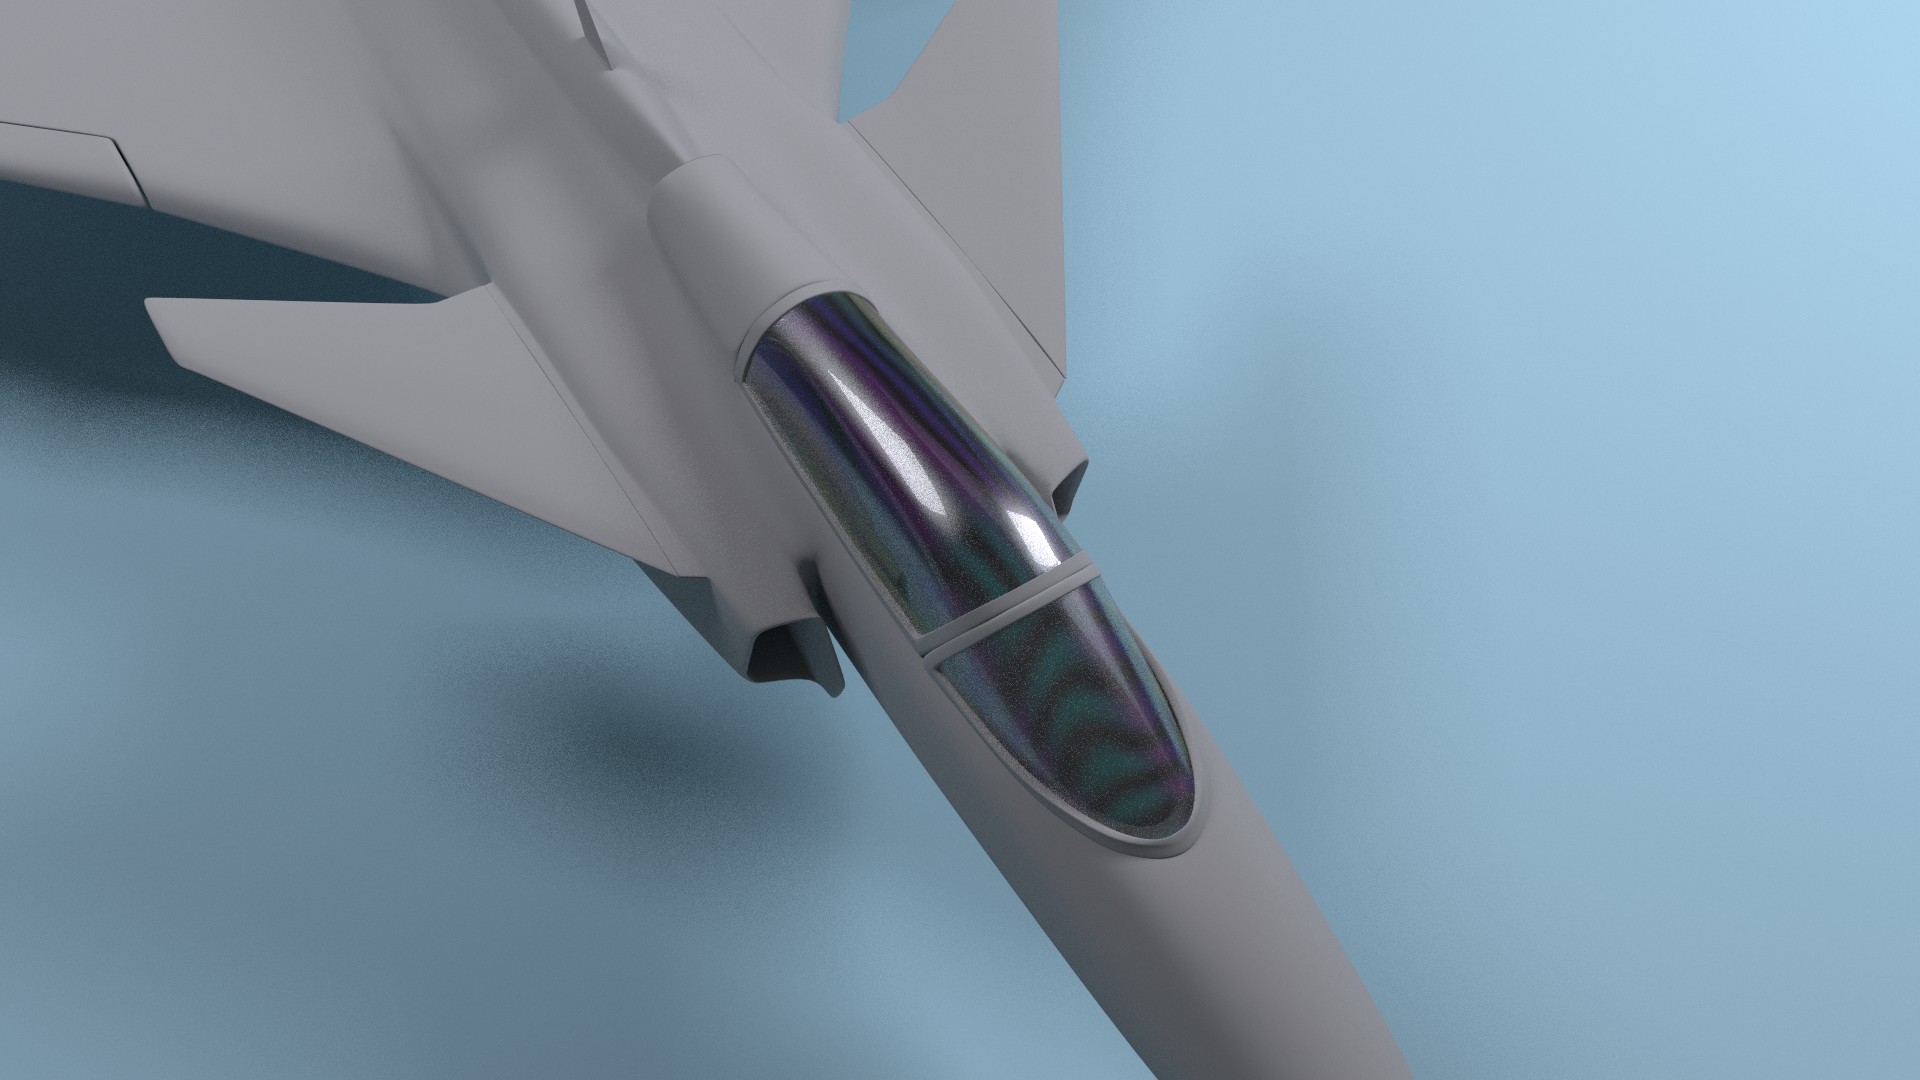
The goose feathers in the exhaust look fab
LOL, they will indeed be changed. They are placeholders more than anything. But hey, the new Meteor missile just got approved for the Gripen, and they didn’t say it WONT fire Rubik’s Cubes
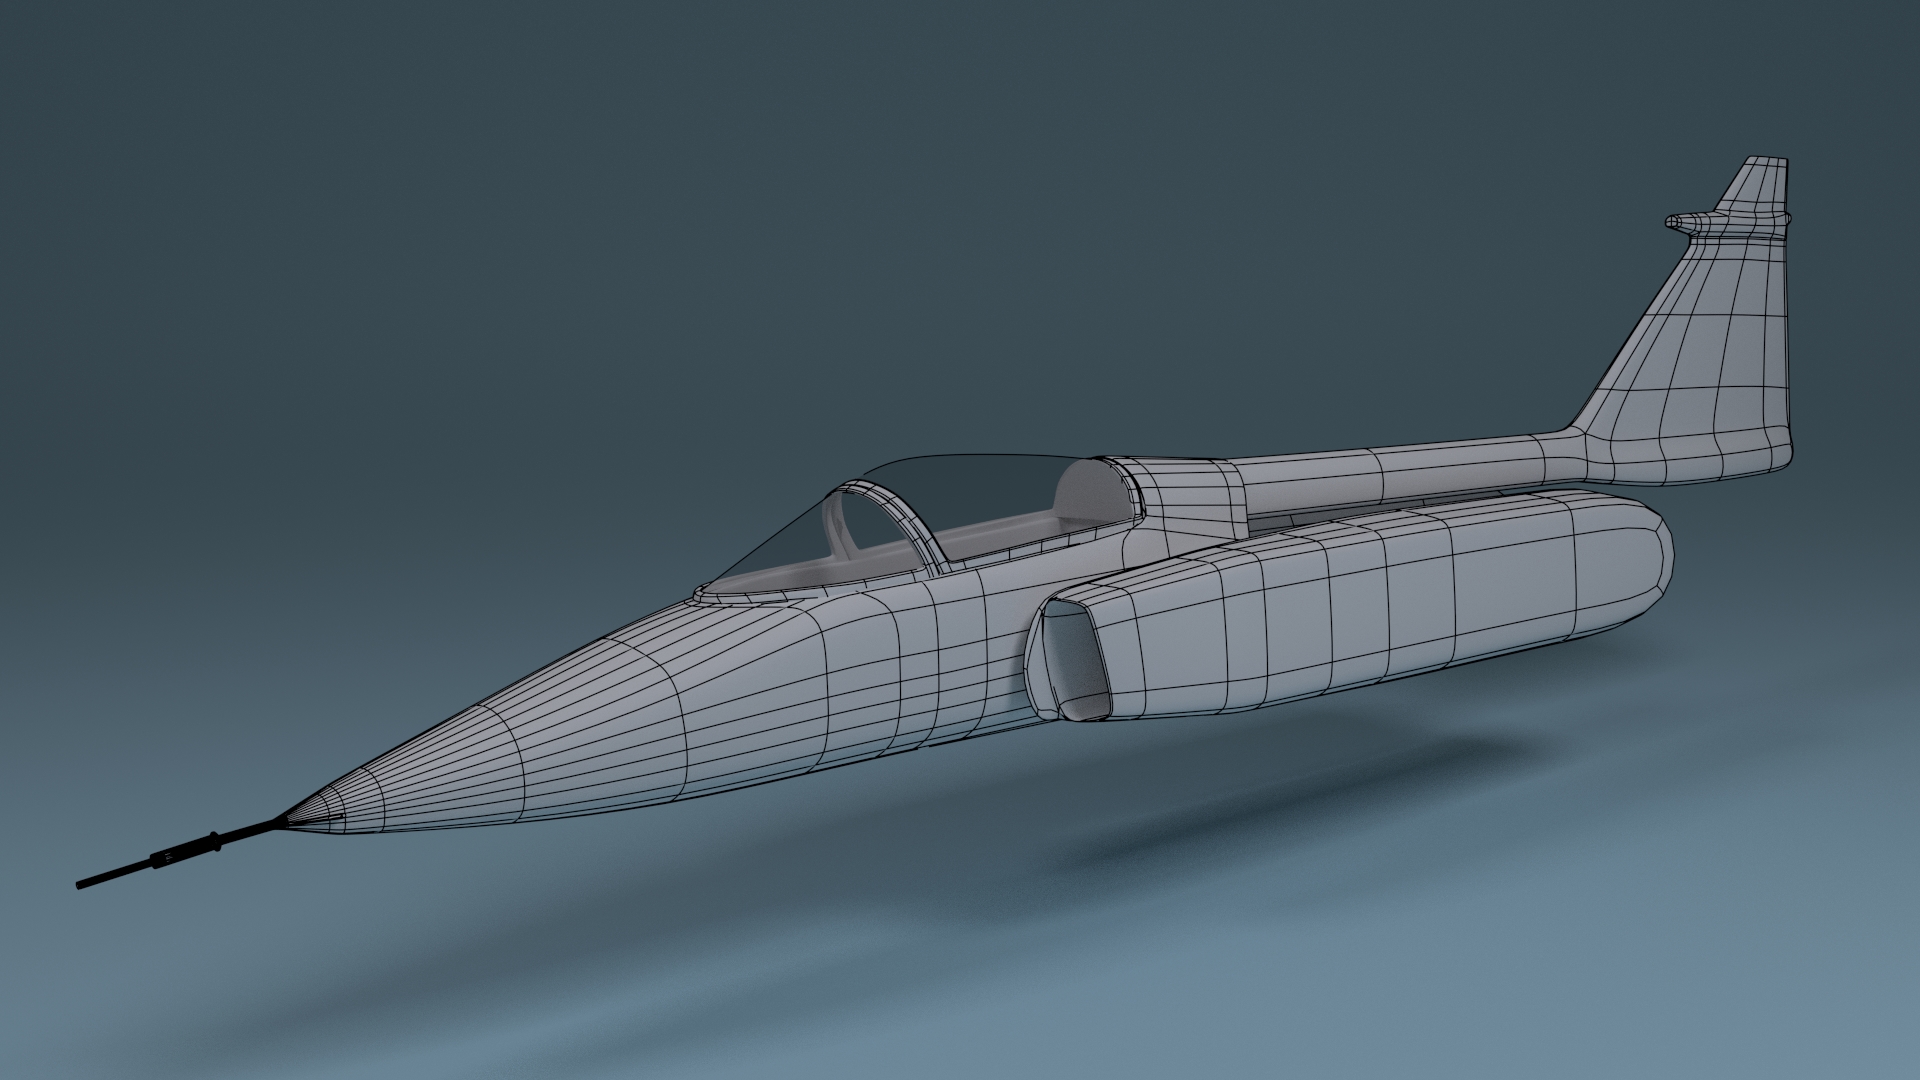
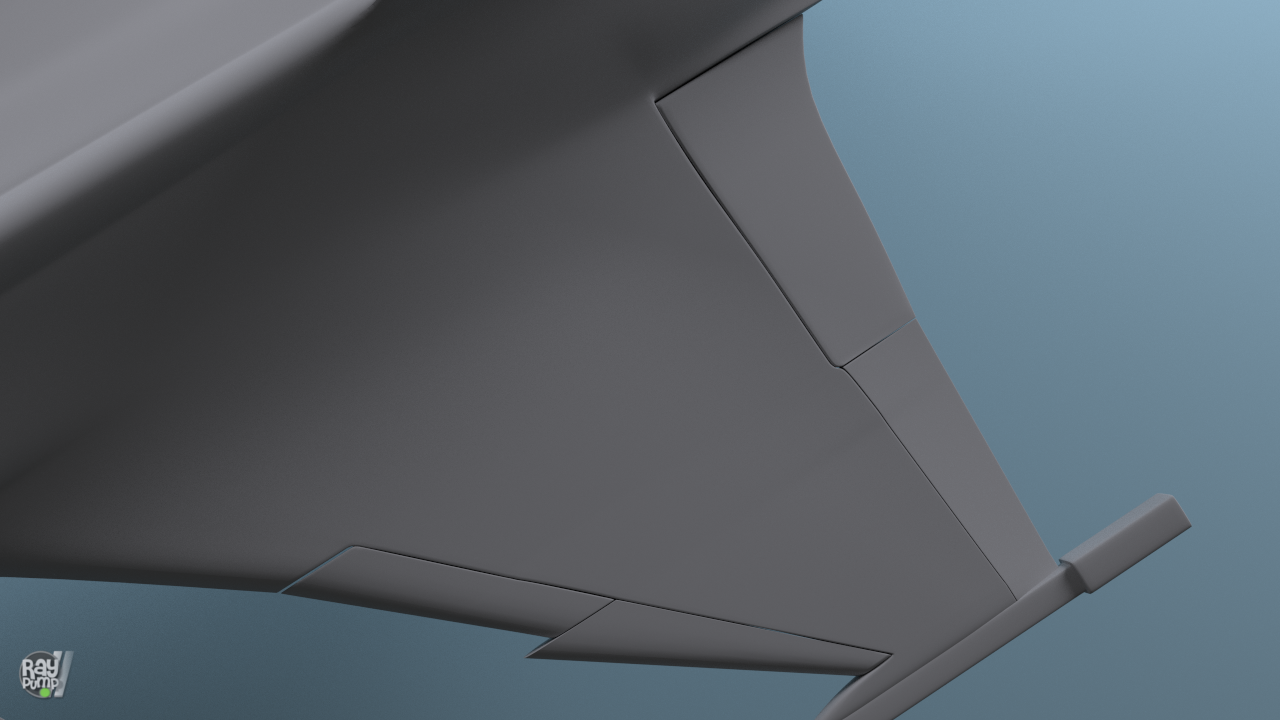
Attached the nose and tail to the rest of the fuselage. It wasn’t the simplest thing in the world, especially since the nose started its life and a cylinder and the fuselage started its life as a cube. Think of it as trying to fit a square through a circle It left me with some clean up to do, but its much better now that everything is attached. After cleaning up the mesh around the joining areas, I can move on to detailing the wings more.
Cheers
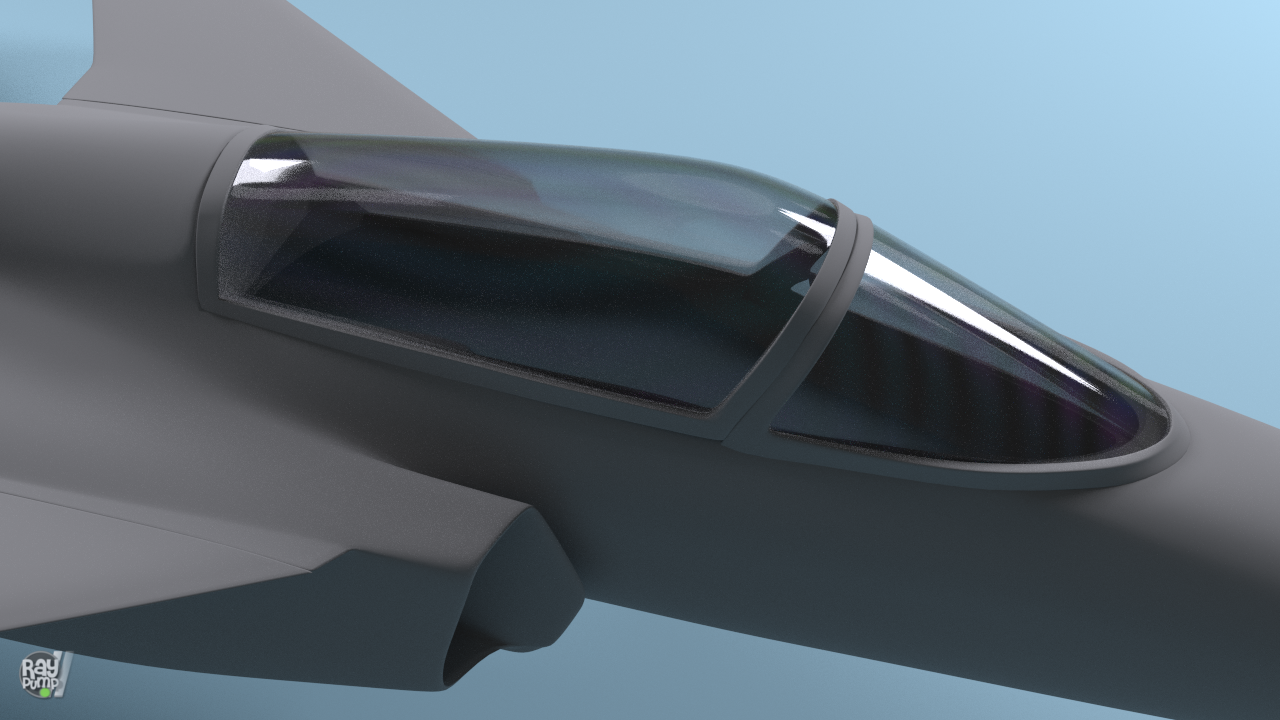
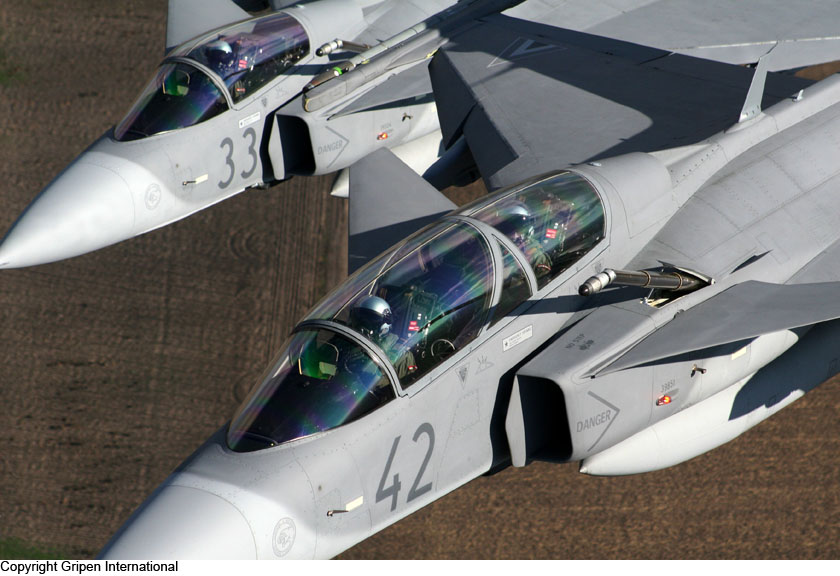
Just to take a break from modelling, I put a little work into the glass shader for the canopy. I’m trying to recreate the iridescent glass effect (see a relatively subtle example here: http://www.combataircraft.com/aircraft/fjas39_p_09_l.jpg ) Its still in the works, but we’re getting there. No image textures either.
Nicely done! Like how the colours change according to glass tension, I know you’re probably still working on it but I think it feels a bit “plastic” or like those transparency films used in retro projectors used @ school in years gone by.
never the less it looks sooo good!
Looking really good already. I can’t wait to see it fully detailed and textured.
Also, could you send me a PM when you start a new project? I feel like I always find them after almost everything has already happened. I don’t do a good job checking the different forums.
Thanks! Although I feel it’ll be a while until I get to the texturing stage. Haha sure, I’ll let you know when I start something new.
Updated Glass shader ( I still need to create a new texture for the colored rings):
You’re doing great! I’m about to start modeling aircraft that my dad has built physical models of but I’m trying to plan how I’m going to do it. Could you give me some tips? It’ll take me quite a while to produce any aircraft right now due to my busy schedule but any advice you could give would be helpful–especially since I’ve never actually tried anything like this before (the closest thing to this I’ve done is creating rigid mountains).
I haven’t put a solidify on it yet, but I definitely will. I’ll probably do that after I make a texture for the iridescent rings. @AnZwecky Thanks! I’ll give you some tips for sure, even though I’m still relatively new at aircraft too.
Have as many reference photos as possible. Aircraft are so complex, that Its easy to miss something. Try and find every angle of the plane that you can. Use your physical models, and I find airliners.net to be useful.
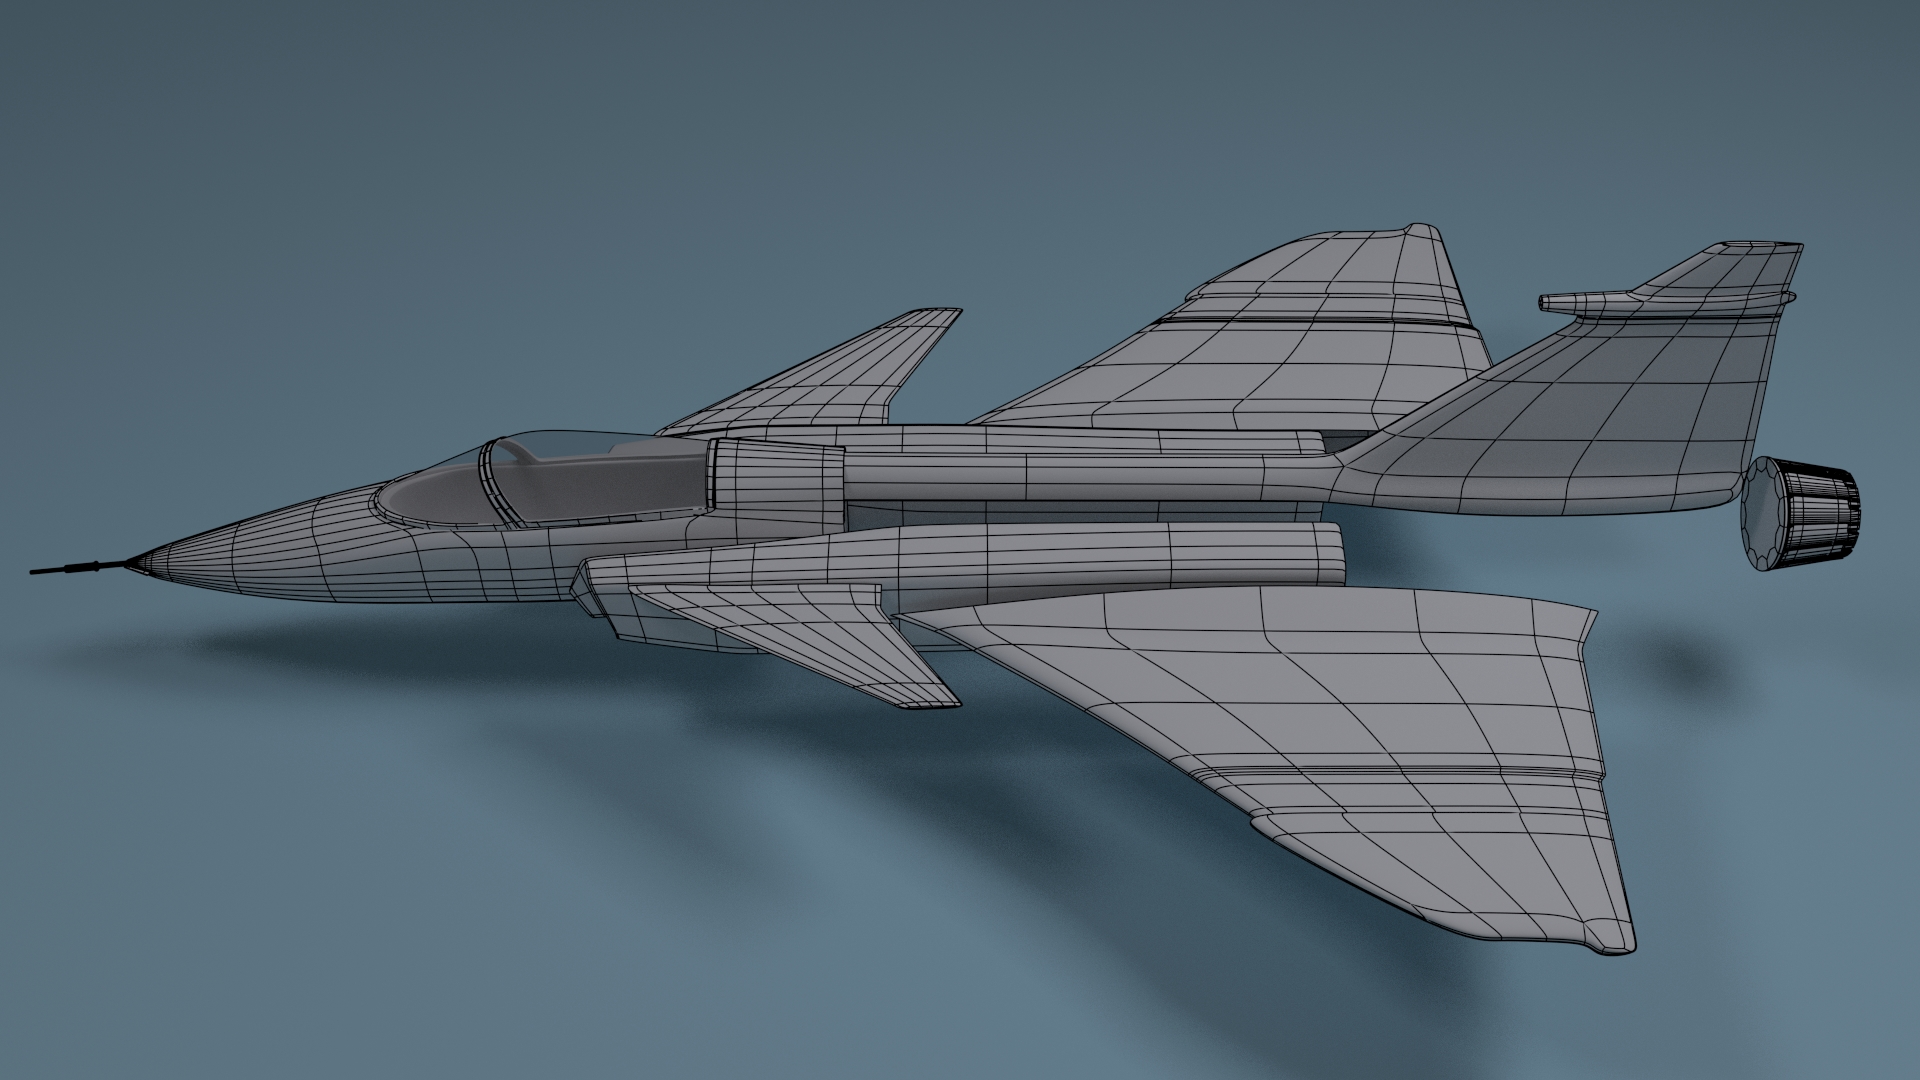
Dont go crazy with edge loops. Aircraft bodies flow really smoothly, and too many edge loops often add up to too many bumps. I’d say I have too many edge loops on this Gripen at the moment. I’d stay conservative with loops until the whole fuselage is shaped properly, THEN you can add details.
Try and find accurate blueprints. Compare your options to real photos and see which is most accurate. It’ll only help later.
Don’t rely on blueprints exclusively. No blueprint is 100% accurate, check ref photos (and physical models) often.
Be happy! Sometimes modeling an airplane can be frustrating, there are just so many details to attend to. I’ve started modeling little things in between here and there to get my mind off of it. The model will be better in the end.
Are you gonna post a WIP thread? It’ll be easier to give advice once you start modeling and post pictures. Good luck
I totally agree with @sdighe in every tip he has giving you, the more reference photos the best…one thing’s for sure if you choose a plane that has many variants/model make sure those images are from the same variant as they tend to change some angles, panel placements and other parts from model to model.
One thing that you have going for you is that your dad has already built one, so you must have a wealth of blueprints, measurements and side notes your dad made when building it.
I suggest that you make a WIP thread where people like Sdighe, myself and others can help you out
Now the most important piece of advice I can give you is, have fun making the model and don’t be affraid to ask if you get stuck.
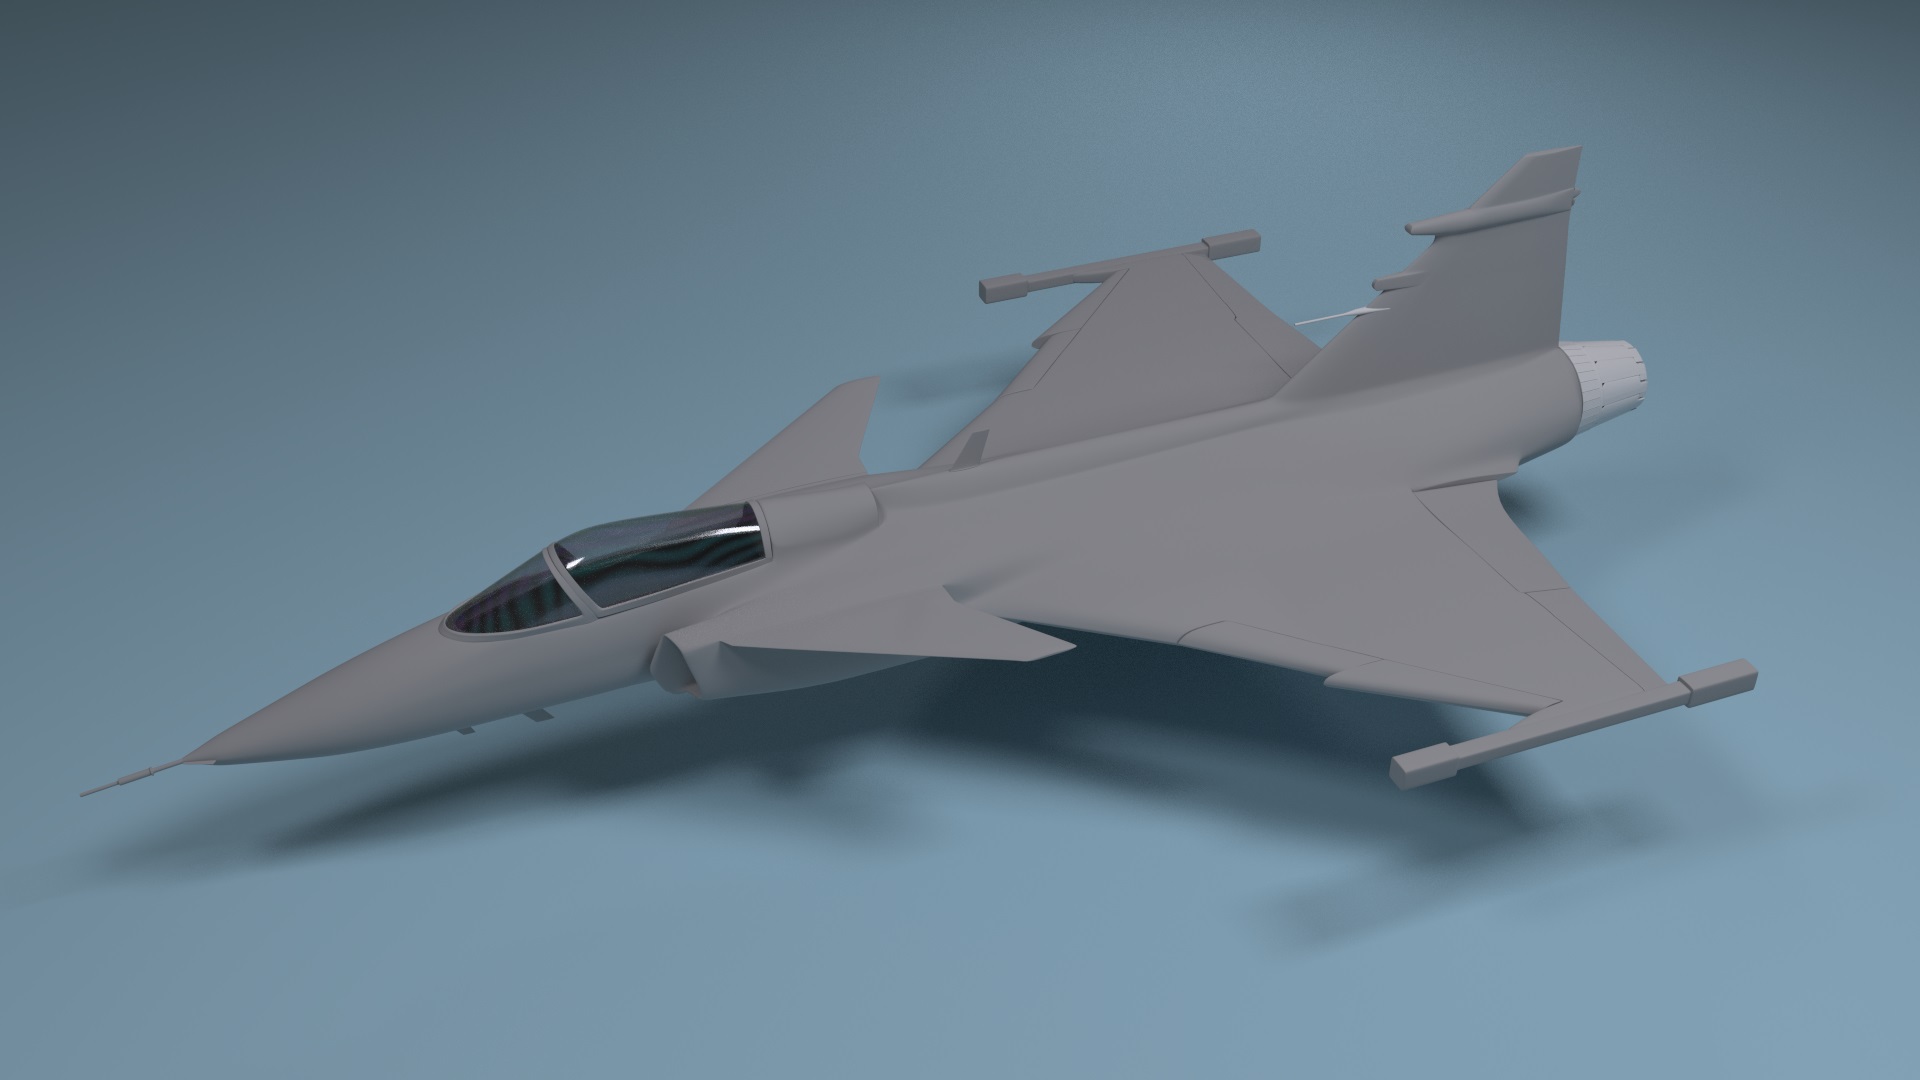
Haven’t had much time at all to work on this, but here is an overall view of where we are at so far. Since the last update, the glass shader has been updated slightly, and the front gear doors are added. Next up is probably re-doing the frame of the canopy, and then adding the gun and rear gear doors.
Remember this project? Recently I’ve had a lot of other things to do, but I’m back on this project. I’ve finally (sort of) gotten the hang of UV mapping, and so with much joy, I present to you a very rough, basic color map for the fuselage. The dark grey parts of the plane aren’t mapped yet, as with the white parts. It’s just the fuselage for now. I’ve still got one or two things to add to the fuselage, mainly the hardpoints and the gun pod, but since they would be separate on the UV map anyway, I can add them in later and not have to completely re-map the fuselage. Well, here she is so far:
 (Tried out freestyle, its a sweet feature.)
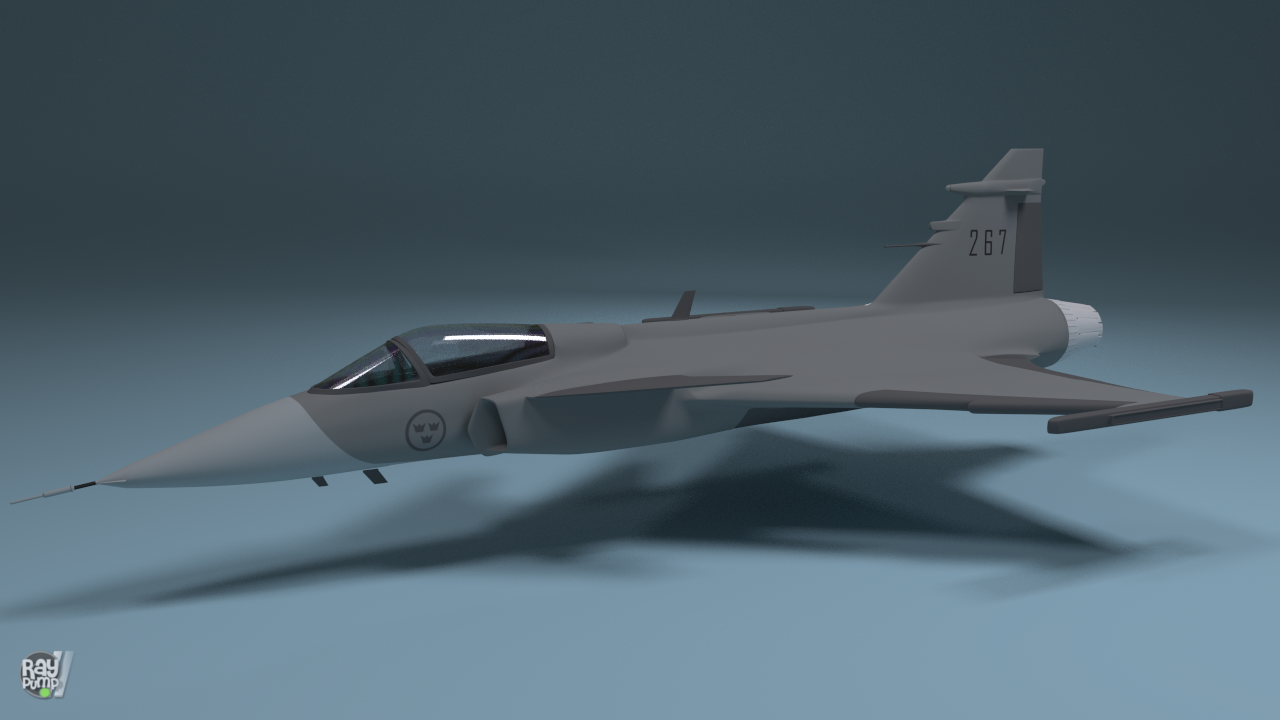

