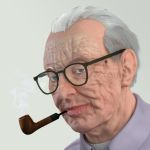
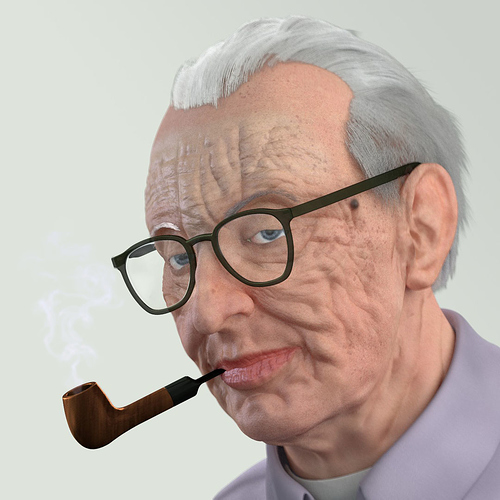
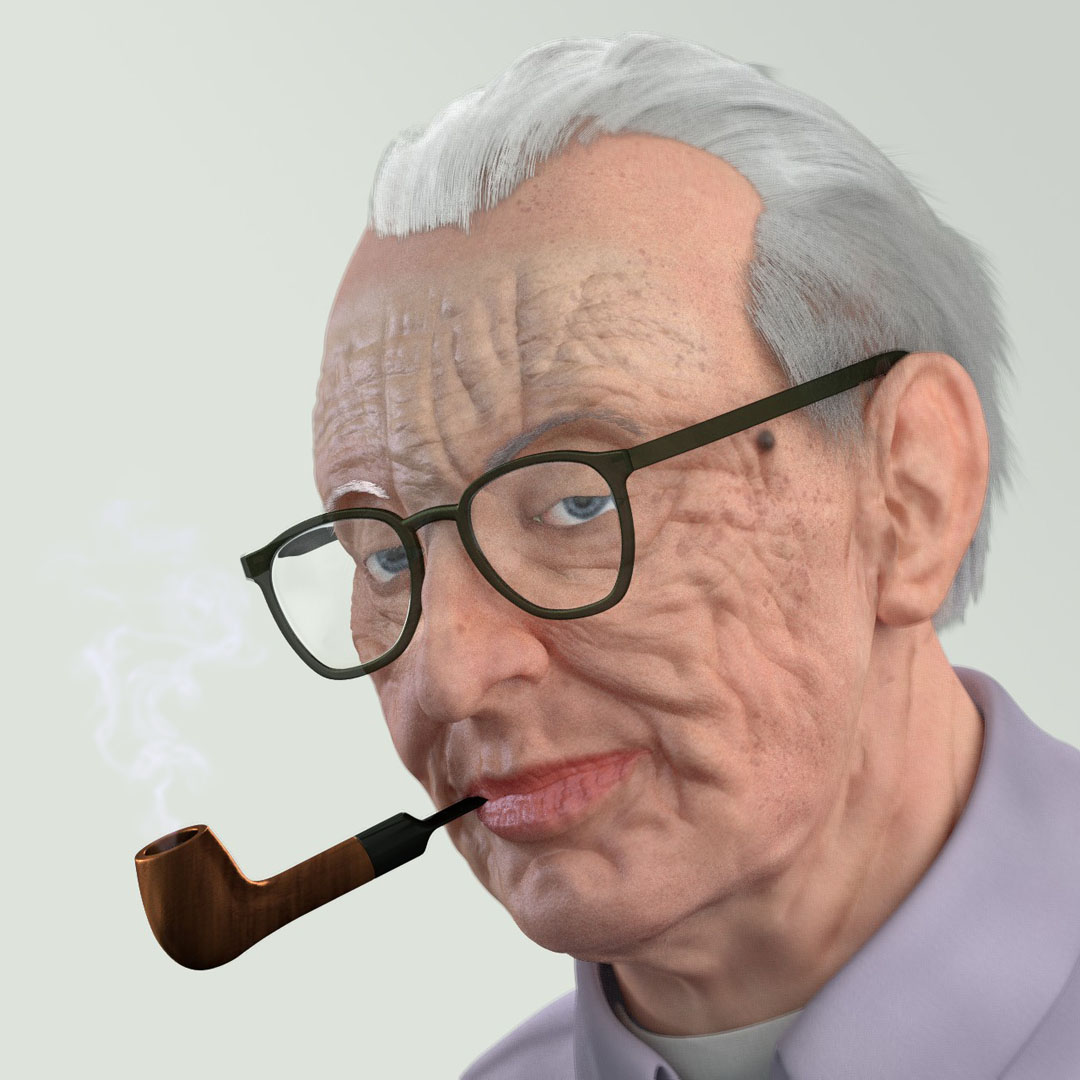
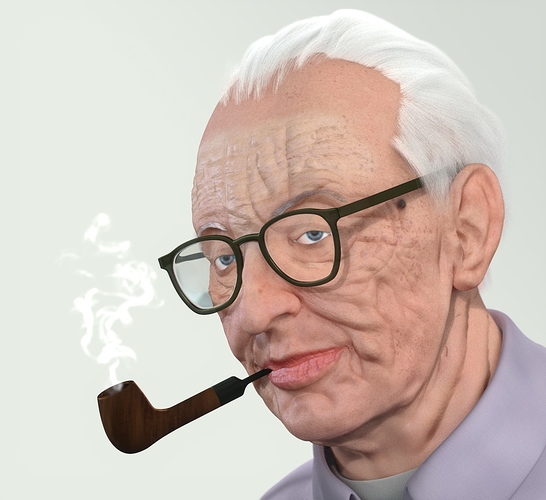
Carl Orff was a German composer, known mostly for Carmina Burana, although there’s more to him than that. Besides, he had a very recognisable face, so I chose him as a model for a portrait. Unlike just sculpting a generic face, it turns out that it’s very difficult to achieve a close likeness when doing a portrait — I think this is my best attempt at making a human head so far, but I would greatly appreciate feedback on how to improve it. The glasses’ frame was supposed to be translucent, but I have trouble with Cycles showing black triangles in transparent objects (in fact, some can be seen in the edges of the glasses).
By the way, I used the skin shader by Andrei Cristea, which is easy to use and would certainly do wonders in hands more able than mine.
I did a quick image search and just at a casual glace the lips are too red and the skin is too puffy. Less form in the cheeks and more texture to get those details of age. I would also tone back the smile. Also, I would light the eyes to get some reflection in them to liven them up a bit. I would not tilt the head in the renders - it looks to floaty and I would model out some kind of a shirt or something to ground the head a bit. The blue background is distracting. Hair is too reflective as well. Maybe add a touch of a brown just to warm it up and make if feel more attached to the head.
sbabb: Yes, I agree on lighting the eyes, changing the background and adding a shirt, which I’ll do, but right now I’m concerned with the overall appearance of the head. Oddly, the hair has only a transmissive Cycles hair strand material, so I guess it should not be reflecting much — the hair should be white. The head is tilted because I tried to match it to one of my reference pictures.
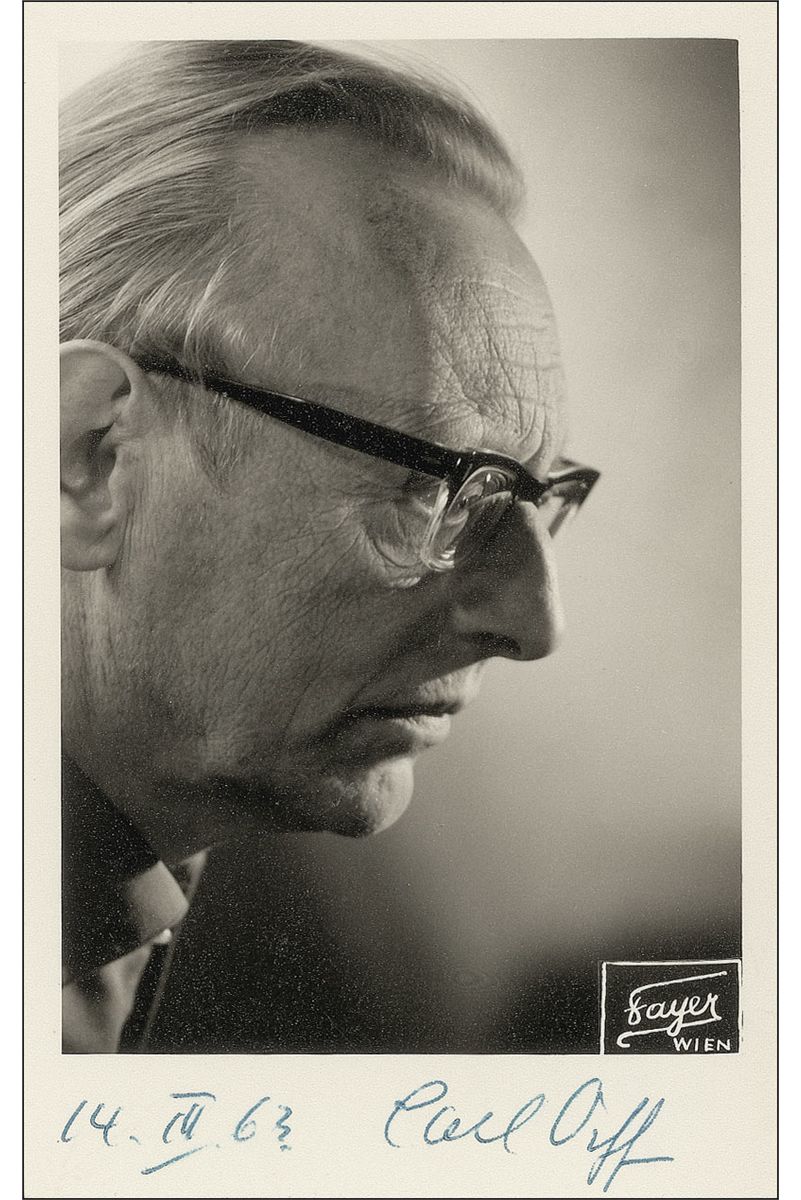
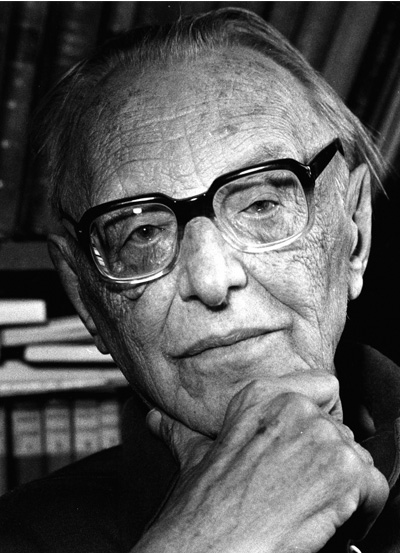
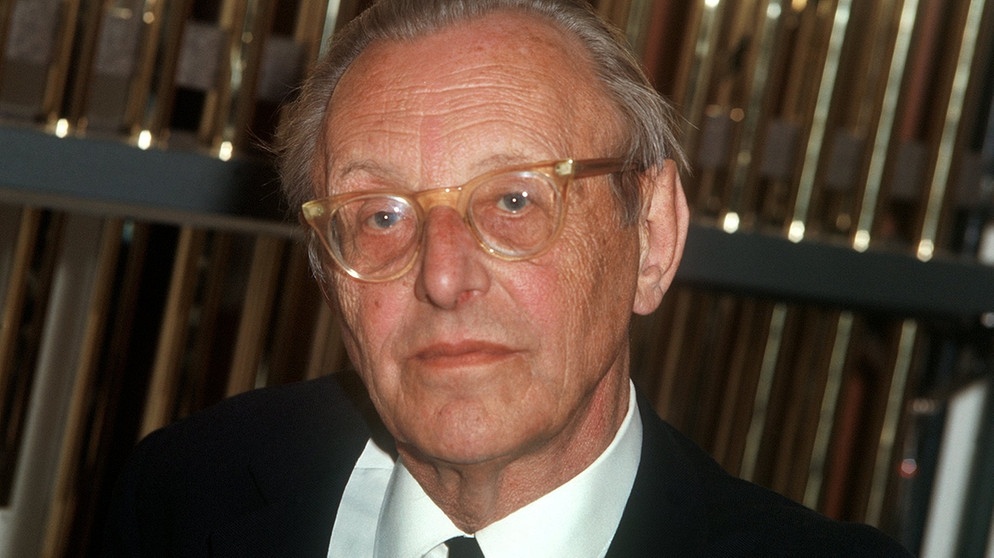
Some of my references, just a few, follow:
Cool! Looking at the reference I’d say create more a edge where the lips meet the rest of the face. He has a “sharp” bottom lip - where it meets the chin area. Again, great work.
Made some changes, basically made the lower lip sharper, the hair thicker (I’m not too sure about it looking better — perhaps it should be something between the original width and the present one), and slapped an HDRI, which changed the overall tones. I’m still to add a shirt and maybe some background.
Made some major updating: changed camera angle and lighting, and added some clothes and the pipe. Put Some depth defocusing and the smoke from the pipe in post.
The face sculpt is amazing but the glasses make it look weird - like there’s no glass in them. Even a low lens strength would distort or displace the image behind…
Thank you! I guess you’re right about the glass — They do refract, but maybe not as much as they should. I’ll see to change that, I already posted this in Finished Projects but nothing is ever actually finished and there’s always room for improvement. Thanks for the feedback!
For the thickness of hair in blender I use a scaling in the Cycles Hair Settings: 0.0003 and I also can get away with 0.001 .
The real thickness of hair is approximately 0.18 mm. ( I see some variations on the internet about the thickness of the human hair ).
Average a human has 100.000 hairs, but I think we can get away with 30.000 if we make he hair thickness around 0.001 in the Cycles hair settings. I think this man would have half the amount of hair ? So you could try 15.000 hairs with a thickness of 0.001.
Maybe you think he has thick hair, but what you see is that the hair is sticking together and it looks like he has thick hair.
The best free HDRI for me is from greg zaal called northcliff or otherwise the barcelona rooftops. This because there is something wrong or with the shader or with the lighting. Probably set the strength of the HDRI to 1.3. Be careful with sunlight or other lamps, in my experience they easily makes the render sterile.
The sculpting is amazing.
I would try to play with the focal length of the camera lens as well with a few low resolution renders. And some little variation in the background. It looks so sterile.
Ah, now I see it…: shadows. The shadows are barely there and are very soft. Could it be that you turned on Ambient occlusion? If so, turn that off. Use light paths around 2 bounces for diffuse and 4 for glossy in the render settings.