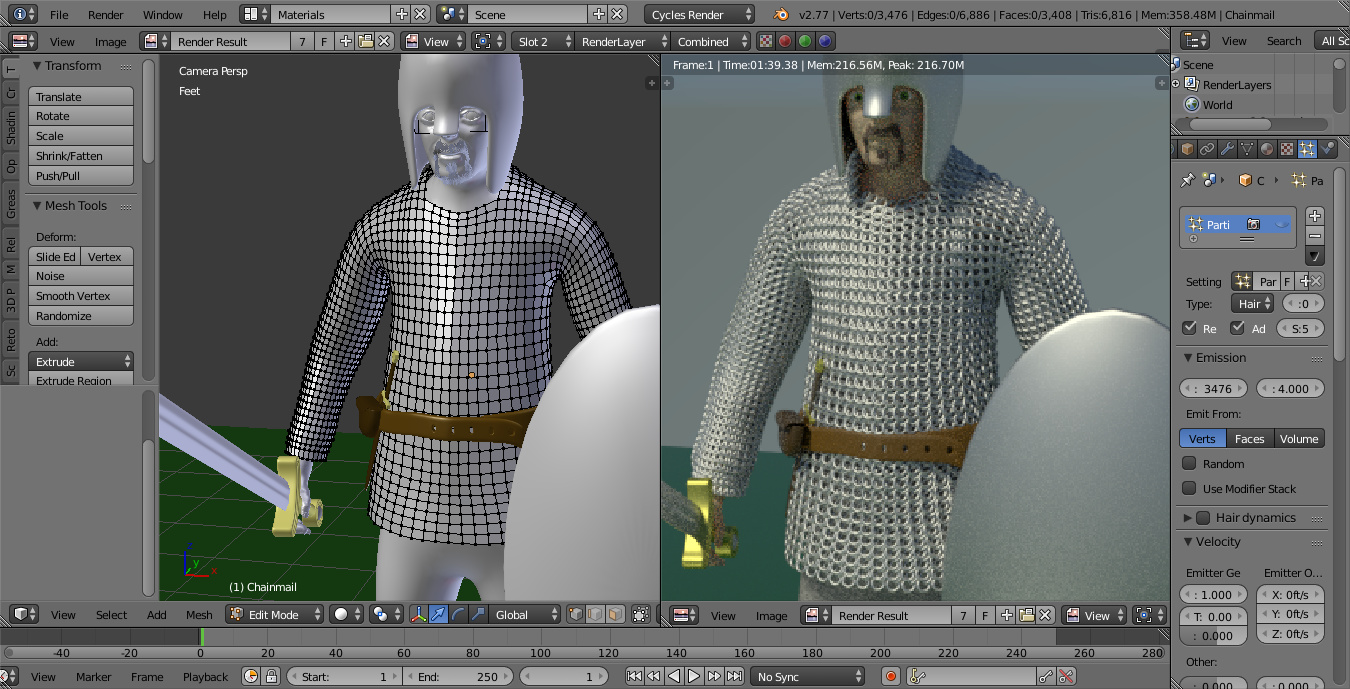
A few days ago, I started working on a chain mail armor for my self portrait character and I’m using a technique for doing it from an old CG Cookie tutorial. One thing I noticed is that in places where my mesh is dense with vertices, the chainmail looks fairly decent and linked, but there are a few places where it almost seems too dense and other places where it seems like the links aren’t linking at all. I’m just wondering if there is a way to have the scaling of the particles change base on the distance between the vertices? So if the vertices are further apart, the particles will be bigger and when the vertices are closer together, the particles will be smaller?
have you tried the Tissue addon? it may be better than using particles.
I haven’t yet, but I’m using the vertices for the placement of a particle object… can something similar to that be done with that add on? (looking at the add on, I might take a look at it anyway for other stuff.)
the addon doesn’t work on vertices, but on faces. it changes each face into another object, and if the object has seamless properties, it will fit right in.
Since your mesh is basically quads, this should be simple.
There’s someone who already used the addon for a chain mail and it was looking great… don’t recall where I saw it… 
If you happen to come across it or remember it again, let me know! My initial test of trying this looks like it might be what I need, though it’s being really slow to generate or update, but the results are looking close to what I want… I’m still trying to tweak to see if I can get closer.
Thanks Secrop, for both the Tissue recommendation and the link to the chain mail!
One thing I’m noticing, at least for the chain mail, is that it works really good on something flat, like a plane, but isn’t quite as clean on a more realistic example, such as the shirt. But I think the effect will be good enough for what I need, at least. When I try to clean it up on a plane, it’s really easy to do, but trying the same thing on the more complicated shirt essentially looses about half the shirt, so I’ll have to leave that extra in if I use it and not clean it up, which would make it look better if I could clean it up as easily on the shirt as on the plane. It’s also a heavier mesh, using nearly 1M vertices (and that’s before subsurf!) which my laptop seems to be struggling with, so I may, after this test, use the lighter particle for test rendering and bring back the heftier mesh when it comes time to do a final.
Part of the extra geometry has to do with the better chainmail linking – which that link alone was worth the time it took to figure out. Using what I learned from that one image helped me do a better base, even for the particle version.
I think I figured out the problem I’m having with the results from the Tissue add on with the practical object. It’s not lining up the holes properly.