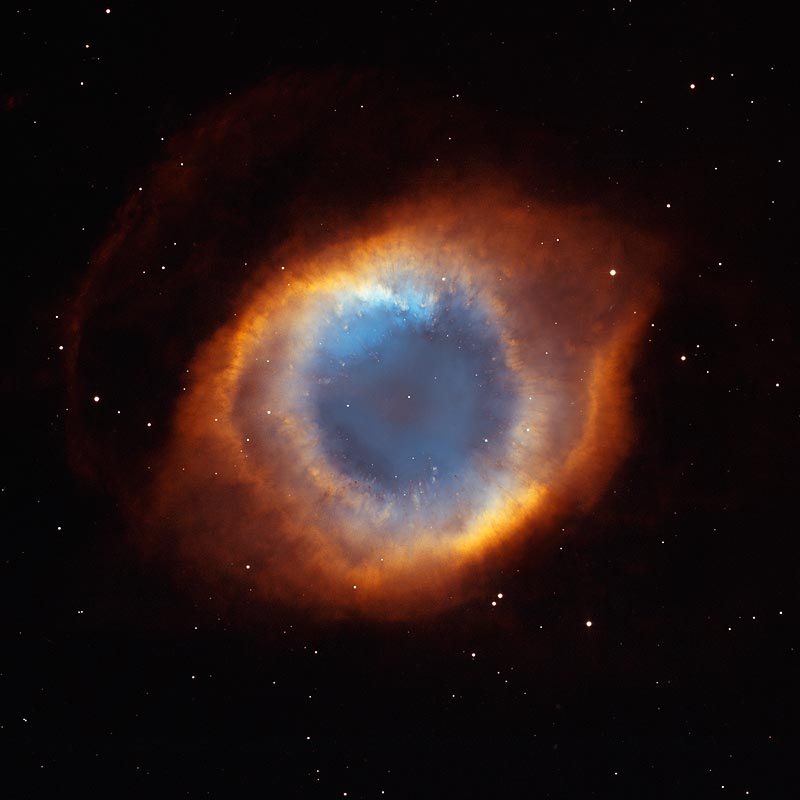
My attempt to generate a volumetric representation of a space object from photographs.
Rendering took 57 hours on 20 CPU threads and 2 GPUs in parallel.
My attempt to generate a volumetric representation of a space object from photographs.
Rendering took 57 hours on 20 CPU threads and 2 GPUs in parallel.
Very cool!
That is very cool!
I realy like this result any chance that you share the basic setup or a tutorial…
Awesome space animation!!!
Thank you all!
I already wrote a short summary on the shader on Youtube:
The rather complex volume shader uses color and brightness of the photograph in combination with various procedural noise textures to define color, emission, and density of the volume. The stars, however, are particles. Nothing in the scene is modelled by hand. It is rendered with Cycles and each image rendered in about 13 minutes on a higher than average system.
If you have specific questions on details I will try my best to answer them, a tutorial is not yet planned.
What do you use for the volume ?
Man, that was beautiful.
Very cool!!! Did you get the 3D data from any source, or is it just an interpretation from the photos?
The volume object is just a cube and the shape is formed by a mathematical interpretation of the photo using the aforementioned noise textures and a lot of math nodes. No actual 3D data is used.
very nice. beautiful 
Very nice. The way you have delineated the volume is very impressive. I would be very interested in a little more detail of your technique and specifically what the photograph was and how you used the colour and brightness to delineate the volume. I assume from what you say that it wasn’t about projecting the photo Into the volume?
For the volume , have you used micro - displacement ?
I love it! Good job!
The volume is basically a cube and the basis is indeed a photo projection onto the volume. However, density, emission, and color is limited to certain areas by calculating a 3d mask using the UV space and math nodes. I use noise textures to break symmetry and add more variation. That’s the principle, mesh tools like micro displacement are not used at all.
That’s the photo being used:
I’ve used that approach of projecting into the volume myself so I can envisage how you have done it. Impressive result.