Render Passes in BGE

What are render passes?
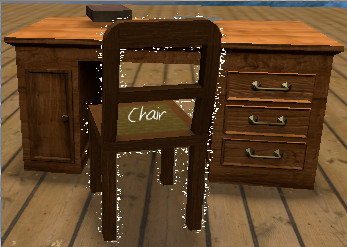
Render passes are a great trick in game engines. They allow you to outline objects:
/uploads/default/original/4X/2/5/4/2542b88271b471802a28ed6c5f251478cf01d5ab.jpgstc=1
And do many weirder and more wonderful things.

Basically a render pass is a rendering where you render only a subset of the scene. It may be only specific objects (as in the example above - the outline pass is a render showing just the chair), or it may be a specific attribute (eg all objects specular)

What this tutorial is not:
This tutorial is not a collection of sample code. If I get around to it, I’ll provide some, but for now it is just a knowledge dump.
So how do we do it:
Pretty much this all stems from the fact that the RenderToTexture update happens when you call source.refresh(True). So you can twiddle object parameters all you like before then. Then you can combine render passes in the node editor as the passes are just textures, and put a plane in front of the camera to display it.

One comment before we get into some examples: if you’re going to be displaying render passes directly on the scene (as in the first image), you’ll have to have two camera’s in the same location: bge.texture.ImageRender does not allow the active camera as a source, but it does allow one in the exact same location.

The most basic is to simply render only some objects. In the case of the outline effect above

    overlay_obj = cont.owner.scene.objects['Overlay']
    made_invisible = list()
    for obj in [o for o in cont.owner.scene.objects if o.visible]:
        if obj is not pickups.get_looking_at():
            obj.visible = False
            made_invisible.append(obj)
    RenderToTexture.update(overlay_obj)
    for obj in made_invisible:
        obj.visible = True

Now we’ve set every object but one to be invisible for the render pass, and then set them all back the way they were.

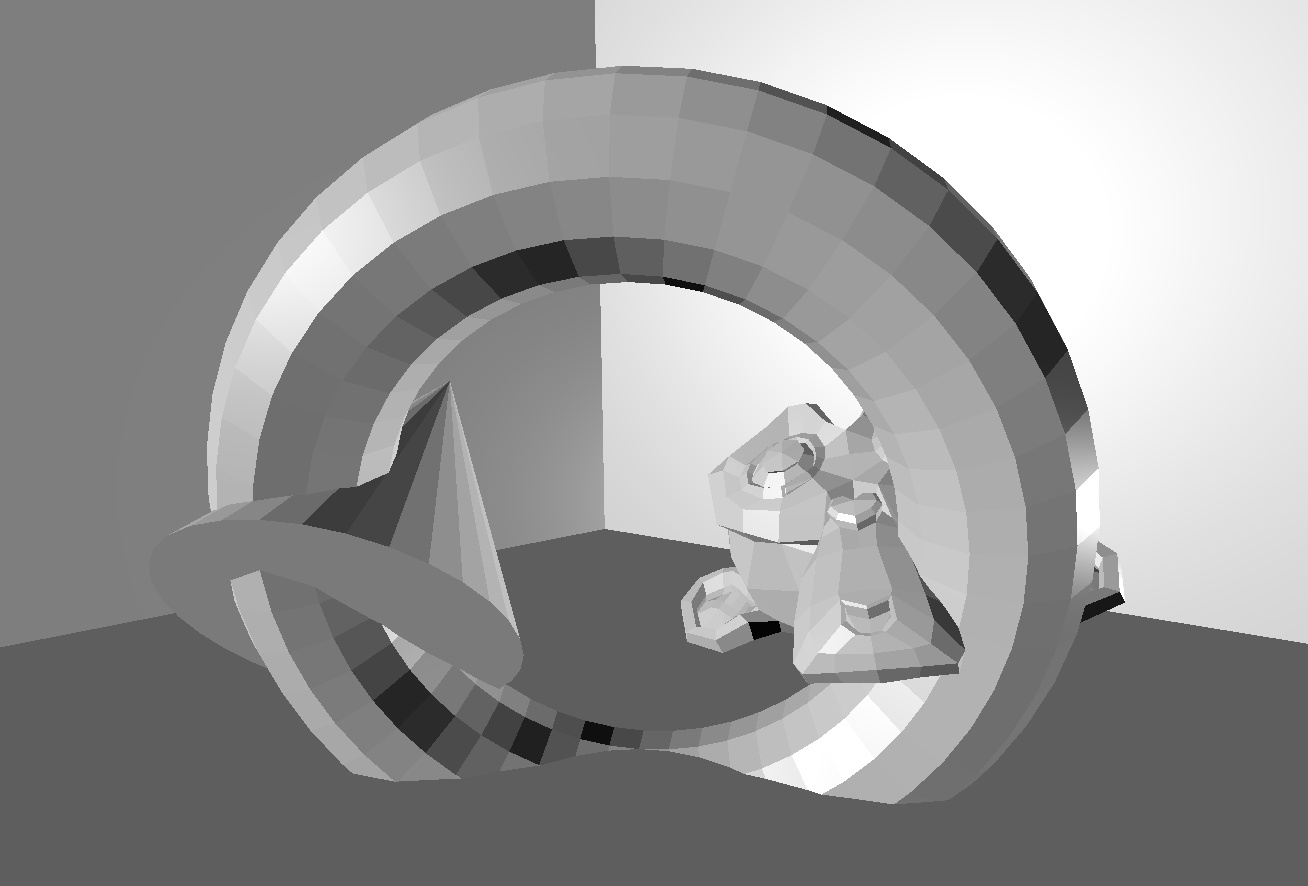
How about, say, a specular pass?
What happens if we have this node setup:
/uploads/default/original/4X/4/6/e/46ec70d956798558882267958114dfcc803e6687.jpgstc=1
(note that the material that’s currently black has Object Colour enabled and is shadeless).
So now we can, by twiddling the object colour we can get the material to be specular only. Aint that grand? With a bit of twiddling, I think you should be able to get a normal pass as well.

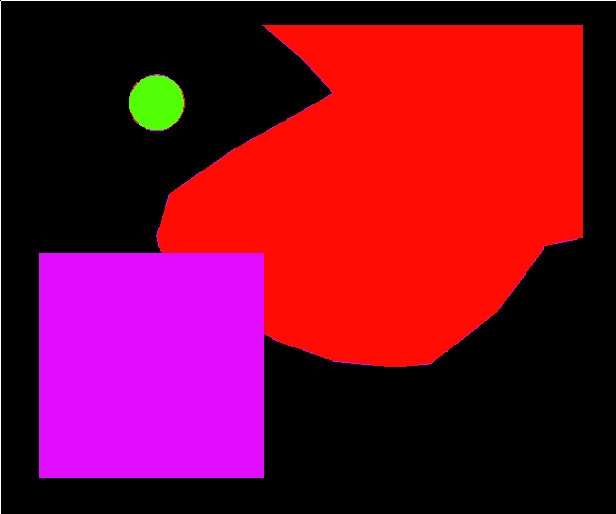
How about passing arbitary data into a render pass? So instead of a pass of specularity you want, say, a pass of object density, or mass, or some other non-material parameters? In one case I worked on a render pass needing lots of data (potentially tens of parameters) about thousands of objects. This was achieved by:

  1. Assign every object a unique colour (by setting obj.color on a shadeless material)
  2. Compile the GLSL shader that will display the render pass with a great big long array of structs containing the relevant data
  3. Do a render pass of said color
  4. Inside the fragment shader perform a lookup of the object in the array of structs, and extract the reqired data.
    Implementing said system took several hours. It works where you don’t need lighting information (ie objects are uniform), but mipmapping can cause interesting issues.

    In that image, the render pass is simply shades of red, and the colours are added by the fragment shader displaying the render pass - the colours are loaded from a JSON file along with several other parameters. Mipmapping is responsible for the purple blur around the red object.

Conclusions:
You can do a lot of stuff by rendering non-materials using the render to texture functionality - but beware, ever render pass costs quite a lot of processor time.

Things you can do with render passes:

  • Object effects
    [LIST]

  • Outlines and highlights

  • Bloom on specific objects

  • Screen-space distortion around specific objects (if you’re brave)

  • Scene Effects

  • Bloom only on specular highlights or emissive objects

  • Ambient Occlusion in the node editor (if you’re brave - you have to use the normal data)

  • Soft particles (if you’re braver: fading out objects based on normals of nearby objects)

  • Weird and Wonderful:

  • Writing a renderer inside a fragment shader (if you’re a legend: ie martinsh - who did)

[/LIST]

Attachments


1 Like

Nice explanation of how to use render passes. Very useful technique.

can you do that outline effect but have the border animated ?
(like pulsing energy?)

can you only bloom the highlight surrounding the object?

Yes both of those are possible. Have I don’t them? Nope - that’s up to you!

Hello, if I need to superimpose a later copy of ImageRender of fully visible scene on a previous copy of ImageRender of partially visible scene with some added post-processing effects on it, will I need two different materials to store them or both copies can be stored in same material in different texture? I can’t get ImageRender to access other texture channels than the first one to work.

so here is a file ive had for a while, just waiting to put it in my mario game. I learned how to do this with martinish’s files. He is a genius. I saw this post and had to share. so here u guys go.

notice the blue cube’s straignt edge. I made a dynamic clip plane, using a plane equation. in one scene i did the 2 cam render setup, and had to do the same for the skybox. so in the first pass i do the clip plane, and when i do the second pass i turn off clipping and render out the scene and slap it on the plane. Its set to halo so it faces u at all times. then i call screen space in the frag shader and do some cool distortion that follows it position in screenspace. without that technique the distortion stays a center of screen, which we dont want bacause i spills off the plane.

Attachments


sceen_space_distortion.blend (1.98 MB)

I guess this could not be used to render a butch invisible cubes could it?

What exactly is RenderToTexture in the code you posted? Is that a class that’s been instantiated? If so, which one?

Is it at all possible to generate an alpha map of an object without using “obj.visible”?
Here’s an example of something I’m trying to achieve

This is the normal render that you’d see in-game:


And this might be the pass / alpha map:

You obviously can’t manually change every object material in between source.update(True), so how would I do this?

Thanks in advance

I don’t know if it’s just me, but @sdfgeoff’s node setup seems incomplete and/or outdated?

Complete but outdated i bet. Its for old blender, done with RenderToTexture due to bge lack of FBO architecture… someone corrects me.

Still works in 2.79. If I remember correctly, RTT uses FBO’s internally (or maybe that was in UPBGE 0.2.x version).

By some definition yes it is incomplete. There is not a sample file you can download or run - I originally developed most of this on Company time, so what you see here is are some stripped down versions that I whipped up in an afternoon to reveal to other people that it was possible. I didn’t post any code because it could have been interpreted as a violation of NDA (and there is a tonne of code required for advanced things).

But from another perspective: if you can set up a RTT and have some creativity you can do all the things mentioned here.

With all due respect (I am a very big fan), that’s not very helpful. For instance, the Multiply node (MixRGB) in the screenshot has no color inputs, but the modern multiply node has two color inputs such as the one shown for the Mix node. Where does the outpust for the SeperateRGB node go to with the Multiply node.


The blend file that was shared by cuervo1003 helps explain things, but not with nodes. Fyi, I am no n00b with RenderToTexture, but the setup for masking is a bit out of my league I’m embarrassed to say.

The multiply that operates on values rather than colors is in Converters->Math. Lots of usefulmath operations there: pow, modulo etc.

Anotger trick is that there is nothing stopping values being plugged into colors.

You can get a RTT into the node shader using ImageTexture which means you can use node shaders to do post-fx. You just have to be sure that the underlying material has that texture in a texture slot so you can set it from python (this is with 2.79. IDK about Upbge 0.3.0+)

You can control what is rendered into an RTT by running code (eg obj.visible’ or ‘obj.color’ or shader.setUniform) before calling texture.refresh() which means you can write whatever data you like into a texture buffer.

1 Like

Upbge 0.3.0 / blender 3.0 has the ability to render to offscreen buffers called AOV

We can use these for 2 2d filters

We can also bind attributes to pass to the shader graph using attribute node / object

own.blenderObject[‘Prop’’] = 42
Then there is a notifier to tag the object for update

I will try and post an example tonight.

That’s what I needed. Not sure how I missed that. Thank you.