Please note I’m an artist, not a coder. So this is no “real” script or addon, but works well nevertheless.
Converting panoramic images to files the Source Engine can read is a tedious process. No matter if you do it for Half-Life, Team Fortress or Counter-Strike, it takes many steps and much time. But I came up with a solution to automate it.
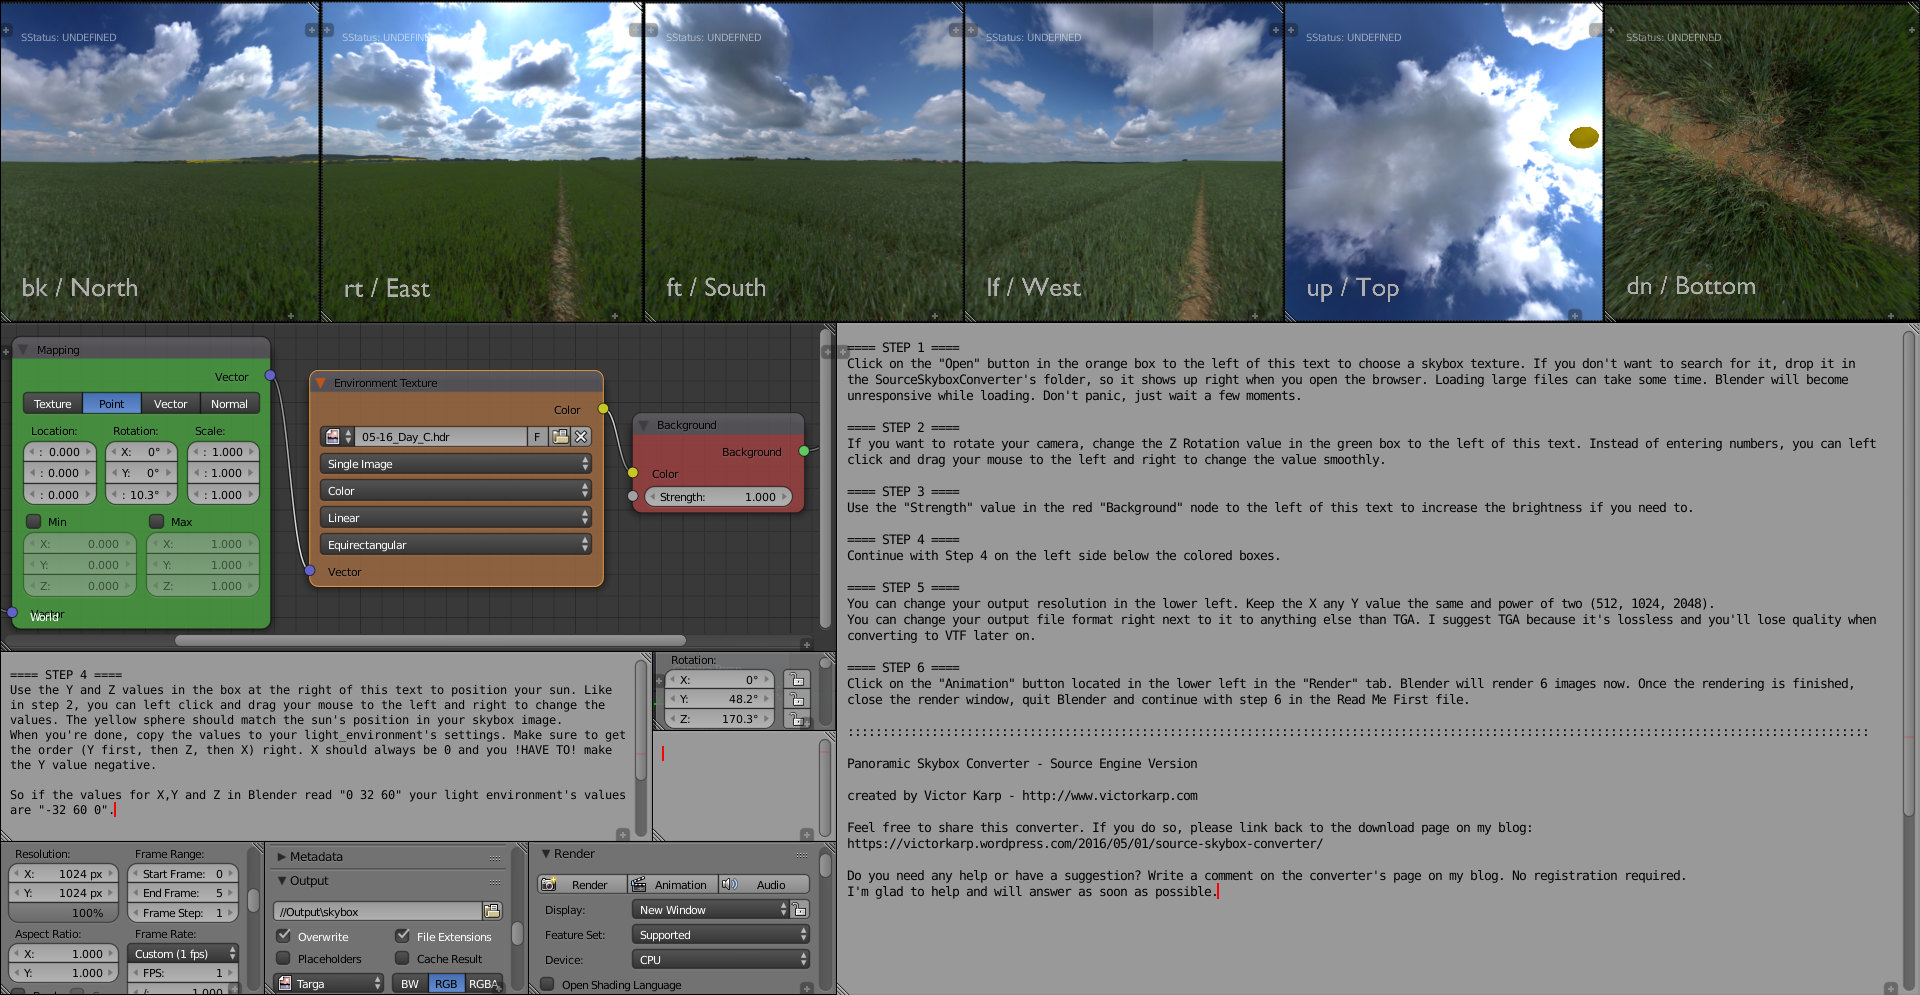
The package converts panoramic skybox images to 6 separate images with a resolution of your choice. It automatically creates .vtf and .vmt files with a skybox name you can specify. You can also adjust the skybox orientation before splitting it into 6 files. This boils down skybox creation based on images to only a few clicks.
You need a panoramic skbox image first of course. You can find high quality HDRs for example on noemotionhdrs.net or cgskies.com.
Now download my Source Skybox Converter Package. It contains a Blender project file, a batch file, a Read Me and six VMTs.
You’ll also need Blender and VTFLib. You need the binary archive of VTFLib. Please make sure to download VTFLib, not VTFEdit.
- Either install Blender or unzip it from the archive if you chose the ZIP Version. You do not need to know how to work with Blender to use this converter!
- Download the VTFLib Binary Archive, open the archive and open the bin folder. Either open x86 or x64 based on your system.
- Copy all files from this folder (not the folder itself) into the vtflib folder that came with this converter.
- Double click the SourceSkyboxConverter.blend. This will start Blender and load the converter file.
- Follow the instructions inside the file. If you can only see an almost empty viewport but no instruction texts, click on File => Open in the upper left, make sure “Load UI” is checked in the lower left and double click the SourceSkyboxConverter.blend
- After you have renderer all 6 images and closed Blender, run the Skybox_Renamer.bat
- The renamer will ask you for a skybox file name. Enter a name without a suffix (e.g. myskybox). You’ll see the converter do his work, it will close automatically once it is done.
- Go to the Output folder and copy all .vmt and .vtf files to your
Counter-Strike Global Offensive\csgo\materials\skybox folder. - Don’t forget to change your skybox texture inside Hammer editor (Map => Map properties => Skybox Texture Name).
In case you are interested in how exactly all this works: the panoramic skybox image is loaded into Blender as a sky texture. When you press the Animation button, the camera will render 6 Frames and rotate after each frame.The batch file is commented. You can right click it and edit it with a text editor to see what it does exactly.