Hi there! This is my first post on BA. I’m pretty new to Blender, started out just about a month ago or so. I’m not totally new to 3D though. I’m frequently working with 3D Assets in Unity, as a programmer, and learned the basics of modeling more than a decade ago with Lightwave. A few weeks ago I still had a hard time modeling a simple power outlet, but slowly I’m starting to like my renders. So, here is my latest intent. I’m pretty happy with it right now, though I guess in a week or so I will start to detect noob errors all over it. You can help me to speed up this process, your critics are welcome, thanks!
Looking very good already! The two thinks I think you could improve on are the textures and the lighting:
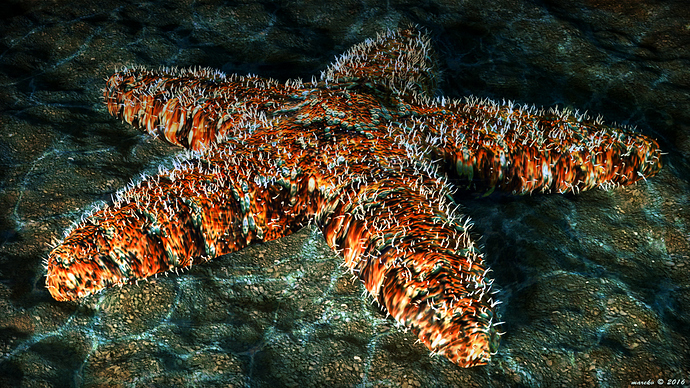
The textures, especially on the side of the arms, are the first thing that you could work on. Maybe you need higher resolution textures, maybe the biggest problem is the mapping. I would suggest you to have a look at techniques of UV mapping to fix the arm textures. I personally prefer using procedural textures and bump maps, as flat image textures often look, well, flat.
The lighting looks good already, although this image might become more believable if you would add typical underwater light, with refraction patterns because of the water. And maybe particles in the water and a kind of underwater mist, because of smaller particles, would be a good idea, to take away the clean, artificial look. Not too much, but a bit.
Those are the things I think you could improve on, though I think that you are already coming along very well!
Thanks for your detailed reply Triastase. Yes I noticed the problems with the uv mapping, especially the distortion on the side of the arms. The texture is also pretty lo-res. I will read up a on procedural textures and work on the underwater look. Right now I just blended with Photoshopsome caustics/refraction pattern and a gradient on top of the render, plus some color correction. Speaking about this, thank you 3pointEdit as well, I guess I’m not using Blender color management, 'cause I don’t even know what this is about but will definitly hit google on this tomorrow.
Good night!
Holy shirt, it takes an eternity for my comments to get approved, I’m still in baby sitting mode :evilgrin:
Anyways, here is a render with the previous node setup. I tried some kind of phosphorescent/glowing in the dark look, but was stuck at this point, so I started over and came up with the one I posted before.
PS: I guess I should have posted this in the WIP section, but honestly, I thought that’s pretty much as good as it could get. Will definitely try to improve upon the suggestions now. Thanks again!
I tryed hard on the procedural approach and I came close, but in the end it looked just aweful :S learned a lot though. Finally I started all over again, new model, new unwrap and even painted the texture (sort of) in 8k resolution. Spent a lot of time on the lightning, the volumetric fog and the fake caustics. I’m pretty happy with the result, again. Could go on tweaking forever I guess, but it’s time to move on. Thanks for watching!