Now, I only need image that I would like to animate the spread colour on it like as what Tiji’s “Colour” looks like here…https://youtu.be/dBphtvT5JrY. I was looking for some tutorials. I did found two posts but these tutorials that spread on object insteads of spreading on image. I cant find anything even Gimp is not really closer enough neither. Do you have any suggestions for it…
I hope my explaination that I am asking clearly to you as my second language in english… smile… thanks
The two most likely workflows would be dynamic paint, and the use of compositing masks.
dynamic paint. You somehow texture your sculpt, whether its a simple vertex paint, or a uv unwrap you paint it. You then create a modeled brush (or 2 or 3) You animate the brushes so that they move over the sculpt, and where they touch they create a new vertex colors attributes whihc can be used in the matreial nodes to mix your textured version with a blank white one.
compositing masks. You render out your image, as above, and use gimp/ps to paint over it as a maquette. You then paint some “brushes” and animate them (using batch processing, or something like AE (or even back in blender compositing moving over and masking the white version to reveal the painting.
Generally speaking if you plan on having the camera moving, dynamic paint will be easier.
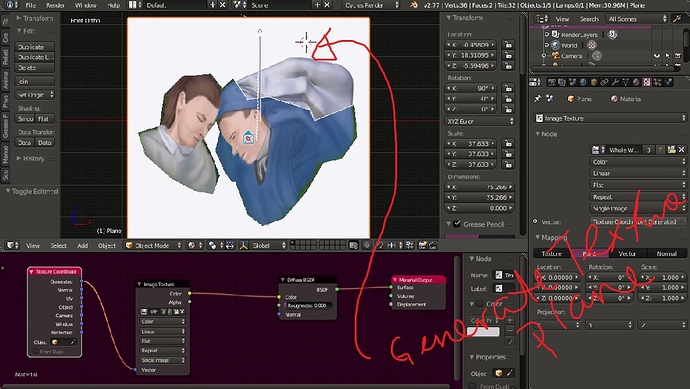
If you don´t want to spread on the object but on the image you can simply set the texture coordinates of the mask that animates the spreading color to “Window” istead of “Object” in the Texture Coodinate node.
I tried these methods that you have suggested me. I experiment on these methods… @Lumpengnom’s suggestion does work for me. I did take it… Many thank both of you for your advices!
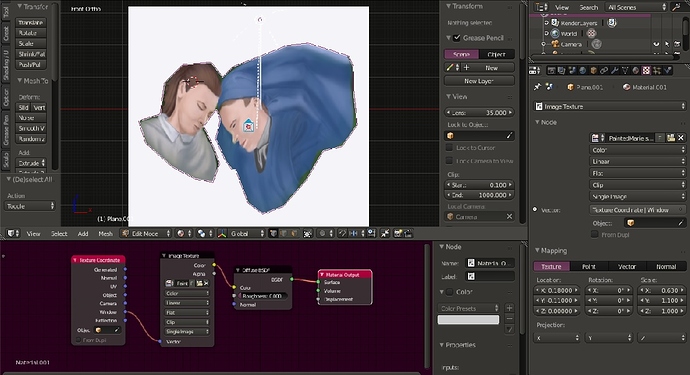
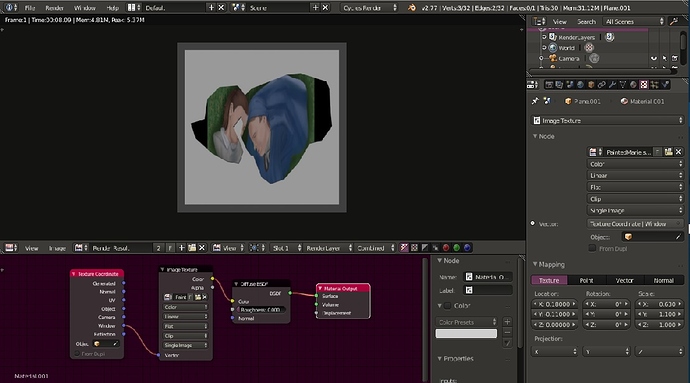
I set the first image texture in generate under texture coordination that has no problem. The second image texture that I set it as window on texture Coordination. So i can use second image texture as spreading colour that I could animate at last thing to do. Also, I set location and scale of this image as you can see material shade mode. I turned it into render to test and that it looks not right. I struggle to get it right with render. Did I missed something that relate to render? Thanks
See if this helps. http://www.pasteall.org/blend/42216
There are two examples in one: shader mix and color mix - select one of the output nodes to see the render preview.
Tbh, i’m not quite sure mapping you use does have impact on node tree itself.