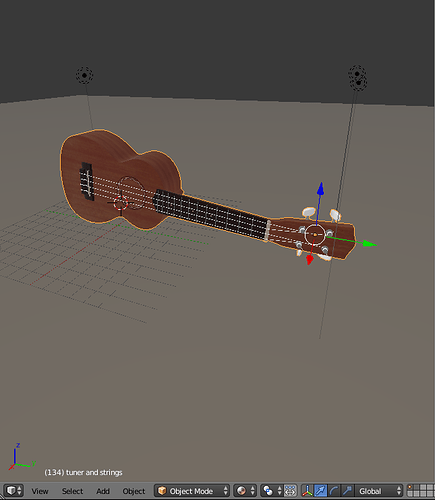
Hello all. When I select the material method in object mode, it does not work. There is no change to the object; it still shows only the default light gray color
. I am brand new to Blender. Please help me to correct this.get the latest daily build at buildbot to have this work
happy bl
Hi
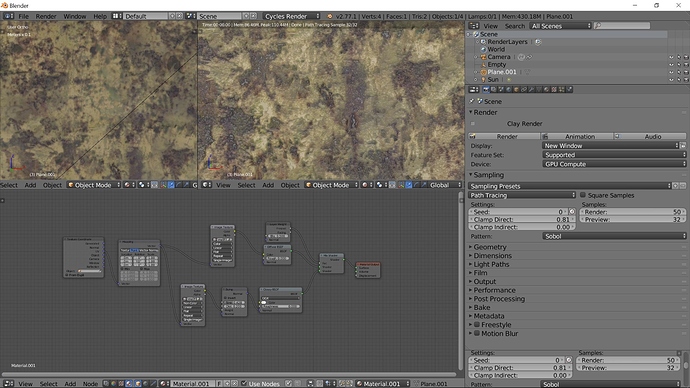
You have a texture in displacement…Materiale view did not show it…What happen if You go texture view…?
Tai
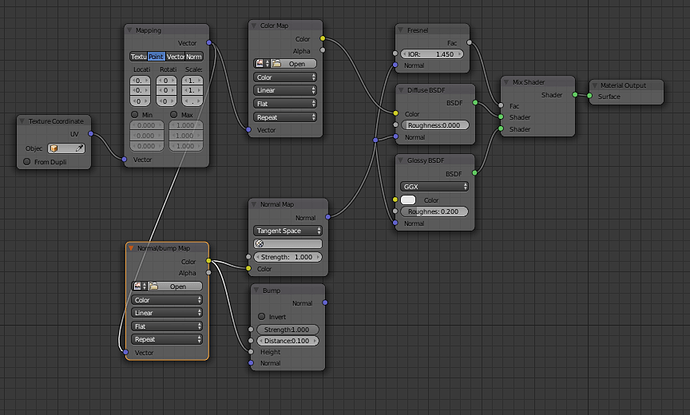
im not 100% sure what you are doing, but i think this is the node setup you want to go for:
if you can tell me what kind of material it is and what its for, then i can help you out.
this node map also works perfectly in the material viewport, i think your problem is due to not setting up a proper material.
if you also post your node map i can tell you what you did wrong.
NOTE! you dont want a normal AND bump map on the bottom texture input there. if the texture is black and white, then use the bump map, if its blue/purple’ish then use the normal map.
Hello Taipan. Texture method works.
I will learn about daily builds versus stable versions. Thank you.
finalbarrage, I am going to post my .blend so that people can better understand what I am doing. I followed a tutorial to create a ukulele. Again, I am brand new at Blender and modeling, so guidance is welcomed.
Here is my .blend file. This may be helpful in pinpointing the problem. Thanks!
Attachments
ukulele#2.zip (983 KB)
also, please select the two dark strings and CTRL+N to recalculate the normals… it bothered me 
Hi
There is no texture file in your blend file…It’s because You have not packed it into Blendfile.
To pack it into Blend file…You have to go Menuline top - File -External Data - Automatically Pack into Blend…And Tic the ittle Box.
It will pack it into Blend file.
Tai
that has nothing to do with it, he has the texture, and i found the texture online cause i know where he had it from.
I know…!!!
I tell him, because it is good habit to get it all in your Blend file when you need help with a Blend file.
Medicanicc7…Nice model btw…You have spent a lot time with it…It’s a heavy tutorial…)
ai
finalbarrage, the node mapping is quite challenging to me. I am trying to make sense of the logic behind linking certain nodes and where they would be best linked for a better final result. Also, I am trying to find the location of the normal and bump maps. My view doesn’t show any dark strings. Are the two dark strings showing on your end in the material method view? If so, then I wouldn’t be able to see them because that view is not visible on my end. I will try doing the selection-and-hot keys method you described on all the strings despite not seeing two of the strings being darker than the others. 
Taipan, thank you for the compliment. The tutorial is a long and challenging one but a good one. I think I understand what you mean by packing all the things together in the .blend. External elements should also be included in it if another person is to better able troubleshoot my .blend.
This is a bassic setup for Bump Map.
A rule of thumb say’s color to color - Blue to blue Etc…Bump map is in add - Vector - Bump.
In node Editor You can press Shift-a and use search to find nodes…Eg. Bump will give a Bump Map node.
In the picture I have plugged it into a Glossy Node…Control the Bump with Bump Node and Glossy shader roughness
Value.
Rule of thumb is not alway’s right…See…I have plugged the BumpMap Texture in Texture Node into the white connection in the Bump Map Node - Height…In Image Texture Node - Color Box… I have change it to Non Color.
There is a nice Addon - Node Wrangler…Activate it in User Preferences - Addons.
It’s very useful when You work in Node Editor…Eg…If a Diffuse Node is Selected - Press - Ctrl-t will setup the Texture Node - Mapping and Texture Cordinate Nodes…Damn Effective…There is a lot of These shortcut when it’s activated.
Hope this can help a little…I’m sure I forgot something but this is it.
Tai
about the string:
https://i.gyazo.com/c569f21561409ae02d1b6387fa046ff0.png
as you can see, the two upper strings are darker. that is because the normals are incorrect, go into edit mode, and press L while hovering over the strings, and CTRL+N to recalculate them.
i see he has the normals inverted in the tutorial aswell so its not your fault.
finalbarrage, thank you for showing the close-up view. I can see it now and will correct the normals. I would never have seen the error with those normals if you didn’t point them out.
Taipan, I am understanding better the logic in selecting nodes and why certain ports are being connected. I appreciate you giving an example of node selection for bump mapping. Also, I will try the mentioned add-on when experimenting with the nodes.
RickyBlender, I updated from 2.74a to 2.76b and, now, something does happen when selecting material method in object mode. However, the material method is not properly being displayed. In 2.74a, nothing happened and, in 2.76b, material method displays all the objects black and everything else a shade of gray. How strange!
Attachments
ukulele#2.zip (987 KB)
it won’t work in latest official version
go here and get latest built
https://builder.blender.org/download/
this has the viewport material feature included
just make a new folder download it there and unzip it
then run that bl version and open your file
happy cl


