It’s already a while I saw the Video but i think he made in gimp a Difuse map (also known as color map), a spec map and a bump map.
What he also did was a Subdermal and Epidermal map for a Multilayer Sub surface Scatering Shader like this one here: http://bensimonds.com/2010/05/31/three-layer-sss-in-blender-demystified/
The Cavity map can be used to bake AO for small details into the diffuse map. AO doesn’t work with bump or normal maps so with this method you wont have a texture that appears to be perfect smooth in the indirect lighted parts of you model.
The Cavity map in the specularity map should prevent specularity inside winkles, etc. Like this it makes the surface less smooth when the specularity of a lamp hits the surface.
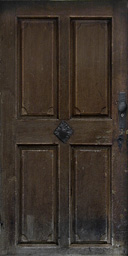
A diffuse texture is the basic color texture that everyone uses every day to affect an objects diffuse color.
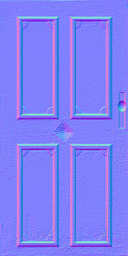
A normal map affects surface normals to give an object the illusion of higher geomtric detail.
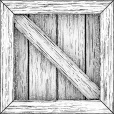
A cavity map renders concave surfaces with dark shading. You also know it as an ambient occlusion texture:
A cavity map is not a diffuse map strictly speaking, but in current/past-gen realtime workflows they were usually combined. All you do is go into your image app, add the AO map on top of everything else, and set the blend mode to multiply.
You beat me to it, but that’s^ incorrect. There’s no issue whatsoever with using an Ambient Occlusion bake with Normal maps. Especially not when your Ambient Occlusion is baked from a High Poly to your Lowpoly (in realtime scenarios).
In other cases Ambient Occlusions are often generated from the Normal Map which in turn is of course created from the diffuse and all the fine surface details. Tools such as the xNormal and nDo2 plugins are both excellent for this.
Ambient Occlusion maps can by the way be used for several other purposes as well. They are great as grunge and dust masks because they shade all the recesses areas which would collect…dust and grime.
For that reason they are also used to dark the recesses of Specular maps because those areas wouldn’t reflect as much light.
in 2.6 we got a lot more features for baking and making different type of maps
and did not find a lot of doc on these new features!
so just trying to better understand what these new features are and how to use these !
in first cgcookie video
the first map he does is by using the Vertex paint and then click on the dirt vertex
which i guess is the making of a cavity map
and not certain here if he used the bake button to do this cavity map ?
but how does this work ?
what does it have to do with dirt verts and the vert paint
and another thing if you use Vert does it means it is using Vcol feature may be?
i tought you could not mix Vcol color with other texture type like normal proc texture or may be UV mapping !
like normally UV map will overide any proced texture
but not certain about this Vcol and Vert painting!
is there a hierachie description of color mapping which can show the priority between UV proc text and Vertex paint ect…
like if you use vertex paint you cannot use any proc text or UV mapping may be!
normally the diffuse map use a simple color image which is added as a texture image = texture channel UV
you can make from the 3D highr res model a normal map and bake it then use it on the low res model
but here you must have 2 model s one high res and one low res to do the baking !
this normal map will fake any 3D features on the low res model
then you can add other texture map to affect the color spec or even mirror map to the model
i remember seeing in the UV wiki page that for skin you could have up to 7 layers of textures!
Sorry, I probably wrote it a bit confusing. What I mean is when you light a object only with Ambient Occlusion you won’t see any effect of the bump map (at least in BI). Generating a AO map (like you said -> generated form a normal or bump map) and mix it with you diffuse map fakes AO for the bump map and looks more realistic in the final render.
Edit: Just tried if Cycles GI Occlude bump maps and it does. Nice
Yes you are right, at that point he is generating the map. The map is stored as Vertex colors and have to be baked to a map that you can use in Gimp or Photoshop. To bake it you UV unwrap you mesh and create a new image, create a material and set in the Material Panel –> Options –> Vertex Color Paint. Then in the Render Panel in Bake, Select Bake Mode: “Texture” and press bake.
ok read the wiki page on baking
but not certain if this page has all the features for baking in 2.62 !
mind you on this wiki page there is nothing on cavity map !
or how to use Vertex paint
i’ll continue to try something for the first cavity map
but first i have to find a good head model with unwrap then test this to make a cavity map!
so a cavity map would be like a normal map except it has better definition for inward cavities i guess!
and it does not use the same type of light when being done !
but then why do you need the 2 type i mean the normal map and the cavity map
are there occasions where you need one or the other type of map ?
is there an image to show the kind of seams for a head unwrap
like the one done in cgcookie video !
Well cavity maps aren’t equal normal or bump maps. They are technically the equal to Ambient Occlusion Maps. You can bake Ambient Occlusion directly in blender and even Normalize them so that smooth surfaces are white and cavitys are dark.
You can use a Normal map to generate a cavity map with xNormal.
About the UV Unwrapping and stuff: You have to apply the mirror modifier and unwrap again to see the other side. The seams look ok but the output looks a bit unexpected, maybe you already get a better result with applying the modifier, if not you might have to check your seams on the sides to see if you haven’t forgotten to select any vertices. If there is still strange behavior you could try and recalculate your Normals, maybe they don’t face all outwards. Can be problematic for Blender.
Well the Texture under the UV gets mirrored to the other half of the mesh but if you don’t want a simetrical mirrowed texture you have to apply the modifier and unwrap again. I think its common when texturing a game model to only texture one half of the face and lay the two UV’s of the face one over the other (one mirrored) to save texture space (only useful for symmetrical faces/objects). When applying the mirror modifier after unwrapping you get the two half’s sitting on top of each other.
You can use Dirt verts to generate a cavity map but you need a lot of vertices and apply subsurf or multires modifier to get a nice result (Because it bakes as Vertex colors and not as a PNG or JPG image) but its not the only method to generate one tough, You can also use baked Ambient oclution or generate one from a normalmap with xNormal(Free but only for Windows). Its probably personal preference, all this methods have there pro’s and con’s.
but would like if possible to see how it is done in blender
like i’m following the cgcookie video right now for blender
i’ll try to keep the mirror easier to work with a symetrical head
but if it was not sym yes i guess you cannot use the mirror !
i’ll try today to make my high res model for this head and do the unwrap just to test it
even if it is not necessary for the cavity map but will be i guess afterward for the UV mapping using the different maps!
in UV editor where can i find this mirror thing for unwrap ?
also should the different islands be apart in UV editor ?
and not over other part of the uvmap ?
I’m not sure what you mean but if you want to mirror a selected UV Island you can got to the menu UVs –> Mirror –> X Axis or Y Axis. Also Possible with the Ctrl-m and press X or Y.
About overlapping Islands: If you want to bake something it may produce unwanted results. but if you want to reuse a part of a texture (Like the mirrored skin method or i.e. a tilt able 512x512px grass patch) then it’s OK to overlap UV Islands. Overlapping UV islands can help to save space for your texture map if there is a possibility to hit a memory limit like graphic card memory or limited memory of an older game console like the PS2 with around 32mb of ram.
OscarM, I second your recommendation on using xNormal. It’s vastly superoir to anything else out there and it’s pretty much the industry standard for texture baking.
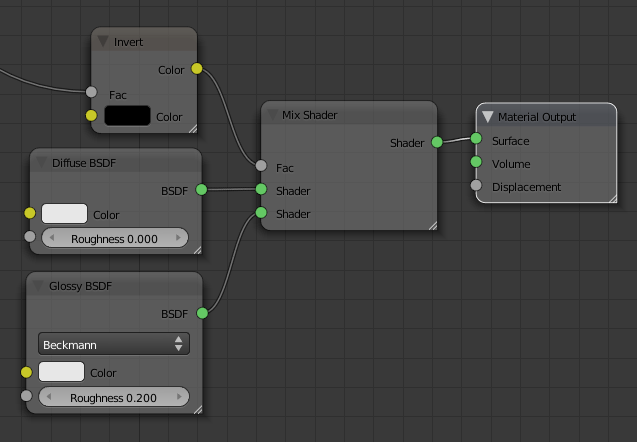
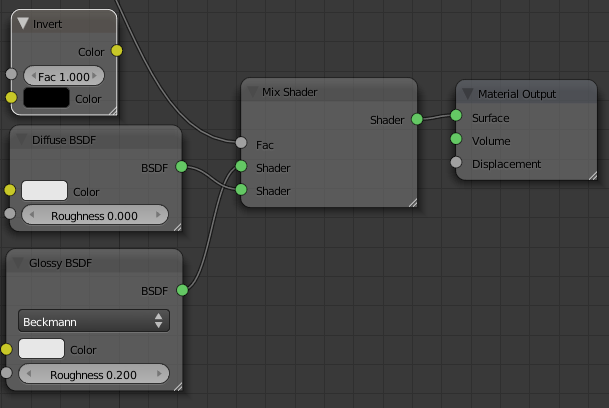
Correct me if I’m wrong, but isn’t that Invert node unnecessary? Couldn’t you leave out the Invert and rearrange the order of the shaders in the Mix node to achieve the same results? Just a thought. Thanks for the tutorial!
It’s not really unnecessary. The first “nub” on the mix node is separate and different from the bottom two. While the stack can be rearranged below, the upper nub belongs to the singe “factor” value.
If you used the vertex color directly (might be possible), then I guess you wouldn’t need to use it as a factor.
I’m sorry. I might not have been clear enough. I understand that the Factor socket or “nub” is required to tell the Mix Shader node how to blend the two shaders…But the Invert node itself being used to invert the way the two constituent shaders blend seemed unnecessary when one could simply rearrange the input sockets or “nubs” and achieve the correct mix. I’ve attached some images to explain.
Edit: After rereading your post, I think we are in agreement. To summarize, we both agree that the Invert node would not be necessary if you used the vertex color directly, but you must simply rearrange the input sockets on the Mix Shader node. The Factor socket has a rightful place and no one thinks it is unnecessary. Right?