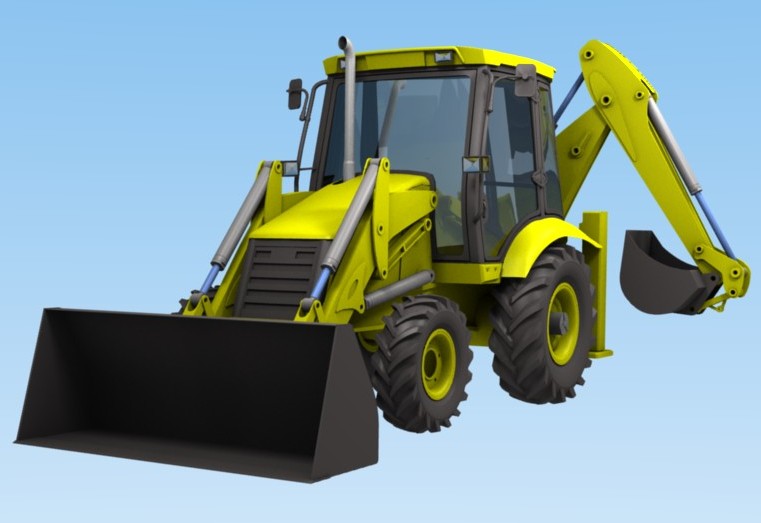
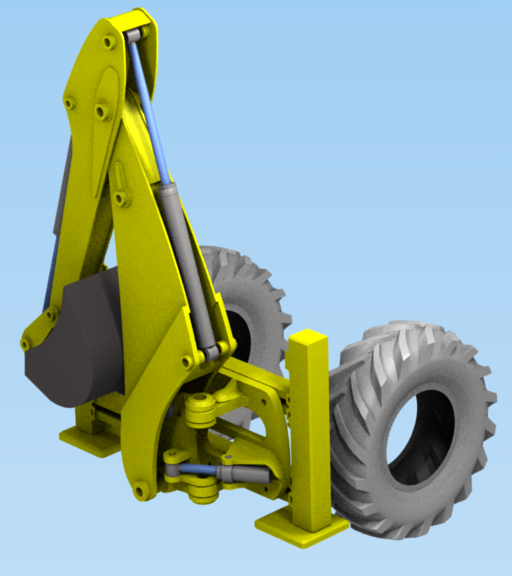
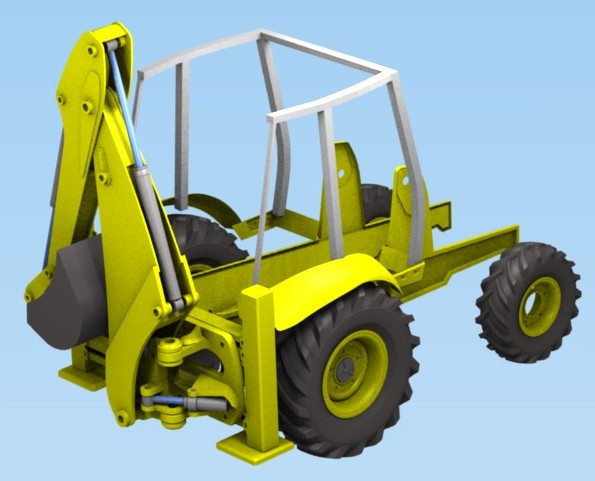
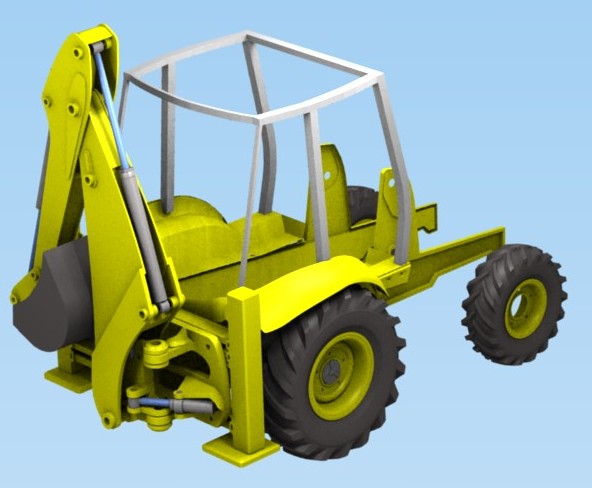
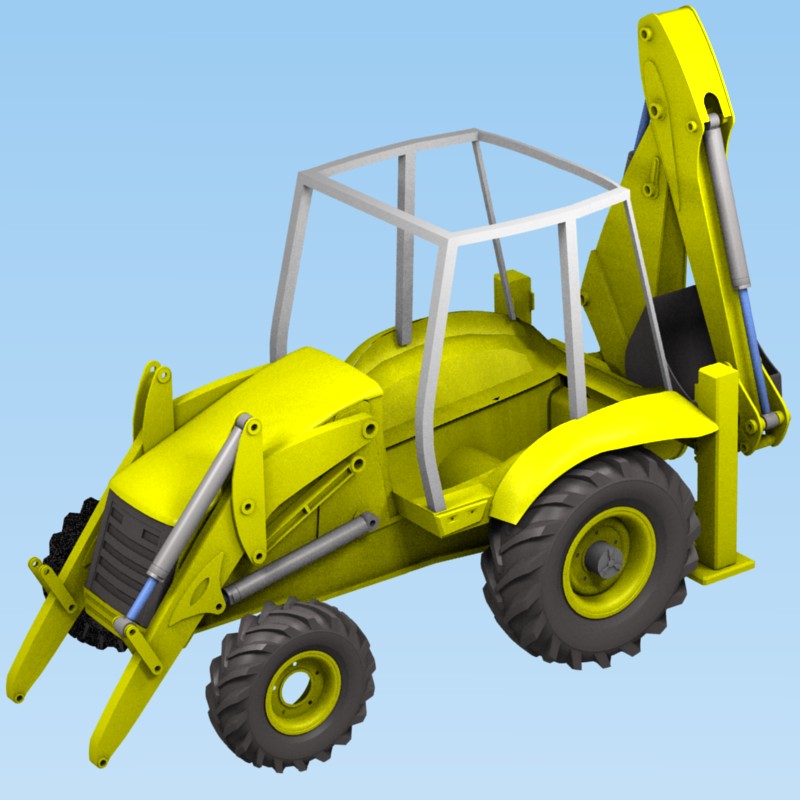
I have now added the tractor mount. The Back Actor rotate cylinder works well with a front pivot point.

The tyres have proved to be a bit more tricky than I thought they would be, but they have turned out OK.
Attachments
Wow, great modeling!
No crits…I sat and tried to find some 
Thanks Photoguy
I am beginning to struggle with this because my plans are so pore (screen grabs from the product brochure). I only have a side and back view, it would be so much easier with good reference material. I will have to see if I can find one working locally and go and photograph it for all the missing details. This is the progress so far.
Attachments
What kind of Excavator is it? I live in a housing development and those for up the street from me every once and awhile. I may be able to take some detailed pics if it is the same kind of excavator.
-Nick 
Man, that’s some great piece of work! I’m a fan of your site, and this is definitely one of the best works I’ve seen you do. Hopefully a tutorial will come up on this, if it’s not too much to ask for (which, I think it is…). Anyways, keep it up, it’s great!
@ AtomicDingo its based roughly on a JCB 3CX, thanks for the offer of photos, I have now managed to find some good reference images and started to make progress again.
@ techwielder thanks for the encouragement, I don’t think a tutorial will come out of this, but I am thinking of adding a projects section to my site so I may add some mini tutorials in the project ares.
Attachments
Wow, robbur, that’s getting better and better! I can’t wait to see how this project ends up. And I actually think that adding that projects section to your site is the best solution thing you could add to your site right now!
Greetings,
Richard
That’s a pretty awesome model and it really looks like you’ve payed attention to the fine details. I cant find any technical inaccuracies off of the pictures you’ve posted.
I do have one question though. It looks like you put a fillet on some of the edges in your wireframe at the bottom of the first page. How did you do this in Blender?
Thanks techwielder a projects page will give me something to do in the new year.
@ Sharper, thanks for the comments. There are a lot of differences between the model and the real thing, but getting it spot on would require a lot more time than the odd half hour in my lunch break and the limited time at home.
I haven’t chamfered any edges on this but I always try and make the edges chamfer friendly by extruding and scaling edge loops into a flat surface before filling them with Shift-F. To add bevels later it just needs you to select the edge in edge select mode and hit W Bevel. Moving the mouse will then add the chamfer on the selected edge.
Attachments
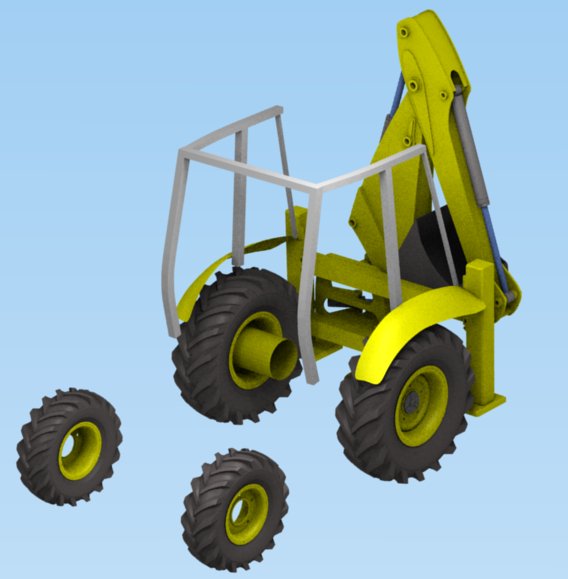
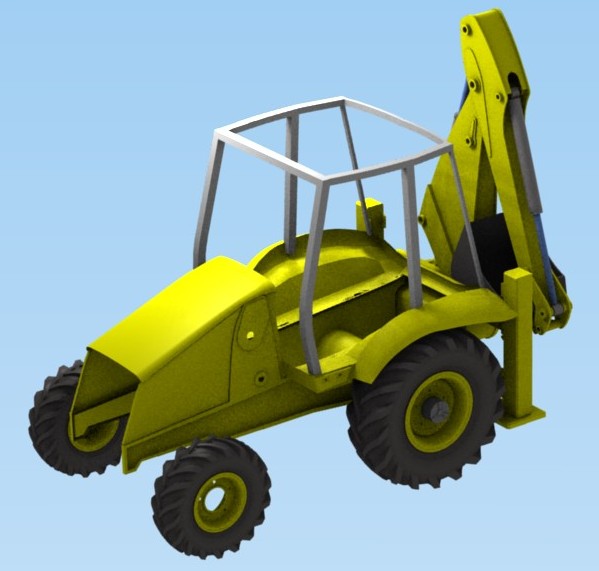
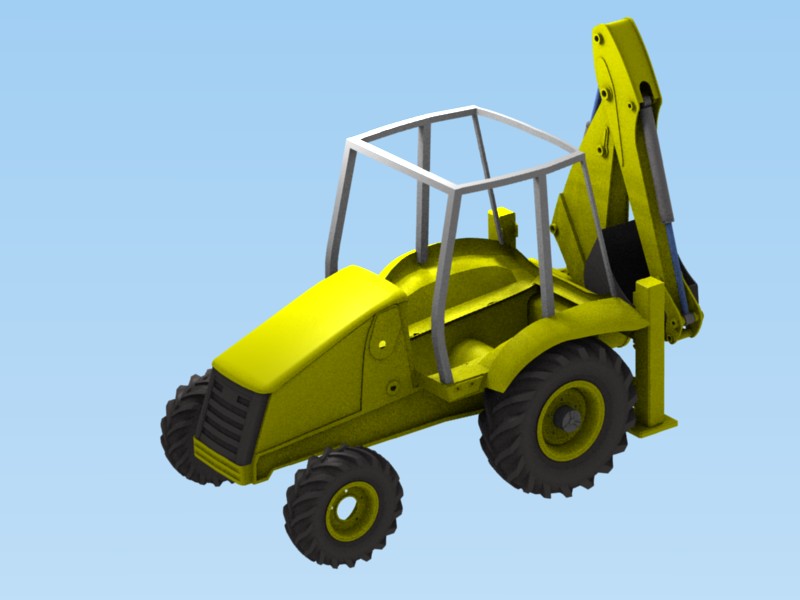
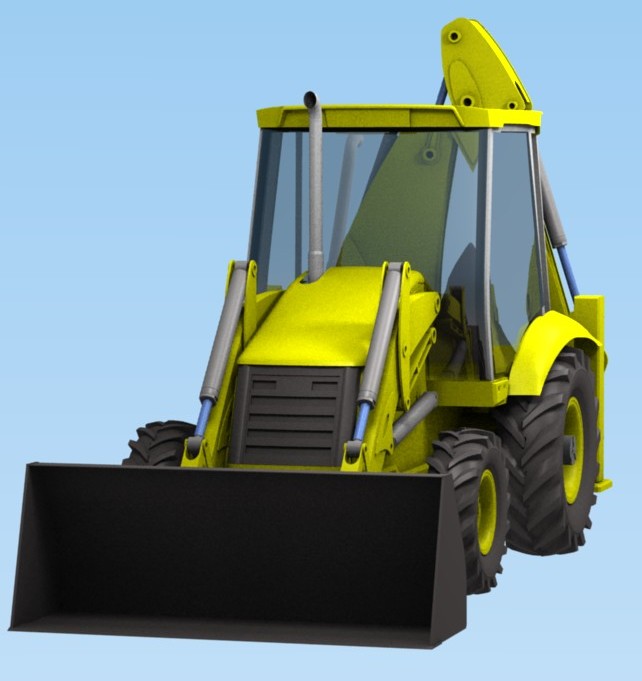
Its starting to look a bit like a tractor now. I am still struggling to find images of the steering mechanism, but I will carry on with everything else and add that last.
Edit: added the front end and radiator.
.
Attachments
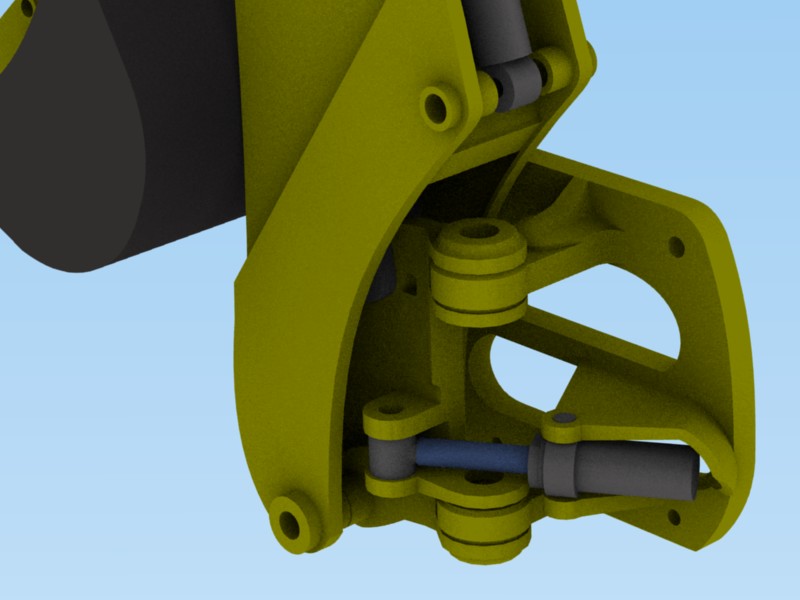
Rigging the linkage for the front bucket looks a bit tricky? thoug I think I can make it work.
Attachments
I thought I had the rig for the front bucket sussed out for this, but it wont work the way I would like. The linkage onto the top cylinders is there to stop the bucket tipping back when the arms are raise. I can make the linkage work OK but with a track to constraint on the cylinder the cylinder compresses as the arms are raised rather than the bucket rotating to stay level. It means I will need to animate the bucket rotation as the arms are raised. If anyone has any ideas or tips how to rig this movement it would be much appreciated.
Regards
Rob
.
Attachments
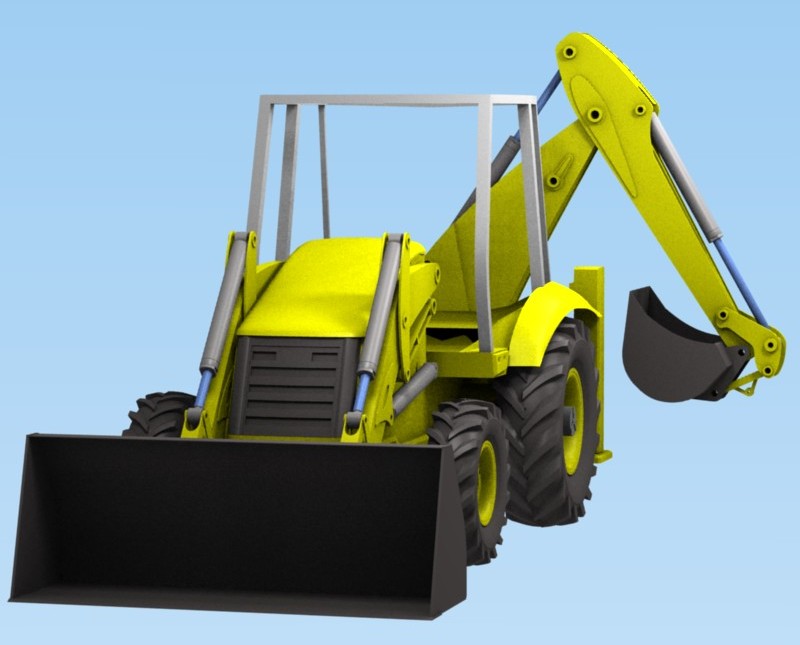
wow.
this is awesome!
if you textured it and plopped it in a construction site picture, i’d think it was real!
a screen or two of your rig would help ![]()
Hey there, you’re making some great progress! I rigged something similar a while ago. The front bucket is a bit tricky, but it can be done.Here’s the blend.
http://www.cdupload.com/files/43296_jnhku/ffExcav.zip
To operate the bucket, rotate downLever.L rotating liftArm.L will move the whole front mechanism. If you hit play, you’ll see it all moving, just enable script links to activate the wheel turning (and ignore the windscreen wiper). It’s still a W.I.P., so it’s a bit messy, but it should help with rigging ideas.
FreakyDude
a screen or two of your rig would help
.
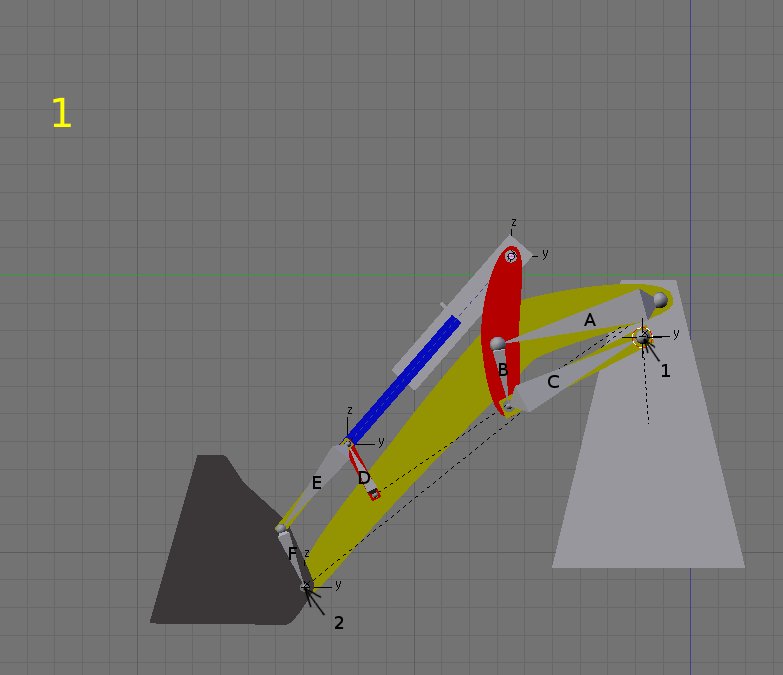
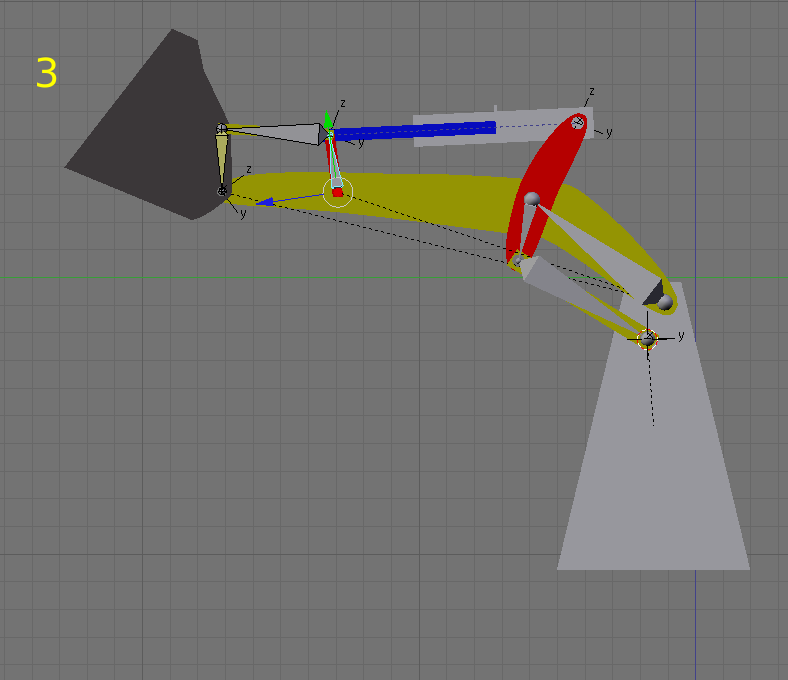
Hopefully this will explain what I am trying to achieve.
Picture 1 is the rig: Armature A,B,C ends with an IK Solver targeted at an empty on point 1. When you rotate Bone A the arm lifts and Linkage B and C rotate correctly. The piston is a simple track to set-up.
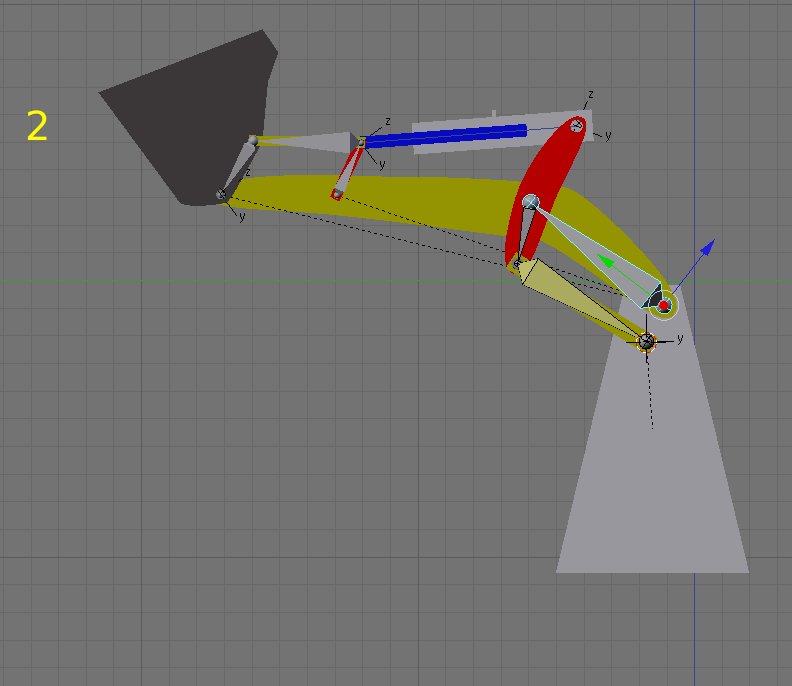
The problem is (Picture 2) rather than the piston and cylinder remaining at the same length, they compress and the bucket follows the arms rotation.
The bucket should only rotate about 1/2 the rotation as in picture 3.
I still also need to be able to separately rotate the buckets tipping movement.
Is there a better way to rig this?
@ Fatfinger
Thanks for your Blend I will have a look now, hopefully it will solve my problem.
Attachments
@ Fatfinger: That’s a really impressive model and rig you posted. I haven’t yet worked out how to apply the techniques to the front bucket of my excavator. What you have shown is much more advanced than my level of rigging.
If anyone has any suggestions on rigging the front arm and bucket, it would be really appreciated.
In the mean time I have continued adding detail to the Tractors Cab.