walkercreations: Thanks :). I’m already feeling better and am back at work.
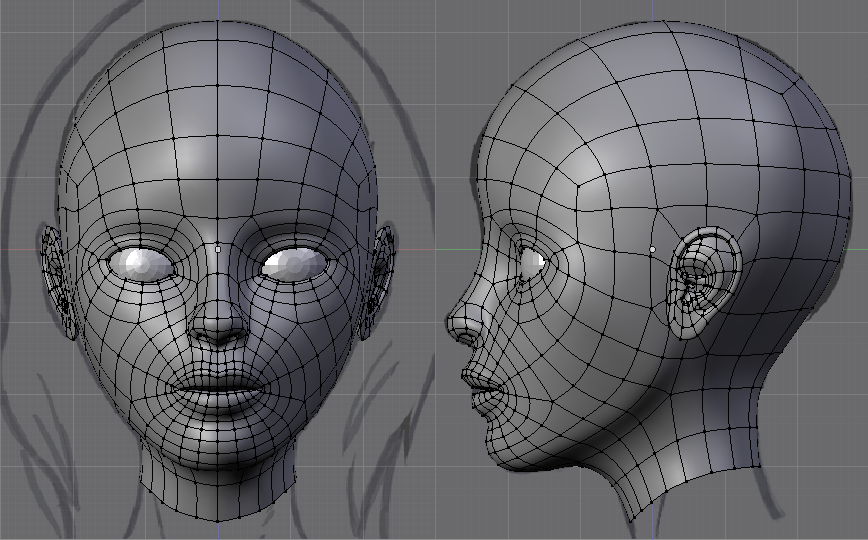
I’ll continue work on this over the weekend. The head mesh requires slight tweaking around the mouth/cheek area. The head model doesn’t look exactly like the one created by the author but I like it.
Can someone help me out with material/light settings? I see some people post the model with materials that make them appear like clay models/sculptures. It helps reveal imperfections in the mesh quite well. I tried several attempts but I always get too much shadowing and/or too much exposure.
marlopax: Sure, what would you like to talk about with respect to realistic modelling? Keep in mind that this is my first attempt at a character. I have only done a couple of projects before.
BleedForMe: Just do it man! Actually, I think I found this tutorial easier to follow compared to others. There are times when I scratch my head thinking about what the author is doing but I think if you understand the basics of flow, it shouldn’t be hard.
lawsonfulton: Thanks. I can’t wait either :D. You guys are keeping me motivated.
I think I’m tired of tweaking the head. I don’t know if you’ll notice a difference but I played with the chin/cheek area and ears. I saw a little bit of a deviation near the back of the jaw where it doesn’t match the concept’s outline but for now, I’m going to stop or else I’ll probably ruin the mesh. Hope you will like it
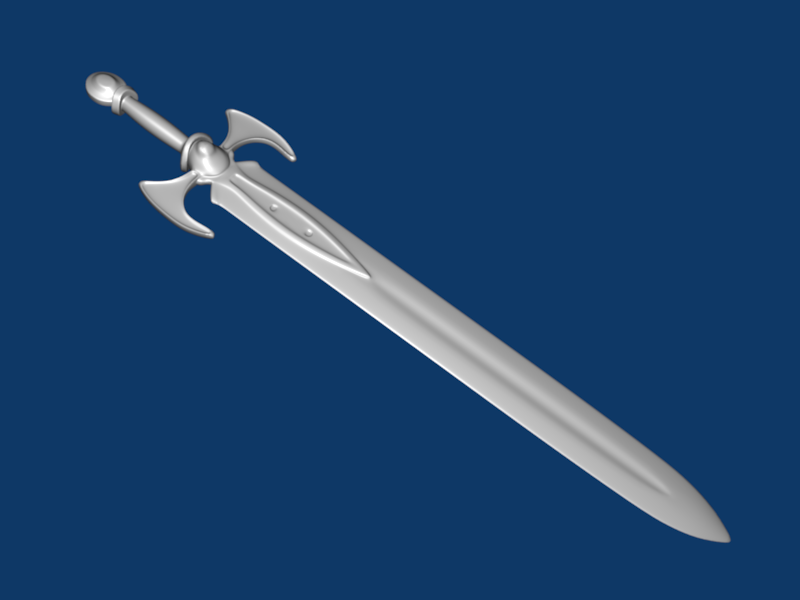
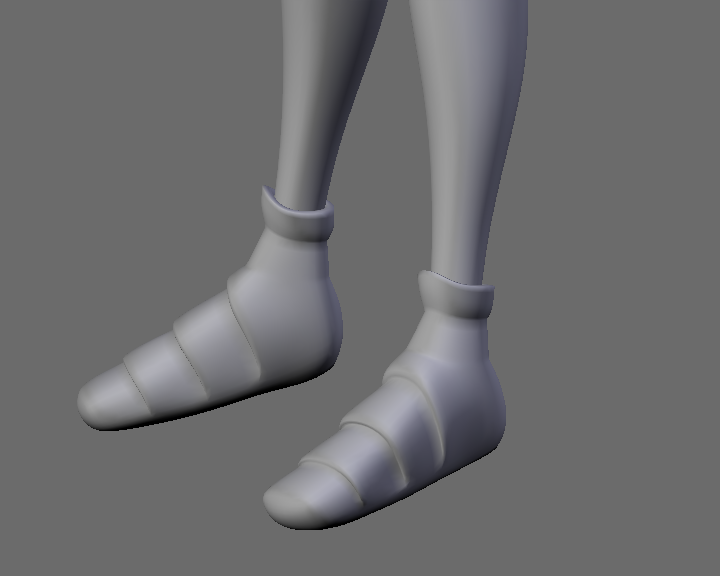
I bet that was a nice relaxing change after modeling that head! You have more patience than me, no doubt (my head turned out a bit lumpy -as usual). Great job you have done on all of it.
Btw thanks for sharing the blend files above. It helped to see how you worked around the 3DS cutting technique used in that tut (still not easy tho).
Thanks. That was definitely much easier to follow. The only problem was doing the bevels. The Blender version of this tool isn’t great and I had trouble using the Bevel Center script. So I simply used extrude followed by scaling and moving.
we also have a forum at http://www.itsagthing.net.
if you build a tutorial and would like to have it on other forums,
we would be happy to show it and archive it on our forum
Unfortunately, I don’t have a tutorial for this as I wasn’t keeping track of all the steps as I went along. This is my first character model, so a lot of things I have done are by trial and error and by following some suggestions posted in other people’s work. One of the video tutorials (Adriana, i think) helped a lot in understanding head modelling as well.
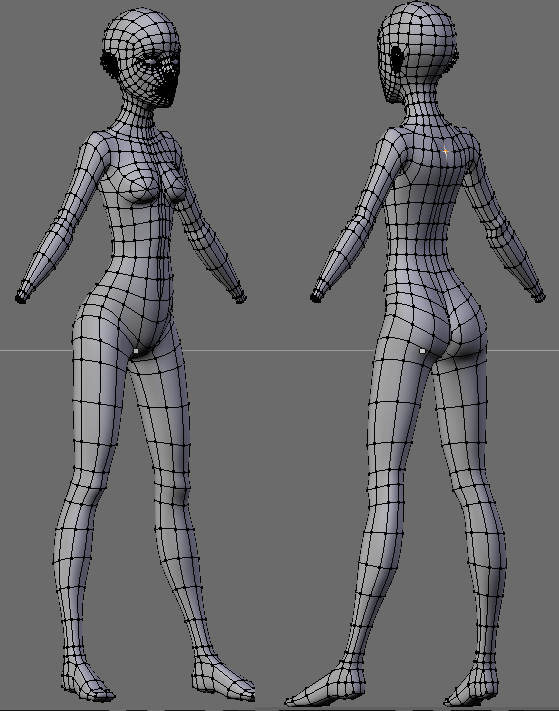
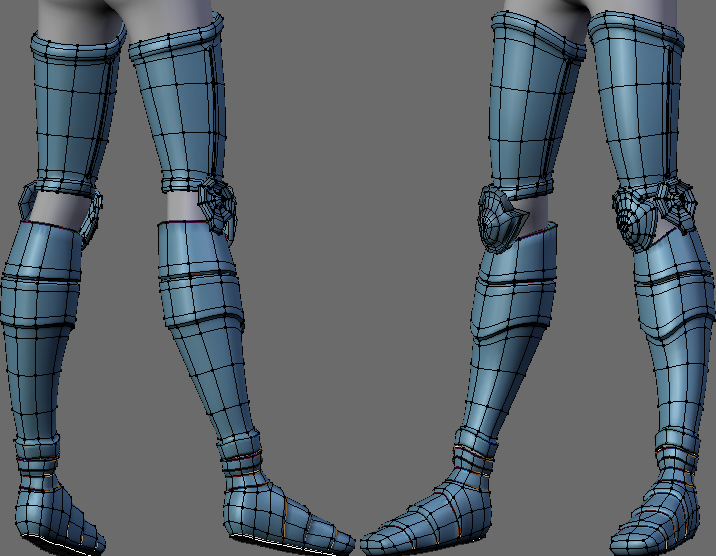
Here is a composite with all the wireframes (the knee armour is cloned using ALT-D for now but I will merge it with the rest of the armour later. There is only one little problem: The knee armour on the side doesn’t use subsurface at all because I wanted to preserve the sharp edges of the hexagon. It is smoothed and then Autosmooth is applied.
sweet! nice job I tried this tut once and I got the body to look decent not as good looking as yours though. I am gonna try the blender version of that tut sometime soon.
Great job so far ^_^! Your thread is inspiring me. To get sharp edges with subsurf jus put 2 edges close together and there you go. Also there is a crease edge function in the Ctrl-E menu, I’m not to familiar with that one though.
Just a quick off-topic question, i noticed you have different blend files for the head and the body.
I haven’t found a way to import models from other files
Can anyone tell me how to do it?
LowPoly: I know of both methods. If you noticed in the last render, I’ve used a combination of both. For the armour plate on the side of the knee, 8-sided cylinder produces a rounded cylinder with subsurf and adding a crease doesn’t help. One way of achieving the effect is to double up each vertex on the corner. See following screenshot. I didn’t start like this and was forced to use autosmooth. I will rework this piece again using this method so I can join everything later.
Znake: Use SHIFT+F1, then pick your blend file. It will then list everything in the file. Click on Object and then select which object to import. The materials associated with the object will automagically be imported. I will post a blend file with the head attached once I finish the armour. [Edit] If you want the recent blend file let me know and I will upload it to the same place as others.