The Neziņa Project (nudity)

Thanks much for the comments, folks! New animation from opposing camera views, showing the deformations more fully. I’ve tweaked things a bit, adding correctives in the wrists, ankles and backs of knees that help preserve the “constant volume” look in those areas under extremes of flexion.


Clean & Jerk double-Wide Two-View Movie

@ Wronski – I’ve bulked up his arms a bit for the final version, as well as re-vamping some of the topology in the pectoral/deltoid regions, resulting in a more natural look there. One of the challenges was to not be too specific about somatotype (body form) at this stage, and keeps things at a rather bland average, with well-defined musculature, but not too thin nor too bulky. The idea is that this will be the “clay” from which more distinctive characters can be sculpted without having to worry too much about topology & vertex weighting – it’s already in there! This shows a lot in the back view, where the traps and other muscles of the upper back aren’t as well-defined as they might be in a weight-lifter. The legs as well, which are fairly normal bulk, not nearly as developed as most weight-lifters, since they are the primary lifters for much of the action.

Have started moving on to the female version now, using my Neziņa model as a basis. The changes to the rig are forcing some revision to her as well, but it’s all good – better topology + better response to the rigging = better animation in the long run.

And now she has, feet, too! :smiley:

C&C always appreciated!

This project is progressing fine. You are master of realistic human modeling (and rigging). I am following this thread with great interest (and as I said, I would love to put my sweaty hands on those beautiful models (and rigs, rigs, especially the rigs ;))

Heading up the down staircase…


First look at the progress on the female generic model. Cogitating a subject for an animation test, I fell back once again on “classical art,” this time a bit more contemporary, Picasso’s Nude Descending a Staircase, but without all the Cubist embellishments :wink: I thought it would be a good animation challenge as well as provide a suitable setting for testing the rig & model. Haven’t done much yet but this first key pose.

Shown here are in most part the “default” deformations produced by the rig – a small corrective manual adjustment was made to the left deltoid area but otherwise this is sans tweaks, unlike the weight-lifting animation, which took many adjustments, but then that one’s a lot more extreme.

The Staircase of Mystery!


Taking Steps

First test animation with the female figure, who demanded a less generic look and a more modest wardrobe for the test! What could I say? I whipped up black vinyl micro-shorts with futuro-cut bolero + a Zorg-like 'do, then added a little drama to the scene… such a drama-queen she is!

Still a few tweaks to the vertex weights to be made but all in all coming along well. I need to test the shoulders in more extreme poses, though.

Beautiful as usual. Those armpits, why did you make them look so good? Don’t you know how insulting that is to the rest of us? :stuck_out_tongue:

I don’t think this is happening, but because the weight was so believable, I imagined I saw her foot spreading to take it.

My only crit is the hand on the pole, doesn’t quite slide around it. --> I struggled to find something, anything wrong. :slight_smile:

Now I am going to suggest something, please bear with me. So far, kata, othello, your older animations and these recent ones all are top quality, realistic, and obviously improving. But they all are also quite sterile. They move as if a world class animator did them, but as if they were animated as an example of perfection. I realize what I am saying is contrary to your entire style, the models are real and the movement is real. I am asking you if you have considered pushing it over the top. I want more, beyond real movement, …better than life.

Of course that is just my personal opinion, one person’s taste. But I think that it is one shared by motion picture audiences. There is also the consideration of the uncanny valley, though it seems you have almost made it safely to the other side, which is so amazing!

Anyway, thanks for sharing these studies with us, they are teaching me at least, quite a lot.
Some questions I have about the clothes you made for this last one, would you mind sharing your process?
I ask because I understand the amount of time you have spent with the weights and probably corrective shape keys, how is it you can add clothes so easily?
Is the rig’s automatic weighting just working that well, or did you have to tweak it? The clothes follow and move perfectly, and they are skin tight which is more impressive.
Are they a seperate object? Same mesh but disconnected from the body? They look like they are seperate and have thickness. They also look like they follow the current topo of the body fairly closely, so could be duplicated and extruded possibly.
My curiousity about the topology and their floating or connected status is killing me! :slight_smile:
Sorry for the article I wrote here, your work is very inspiring man.

very nice work, would you please reveal some detail on the skin shader

The clothing shown in the generic figures so far are a bit of a cheat, but an effective one for some uses. Since the vertex weighting of the body mesh is well-established, what I did was duplicate certain faces from the body mesh, made them Separate (P-KEY), and then used Shrink-Fatten (ALT+S in Edit mode) to expand them a bit so they float above the body mesh. They follow the body so well because their vertex weights are duplicates of the body weights. In the female outfit I didn’t alter any weights, and just did some trimming away & smoothed a few verts to get the cleaner lines.

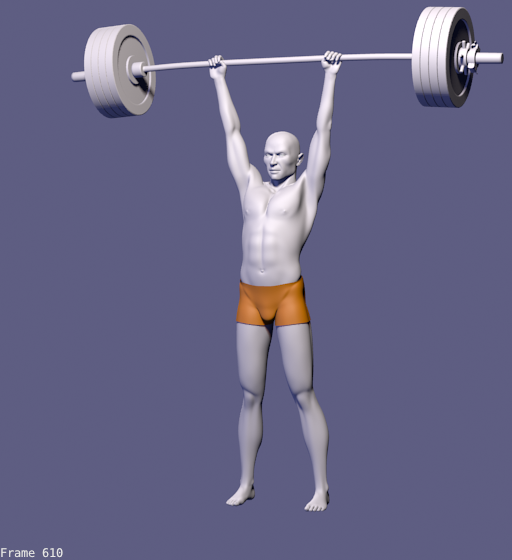
In the guy’s shorts, I did do some significant remodeling & even re-weight-painted some areas, then used a partial-Influence Shrinkwrap modifier, but this led to a number of punch-throughs of the underlying mesh that you can see if you look closely, when the thighs are highly flexed. Since these are tests of the body deformations, I didn’t try to clean up the garments to perfection.

For Dave the slinger’s loincloth I started with duped faces but obviously did significant remodeling and sculpting, then applied a Cloth modifier to get the response to the body motion, which I think is over-stated for the moves, but I tried a lot of settings & not much changed.

Sorry about the armpit insult! :wink: I’ve spent a great deal more time on the shoulders and underarms than on any other portion of the models’ anatomy, in terms of modeling/topology & rigging/vertex weighting, for the very simple reason that this area is a total beeyotch to get even halfway right. In the end it ends up being a compromise between what looks best in one pose and what looks best in another, but because of the very large range of possible motions, it takes a lot of testing and re-painting of vertex weights. Which has to be done everytime the geometry/topology changes, and is significantly different for the two genders.

In terms of animation, well, I’m still learning, part of which is learning how far you can push a move before it gets out of the range of naturalism (my guiding artsy-fartsy philosophy here). It’s well-established for more stylized characters that overshoot & rebound, squash & stretch, and other such motion concepts, help to give “life” to an animation, and these can be pushed to extremes in some cases and work just fine. But it doesn’t always work for naturalistic characters, who have to act within a more limited range of expression and physics. But it’s still acting, and in some cases, “over-acting” is called for – I’m still developing a feel for how to do that best. Feedback such as your helps a lot, and I do appreciate it.

@ chrisspoi: I’m still tweaking the skin shaders at the moment, but in general, it’s just a combination of procedural and image-based textures, base RGB coloration, and a fairly simple SSS treatment. No multi-layer magic (other than layers of textures, I guess), no node work, nothing fancy or innovative. Sometimes using the tried-and-true approach is enough if done well. However, I can’t really publish the shader specs at this point because some of the values aren’t accessible – the numeric fields for some values will accept very low numbers (such as .005) but only display two significant digits (it shows as .00), so that’s no help at all! Once I get them finalized I can offer them as .blend files (shaders only) but be aware that they are model-scale-dependent, the developed characters will use custom image mapping that is specific to a particular UV-unwrap – some procedurals get baked to images – and there is a fair amount of texture-painting done as well, specific to a particular model.
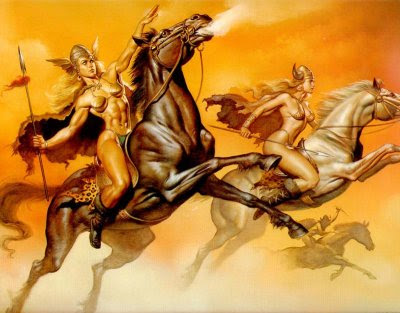
Shoulder Solutions: Part 1

A discussion in another thread has prompted me to diagram my solution to “the shoulder problem” for my naturalistic characters. While this is probably more complex than many kinds of character models need, some of the principles are very applicable to all situations.


First is the modeling – morphology (shape) and topology (mesh structure). As stated elsewhere in countless tutorials on modeling, especially human form modeling, edge loop flow is a critical factor in achieving good deformations, particularly in areas like the shoulders. Since my characters for this project need to show an active musculature, I’ve used the edge loops to help define muscle masses as well as create the proper flow for the deformations.


This is the main set of animation controls for the arms, head & torso, with arms under FK control, my usual method. You may recognize a number of elements from cessen’s Sintel rig, which forms a solid foundation for this more elaborate implementation. I’ve replaced the original shoulder controls with my own design, adding some interactivity between various bones via Transformation Constraints. The activation of these main controls is what generally drives the transforms of the bones shown in the following illustrations, but nearly all can also be adjusted by hand as well.


Many of these secondary bones are linked to the main ones by Transform Constraints. But because the range of human motion is so large, only the basic transforms have been automated – for many poses, hand adjustment is also necessary. In some cases I’ve used bone shapes that mimic the muscles or bones they are intended to imitate, so you may recognize the deltoid and scalpula bones. Others like the armpit/lats control are more abstract. There are controls for the clavicles, neck muscles, pectorals, breasts and other body features shown here. Additional bones in the arms help even out the twist created by certain rotations, which helps alleviate shrinkage of the mesh cage with twisting.

Since there’s now a 3-attachment limit per post, I’ll continue in the next post.

Shoulder solutions: Part 2
Note: go up one post for Part 1.


These bones are more specialized than those shown above, and allow for specific manipulations of the mesh to either correct certain areas or to imitate body actions like muscle contraction or breathing. There are also bones that can be used to re-proportion body parts like the hands and head without having to deal individually with the many bones that these parts of the rig can contain. Location, Rotation and Scale transforms can be used with all these bones.


These are the fully-automated bones, those that rarely need manual adjustment or have separate controls. These are all deforming bones; those at the elbows and wrists help keep the mesh from collapsing when the forearms and hands are flexed to extremes, those at the neck perform a similar function, and those in the chest area imitate the pectoral muscles where they insert into the arms. Automation is generally done using Transform Constraints, using the rotation values of the main bones to drive the transforms of the helpers.

This is an all-bone rigging solution, using no shape keys for the deformations shown. I do use them for other purposes, but in general I prefer to have immediate and highly-adjustable control over the mesh shapes as I animate. The problem I see with shape keys for my characters is that they are adjustable only in the amount they influence an area of the mesh. Their morphology is fixed. With multiple-bone adjustment controls, it’s possible to customize the corrective or imitative deformations for specific instances of rig configuration. It can even allow for custom vertex weighting if need be to solve particular a deformation problem. This kind of flexibility makes the more complex design worth the effort in both its design and use.

Wow, you give me a break!.

Sorry for not comment more this time but this is a clever work.
Actually Im studying mesh deform…finally I catch it but Im testing some. All bone rigging solution sounds quite practical.

Thanks!

If her left arm is up, the left breast should be upper, I think.
Just think about some study of movement on real models.

Excelent work, I’m watching you.

@ Lin2010: The breast control is set up to raise with the raising of the arm, pulling the breast up automatically. It probably doesn’t show as distinctly in these images, but take a look at the animation in post #15 and you’ll see how it works. In that model the breasts are a bit larger & fuller, so the motion is more visible. I can also adjust the amount of motion in the Transform Constraint, or add a manual adjustment when necessary.

Holy Man

The first character model derived from the generic male mesh:


The Bishop is the Catholic authority in the Southeastern Baltic region during the time of Neziņa’s story. Self-indulgent, autocratic and ruthless, he turns a blind eye to the atrocities committed by the Swordbrothers, a crusading brotherhood he played a major role in bringing into existence.

I won’t be modeling the body any further since this character will be wearing robes, but plan a high-level sculpt for finer facial detailing, to be applied via a normal map. Current skin material is just a base, will be enhanced with texture painting for various channels.

Attachments


Holy Man – now clothed, thank God!


I’ve done the basic modeling & coloring for the Bishop’s simar, the everyday garment of this rank in the Catholic church. Oddly enough my research shows that this hasn’t changed a lot in about 8 or 9 centuries, so modern refs are still useful. I do plan some detailing to improve the look and hopefully make it more medieval in character. I also plan to add the part of the fascia that hangs from the sash, and the required pectoral cross.

But first I wanted to test the possibilities for using the Cloth sim on such garments, and in doing so have hit a problem I explain in this thread in the new Particles/Simulations section. If you have some insight into using Cloth in 2.56 beta, please stop by that thread and see if you can help. Thanks!

NOTE: That cloth problem has been sol-ved (<- use a Clousseau-type accent on that last word, btw :wink:

Thanks Jonathan!

The Bishop threatens…


With the cloth issues solved thanks to this great community, I added some more accessories, ramped up the materials a little, and decided to try a render with some environmental lighting using an AngMap image. The cathedral interior isn’t contemporary with the time period in which Neziņa is set, but it’s a good image to test with. I used direct lighting as well to try to match that of the photo. Getting the perspective aligned somewhat was a bit tricky, but it works OK for this test.

Materials still need lots of work but I’m holding off finalizing those until after I do some more characters & costumes. I think this approach will help me develop a consistent design motif that I can apply to all the major characters as I finalize the models & materials. I also need to study up on ways to do good cloth textures, something I’m not really up to snuff on yet.

Photo used under CC license courtesy marcp_dmoz on flickr

The Bishop is menacing, I fear for Nezina. :o)
An easy way to get a cloth texture, is the “clothify” filter in Gimp. It’s just a start to a good texture, but it is that at least. Progress looks great, must be nice to have Jonathan’s personal help. :wink:

Karl, you are making an amazing progress here. I can’t wait to see the thing finished, but I also intend to enjoy looking over your shoulder during the process. Uh, and thanks for the cloth simulation info. It cleared several of my own problems with cloth simulation.

The Sins of the Father…


This is Niklaus, Neziņa’s father, descended from Viking raiders who established many settlements on the south Baltic coast. While he considers himself a fair warrior, he takes more pride in his seamanship, and made a good living for himself and his family trading in amber and furs, and the occasional pirate raid.

Though he never let it show to his children, part of the light went out of Niklaus’ life when his young wife died not a year after Neziņa was born, carried away by a plague that swept the coastal villages. As Neziņa grew in her mother’s image, the old sailor indulged her shamelessly, letting her learn to sail and train with sword and armor with her two older brothers, and it was he who gave her the pet name “Mazs Valkyrja” – Little Valkyrie.

Because of his prominence and relative wealth among the pagan villagers of the south Baltic, Niklaus became a target of the Swordbrothers, and it was their savage treatment of him that set Neziņa on a path that eventually led to her fateful encounter with a strange monk and a terrible secret.

Background photo used under CC license courtesy marcp_dmoz on flickr

3dementia & ristesekuloski: Thanks you for your kind comments!

As with the Bishop, the materials in this render are not yet final, just brought forward far enough to help establish the look of the character.

The first girl looks like she has injected botox or some unknown liquid over her eyes. Also valkyrie and viking? Vikings are blonde…so are valkyries. Look below for a good reference…

Your modeling is perfect, but I’m not sure what reference you are following…
http://2.bp.blogspot.com/_7HTO3jP-_lk/Sreh7ePjLVI/AAAAAAAAE_8/AHsMIWqCgM0/s400/valkyrie.jpg

You theory 100% explains Eric the Red who happened to be a red head and a viking oh wait it doesn’t. There is plenty documented of proof of vikings who had hair colours other than blondes.