Hey guys, this is my first Blender tutorial, so please bear with me if it’s got some issues and such. As far as I know, I’ve developed this technique myself; I couldn’t find anybody else with a tutorial like this. This tutorial is intended for anybody, from a newbie to a professional. I’ve done my best to make sure that a beginner can follow along, without making it too simplified for pros.
__________________________________
Okay, I’m going to show you how to create a realistic-looking carving in Blender using a picture. This technique is great if your image is not high enough quality for you or if using a bump map does not give good results.
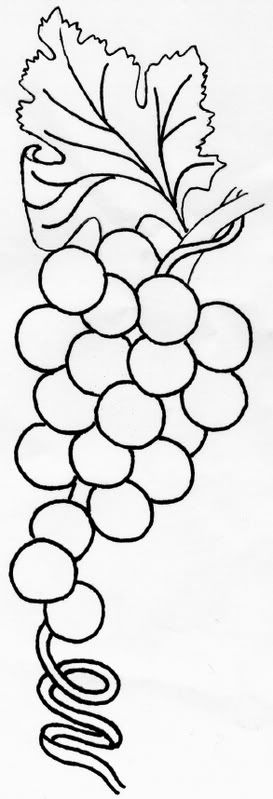
Before you start, pick out an image that you will use to turn into the carving into 3D. IMPORTANT: Choose an image that doesn’t have an insane amount of detail for your first try; this process takes a while, and the more detail is in the picture the harder it will be and the longer it will take.
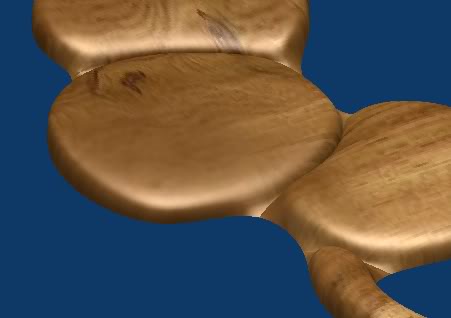
You may need to look on the internet or take a picture of a carving you like to find a good one. I’m using the picture below.
Okay, so open up Blender, delete the default cube, and put your image in the background (View > Background Image).
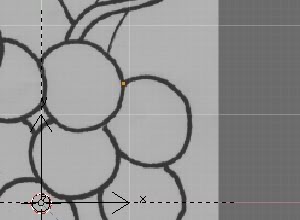
Create a plane, and delete all but one of the vertices. Go into top view (NUM 7). Put that one vertex on some line on your image (See below).
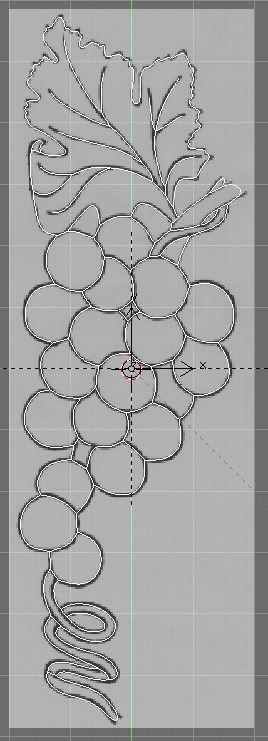
Extrude that vertex (E) to trace that whole outline. Be sure to put a vertex wherever two lines intersect or touch. Also be sure to snap the vertices to the grid when you’re extruding them, you’re going to need to be able to snap other vertices to the same position; the grid is the simplest way. You don’t need to be perfect with the outline, just make it follow the path fairly well.

Look at the picture to see what it should look like now.  Note some of the vertices (circled in red) that are placed where two lines meet.

Okay, now extrude more vertices to trace the rest of the picture.  Use Remove Doubles (W > Remove Doubles) every once in a while to avoid confusion.

When you think you’ve traced all of it, go into Object Mode (TAB) to make sure.
Now, apply a subsurf modifier.  (You DO need this now.)  Go into the edit panel (F9) click the “Add Modifier” button, and click subsurf.  You can use a level 1 or 2 for now.  You also may want to click the “Optimal Draw” button so it’s easier to see what you’re doing.

Okay, go back into Edit Mode (TAB) so we can start the main work.  This is the part that will probably take you the longest.  Choose a separate section (a section of the picture that is completely enclosed) and select all of the vertices in that section.  This part must be done one section at a time.  Once you have the vertices selected, go into front or side view (NUM 1 or NUM 3) and extrude (E).  Move it in the Z direction to the level of thickness that you want your carving to be (in my example, I moved it .1 in the Z direction, meaning that my carving won’t be incredibly thick).
Now you have to start making faces. Select any 3 or 4 vertices that are near each other on the top layer, and create a face (F). I recommend that you use mostly squares, with a few triangles where necessary. Do this to complete an entire section.
Now move onto the next section. <i>Make sure to extrude all of the vertices, even the ones that were used in the last section.</i> Extruding those vertices twice gives it the effect of depth.
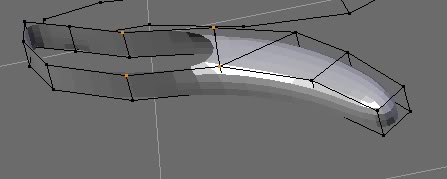
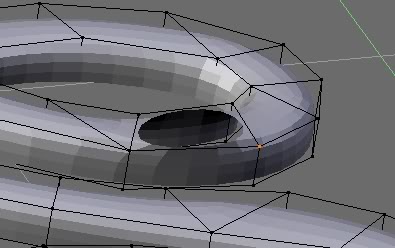
Continue to do this for the whole model. Sometimes, a section will have some vertices that are used more than once in the same section. If you do the whole section all at once, the depth effect will not appear. You basically have to do it in parts. (It’s hard to explain, look at the pictures.)
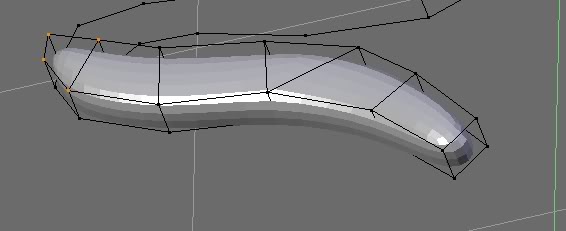
Here is the first half of this part.
Basically just extrude the parts as if they were separate sections. Now it’s almost done, except it’s got that weird crack. Go into Wireframe Mode (Z) or click the “limit selection to visible” button (the gray box) and select the vertices where the crack is. To be sure that you will select all of the vertices there, use box select (B). Now hit W > Remove Doubles. If you selected all of the vertices that were there, the crack should be gone, in which case you can finish up that section.
If you want you can now TAB out of Edit Mode and into Object Mode, to see how you’ve done so far. If you want to, hit Set Smooth in the Edit panel (F9). You will most likely have flipped normals, so TAB back into Edit Mode, select all, (A > A if something is selected or just A if nothing is selected,) and hit Ctrl-N to recalculate the normals.
Now go ahead and finish up your model.

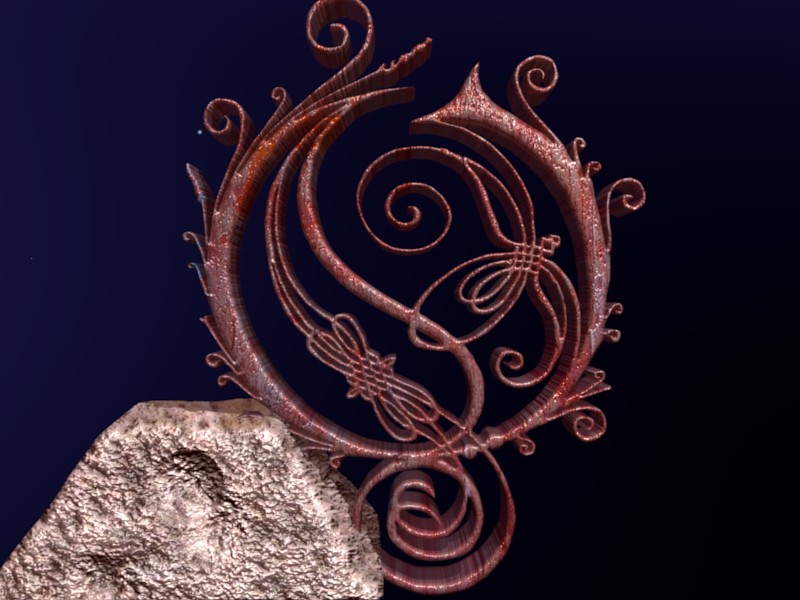

 Thanks for the cool tutorial.