Hello this is my first mechanical rig.
Can somebody help me please I can not figure out how I have to set the rotations from the bones and how to lock them right.
http://www.antoons.org/blender/rudders.blend
greetings
Anton
Hello this is my first mechanical rig.
Can somebody help me please I can not figure out how I have to set the rotations from the bones and how to lock them right.
http://www.antoons.org/blender/rudders.blend
greetings
Anton
Could you be more specific? What exactly are you having problems with?
Here’s another way to do it, using constraints and parenting.
http://www.cdupload.com/files/39466_odchw/rudders1.blend
All of your objects pivot points were centred in one spot, which isn’t good for this kind of animation, so I re centred, using centre new and occasionally centre cursor. For example, Tube.004 needed to rotate around the centre of the hole, so I used centre cursor there.
As to the constraints, I used a track to on Cylinder.029, a copy rotation on Cylinder.001and a copy location on Cylinder.031. I also used track to constraints on the piston, targeting empties. All the rest is done with parenting. Rotating cylinder 23 will move everything as it should.
I only did the first two rudders, you should be able to work it out from there, just look at the parenting in the transform properties window (n key) and the constraints mentioned above. Also, some of the meshes need work (cylinders not uniformly scaled, etc. )
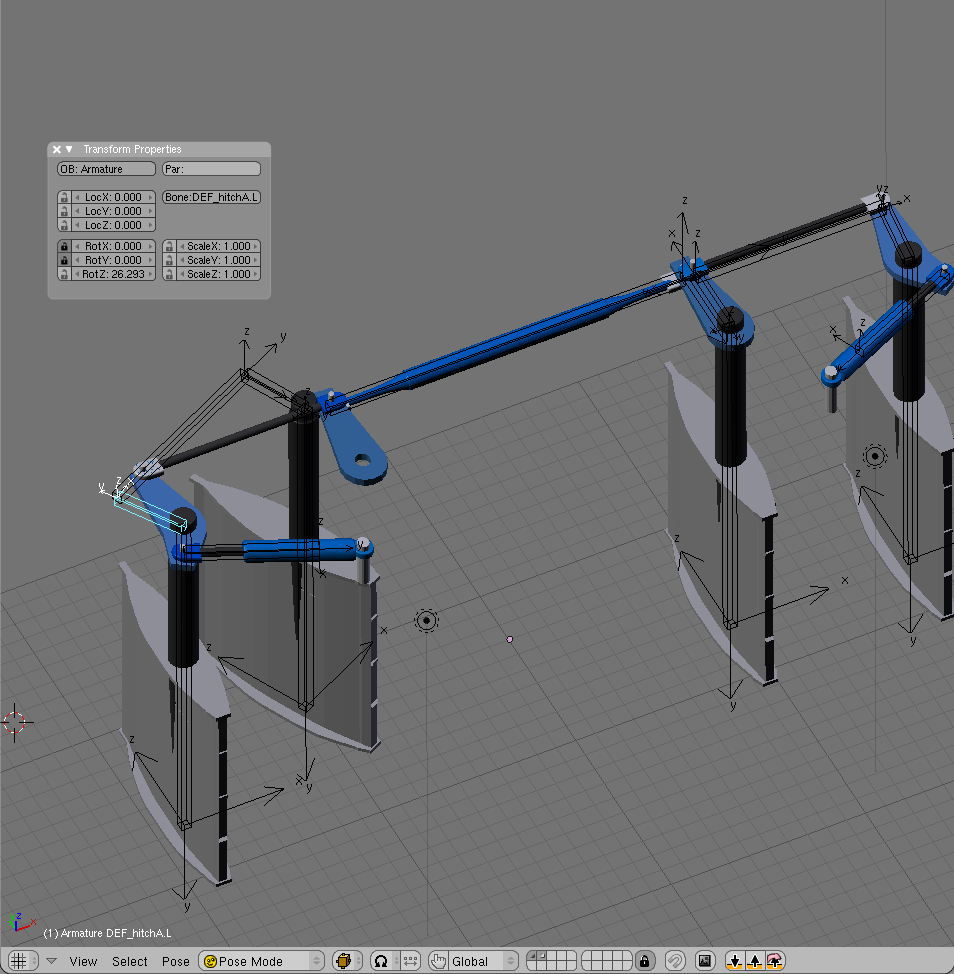
Can not get in pose mode anymore ?
rotating is not going right. The rudders must stay in place and rotating around rudderrod
I deleted the armature in the file I uploaded. You don’t really need it. Did you rotate Cylinder.23? If you rotate that, the two rudders I linked up will rotate around the rods.
Sorry I was not looking right it works perfect.
But how can I make an animation when I have no pose mode.
Do not understand that?
You don’t necessarily need bones to animate it. Just keyframe the rotation on Cylinder.23. You could turn auto keying on (the red dot on the timeline), or rotate, press the I key, choose Rot. If you wanted a ‘pose mode’, I guess you could add a control bone and constrain that somehow, then, animate the bone. I uploaded a file with animation. You can see the key frames in the IPO window of the file. Enjoy.
wow that looks perfect just have to finish it and then render it all.
many thanks.
Did not now that I could animate with just keyframes.
Thanks
No prob’s. Hope it all works out for you. 
What should used a track and copy location do.
Still trying to get it work but that is no problem I want to learn it.
A Track To constraint will track the position and rotation of another object. For example, the piston in your file uses a Track To constraint on Cylinder.025, that tracks Empty.001, which is at the other end of the piston. If you select Cylinder.025 and then press F7, for the object editing tab, in the buttons window, you will see the track to constraint I’m talking about. From memory, I think I used a copy location, to keep one of the joining pins in place.
Also, remember what I said about pivot points, they are important. for example, if a cylinder needs to rotate around its centre, it’s pivot point will need to be in it’s centre.
Hope that makes sense, I’m just about to head out the door, so it was a bit rushed.
Thanks, I have set al the pivot points, my problem is when I rotate Cylinder 0.23 how can I rotate Tube 001 at the same time. Like you did with Tube 004.
You have to parent it (in a logical progression) to Cylinder.023. You select the child first, then the parent and press Ctrl p. A little pop up will appear under your mouse that says “Make Parent?”, click on it, or else the parenting won’t happen.
If you click on Cylinder.029, you will see the Track To constraint which keeps the tube in line. You will need to put a track to on one of those connector bits and parent the tube to it. An easy way to apply constraints is to select the constrainER object and then the constrainEE object and press ctrl-alt-c and pick the constraint from the list.
Just think of it like a hierarchy. Cylinder.023 will be the Master parent, the children attached to it, will also be parents of parts further down the line. hope that make sense. cheers.
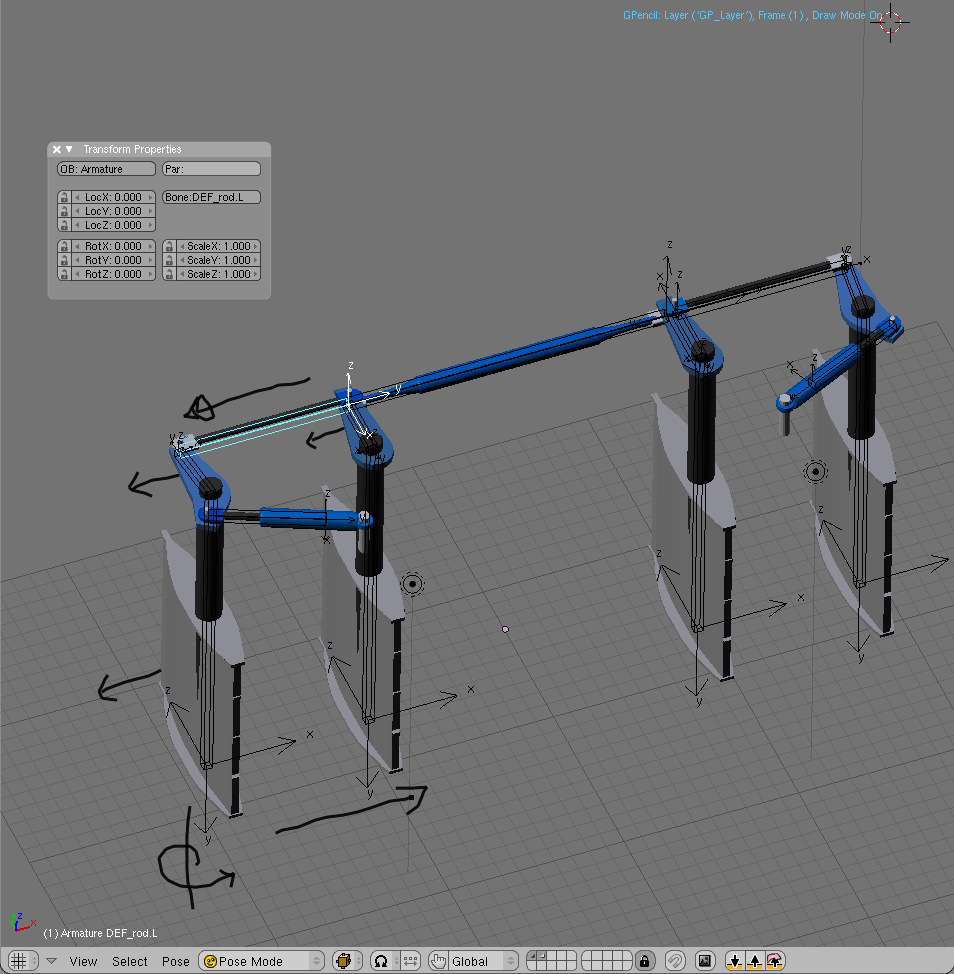
have parent tube004 to Cylinder 0.23 and constraint copy rotation tube001 to Cylinder 0.23 but tube 001 is not rotating on its place. It is rotating on the pivot point from cylinder 0.23 but it must rotate on its own pivot point
i could have a look at this, but not now. I’d say DO use an armature. your model is complex enough to use one and has some advantages over parenting and animating.
I think and see that it is possible without armatures.
Still have to figure out the constraints.
O.K., try this. PLEASE NOTE, you have the same parts duplicated in the same spot, in quite a few places, so the objects I use may not be the same ones you select. I would suggest deleting the unused parts, to avoid confusion.
Parent Cylinder.036 to Tube.004
Parent Cylinder.037 to Cylinder.036
Add a Track to constraint to Cylinder.037, targeting Cylinder.019. Select Cylinder.019, then select Cylinder.037. Press ctrl-alt-c and choose track to. In the Constraints settings, choose -x for the to: and z for up. Press F7, with Cylinder.037 selected to get the constraints settings, in the buttons window.
Parent Cylinder.019 to Tube.001
5.Parent Tube.002 to Cylinder.037
Parent Cylinder.020 to Tube.002
Apply a copy rotation constraint to Cylinder. Select Cylinder.023, then Cylinder, ctrl-alt-c, choose copy rotation.
Parent Tube.001 to Cylinder
Parent Plane to Cylinder
Parent Cylinder.015 to Tube.001
Parent Cylinder.014 to Cylinder.015
Apply a Track To constraint to Cylinder.014, targeting Cylinder.009. See step 3. For this one, I chose x for To:
Select Cylinder.013 and Centre New. Centre New is in the editing tab (F9)
Parent Cylinder.013 to Cylinder.014
Parent Cylinder.011 to Cylinder.013
Parent Cylinder.009 to Cylinder.006
Parent Cylinder.006 to Cylinder.003
Apply a Copy Rotation constraint to Cylinder.003. See step 7. Rotate Cylinder.006 180 deg. around the z axis, if it flips. (hold ctrl while rotating to snap to 5 degree increments)
Parent Plane.003 to Cylinder.003
Duplicate all the parts of the working piston, including the empties and rotate them so that they line up with the piston you will replace. Move, or delete the old piston and then re select the new piston and move it into place. Parent Cylinder.040 to Cylinder.006 and you’re done!
There are some minor issues, but if you rotate Cylinder.023, everything should move and rotate as it should.
many thanks , I noticed to have some duplicated objects on the same place .
That is indeed not good.
Most of the work you describe I already did but still many thanks for the tutorial.
I will show the result here .
happy blendering.
here the final result now I am rendering the animation.