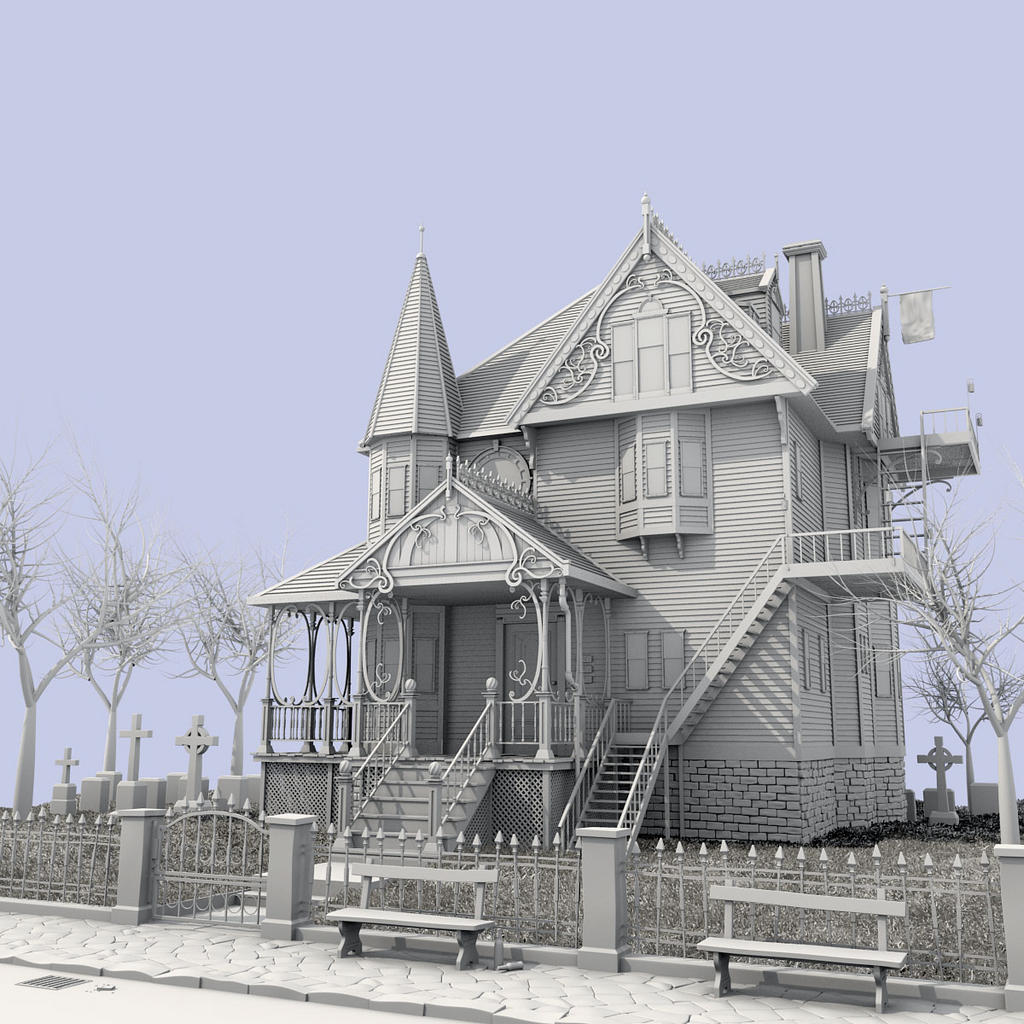
Hello guys, here is my finished project on Pink Palace house, which everyone remembers from cartoon “Coraline”. On this one I didn’t want to create a realistic look of the image, but more like cartoon one. I also have a thread on focused critiques here, that shows a lot of models which will be finished in the future. So first pick was on Pink Palace. I hope you like it 
Looks close (that was a fairly good movie too)!
Yes indeed, I watched a 5-6 times so far. So that was the reason why I create this house, just to have something that will always remember me, on that movie 
Nice modeling – keep it up!
good job mate,
good luck.
Really nice colours and lighting on the final!
I like!
Thanks guys for the positive comments, it’s good to hear a positive respond on my work. Here are few words about the work process.
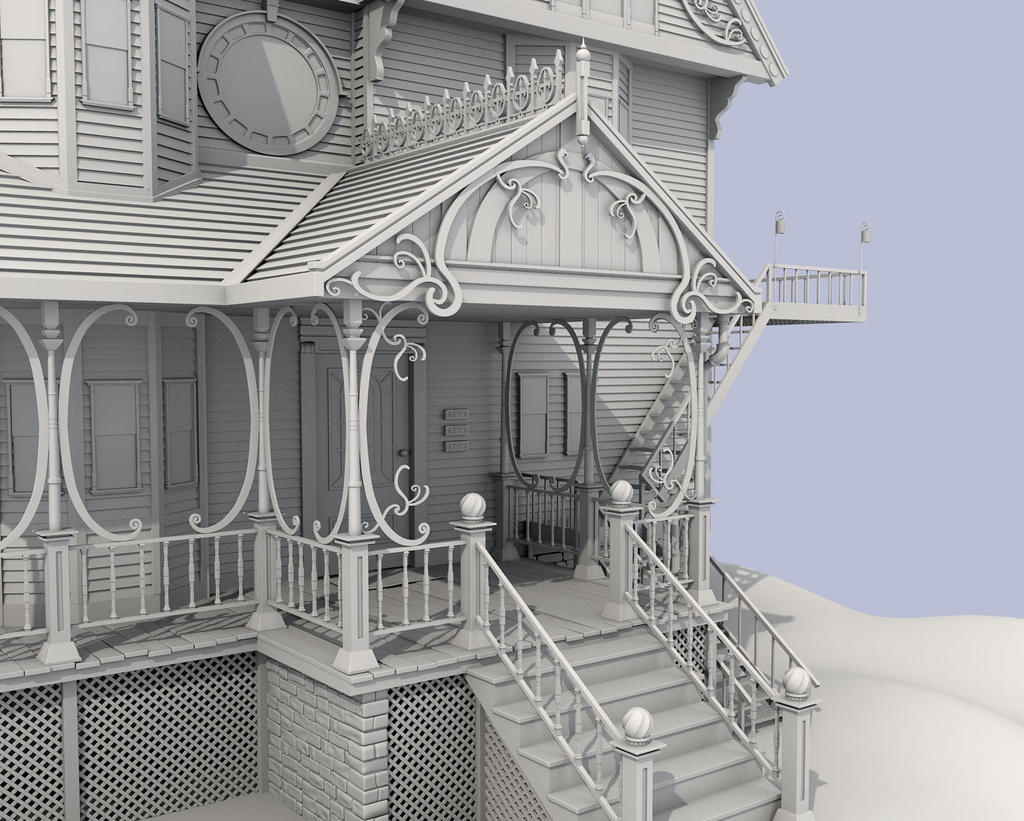
Well, the scene was made in Blender 2.55 Beta. All scene was made from scratch (house, trees etc…).
After a finished modeling part, I turn to texturing a scene, by applying a simple materials that was a little bit corrected in Photoshop, just to give that randomness to the textures.


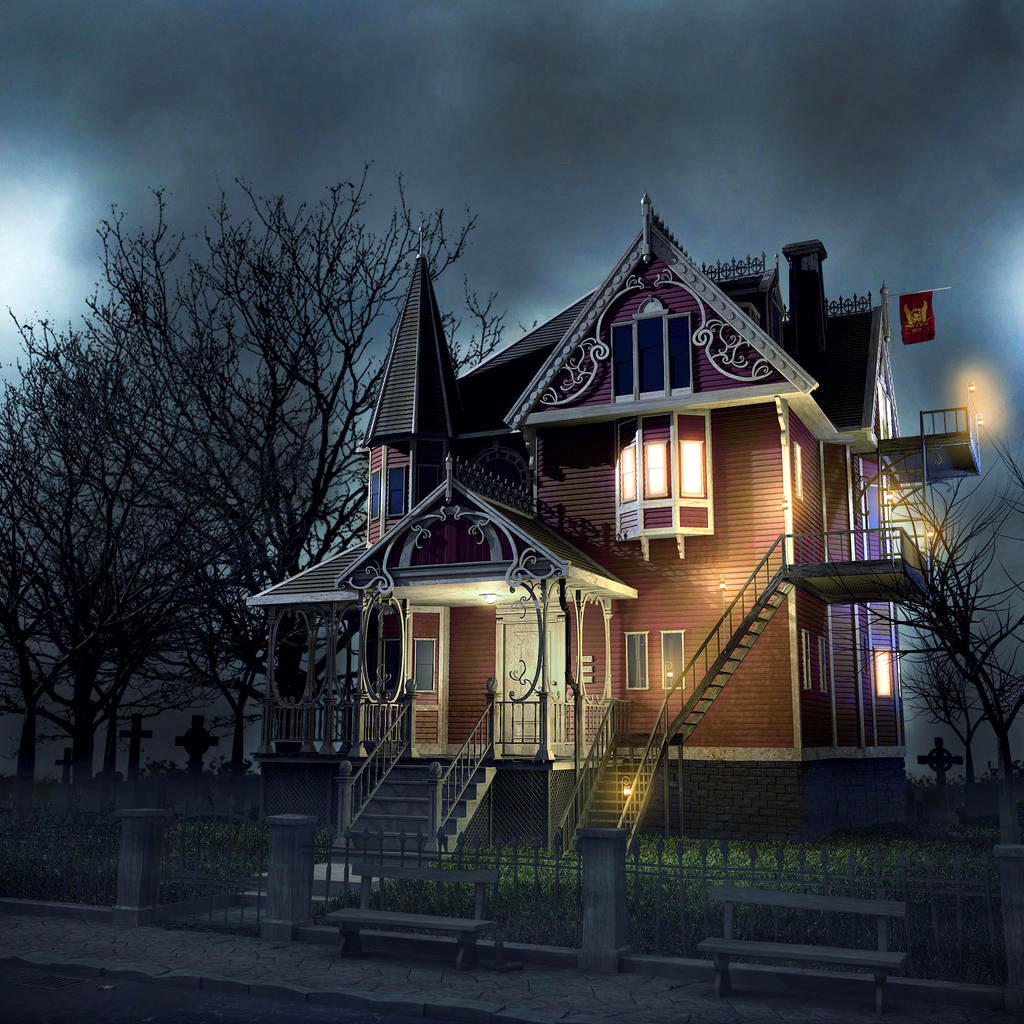
For the lighting I used one spot light for the basic moon light (since it’s a night scene), on every little light along the stairs of the house, I used a point yellow light with a sphere function turn on, so I can control where the light will start and end to emit. And also in the front of the house (at the entrance ) added a one point yellow light with sphere turn on.
At the right of the side of the house I add one point light with a blue color and also a sphere function turn on (you can see the blue light on the right side of the house) that simulates a sky color. And at the end I render it in four passes:
   1. Complete scene
   2. Shadows pass
 3. Lights along the stairs
   4. Background sky
After that (when I had those four passes) I do a little bit composite inside a Photoshop (I could use a composite in blender also but I decide to do it this way). On the complete scene pass I added some corrections to the image (levels, color balance etc…). On a lights along the stairs pass I added a glow effect. Shadows pass, I used to give a much darker look to the shadows overall. For the background I do a little bit of matte painting, by darkening even more a background, just to define where is dark part of the background and where is a light one (it depends on a lights position that I previously defined in Blender).
And that's about it for this image, I hope I didn't miss anything to explain along the way :)a lot of detail on the house, really good, I like this work:)
Very nice - great detail
Beautiful detail and your color palette is spot-on.
ahhh, i remeber seeing this a while back, great to see it rendered nicely
great detail! but looks brown to me, to pink, or is it? looks great though! :yes:
very nice work ,
thanks guys
that looks really great! congratulations!
Thanks Sebastian, I appreciate it
hey, i was wondering…i wanted to make a house a while ago…did you use a cube and then make all those indentations?..because everytime i try to make a bunch of wood planks…blender crashes because they are just too verticiced 
help?
Well it probably slows because of the number of faces that you have in the scene. This scene have 6 k polygons. But my machine is 6 months old (I7-930, 6gb, Ati Vapor-x 5750). Try to create a low poly versions of the planks, or do a high poly and low poly version. And use a bake function to bake all the information form the high res to low res poly. It’s a time consuming work but it pay’s off.
well, idk how to lower the poly without decimation…so any way you could do a PDF tutorial on some of your biggest problems creating the house???
Well it’s good to lower down the poly count by deleting the unnecessary edge loops. And refine your shape a bit, try not to lose to much of details. If that model should be seen from far away, that you can make it even more low poly. But if it’s a close up look, then do the first method that I describe you above. For me that decimate modifier is good for some cases, but in general I like to do it manually by deleting edge loops and moving vertices