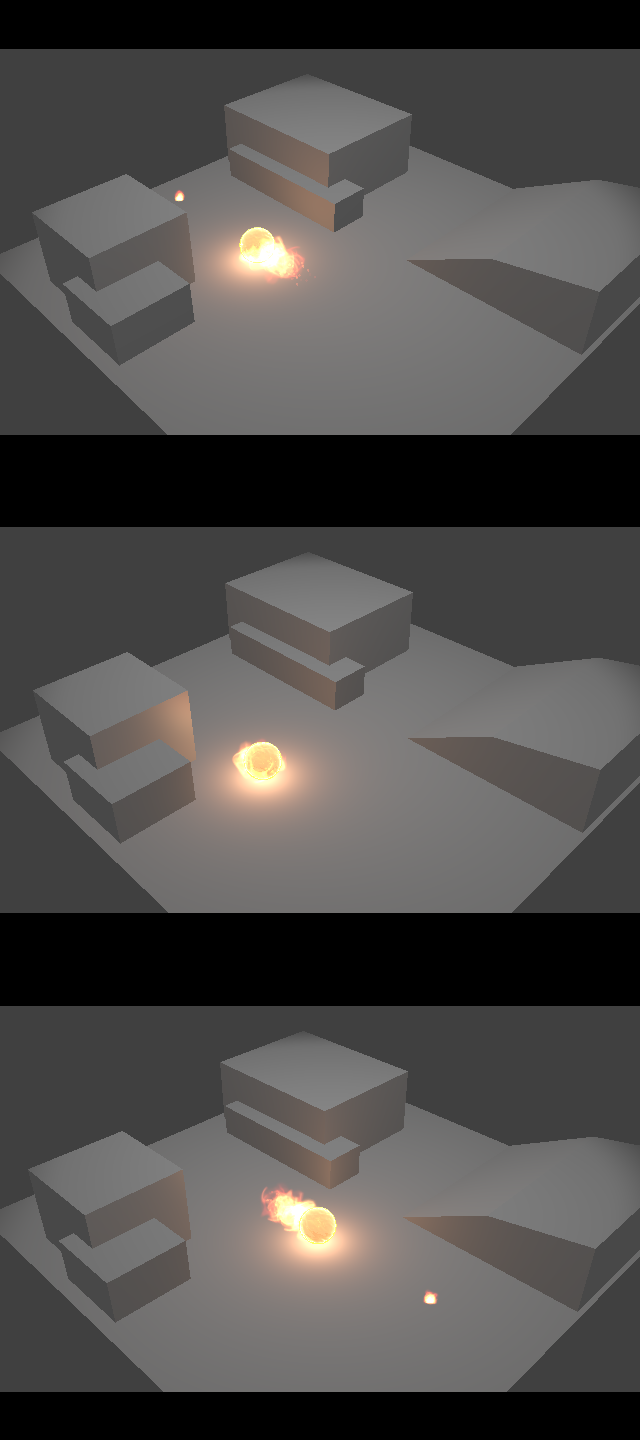
Zip File contains example blend and 3 Particle images [should be resized if actually used]. The example doesn’t match the video 100% as different settings and particle-images were used.
edit:/ With motion blur added the fire even looks a bit more realstic.
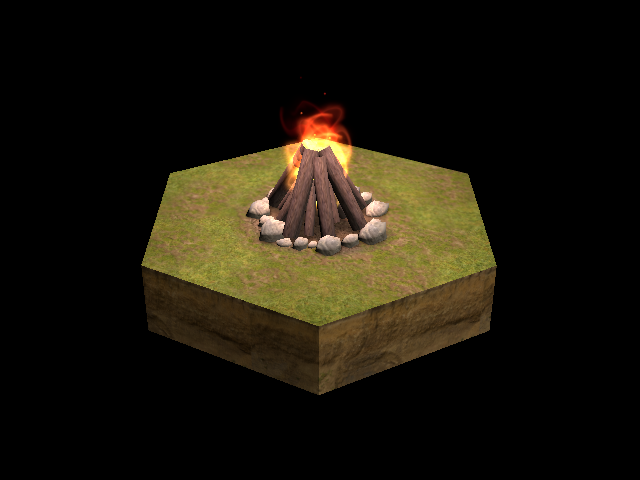
Looking good, Stym! It looks quite realistic. And yes a tutorial will be very much appreciated! If possible, please make the tutorial as detail as possible and put it in beginner’s language, if this is meant for beginners as well.
Thank you for your comment , I really appreciate it!
Yeah it’s always hard to find the right moment between beginner-friendly and fast-paced - I will try my best to give a step-by-step setup, especially concerning the parts in GIMP - but still maintain a short and quick instruction, as I dont really like long-drawn-out video tutorials that only cover some simple steps and could be shortened alot.
Thanks again!
Thank you all !
I got the idea from Dota 2 - I believe they used a similar method from what I observed. They just used “harder” particle images - I’ll try to create some different fire particles soon.
Thank you very much sir!
I apologize once again for not releasing a tutorial yet - but I want it to be well planned and the part with the particles in GIMP will take some time to execute - so I don’t want to rush it - I will have the time to produce the tutorial at the beginning of next week.
I can’t wait to play with this, it looks really fun. Does anyone have any unique particles they want to share, I am interested in seeing what everyone has come up with. I will be sure to share my progress as soon as I can.
It definitely is - you can achieve great effects - especially when using non-additive blending - like for clouds or debris - I played with a lot of different particles - but often times they wont result in very good looking effects - rather just messy. You can use practically any given shape - I experimented with GIMP brushes which I downloaded decades ago - at least I don’t even remember the time I downloaded them - Just put them on a black canvas and use additive blending- or use transparent backgrounds to create any other effect.
It is obviously highly dependant on what kind of effect you want to achieve - for any spell-like colored swirls etc you can always throw random shapes and set different colors !
Exactly The simplicity amazes me as well - as I’m really bad with coding - I can only read and adjust to my needs but never would I have come up with something like this.
As soon as I finished the Tutorial for this fire particle set I will proceed with fog/smoke and debris - maybe some explosion.
Clear explanation especially the installation part(which took me quite some times to figure it out a few months ago), however, the video is rather too short which makes it hard to squeeze in as much detail as possible (but i believe you’ll explain more in your next tutorials). Looking forward to your part2 tut, keep it up!