Hello!
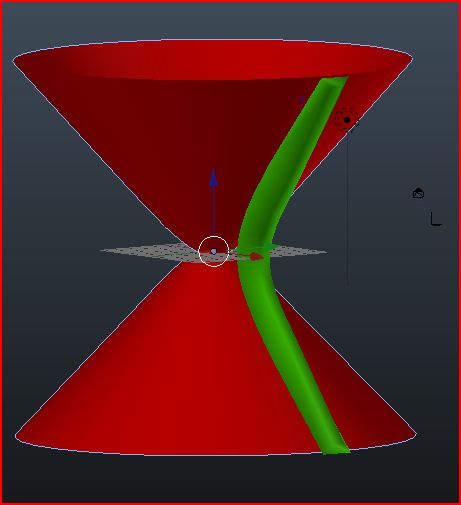
I’m Sonia and I’m studing Architecture, when I start using blender to nowadays I only do orthogonal modelling. I wanna to improve my skills and the best way I think is trying to do something curved. I think that a good idea could be doing a model of the niemeyer’s brasilia cathedral, his geometry is only a hiperboloid. I discovered how to model it with nurbs surfaces and skinning (http://wiki.blender.org/index.php/Doc:2.4/Tutorials/Modeling/Surfaces/Skinning) but I don’t have found the way to model the white ‘‘ribs’’ of the building: his geometry is a trangle that outlines the hiperboloid and his seccion turns smaller when it goes away from the center of the building.
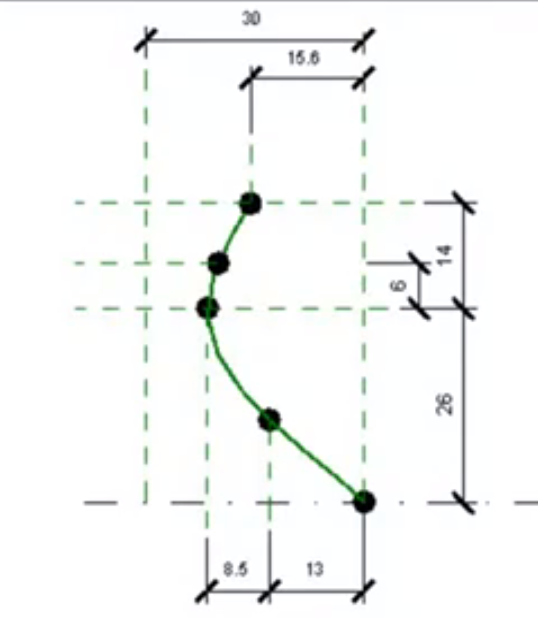
First I made the profile:
I added a bezier circle and in edit mode I selected one handle, deleted it and then selected all and changed the handle types to vector (by pressing V and selecting from the menu).
Pillar shape:
I added a bezier curve and in edit mode I outlined basic pillar shape and enabled profile shape as bevel object in curve properties.
Then I selected first and last handle in the curve and scaled them with alt+S.
Next I made room for the array by moving everything along X, while still in edit mode.
Array:
I added an empty to the same place where the curve object origin is (the center), then added an array modifier, pointed it to use the empty as object offset, set count to 16 and then selected the empty and put 360/16 in the Z rotation field on the properties panel (N).
Before converting (Alt+C in object mode) to mesh I duplicated the original (backup) and then disabled the array visibility because I didn’t want it to convert the whole array. I copied the array again by first selecting the mesh object and then the curve object and ctrl+L -> modifiers.
First option.
Best to do in “Sketchup Software” and then render the image in Blender.
Blender and even to scratch but still not accurate enough and … and it is quite difficult for newbie.
And more practical model first sketchup and then import it to blender and render the image in cycles. Second Option. More Harder.
Make a low poly and then use sub-division modifier … is excellent and NOT more accurate … but it works … after UV-Maps and finally lights.
Good Luck.
Not everyone wants to mess with the extra objects math addon. But in case you do the formula for a hyperboloid is
in python that would be
x=2*cosh(v)cos(u)
y=2cosh(v)sin(u)
z=2sinh(v)
using 2 for a, b, and c. the c value determines the vertical scale. Note the negative min value for v and the different max positive value. This provides the asymmetry in the original. Try different values for a and b to change the curve. They have to be the same if you want it to be circular in cross-section though!