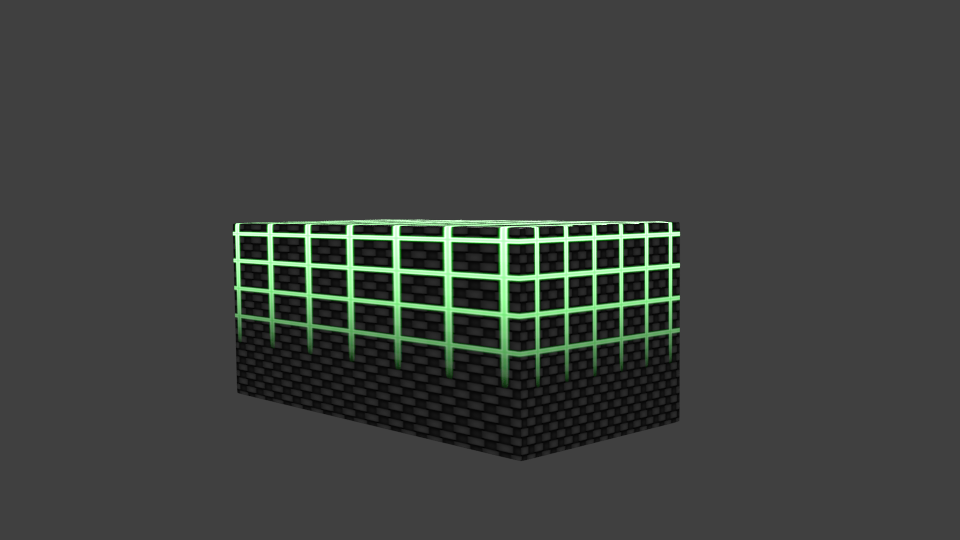
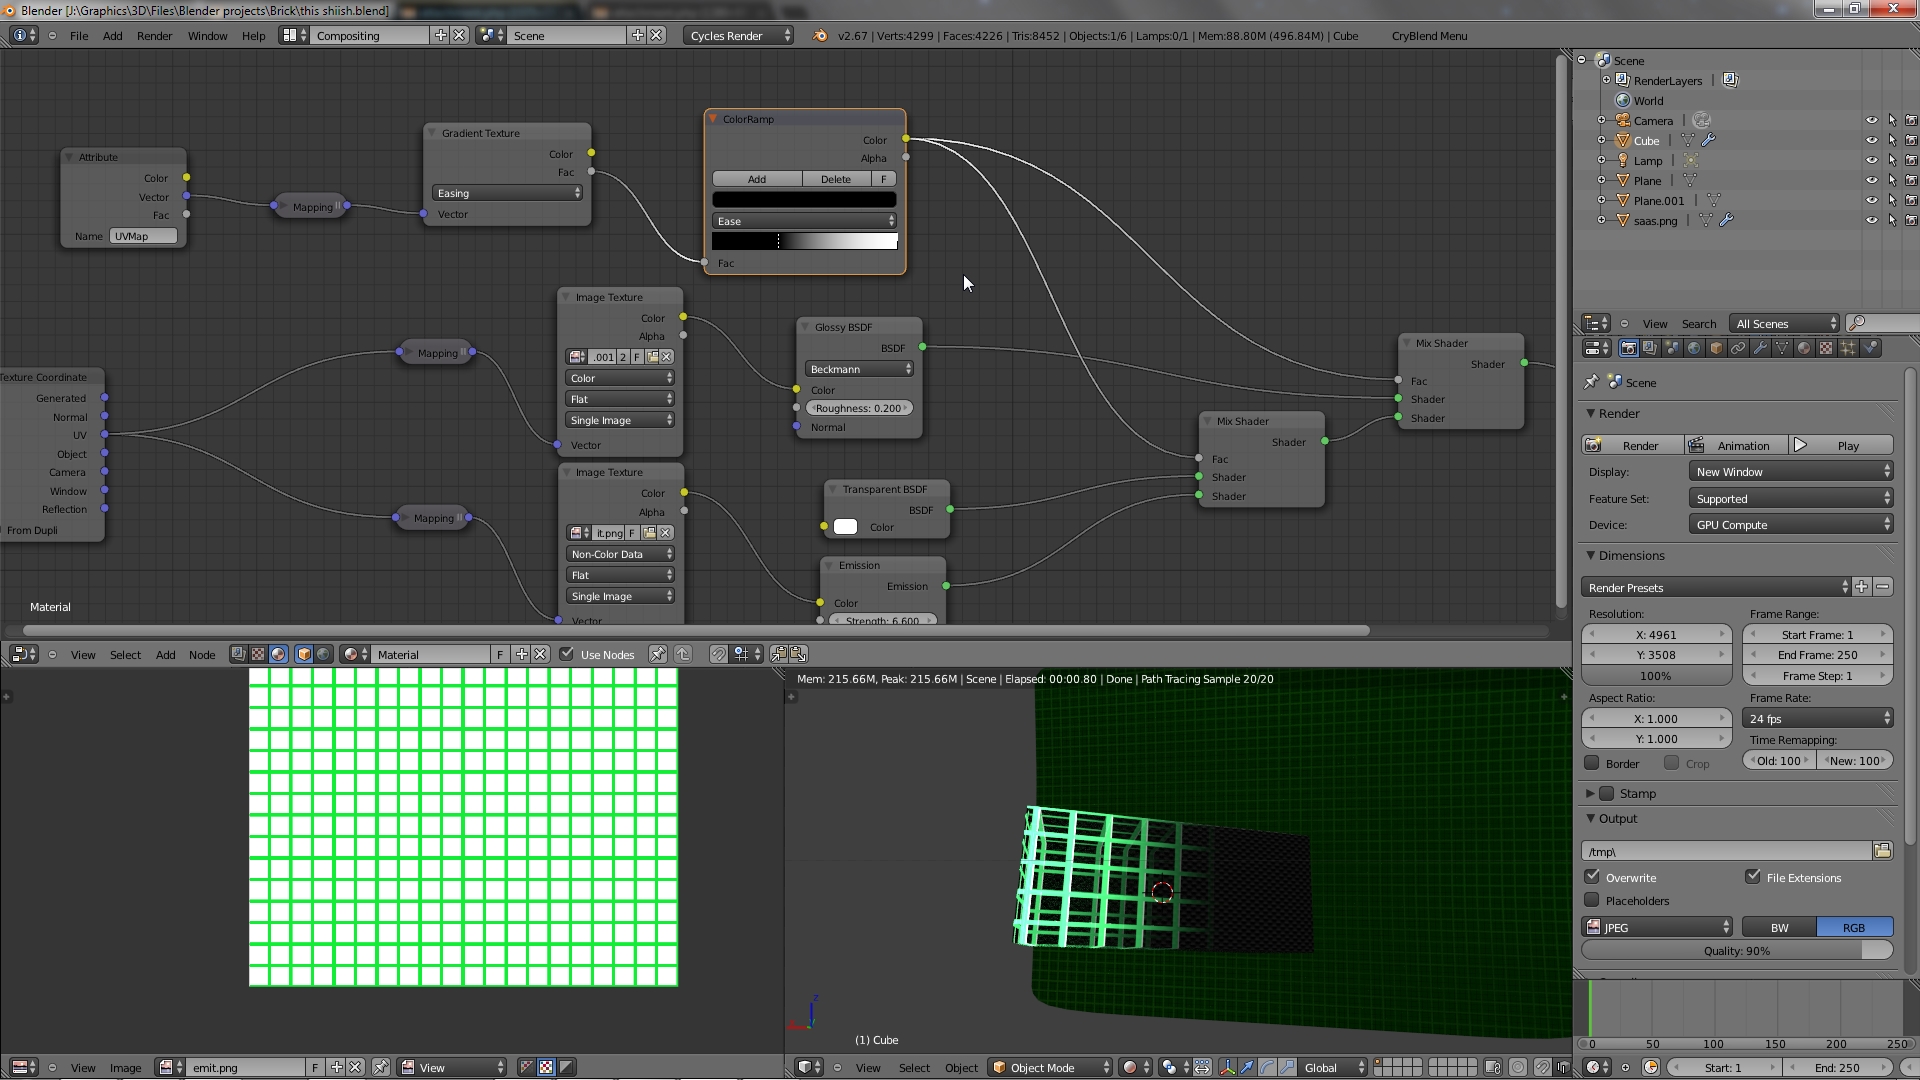
Basically the gray bit should smoothly flow into the green glowing stripes to simulate sort of sci-fi auto-construction effect. Any ways I can do that in cycles? I made an alpha for both images that is the same and inverted for the second gray image and I tried to overlap them that way, but it didn’t work, as the gray texture still covers the whole brick and the green lines, that are supposed to be the only ones rendering atop (the rest of the surface must be transparent o the top), simply cover the gray bit.
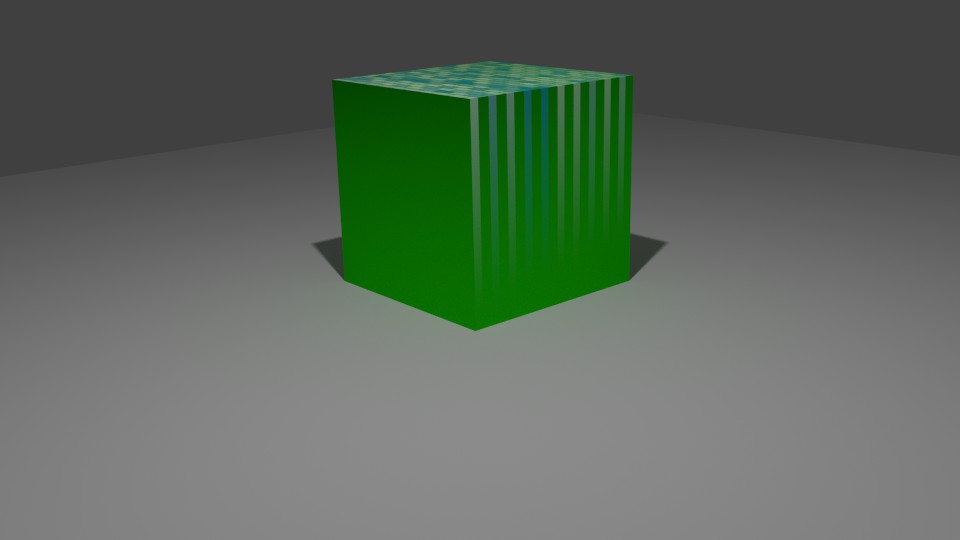
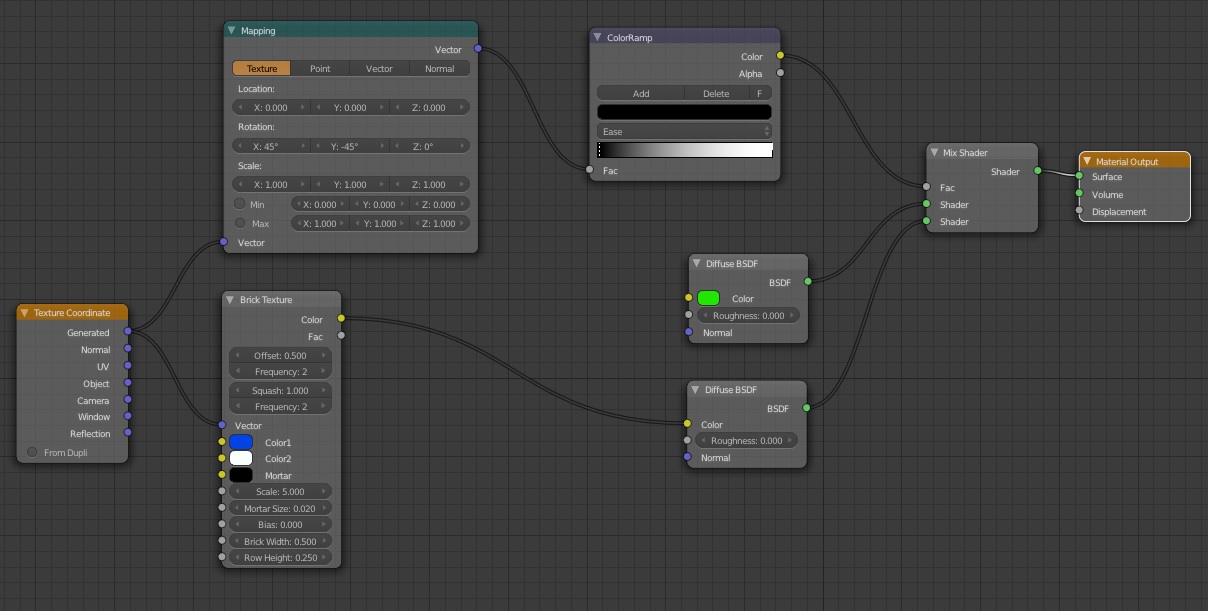
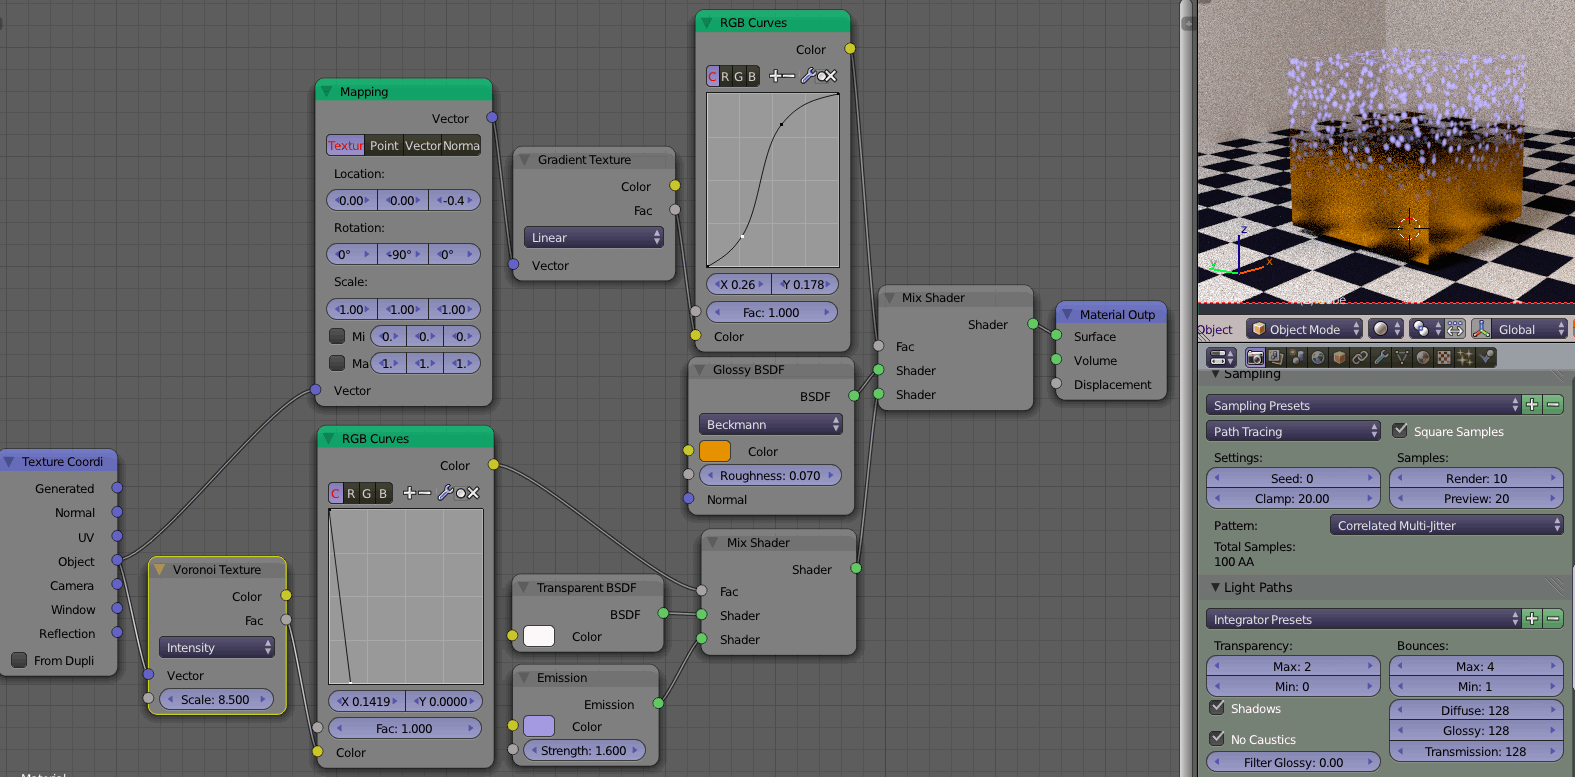
Here is a picture of how I did it with some crap I threw together really quick. I didn’t map it correctly but you can fix that by playing with the mapping node settings. This isn’t an instant fix, but it does give you the idea of how its done. If you want a smoother you mess with the mapping node and if you want it less smooth you play with the color ramp by moving the black closer to the white side. I wish I could give you a clearer answer, but cycles isn’t second nature to me yet. I always get the desired result. I just have to play with it for a while.
No, that’s not what i meant unfortunately. The idea is that the top stripes make the model transparent. They do not overlay the green texture, the green texture would transform into them. The model will gradually become transparent and emit light from the stripes of the top texture.
If you look at the example picture I posted, the top texture overlays gradually, just like in your example, but the bottom texture still covers the whole mesh.
So this is diagram of one side, it’s terrible, but you get the idea: the bottom texture flows gradually into the top one. Once the top texture kicks in, the mesh becomes transparent aside from the stripes.
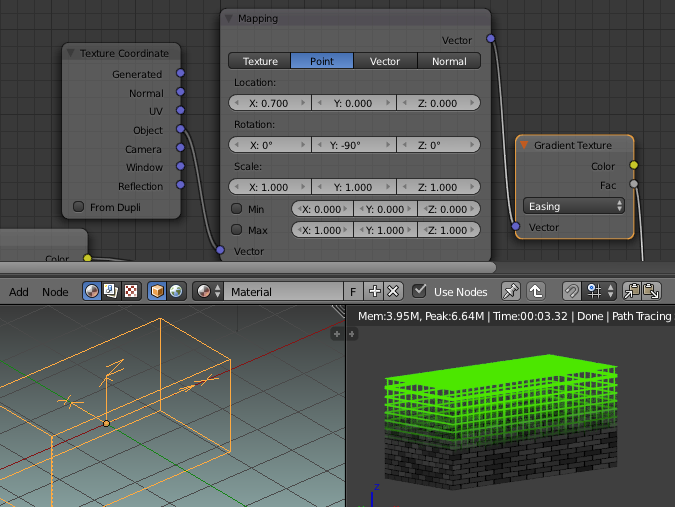
Internal already has the option to drive a texture with mapping to on Object like an Empty - I used to use a blend texture and affect the alpha of the material, so you could probably use it to drive two materials.
Yey! Thanks a bunch for all the ideas! These all pretty much do what I need, let’s see if I can do this myself. I did try to mix shaders with gradient, this was my initial plan but I was likely doing it wrong.
Thanks for the suggestions guys, however I seem to run into another issue. Whatever I try, the transition occurs on a vertical plane, whereas I need it to occur horizontally. UV mapping doesn’t seem to have any effect and whatever I do, nothing works. Why does this happen?
If you’re using UV project modifier and have UV mapped textures, you need two UV maps. You can add more in object data properties (pressing the + sign duplicates the selected UV map).
Texture coordinate node always pics the first UV map so if you need to change that, use the attribute node.
If you’re using a plane to animate the mapping and it doesn’t line up, you can rotate the plane in edit mode so that it lines up with the mapping. That, or rotate in object mode and apply rotation afterwards (ctrl+A -> rotation).
I have tried rotating the plane, to no avail. Does the plane need to have a UV map too? In either case, I will try to make a second UV map and see what that results in (I never used UV project before), but it confuses me as to why the same issue is present with the method from DruBan. And more importantly: why does rotating the UVs on the image doesn’t change anything? I suspect it has something to do with how the gradient works…
Hehe I have been using Blender for almost 2 years now so I am not a complete beginner. No that doesn’t work. In fact even switching TC node to Generated leaves the same effect.
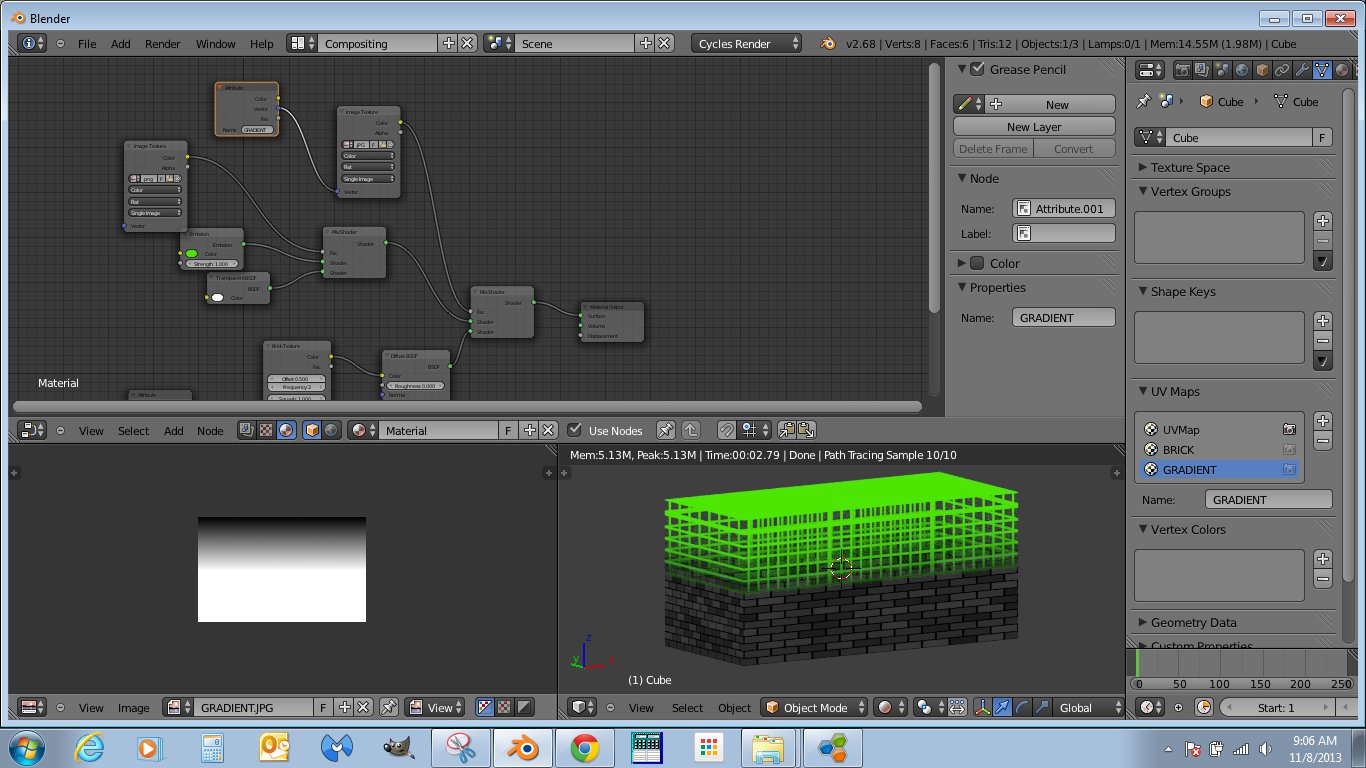
Alright guys I did it by replacing the blender gradient texture with a custom made gradient picture like suggested by Rich. As I suspected it was Blender, which generated the gradient horizontally and for some reason (maybe a bug?) nothing helped change it’s rotation including mapping rotation. All it took was making a custom gradient texture and hooking it into the shader setup. Thanks for all the suggestions guys, gradient maybe one issue but the transparency mix thing I wouldn’t have figured out without you.
I should have gone with that from the beginning as it makes sense, if you think about how the box in unwrapped, the gradient must have 3 levels, not 2 like the automatic one does it.
See the Object axis as a cheat around which axis you want to rotate texture(Obj tab, Display - Axis). It starts in lower left corner (just don’t ask which it will be on that cube ;)), that’s why you need to shift it using Location.