Can I get a quick critique on this please? I’m a total noob when it comes to 3d and I just really want at least one finished product that I can be proud of… I was hoping this sculpt would be the piece I could be like “hey, I can do 3d!” But after a month and a half sunk into this project with no end on sight I’m getting frustrated. How am I supposed to work in the industry and churn out a character a week when I couldn’t even finish this piece in a month (a deadline I gave myself)? Sorry for ranting… I’m just really frustrated that I’m really slow…
So should I keep plugging on? Keep working on it? Any time saving techniques people can give me so I don’t cry myself to sleep tonight? Thanks guys…
Haha you’re funny.
First of all, this is good work so far. You can certainly “do 3D”, at least sculpting and modeling.
As for speed, you cannot expect to have the speed of an industry professional at your first try, right? Also do you work on this full time or here and there, when you have time? There is a big difference.
Speed comes with experience and clear workflow. You have to be aware of all the steps needed to get to the final model. Speaking of which, what is your goal? Is this just a sculpt? Will it be rendered with realistic shaders etc? Is it going to be baked to a low-poly?
Once you know what the end goal is, try to break the process down in the obvious stages. Or you can find a tutorial/workflow video of someone doing something similar and emulate their workflow.
Also don’t put all your faith in this one model. Just finish it, it doesn’t need to be perfect. In the next model you’ll be more aware of the necessary steps so the process will be smoother.
There, my thoughts on mindset adjustment haha, hope it helps.
I agree with what has already been said. This model is already good (I see no problems with it), so you should do any finishing steps you want, and then move on to another model/project. Only by doing this will you get faster at 3D.
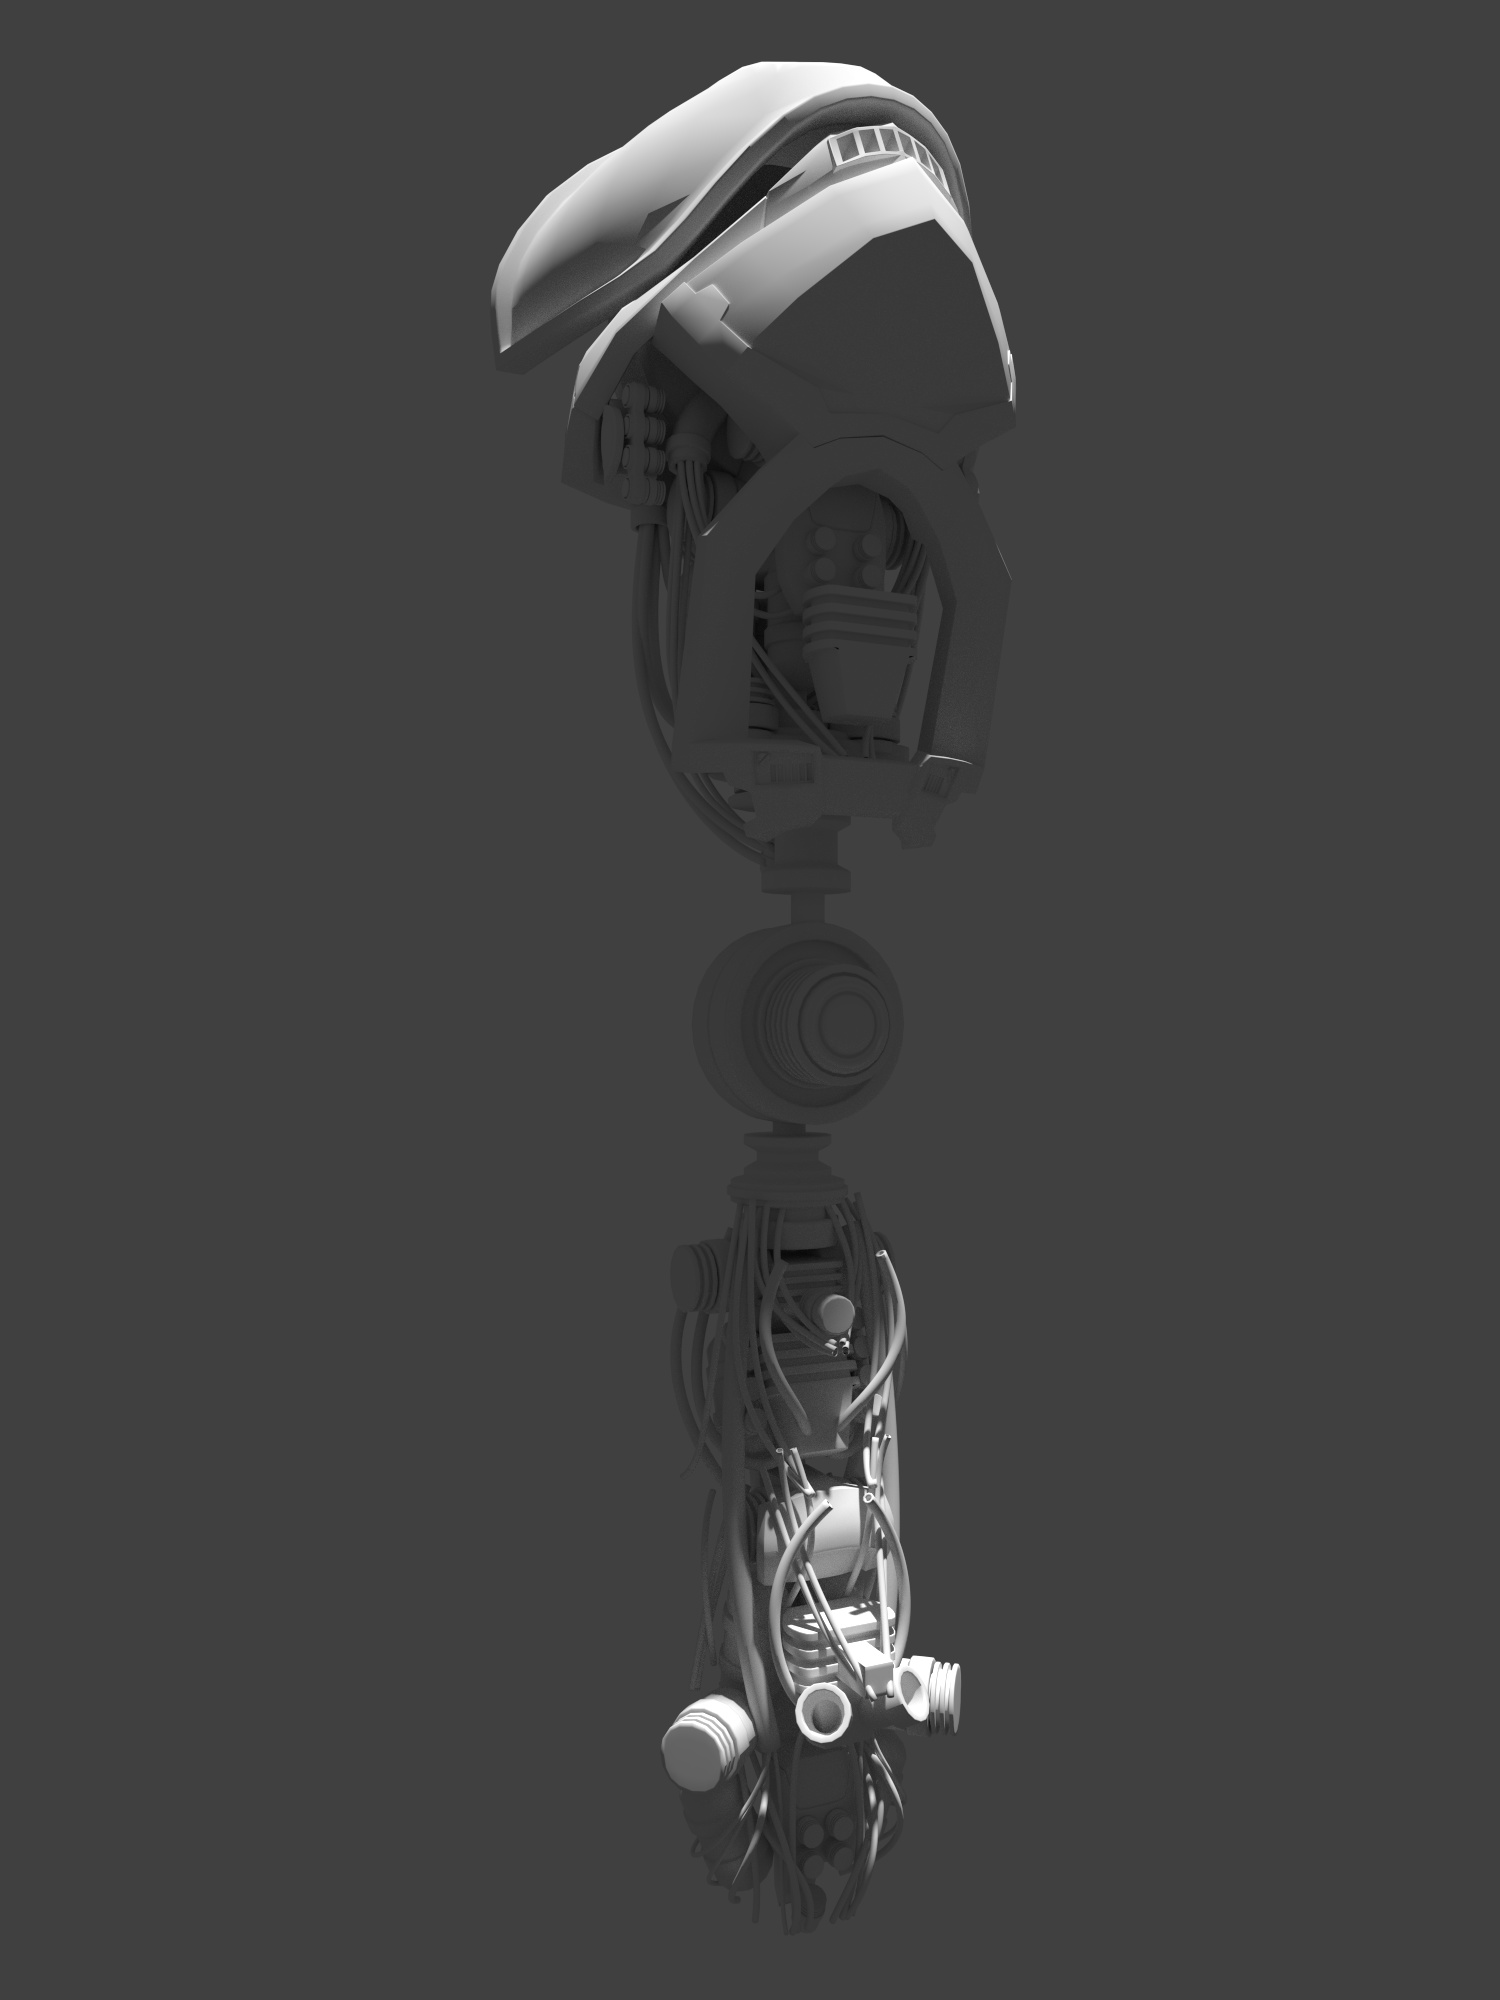
Thanks for the encouragement guys. I think ToshiCG said it best when he said I’ll have clear steps in my workflow after gaining a little experience. This piece first started out as just a “sculpt…” then when I started thinking about presenting it much better than a screenshot of the final sculpt, all hell broke loose… then it’s been a mad dash to retopo retopo retopo land. Not to mention the robotic arm… I got carried away with too small details on the arm until I realized the final product looked like Megatron shitted it. Take a look;
So then it was back to redesign sculpt then back to everyone’s favorite; retopo retopo retopo land (that magical place loved me so much, they gave me an address in it). At least the “form” on the new arm looked better than Megatron’s turd.
Anways… I’m going back to 2d for now to take a mental break from “mad” girl. Besides… everytime I work on her she looks at me condescendingly, like she’s disappointed that I didn’t finished her yesteryear. Bleh…
Ok guys you caught me in a lie… I’ve been technically doing 3d as a hobby since 1999, so yeah, not exactly a noob… but still a noob nonetheless if I can’t pull off a simple sculpture in a month after sixteen years as a hobbyist… bleh. I was thinking of doing a career switch but without speed I might not be able to compete with you youngens :(. In other news… megatron is having a hard time taking a sh*t…
I recognize this frustration 100%. You could wipe the floor with my skills but I’m so ready to put something out there to show that I’ve been involved in 3D since about 2000. Even Art Institute of Fort Lauderdale briefly but nothing to show for it. The quality/quantity balance is what I’m attacking now.
What’s your goal? Telling a story with an animation or an image? You should absolutely continue unphased by the time it takes. No one’s portfolio piece comes quickly and there’s no competition. Whatever you’re passionate about will capture an audience but striking that balance and getting it done will get you across the finish line. You’re going to learn a ton! Settle in, relax and get Megatron some castro oil.
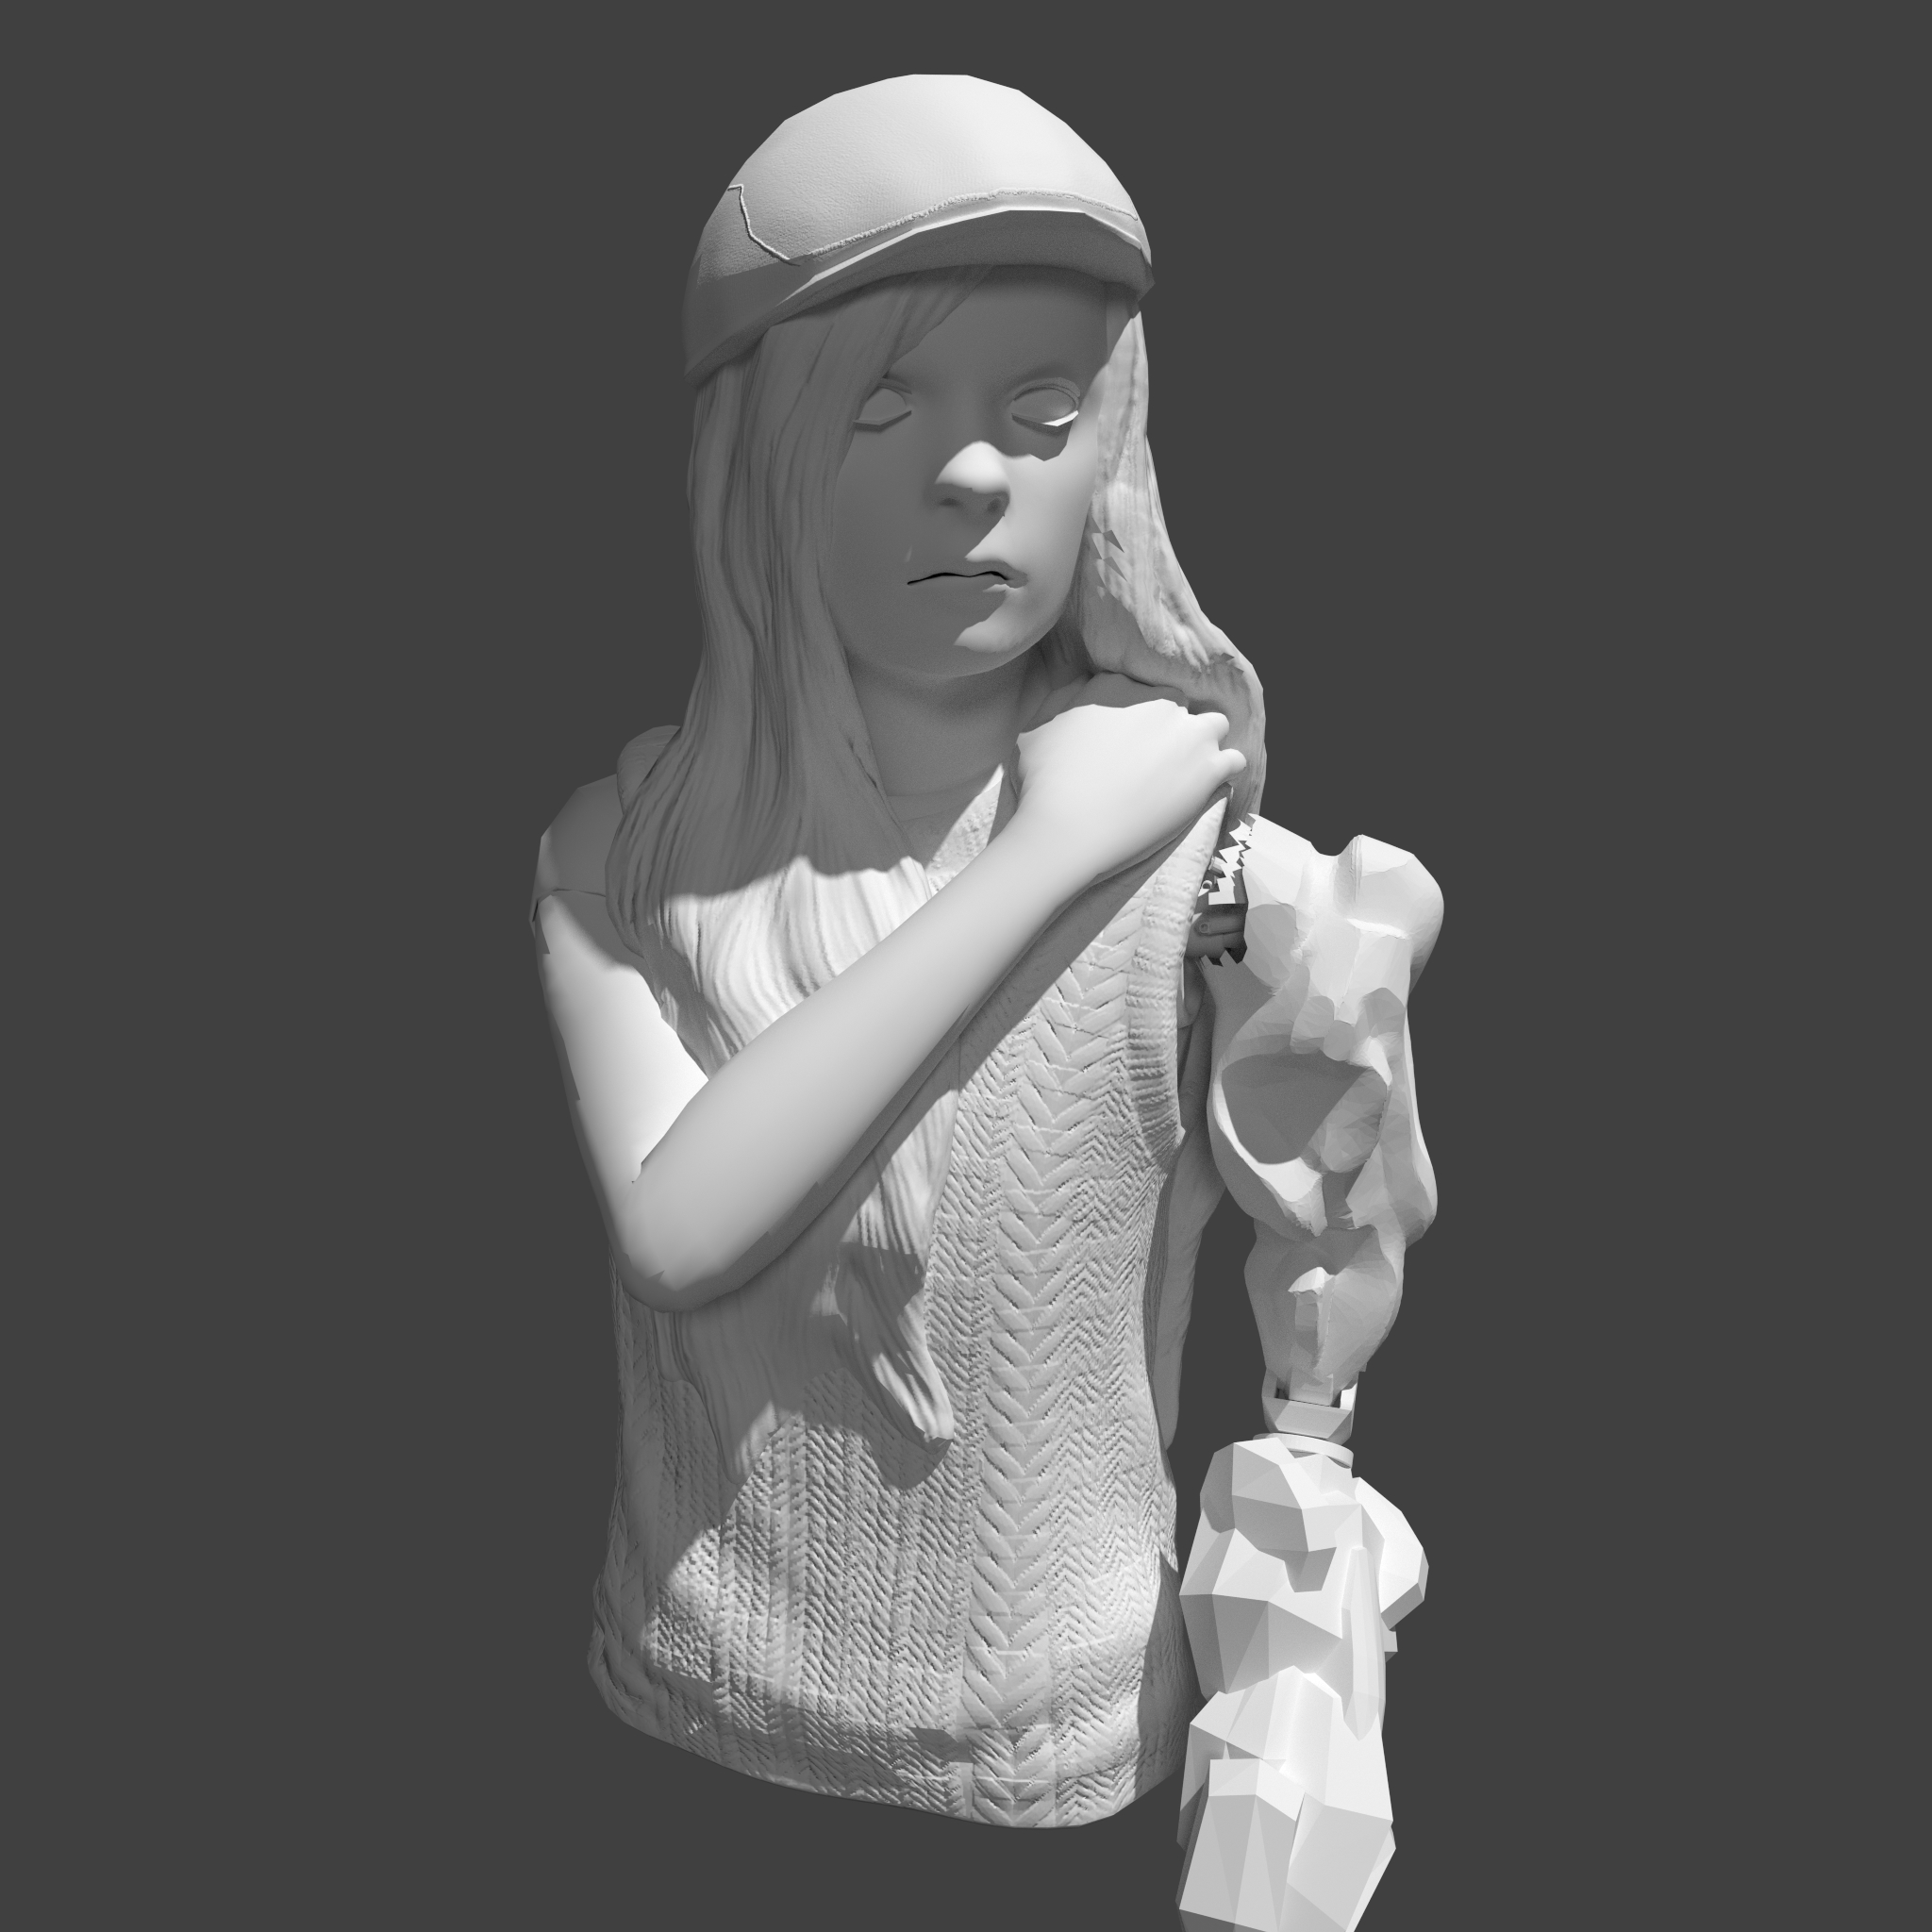
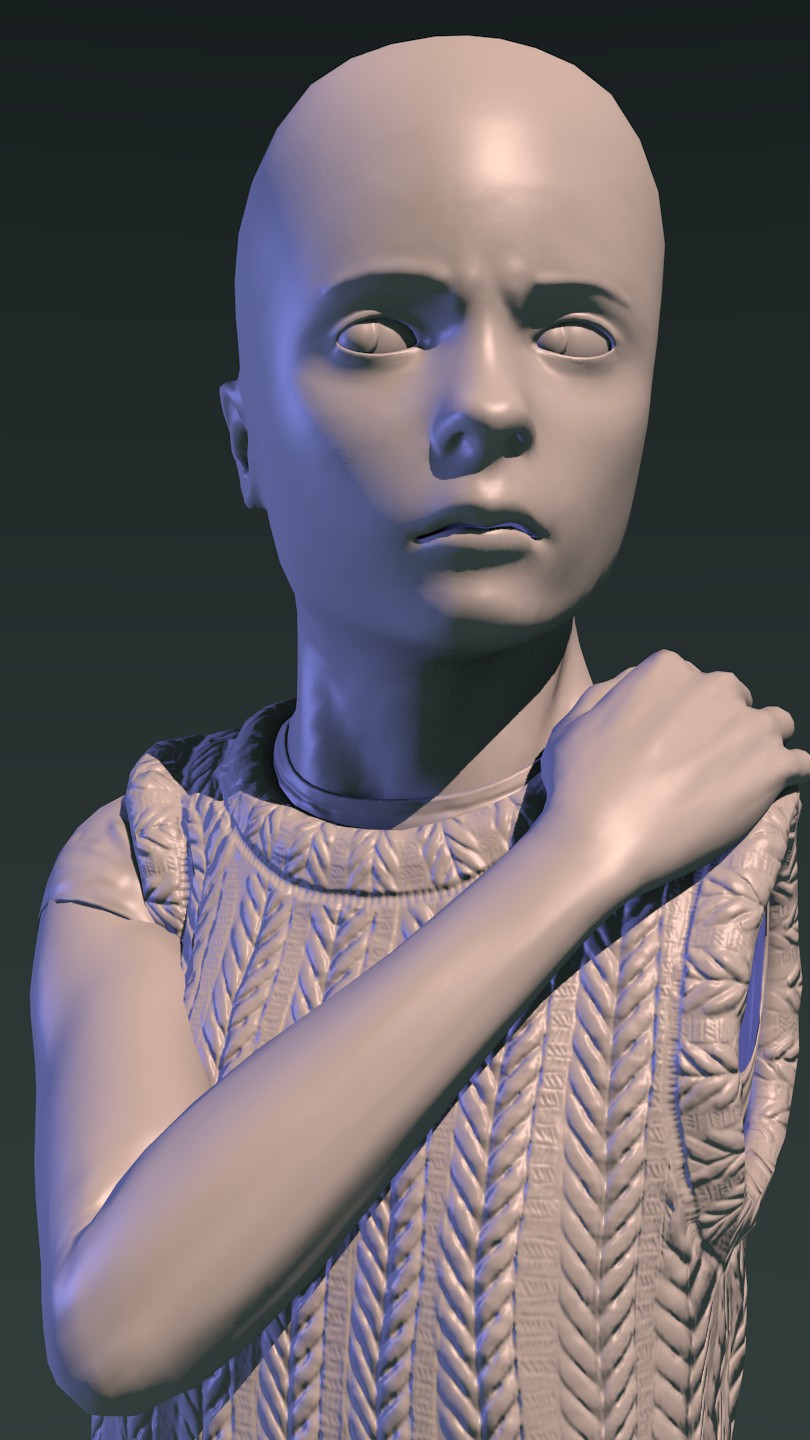
I worked on this piece for the first time since last Feb. I obviously haven’t done much since I spent some time cleaning up my models. My main question for now though is lighting. In the photo above I used blender internal, in the old photo I used cycles:
I’m beginning to like blender internal more now because it goes much faster in my millions year old computer and it produces better shadow than cycles (technically cycles can make great shadows, but then I would have to take out the whip and make my slow millions year old computer work even harder… poor fella). The problem though is that the normal map details seem to disappear in the shadows with the blender internal render. What am I doing wrong?
I think normal maps works because it is telling the light how to act, so if there is not light there is no effect.
Anyhow, I think that now that cycles has true displacement, you have to forget normal map and go with displacement, unless of course you are going to take the model somewhere else, but in that case why is she not in semyTpose to make the rig later?
By the way, I think you are pretty good!!! and there is nothing wrong with start doing things slowly! it is how the brain works! don’t fight your brain, let him work!
I feel retarded for even asking that last question. That should have been obvious, duh!
As for displacement, I’m practicing poly conservatism (those words just sound so funny in my ears). My last project ran 1.3 million polys :eek:. My millions year old computer couldn’t even render that last project without trying to check into the emergency room, hence normal maps. Why is she not in a TPose? Cause I’m deathly afraid of bones… lol. In all seriousness though I have initially planned the project to be just a “sculpt.” When I changed my mind about it just being a “sculpt,” then that’s when all hell broke loose :spin:… hence now I’m all about poly conservatism…
As for being good… haha, yeah no. I had to use makehuman to even get the character above. With my next character I’m planning on starting from scratch, but I have to get this whole normal map/texture map/any maps down. The last time I worked with textures was like a decade ago, and I wasn’t very good with it then. I’ve always been more of a modeler/sculptor. I’m hoping this project can reeducate me about how to use textures wisely.
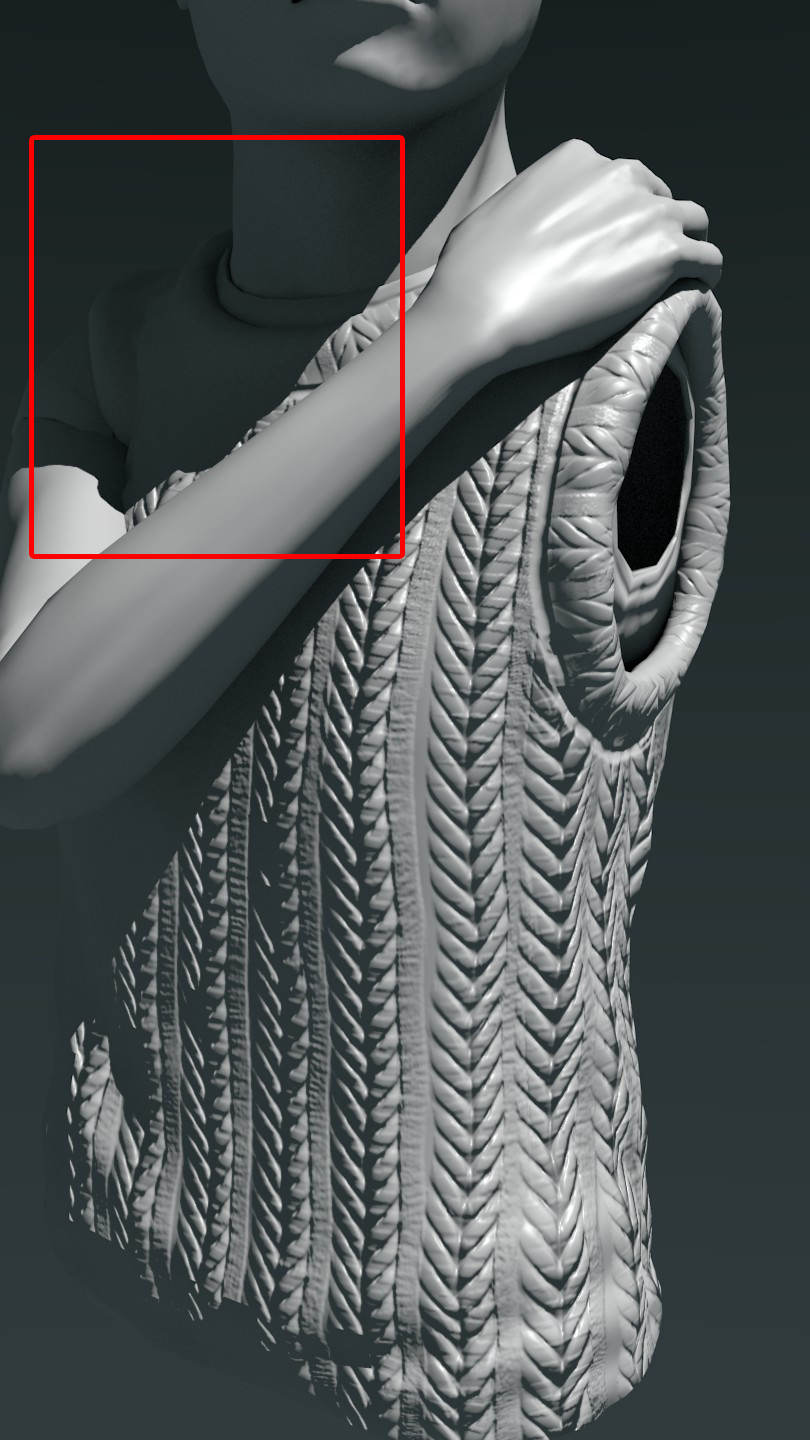
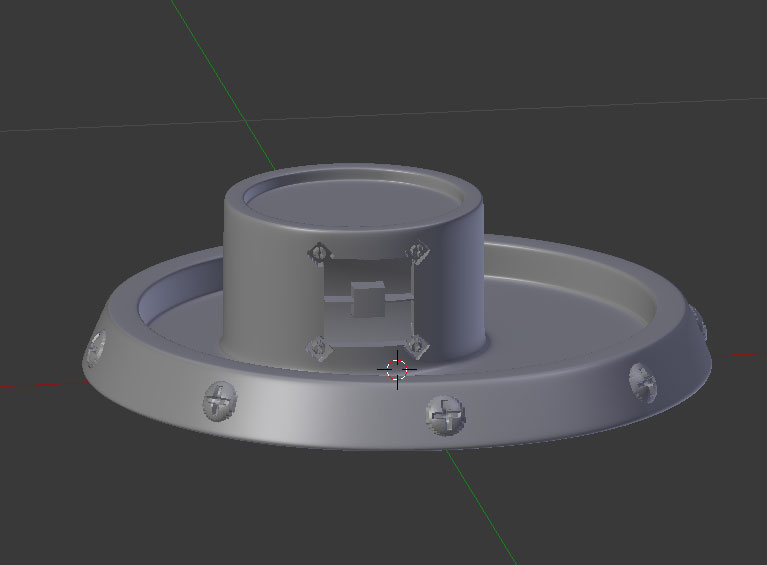
So I’m pretty much done with the girl and I’m now about to start modeling the prosthetic robotic arm… go figure, I’m running into normal map issues again:
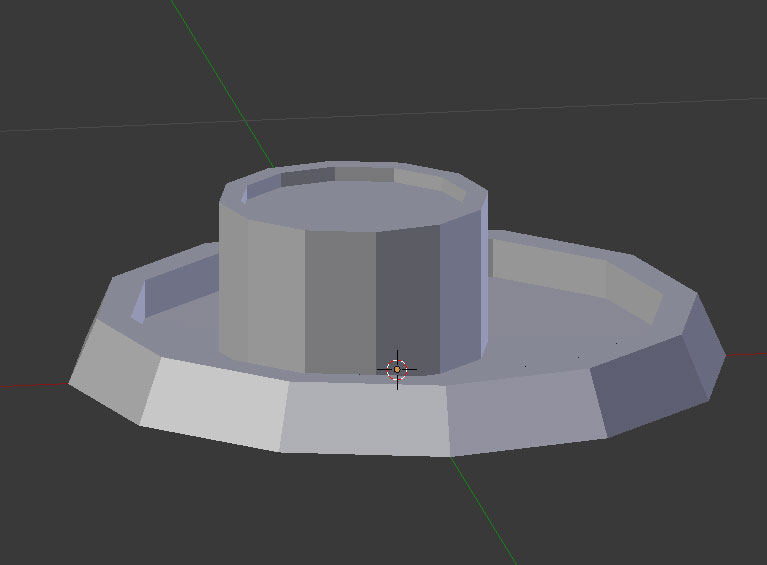
I was trying to bake the high resolution details of this piece:
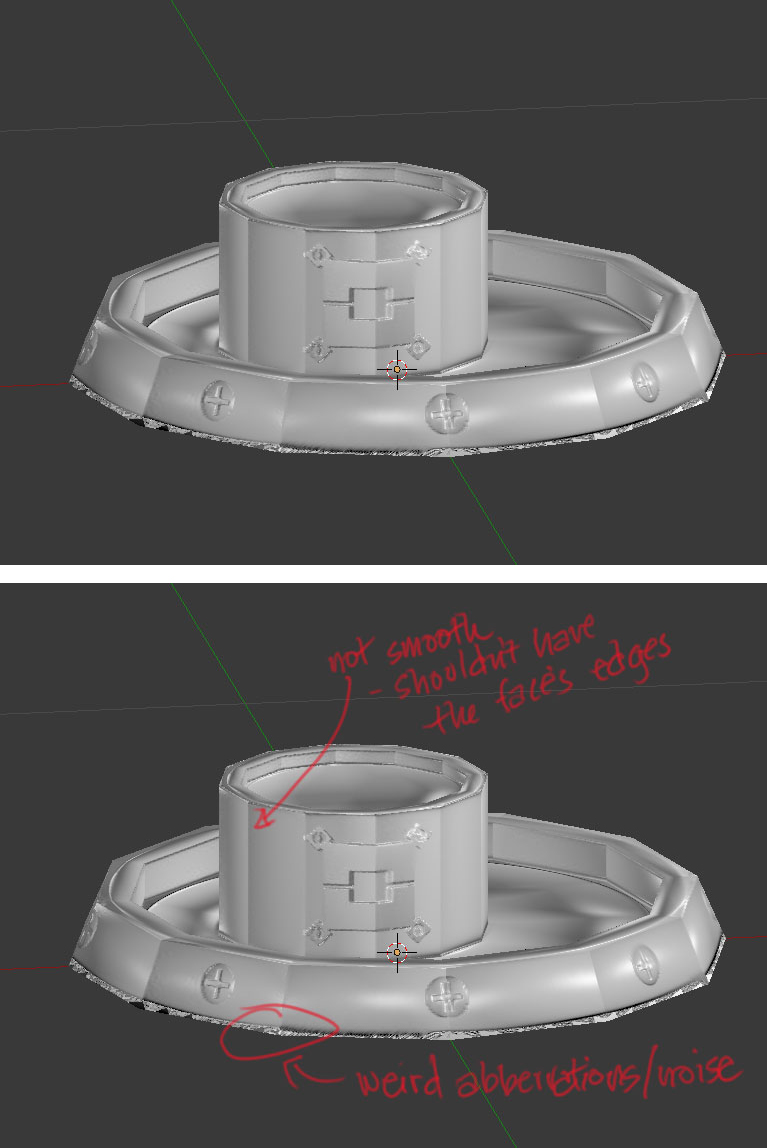
What am I doing wrong? It seems to me that the only way I could ever fix normal map issues is to increase the poly count of the low poly, which I’m trying to avoid because I’m really trying to practice the art of low poly modeling. Any help would be greatly appreciated, thanks.
PS
please don’t tell me to use xnormal. I really want to use xnormal but I only have a 32 bit system… so yeah…
Dude, I so had that problem all weekend! Thought it was a UV/normal map/unwrapping issue too. Turned out it wasn’t. Go into edit mode, select all then choose “Shade Smooth” from the mesh menu, under “faces”. Dunno if this will help with the ugly base thing but it’ll get rid of your pronounced edges.