Concept/Prototype Render for Minecraft

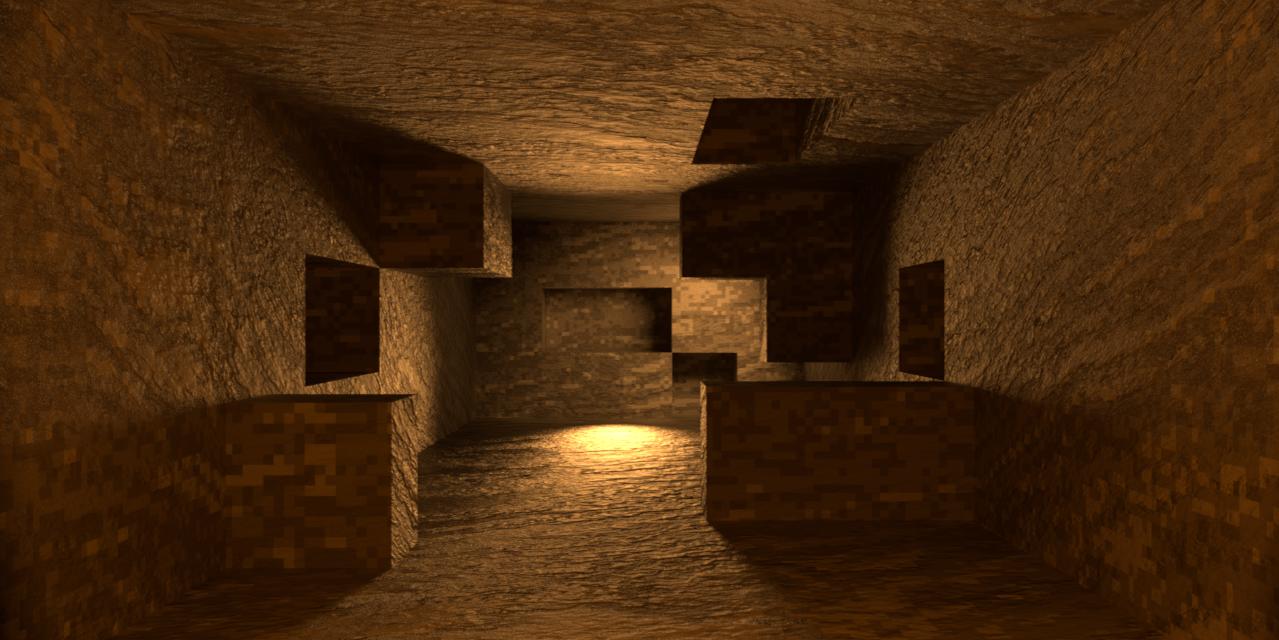
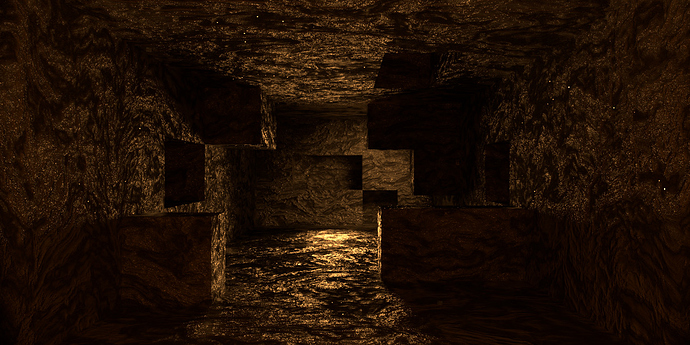
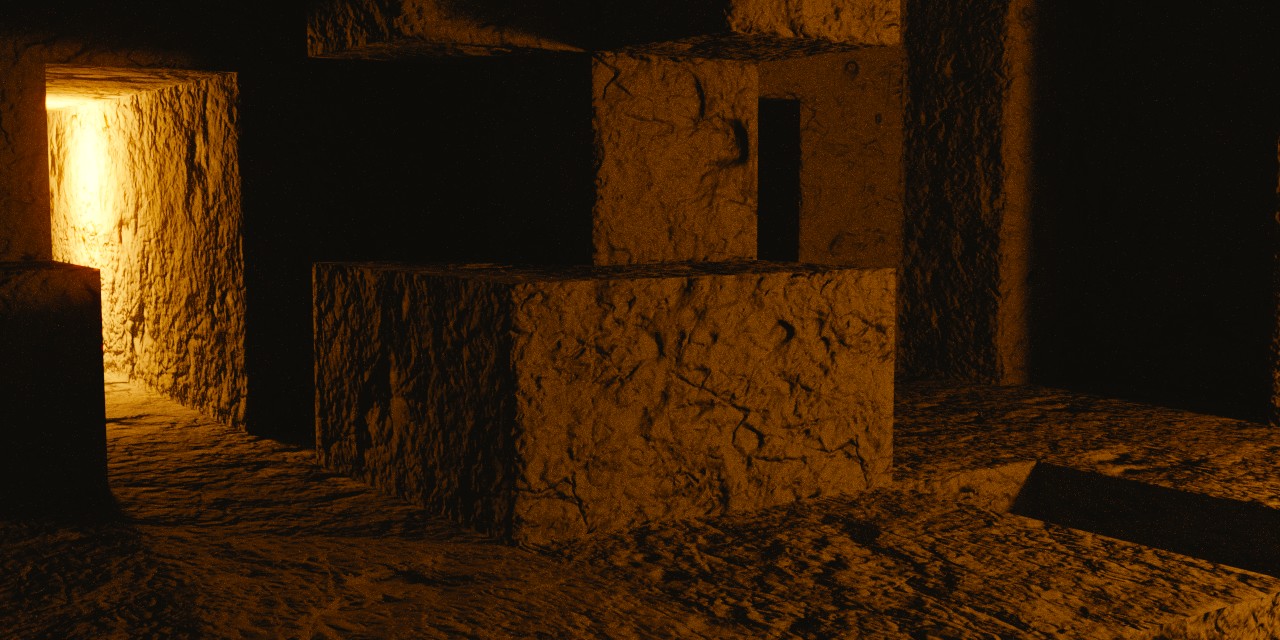
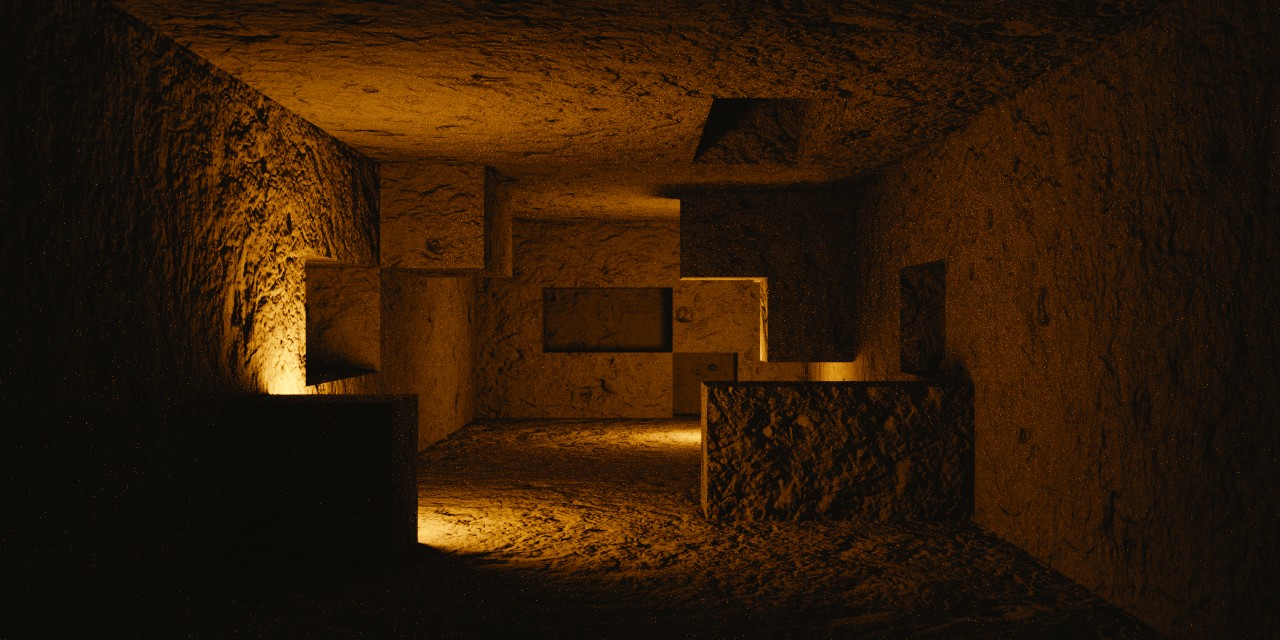
I am experimenting with looks and such to use in Minecraft animations. This is a concept set. The bright light is where a torch would be. It is my practical light source.

This was to test several things.

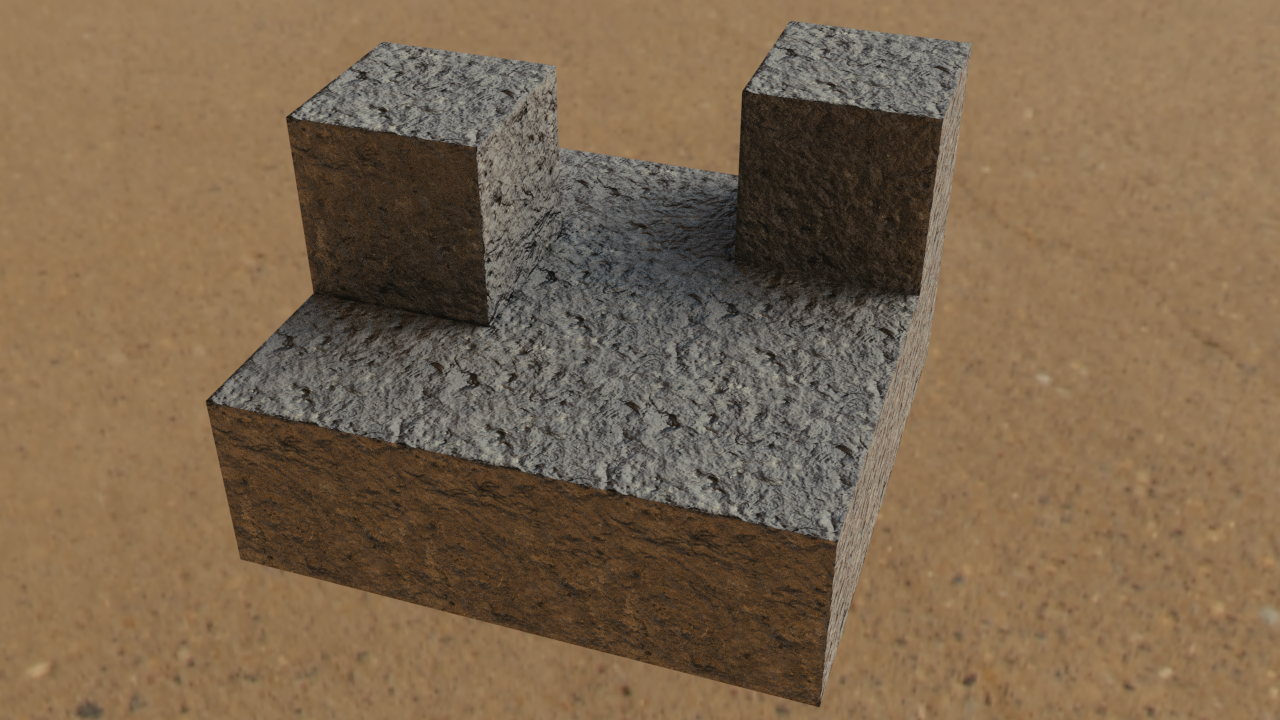
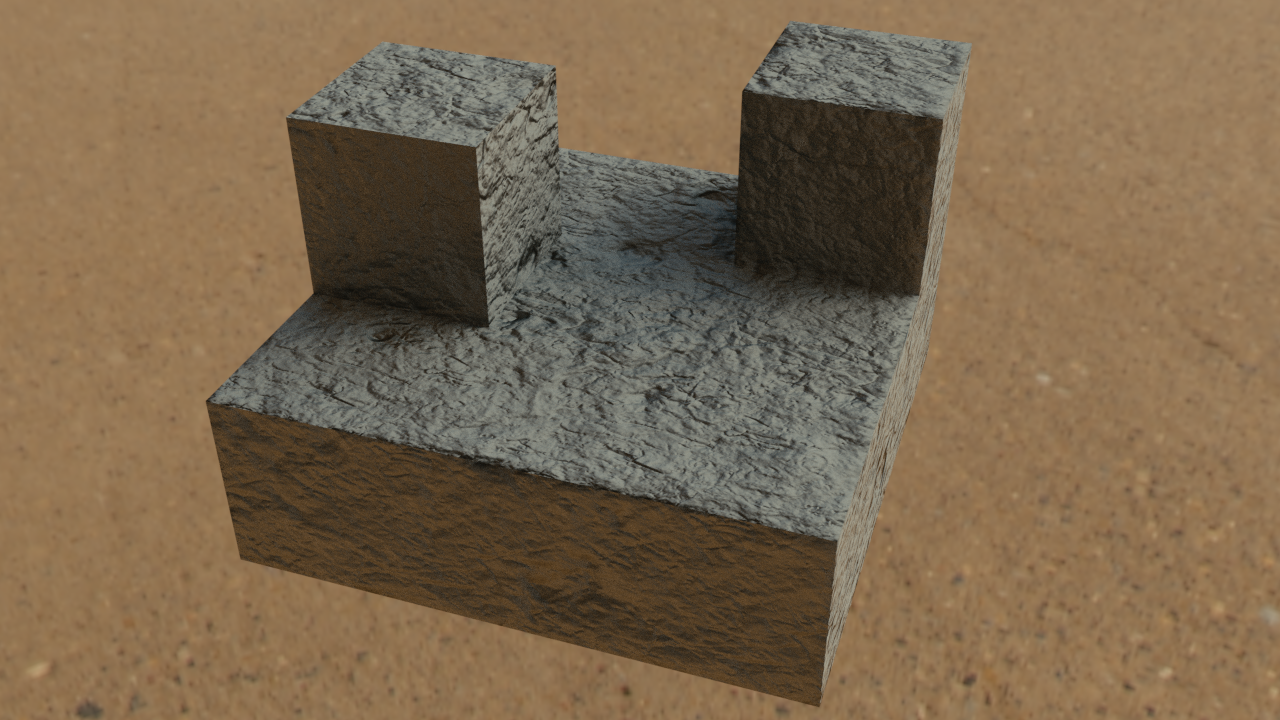
  • The rock texture is baked from a 3D procedural texture based upon world coordinates. It is cool because you can move a block while the texture stays fixed in place. This makes creating textured geometry with varying textures easily.
  • The pixelated diffuse comes from a node processing the high-res texture. (I baked this as well). It is based upon the texture coordinates, so it isn’t any different from using an external program or a low-res texture. I’m trying to apply this principle to world coordinates, but I don’t think that it is possible.
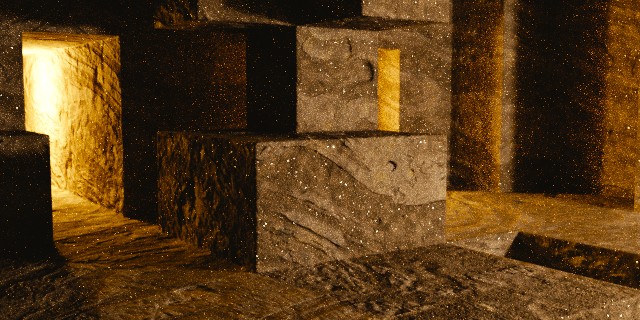
  • I wanted to see what render times I could expect for something like this. The stone uses physically based shading. This has a glossy component, so I wanted to see if I could manage the noise. I tested some lighting techniques. They worked well. I don’t think that I will need to bake lighting either. That will save tons of RAM since the diffuse texture wouldn’t need to be so large. It also means that I can still use glossy shaders.
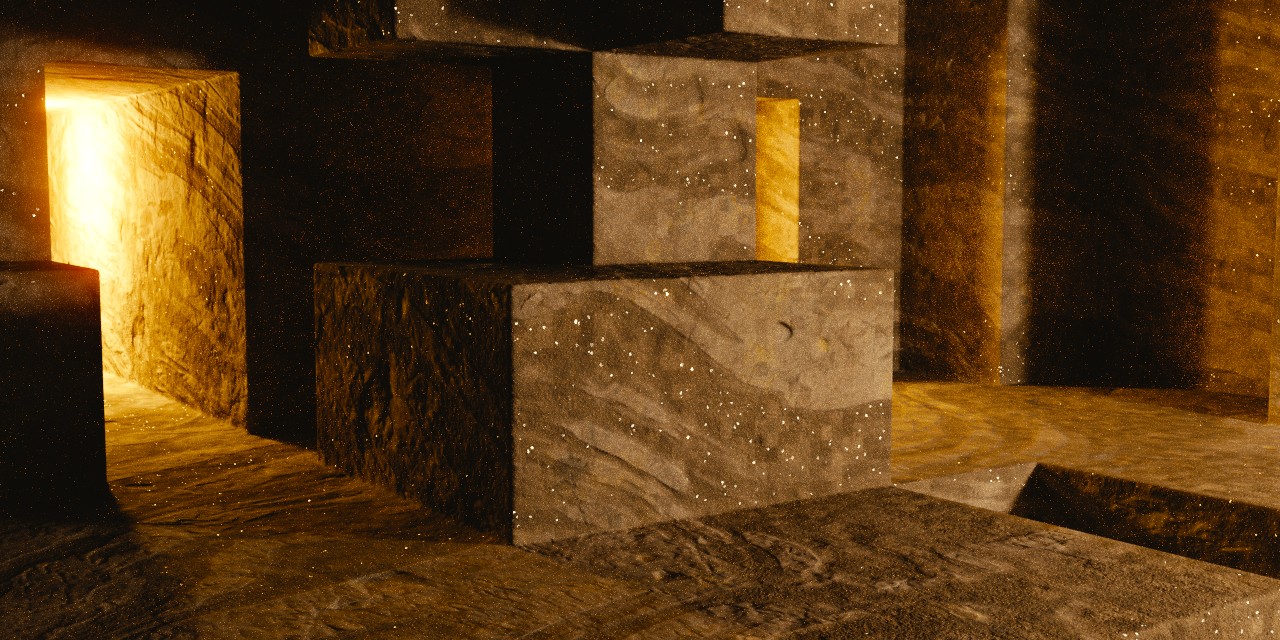
  • I also wanted to test RAM usage. To make the bump map look good, I needed 512px per meter (block) of the set. This small render needed a 10,752x10,752px bump map to look decent. I used the same for the diffuse, but I will use less next time since I don’t need to bake anything onto it. This took just over 1GB to render. My PC died, so I need to build a computer for Blender. This makes me think that a 6GB GPU is a must for me since I love detailed bump maps. Even for larger sets, I should be able to use tricks to make 6GB work. And, I will need much more system RAM than I originally thought. These textures took 9GB to bake (diffuse color baking was necessary for render times). For larger sets I will break up the objects/textures, but this was a very small set. I wouldn’t want to take the time to break this up.

Attachments


The roughness in the stone is something I pretty much never see in Minecraft animations or the game itself. At first, it looked a bit off, but upon closer inspection, I’m beginning to like it. Great job!

Thank you. I’m still trying to play with different styles. I am thinking of taking the same route as the movie industry and use very realistic materials, although I need to take some shortcuts to avoid insane render times. I have been improving my physically based rendering workflow for using physically realistic properties and improving my shaders. So, I need to redo the lighting. But, this next render is a good show of progress.

Attachments


It seems like BA reduced the attachment size limit. Image uploaded now.

I have been playing with my newly finished PBR shaders. This is the result. I’m using high res seamless textures. I use albedo and bump. The micro-displacement are fun to play with. But, they use a lot of RAM and don’t work very well on cubes. I haven’t been able to test this in the cave yet. I have smooth shading on, which is causing the odd darkening on some of the edges.


The cube on the left is sitting on the surface (separate object) while the cube on the right is fused to the surface (same geometry). I used bevels with a profile of 1.0 to limit the visual effect of the smooth shading.

This is a more reasonable bump height, and I removed the smooth shading from the blocks. I think this shading looks better, and it allows me to build the entire set using instanced objects with the same data. This will take less memory and be faster to make. That doesn’t matter much for a scene like this, but it will matter if I want 1000 blocks.


I can make a large plane with a tiled texture for a flat wall, but even that would start taking a lot of time if I want to layer blocks or do something as simple as remove a few blocks from the wall. Positioning instanced blocks is much faster. This prevents me from doing adaptive subdivisions for real displacement and such, but these six-polygon cubes are good enough.

These are all points for RAM usage, but render times are most important. My PC broke, and I plan to build a new PC with a GTX 1070, so RAM isn’t a huge concern. To reduce render time, I need to minimize the amount of calculations in the nodes. I have been doing well with that, but I have cut some corners for decent Fresnel and for energy conservation when reflective caustics are turned off (which makes a significant difference in interiors where materials have IOR>1). I bake all textures, and I will do final renders on Linux. I also have my render settings set carefully, especially the ray bounces. The only thing beyond this is to be extremely careful with the lighting so that there is minimal noise. For instance, I will not use mesh lights.


I modified the lighting so that it looks more like actual torches. I used a physically plausible intensity for the torches’ light (10 watts). So, this will compare to daylight realistically. I adjust the exposure to get the brightness that I want, just like a real camera.

But, this test was primarily to see how these blocks would look in a cave. I hate the way it looks. The repeated texture is too obvious and unpleasant. The large-scale variations in my previous renders of the cave are great. It also allows me to vary the texture of the stone a lot. With a small tiled texture, you can’t have large-scale variation since it will make the tiles look even more repetitive. So, I will sacrifice the RAM to make the stone textures continuous. My next step is to look at that stone in the daylight render to get a better idea of how it reacts to light, but I need to retrieve the files from another computer.

Meanwhile, I don’t like how the light behaves at the edges with the “flat” shading. It is so sharp, too sharp. But, the geometry presents extreme challenges for shading and beveling. My previous renders have the same issue, but you can’t see due to the lighting.


This is my latest test render of Minecraft animation assets. This tests two things:
(1) Better set creation
(2) More efficient texturing

1 - The blocks really need smooth shading to look good, but the blocks need holding edges to limit the shading. I experimented with different methods that involved building the set with duplicated blocks and joining the geometry, but cleaning up the excess geometry took way to much time. Just building the set with polygons worked well, but adding the holding edges afterwards was too time-consuming. I tried using the bevel tool, but it messed up the geometry, even with a profile of 1.0. Then, I remembered that I could use the “snap selected to grid” to fix the bevel tool’s artifacts. That works very well.

2 - The texture sizes were out of control, but I didn’t want a tiling texture. So, I looked at how this problem has been solved before. That lead me to “texture splatting.” That inspired me to make a procedural texture setup. I have two different textures that are applied, but the images are different sizes. One covers 1.5 blocks for high frequency details while another covers 4 blocks for low frequency details. The reference coordinates for the textures are based upon the world, so it will tile correctly no matter where the blocks are.

This test only uses displacement and roughness maps, no albedo. I will get the albedo maps ready later. These textures are very low-res, but I will purchase high-res displacement maps for the future. I want to finalize everything first.

I still want greater texture variations, which is where the texture splatting really comes in. I’m working on how I will implement a system where I can marble two materials together using a low-res map. But, first I need to create the secondary material. Because Minecraft has different ores, I am thinking of how many materials could be implemented as well rather than just rock marbling. But, these secondary materials would need to be positioned more intentionally while still looking like part of the stone.

Just for reference, the memory usage for these renders is less than 6MB. The geometry has almost negligible RAM requirements, and I only used two 512x512 textures. But, I will be using texture resolutions such that all displacements will be at least 1024x1024 (1k) per block. I haven’t decided on the albedo and stencils yet. I think that I want 16x16 blocks of color for the albedo, but I may have the 16x16/block albedo layered onto a high-res albedo map. For high-res albedo, 512x512/block is good. I’m thinking of having the stencils only 16x16 per block as a stylistic choice, but that has some logistic challenges since perfectly aligning the UVs with the texture’s pixels is impossible.

CONCLUSION
I really like the direction that it is going. Also, I think the hallway needs better lighting. Lighting is tricky in general, but I can tell that lighting these cave shots will be tricky. The amount of noise in the renders is an issues as well, but I expected that. Right now I am using actual torches, but I will need to look at faking GI with various fill lights in the future.

Perhaps you could just use the default Minecraft textures here and use a blurred version of the texture as a bump map. Nevertheless, I think some renders still have too much bump, something that should probably be toned down a little, unless you are pitching for that look. Are you using the latest experimental displacement/subdivision features? I think your work is turning out really well overall :slight_smile:

I’ve actually tried using low-res bump maps like that previously. It looks painfully bad. My first few dozen test renders were SOOO bad. lol
I agree; I even think that all the bumps are too strong. I have just finished a new prototype, and I did a lot of work on the bump maps. But, it is still too strong in places. Higher res bump maps will help, but they won’t fix the problem.

I tried playing with the adaptive subdivision and microdisplacements, but they didn’t work well on cubes. The smooth shading on the edges is fixed by using a rounded bevel with more segments. I broke out of my super-low poly mindset because the edges were so ugly. With the more rounded edges, I will try the displacements again. If I use subtle displacements with weaker bump maps, it might just work.


(1) Fixed the shading on the edges of the cubes
(2) Added albedo maps
(3) Created the second stone texture
(4) Greatly improved the bump blending
(5) Blended the textures together using a procedural stencil (baked to a 4k texture)
(6) Added actual lighting - 2200K backlights and a 2700K front light with a white balance of 3200K
(7) The white specs are not fireflies; they are “glitter” in the rock

I still don’t like how the bump looks. I’m going to look at adaptive subdiv again. I’m also thinking about tricks to improve performance. It would be nice if I could bake all the indirect lighting add it to the direct lighting, possibly using render layers. I don’t know if it is even possible/practical, though. Beyond that, I will make the torches.

I did have this in 1280x640, but Blender crashed as soon as the render finished. And, this one is quite noisy. My laptop takes a very long time to render, and I can’t test anything else while it renders. I got to see the high-res version, and that’s what counts. xD

[ATTACH=CONFIG]462236[/ATTACH]

This is with microdisplacements. It looks good, although it exposes how low-res some of the displacement maps are. The problem with this is that it deforms the entire set. Positioning or aligning something with the set would be impossible. Just having a character stand on the floor would be very time-consuming. And, characters wouldn’t even fit through a doorway.

If I decrease the displacement by subtracting a constant, I can get the final surface to be where it should be. BUT, it causes texture glitching that simply ruins everything (maybe because some of the displacement is negative?). So, displacements are not possible at the moment.


I consider this to be the final material. I decreased the bump strength to 1.0 instead of 2.0. It look more like the True displacements anyway. Cavity maps help give it depth at less extreme lighting conditions. If I want to make the surface have more detail, I will just light it accordingly.

I just thought that I can use low poly planes with the microdisplacement. I can’t put true displacement on the set geometry itself, but I can put plane patches with true displacement wherever I want more detail. For instance, I can place one on the floor. The only catch is that I have to bury the edges of the plane so that it isn’t floating above the surface. The plane has to rise out of the surface. So, it could look odd if I’m not careful with how and where I use it. But, this is definitely good enough for me. I can exaggerate the displacement, I can push it back (what was glitching before). It is great.