Hi everyone.
Forgive me if this request is too specific, but I hope that it could be helpful for all of those that started working with the rigging and are still not able to figure out how to adjust those parts not explained in tutorials or books.
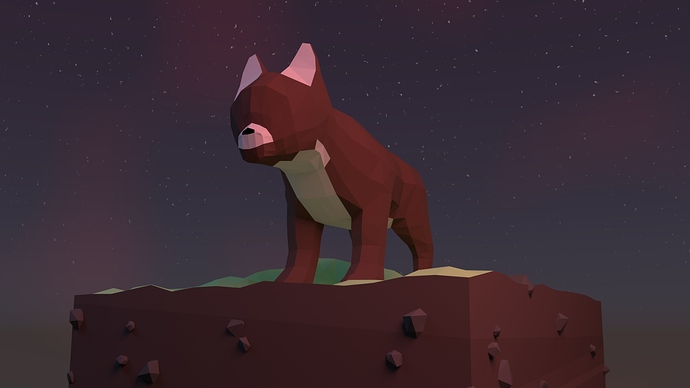
I modeled and rigged a 3D [low poly] French Bulldog. Everything seems fine, and when I pose it if I pay a little bit of attention I can avoid weird movements etc.
The problem is that in some cases I think there is a way to block, limit, and avoid certain kinds of rotations/movements in order to make the whole animation/pose more fluid and realistic.
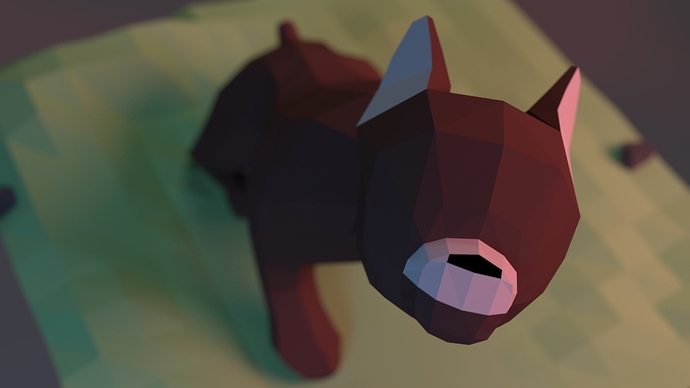
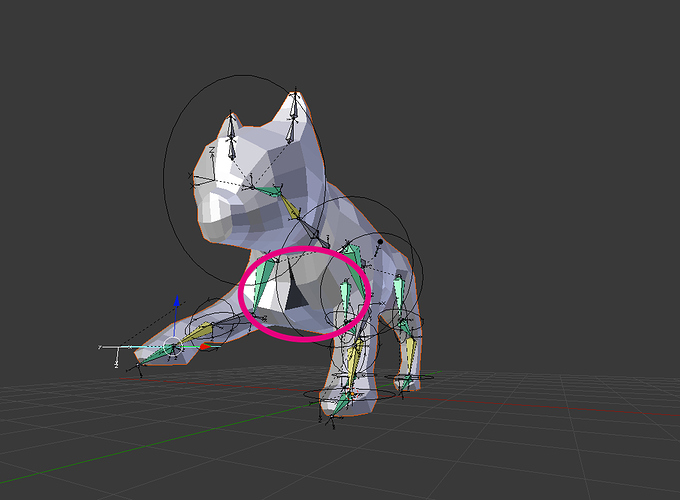
As you can see the front paw seems “broken”. The bones are properly aligned in a straight line, but the mesh seems bended backwards. Do you know how I can sort out this kind of problem?
To be honest I have no idea if I should insert an other constrain [risking to brake the whole rig] or using SHAPEKEYS, modifying the mesh once the rotation of the leg bone reaches a certain point.
Can I ask someone more expert than me an advice on how to sort out this [and other problems that I’ll post later, together with the pictures]?
I just wanted to post the other problems I encountered in order to summarize everything in a single article. Unfortunately there is a limit of three images per post, but at least in this way I can split the problems better.
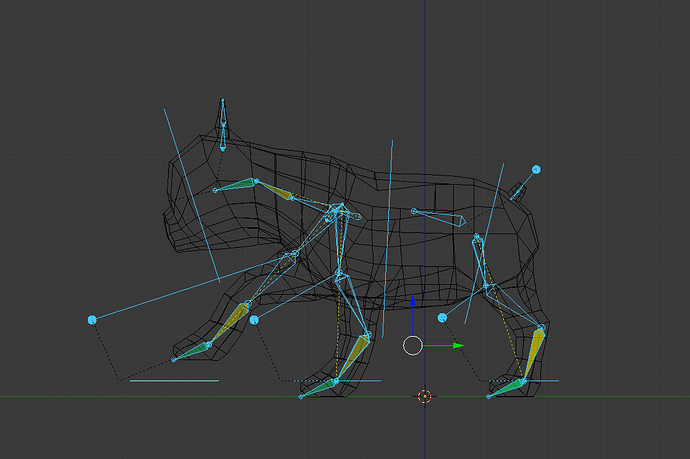
An other problem I encountered is related with weird movements of the mesh once the IK Target is moved far [or too far] from the bones. In this case the back leg rotates several times on the hip once the IK Target is moved backwards and is detached from the toes bone:
Is there a way to block the rotation over a certain limit or maybe make sure that the knee doesn’t get in a straight line [so the constrain avoids the rest of the bones to rotate].
Of course I’m speaking without knowing… mine are just hypothesis. I also thought that maybe I should find a way to limit the movement of the IK Target. IN this way once I reach a certain distance it stops avoiding weird rotations. Is there a way to do that?
The third and last problem is is probably related with the first two.
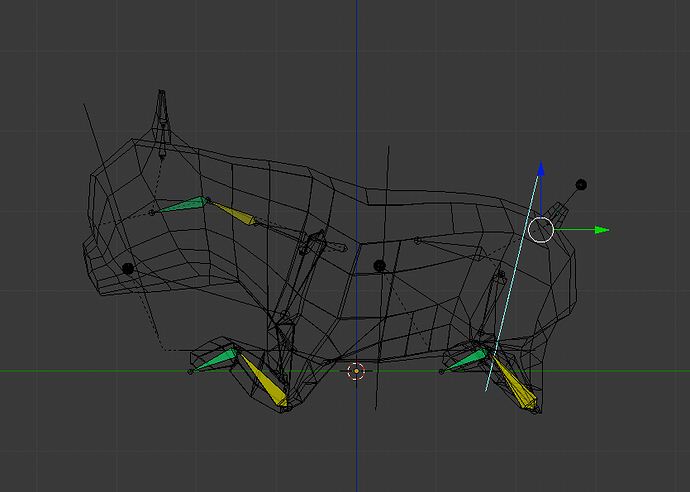
In this case I noticed that when I move down the dog [i.e. when I put it in the nest position], the heel bones tend to move below the ground:
In this case I wish to limit this movement the IK chain in a way that once those bones touch the ground [better… once the mesh around those bones touch the ground], the movement is completed and just the other bones keep moving. The problem is that I don’t know how to control the bones in an IK chain as I can’t move them independently. Do you know if there is a way to achieve this result using constrains or other tools that I still ignore they exist?
Thank you very much again for your help and forgive me for the miles long post.
OK briefly, since I am writing this from my phone… You have too many bones in the legs, animals only have two bone groups in a leg, upper (eg thigh) and lower (eg forearm) you have three, so your basic armature structure is wrong. Secondly the bones should follow the centre of the mesh, yours don’t. Thirdly you have almost certainly got the chain length of your IK constraints wrong, without seeing the blend file I cannot tell, but that’s how it looks to me.
If you correct the armature we can look at the constraint and other issues. You should also make sure IK chains are not dead straight at any point and then introduce pole targets to get them to “break” the right way.
You should do some studying of dog anatomy and skeletons, get your armature right, then you will have far fewer problems posing the model.
Actually I followed the tutorial found on CGCookie: https://cgcookie.com/exercise/rigging-a-dog/
The number of the bones is exactly the same, as much as how I created the IK chain.
For the targets they’re those dots coming out from the leg. I represented in that way in order to easily pick and move them.
At the moment the leg consist in toes > feet > tibia > femur and should. In 4 leg animals the feet remains with the heel high [this is the reason why you saw an additional bone]. The IK Chain goes from the feet to the should [3 bones] while the IK Target is linked to the knee.
I think the comment about positioning the bones on the centre of the mesh is quite good. In the tutorial they are positioned in that way and the legs of that breed of dogs are quite thin [so the bones there are automatically in the centre].
Consider also that in the French Bulldog the femur is “inside” the body covered by the fat.
I found some dog skeletons online in order to better analyze them…
As you can see we have the toes linked to the rest of the feet [the heel remains high] then the tibia and the femur all linked to the shoulder.
So I think that the problem is not how it was rigged, also because the normal movements are quite fluid and good, but how to block certain rotations etc.
Post a blend if possible. Use pasteall.org until you can post a file here.
@Clockmender, are you drinking heavily on that boat?
The number of bones is good for a dog leg, the placement might need some fine tuning. (Dogs have extended “palm and foot” bones that work as a third bone in the chain.) All other issues we would need to see a blend.
Low poly meshes do not deform as nicely as a mesh with some subdivision levels. It’s still possible to get a good deformation, but corrective shapekeys may be required.
Hi DanPro,
Thank you for your feedback. I know that low poly meshes can create problems, but I saw online some animations that definitely seemed working, so I’m sure that there is a way. This dog started as a joke, but with the time came out something decent so I thought… why not giving a try?
I see where Clockmender comes from… compared to how a human is modeled some of the bones of a quadruped are hidden inside the chest. An additional “mistake” is thinking they have the knees “reversed”. Quadrupeds walk on their toes and the rest of the feet is quite long. For this reason the heel seems like a reversed knee. Analyzing properly the skeleton of the dog I noticed how the knee is actually hidden “inside” the belly. What is visible is tibia, feet and toes.
There is still the possibility I made a mistake with the constrains though [this is my very first rigging with Blender].
I uploaded the file and I cleaned it from lights, cameras, etc. in order to male it more “legible”. I hope this can help: http://www.pasteall.org/blend/42482
Thank you all for your support
It’s much much appreciated!
I do as well. I was just poking at him a bit. He is one of Blender Artists.orgs greatest treasures and always gives great advice and he is correct about the skeleton structure. With a dog leg, we can use a single bone rather than multiple bones for the “palm” bones because they do not need to spay like a biped hand/foot would need to.
I’ll take a look at the file tonight. If I find an easy fix, I’ll post back with a solution. It may need to wait until my shift is over tomorrow if an easy/quick solution is not found.
Hi DanPro,
Thank you for your help. Please don’t rush and take your time… it already worths a lot that you correct my file so I can learn something new, but I definitely don’t want this to be a disturb.
@danpro hmm - can you drink too much on a boat? I think I actually may be guilty as charged!!! ( thanks for the awfully kind remark as well, I am blushing at the thought! ) I am back on dry land now in Stockholm, so not home yet and will endeavour to sober up a little
@madquake - yes I can see how you armature is built now that I am not in quite such a drunken stupor, the problem I see is that you humerus bone is inside the chest of the dog. In reality this part of the front leg appears to be inside the chest, but of course is not, it just looks that way once all the hair is in place. For your mesh, I don’t think that you really need this bone? Or, you might like to mod the mesh so you have some distinction between upper foreleg and chest. Otherwise I will gladly take a look when I get home. To be honest though you are in good hands with @Danpro even though he is an old git like me :D:p
@clockmender maybe that’s the problem. I need to see a real dog and check how is it made. I checked on the ferrets of a friend of mine but I noticed that the humerus is actually inside the chest and just the final part comes out. In the ferret I noticed that’s 33% outside and 67% inside.
I can probably adjust the model in order to give it more “shape”.
I don’t think that this will sort out the problem with the extreme stretching of the mesh once the IK targets are moved though.
I’m using this project not just for my portfolio but also to learn something new and I think that I’m on the right track.
Thank you for checking the model guys… It means a lot!
Hi DanPro,
Thank you for the video tutorial it is great! I’ll use it as a Bible of Rigging as in 30 minutes you explained a lot of concepts and techniques that I definitely didn’t have idea could exist.
I loved the fact that the original mesh can be tweaked using the the armature, moving the bones and then applying the new position to the mesh [basically what you did moving the shoulders ahead in order to reposition the polygons of the front legs]. I’ll have to follow it properly in order to assimilate everything, but I need to say that you definitely were able to passionate me about rigging!
I also appreciated a lot the way you created the tutorial with a calm voice that makes it easier to follow.
I’ll keep you updated on how the project will proceed.
I just have a quick question:
I tried to apply a controller to the shoulders in order to be able to “lift” one of them in case for example the dog would walk putting one paw in front of the other [usually felines do this while walking, accentuating the movement of the scapulas while walking].
In my first rig I tried to apply a controller that could “come out” from the body of the dog, as the scapulas are inside the chest, but once I created the controller [something similar to what I used for the IK Pole Target] I was never able to position it as I had to move the original object in Edit Mode in order to move it far from the origin. But while I was doing this, seen that the scapula bones are rotated among the three axes I was never able to position the custom shape properly… Do you know if it does exist a way to move, rotate and scale the custom shapes directly from the bone controller? I mean… if I create a ring to control the feet, but the feet is already rotated in a weird way, can I place the ring as a custom shape and then rotate it directly into the bone and not in the original shape in edit mode?
Hope this isn’t too confusing as an explanation.
Thank you again so much… I really don’t know how to thank you!
Hi DanPro, I couldn’t resist and I did it straight away!
It works great! This setup without pole target gives you a lot more room to animate in different ways and the controller is quite more intuitive than the pole target itself. It’s like the difference between a puppet and a marionette… the second works with strings and for this reason requires a lot more mastery in order to achieve fluid movements.
Forgive me if I keep asking, but as they say in Fringe: “Every answer you get just lead you to more questions”.
In this case I have a straight forward question: Should the IK tweak bone be set on “Deform” into the Bone Panel? You didn’t say in the tutorial but for what I understood being a controller shouldn’t apply any deformations to the mesh but just copy it’s rotation to the right bones. Am I right?
The second question, more specific is… do you know where I can find a good tutorial on the Weight Paint? I wish to complete this properly and I probably need to learn more about in order to do something really good.
I was also thinking to create a post on the “animation” section. I tried to animate the dog, and it seems good but watching him walking there is something missing… maybe the natural “gambol” of a happy dog walking… But I don’t understand how to achieve this.
What you think guys… I don’t want to be too demanding… what you did to help me with this is already 100 times more than what I expected!
Guys an other problem… I’m sorry for all these questions… I tried to clear the parents of the bones to reconnect them after and I noticed something wrong… When I move my dog’s leg the mesh “opens” where the mirror should connect it. I probably did something stupid… I noticed that the vertex in the middle were out of phase… so I selected them, I scaled them to 0 on the x axe, but still they are disconnected… Do you know why this happened?
Hi, you probably need to check “merge” in the mirror modifier settings.
As for your “broken” paws, this happens because the armature’s legs in rest pose are more bent than the mesh, so when they straighten, the mesh bends the other way a little bit. It is crucial to place the bone’s head and tail right where the joints are supposed to be so you don’t run into this kind of issue.
I do not know of any that I could recommend. I will be making one in the next month or two. Sorry if that does not help your immediate need. Weight painting is like torture for most people so they avoid it at all costs. Maybe someone else knows of one.
This is the proper section for animation and rigging help. The other Animation section is for finished works.
Some more work on the spine could help. I concentrated on the legs, but noticed that the hip bone should be reversed. The fat end of the bone is the head. That is the end the bone will rotate from. By turning the hip 180, it will rotate from a more natural spot. This would be true on a biped as well. Your hips rotate from the base of the spine, not the crotch.
That mesh error was there when I rigged the legs as well. You did not do anything to cause it. I should have mentioned it. It should be easy to fix. Select one at a time if scaling to x,0 does not work. You may need to enable and disable clipping in the mirror modifier. Maybe multiple times to fix each vertex. Just drag them to x 0 until they “stick” and merge. (Merging should be enabled.)
Hi,
I fixed the problem with the mirroring… I just had to re-apply it and everything worked well.
I also found a couple of tutorials on weight paint. It seems hard as I still don’t really understand the meaning of the colors, but in these days I’m gonna watch them and try my best to understand it properly [at least now I can say that I’m doing something “advanced”].
The movements now are actually more fluid than before and having a controller helps a lot when positioning the leg etc.
An other user suggested me to use KeyShapes when the leg is bended a lot in order to keep the original shape, maybe modified by pressure of the muscles… what you think about?
Sorry, I ment to reply to this yesterday. I get sidetracked easily at my age…
Shapekeys will more then likely be necessary because the dog is low poly and has that faceted look. My general rule of thumb is three edge loops at each joint to aid in deformations and to make weight painting work a bit better. One at the center of the joint and one on either side to support the joint. Adding that many too your dog will likely ruin the look. It would not hurt to experiment though.
Without three edge loops, the mesh will likely squish too much so corrective shapekeys would help undo the squishing. Drivers could auto apply those shapekeys or new controls could be added to manually apply the corrections.