So I’m trying this minimal Rig without any armature at all.
I will try make it simple for my example before I’ll add more parts to the creature so maybe you can help me out.
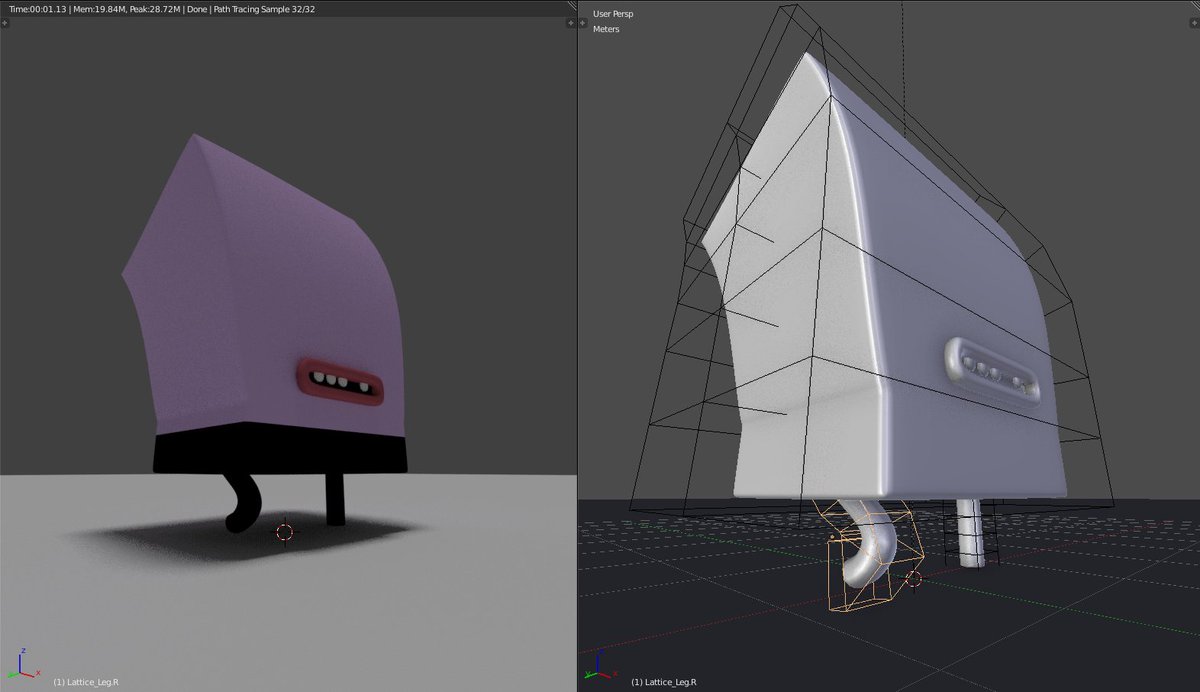
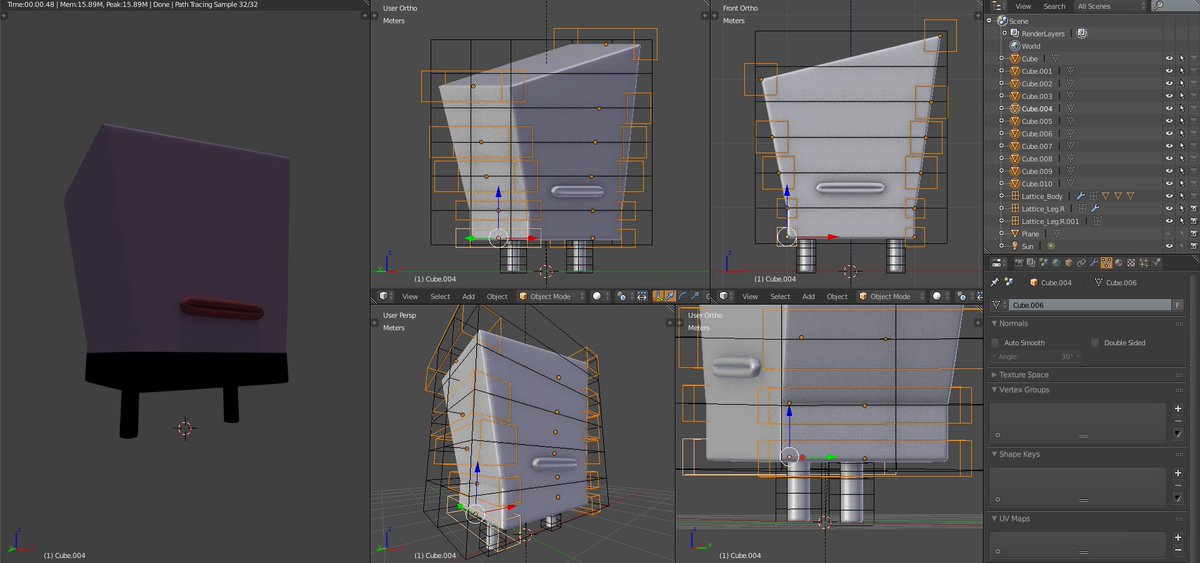
I’ve created a Body and two legs, total 3 individual separate objects.
Each one have it’s own Lattice deformer, and I can tweak it as I wish in the Edit mode and it looks elastic and nice exactly as I want, I’m very pleased.
From what I know (as a Noob), in order to animate each lattice I have to create different Shape Keys and then I can use them.
But what if I want to animate the Lattice without Shape Keys, like add 3 mini controllers to control: Bottom, Middle and Top of each lattice (selecting the vertex I want) and animate the controllers, is it possible?
Can somebody please direct me to a Video Tutorial shows how to add controllers to Lattice and animate it with keyframes? I didn’t find anything like that…
It’s harder for me to follow without a visual video to watch because of my bad English, but any help will be appreciated of course!
Have you tried using Hooks to control the lattice?
With the lattice in edit mode, select for example the vertices at the top.
Control-H, select “Hook to new object”. This will create an Empty that you can animate to move the selected part of the lattice.
WOW! This is what I was looking for thank you so much CD38!
It seems like I can’t resize the empties without tweaking the points, they are huge, is there a way to do it?
Also, is there a way to change the empty + shape to anything else?
EDIT:
I just noticed… the size and shapes on the properties on the side!
But still… I can’t really move the empties to the side or rotate them… any ideas how can I control them beside the built-in properties?
You can best avoid these problems by placing the hook object first; the procedure is slightly different:
Create an Empty (actually, create any object you want) to use as a hook. Set its size, position, and rotation where you’d like it to start.
In Object mode, select the hook object, then shift-select the Lattice.
Switch to Edit mode and select the vertices you wish to control.
Do Control-H, but this time choose “Hook to selected object”.
By the way, to smooth out the hook effect you can go to the Hook modifier on the lattice and set Radius to a non-zero value. This will give you an adjustable, smooth falloff instead of all the selected vertices being affected equally.
Thanks once again CD38, this is really helpful and much more easier to see and control.
So I think I got the idea of the hooks, and it is great! but I guess I’m doing something wrong when it comes to the overall character.
3 Parts: Body (include the mouth with blend shapes, works great even if I tweak the lattice), Left leg, right leg.
3 Lattice deformers for each, for now I’ve created the controllers using the hooks for the body, it works really smooth!
But now I’m getting lost, first I’ve tried to parent the legs to the body so when I move the body, the legs will also follow… but the all lattice stay on it’s place so it’s not working.
2nd try, I’ve parent the Lattices of the Legs to the Lattice of the body… but still a total mess, when I try to drag and move the Body Lattice, everything stay in it’s place.
So… what should I do to make all 3 parts to work together so I can move them as one and rotate, even if I don’t use the lattice just to make the character’s position in general for the animation.
I’m a bit confused, it was so cool looking how the Lattice control the body, but now… I’m not sure if I can make it work.
Maybe I can’t get away with only a Lattice-System? I must use armature?
On the screenshots, I’ve selected the new Hooks (works perfect thanks to you CD38!)
The black 3 lattices for Body and 2 Legs, that’s it.
Think you can help me out here?
I’m very confused… not sure how to make it work.
Thanks for the tips, I did many parenting and stuff… it looks complicated than it should, but I guess there is no way to run away from Armature (I always fight with the weighting skinning part…).
Anyways, the main problem I had while animating… is that whenever I tried to get back to the original pose… which is basically reset the location, rotation and scale.
Whenever I reset the Rotation, it’s cool but when I try to reset the location using Alt + G there is so much mess…
I couldn’t Apply Location before animating the test because it did the same, it’s like locked on a location that I couldn’t reset because I wasn’t sure how without getting these weird movements of the objects.
I think it will be possible to animate using Lattice only if I can get the Reset Location to work somehow…
Just something super quick to see if it’s animatable at all:
(color glitches from the GIF, the original looks smooth)
About the resetting of location, your other option is to parent your hook objects to bones in an armature. Then you can animate with an armature, but don’t have to worry about skinning because all the skinning is coming from the hook objects.
Reset transform works only with armature. Bones have pose mode…empties and objects not so empties are useless for animation because everything collapse to the center if you clear the transform.
Its not a good advice to use emtpies and parent it to bones to control the lattice vertecies because you can use bones directly for your lattice vertecies. Just make a vertex group for your latties, give the lattice a armature, place a bone in the right position and give the vertex group and the bone the same name. In this way you can control the amount of deformation with the lattice vertex weights.
BUT THE QUESTION IS how you want to handle all these deformation bones? how should work your control system?.
Another thing is, combine a lattice and a armature to deform your mesh is only possible if your lattice stay in place otherwise you get a double deformation, but how its possible to deform the lattice in pose mode without a armature weight.? Shape keys with drivers for your lattice and bones to control the shape key value is the answer.
With this setup you can deform your mesh with bones and get a lattice daformation on top and keep all control bones together.
To keep things relative simple use the last blender with the new bendy bones and do following steps.
Only one bendy bone for your mesh (bone and mesh with the same lenght…loop cuts and bone segments schould be the same).
Armature modifier for your mesh. Give your mesh a vertex group and assign in edit modus 100% weights to your mesh. Now give your vertex group and your bone the same name.
add a lattice make shape keys that you need add drivers to the shape key values. Give your mesh a lattice modifier add bones as shapekey controler and parent these bones to the bone in step 1. Use these bones to control the drivers.
Thank you for this information, I guess Lattice by itself isn’t going to work as I wanted a very simple elastic rig without fighting with Armature skinning or vertex groups… but at least I tried
I see, so the Lattice will have lots of troubles if I’ll try to move them just like in my test… it was not so friendly-user…
I’m using the latest Blender version but, I have no idea what are the bendy bones you’ve mentioned, is there a video I can see what it is and how it works?
I will try to follow your instructions as soon as I’ll have Blender near by, but any video will be much more helpful (visually because of my bad English).
Thanks again for everyone who helps in this thread, you rocks!
Bummer… I just tried to follow the Bendy Bones video using the current latest version of Blender 2.77a but the features are not there…
I was so excited to try it, it looks so elastic and more user-friendly to rig and animate compare to anything else I’ve seen so far!
I hope it will be released sometime soon so I can try and see if it’s really easy to use as it looks!
EDIT: Just downloaded the latest build, sorry for the flood… I thought it supposed to be on the latest official version, I will try it soon