I’m wondering about something but not sure how to begin with:
Let’s say that I’ve animated a short 24 fps, short Mouth talking Lipsync based on a specific Audio,
and exported it to .MOV file 1024x1024.
Can I import it as a texture (Cycles) so it will act as a FACE / Mouth on a cube?
Doesn’t have to be a cube, just for testing… could use for a more complicated character’s later on once I’ll get the idea.
I wonder if it’s possible with .MOV / .AVI or even Image Sequence (PNG)
Question:
If the above is possible, is there any easy to follow Video Tutorial you can share with a noob like me?
Have a wonderful day and thanks ahead for any help!
You can just use a movie/image sequence just like an image texture
Note that for a movie you would need to have a codec that supports an alpha channel if you want to use any transparency options so having an image sequence gives you more flexibility
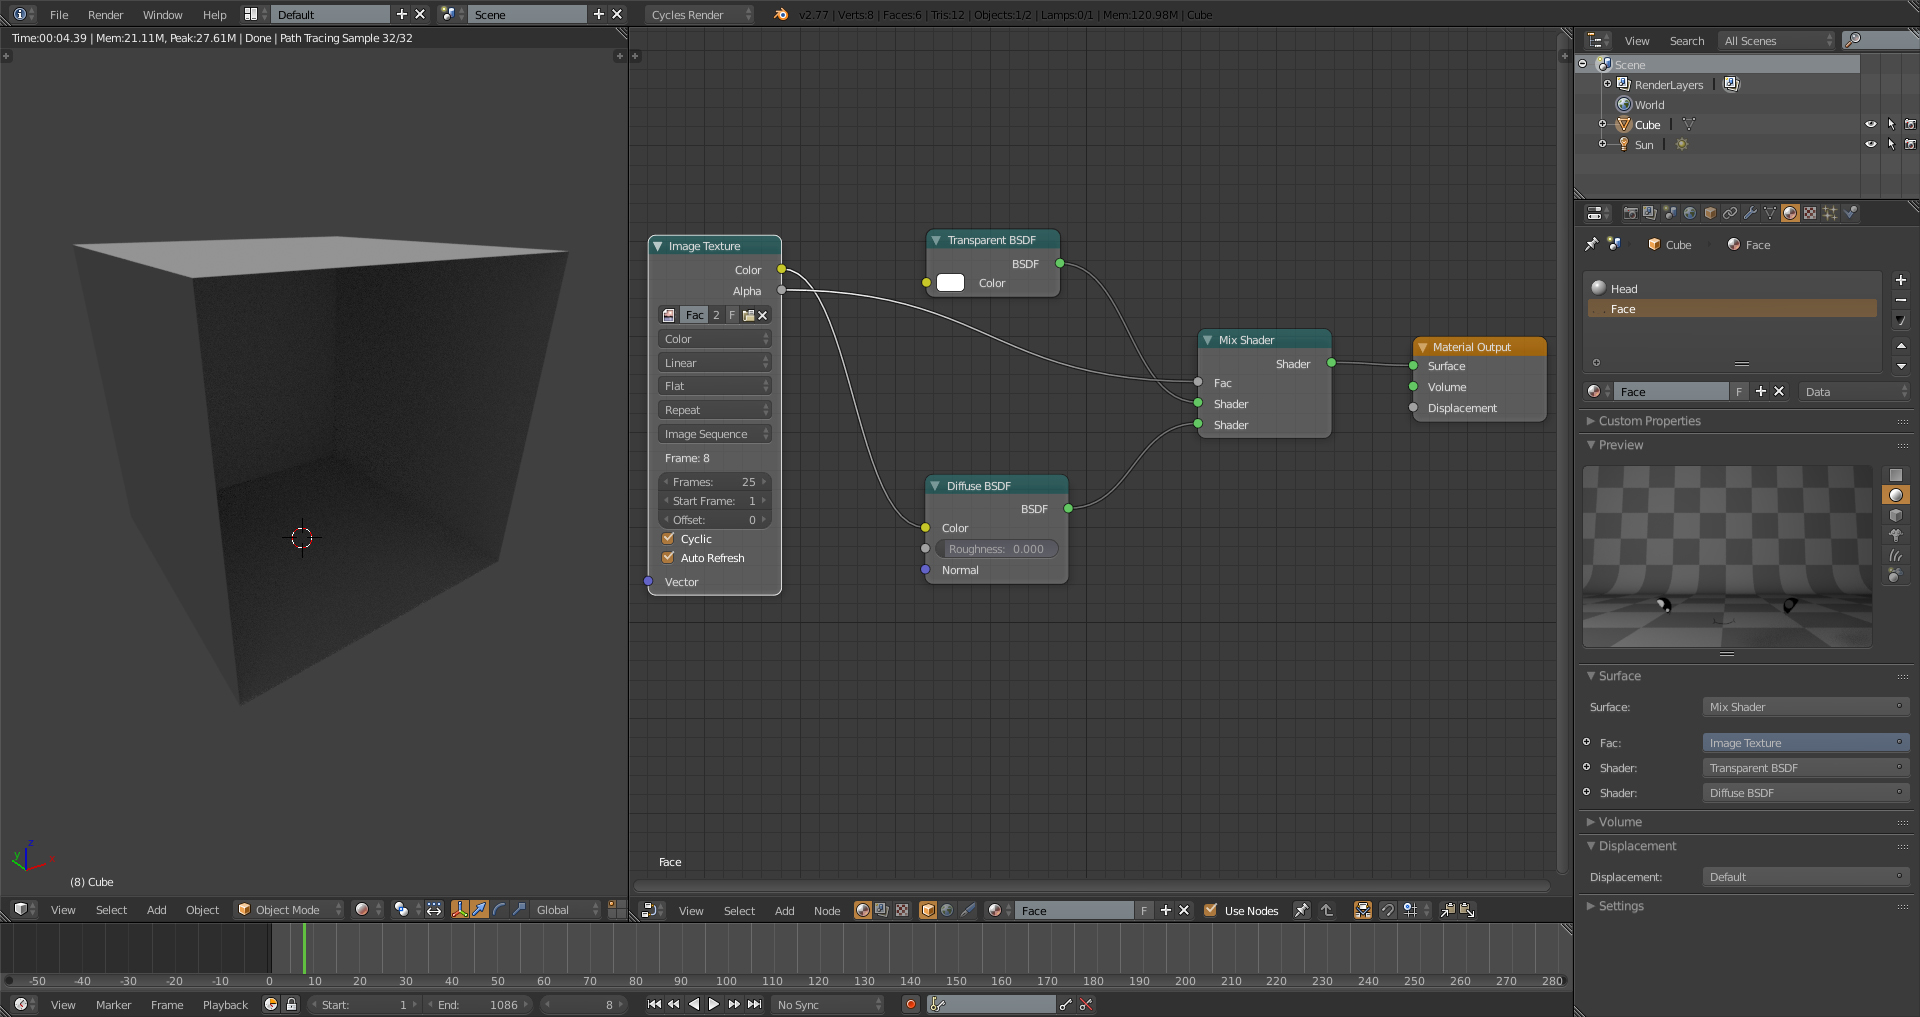
After trying messing around with it… I think I’m almost there.
The files imported are PNG Sequence (with Alpha) you can see a Face with Eyes and Mouth on the texture preview.
The texture applied to the Front Face of the cube after unwraped.
Can somebody please tell me what am I doing wrong and how can I make it work?
TBH, I’m not using blender much anymore, but I know how to do this with BI renderer. Cycles renderer should be pretty much the same, but your working with nodes too. I’ve not ventured into doing this with cycles.
I created 2 images in gimp, each one was just a number, and saved them as 1.png, 2.png. See here:
I then went into blender and deleted the default cube, replacing it with a plane. Assigned a material to the plane, then uv mapped the plane, and assigned my image ‘1.png’ as a texture. When I render this, I get a flat plane with the number 1 on it.
Next, I make a few changes in the texture properties panel:
I change the image type from being an image to an image sequence, and set the frame to be 2, cause I only have 2 images.
Render frame one, and you see the results in the above posted screenshot. Advance to frame 2 and render, I get the same image but with a 2 instead of a 1 on the plane.
In cycles, I would think all the changes and settings I made in the texture properties panel, you would be doing in the node editor for the texture.