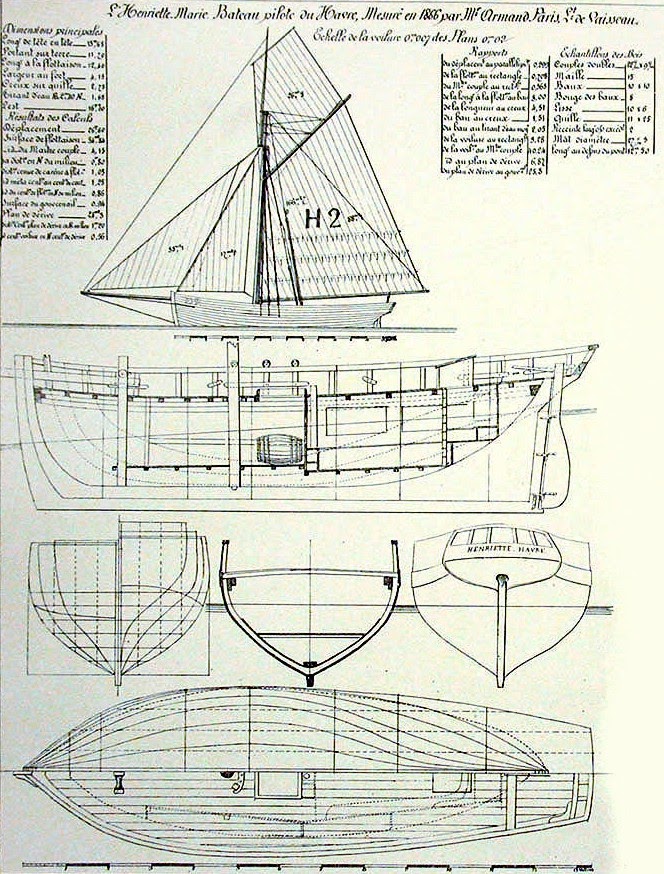
I’ve noticed few people having problems with ship modeling. I do not claim to be an expert, but maybe- just maybe- a little tutorial will help. So- relatively simple subject, plans from french archives, a little craft from 1866, Henriette Marie. Free to grab:
I presume you are able to put image as a background in blender space. A main advantage is- all theoretical lines are on one picture and in one scale, so there will be no problem with distortions and such…
When you are done- you already have the hardest part behind you. From now it will be just adding additional cross section by adding vertical edge loops and moving vertices created horizontally. Your first task is: to create outline of smallest cross section using exactly the same number of vertices, as it was with widest. Here is how I did it:
Two very important things to mention: One- uppermost vertices will have to be moved vertically (and do not be afraid to do so) and two- do not worry if- at the moment- line will be rather rough. That’s how it looks like on mine:
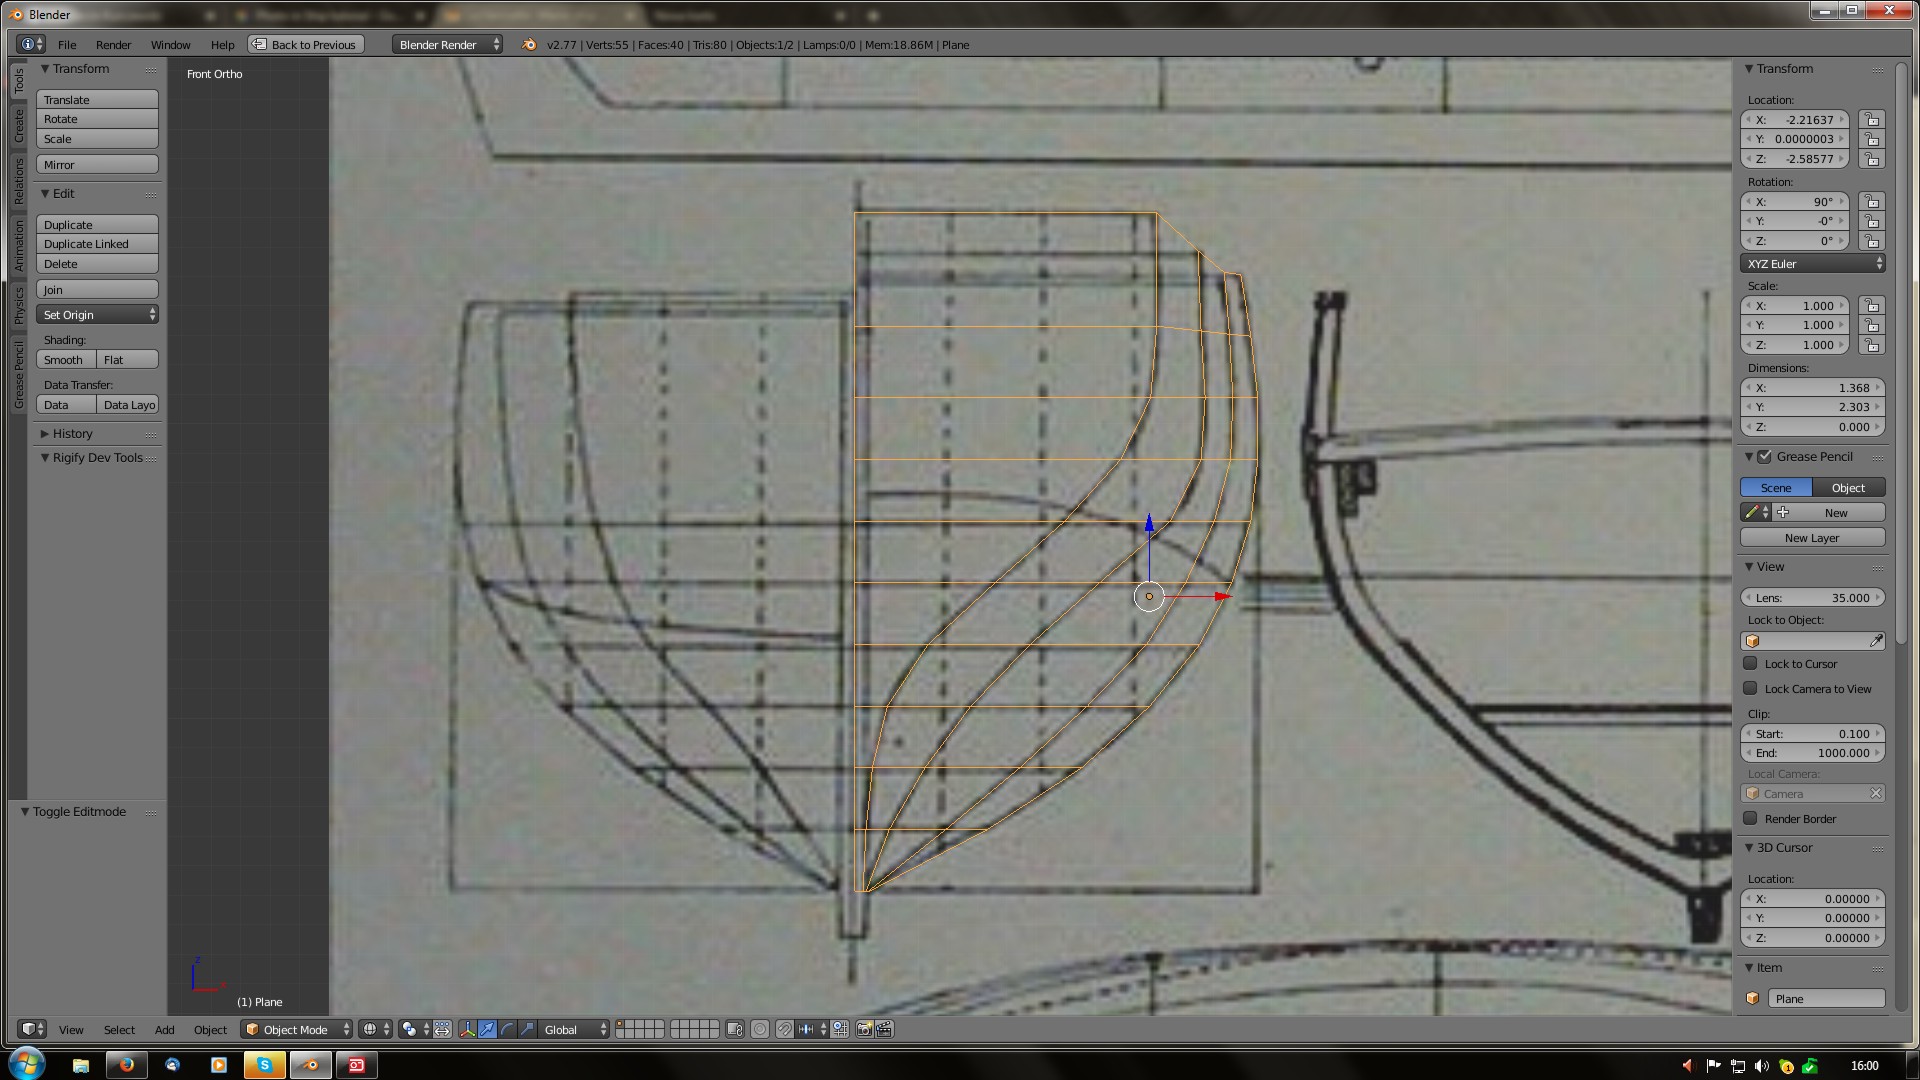
Now fun starts. Grab widest cross section and in perspective view move it back… a bit. We will position it carefully later on, for now we are just separating lines to be able to see them in side view so…
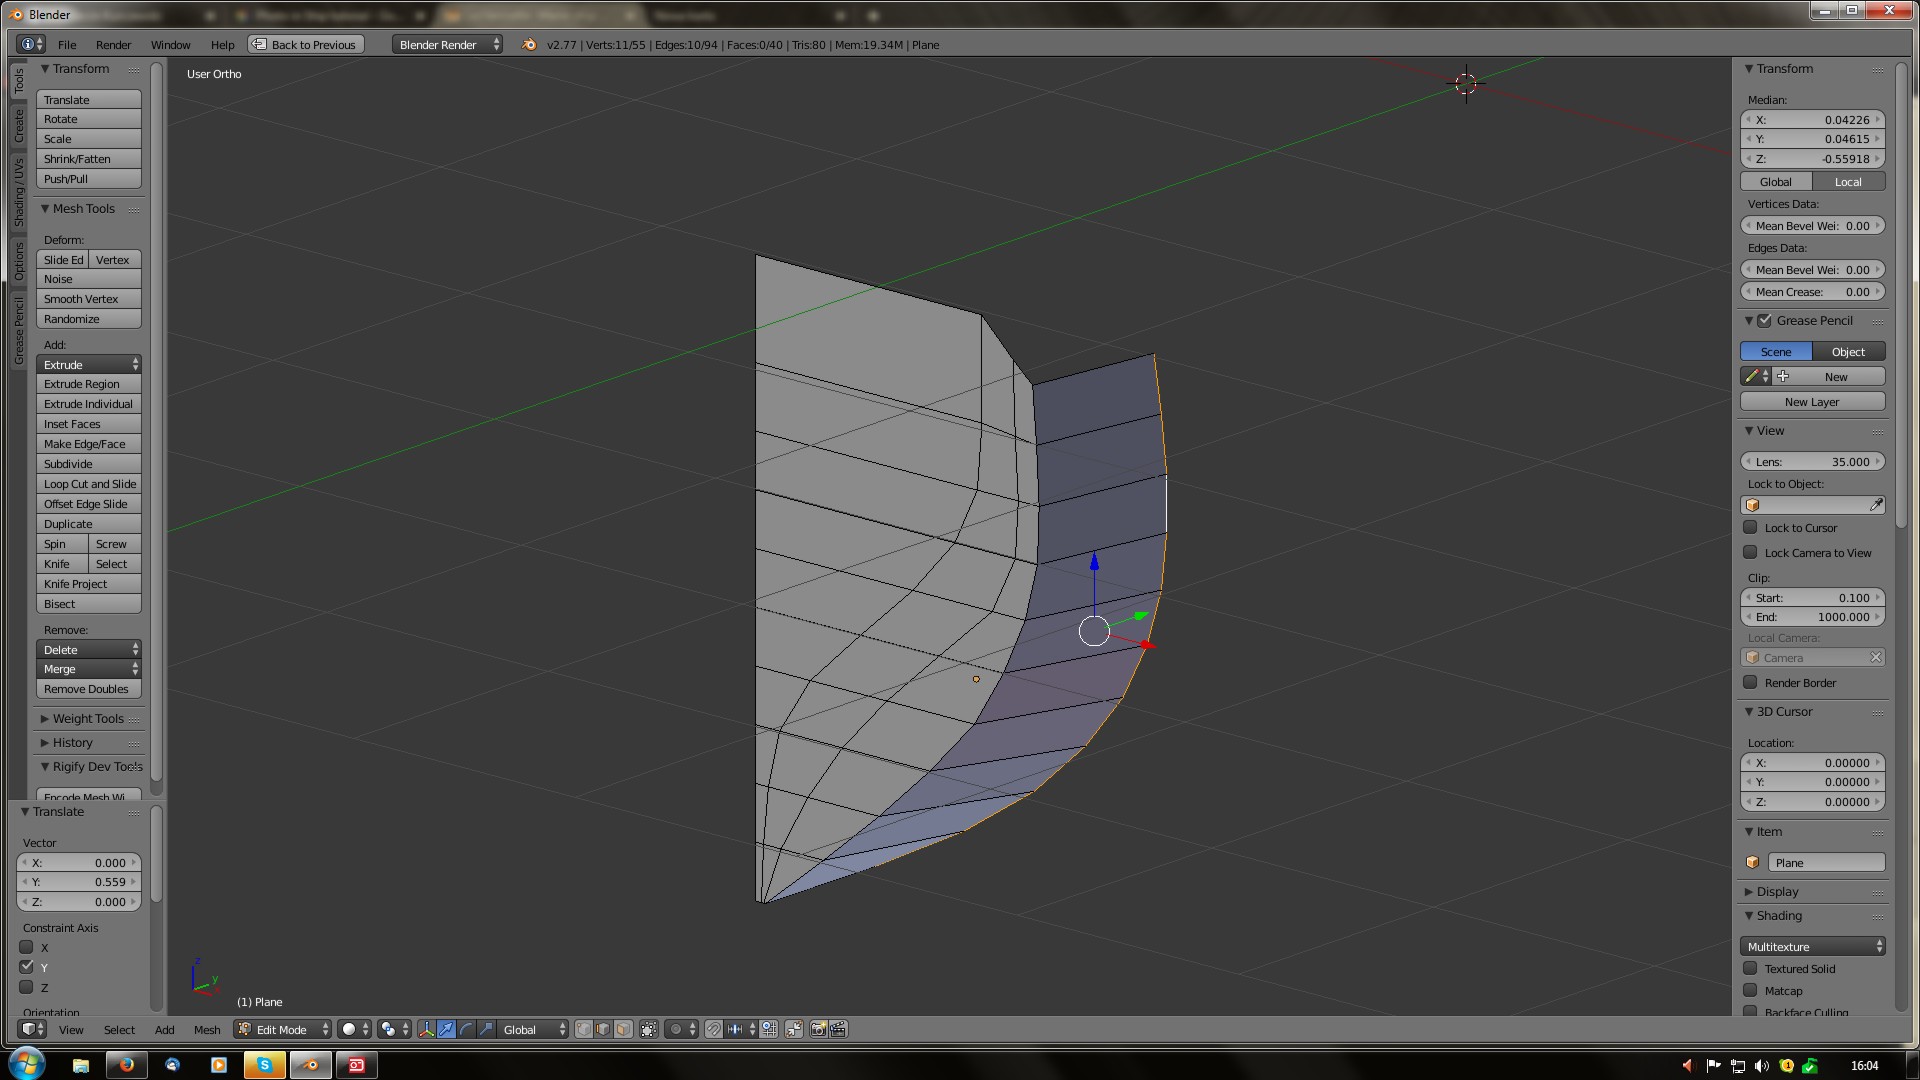
It starts to look like a boat, neh? For now- drop this side. Hide it, move to another layer- whatever rocks your boat- so that it will not clutter your workspace. Go back to ortographic view. Add a plane. Move it to other half of cross section and- using precisely same steps- create other part of hull.
There is a little trick you might find useful (it helps with a good mesh flow)- instead of adding a plane and subdividing it, extrude central line from previously created half of hull as far as you need, then separate faces. As below
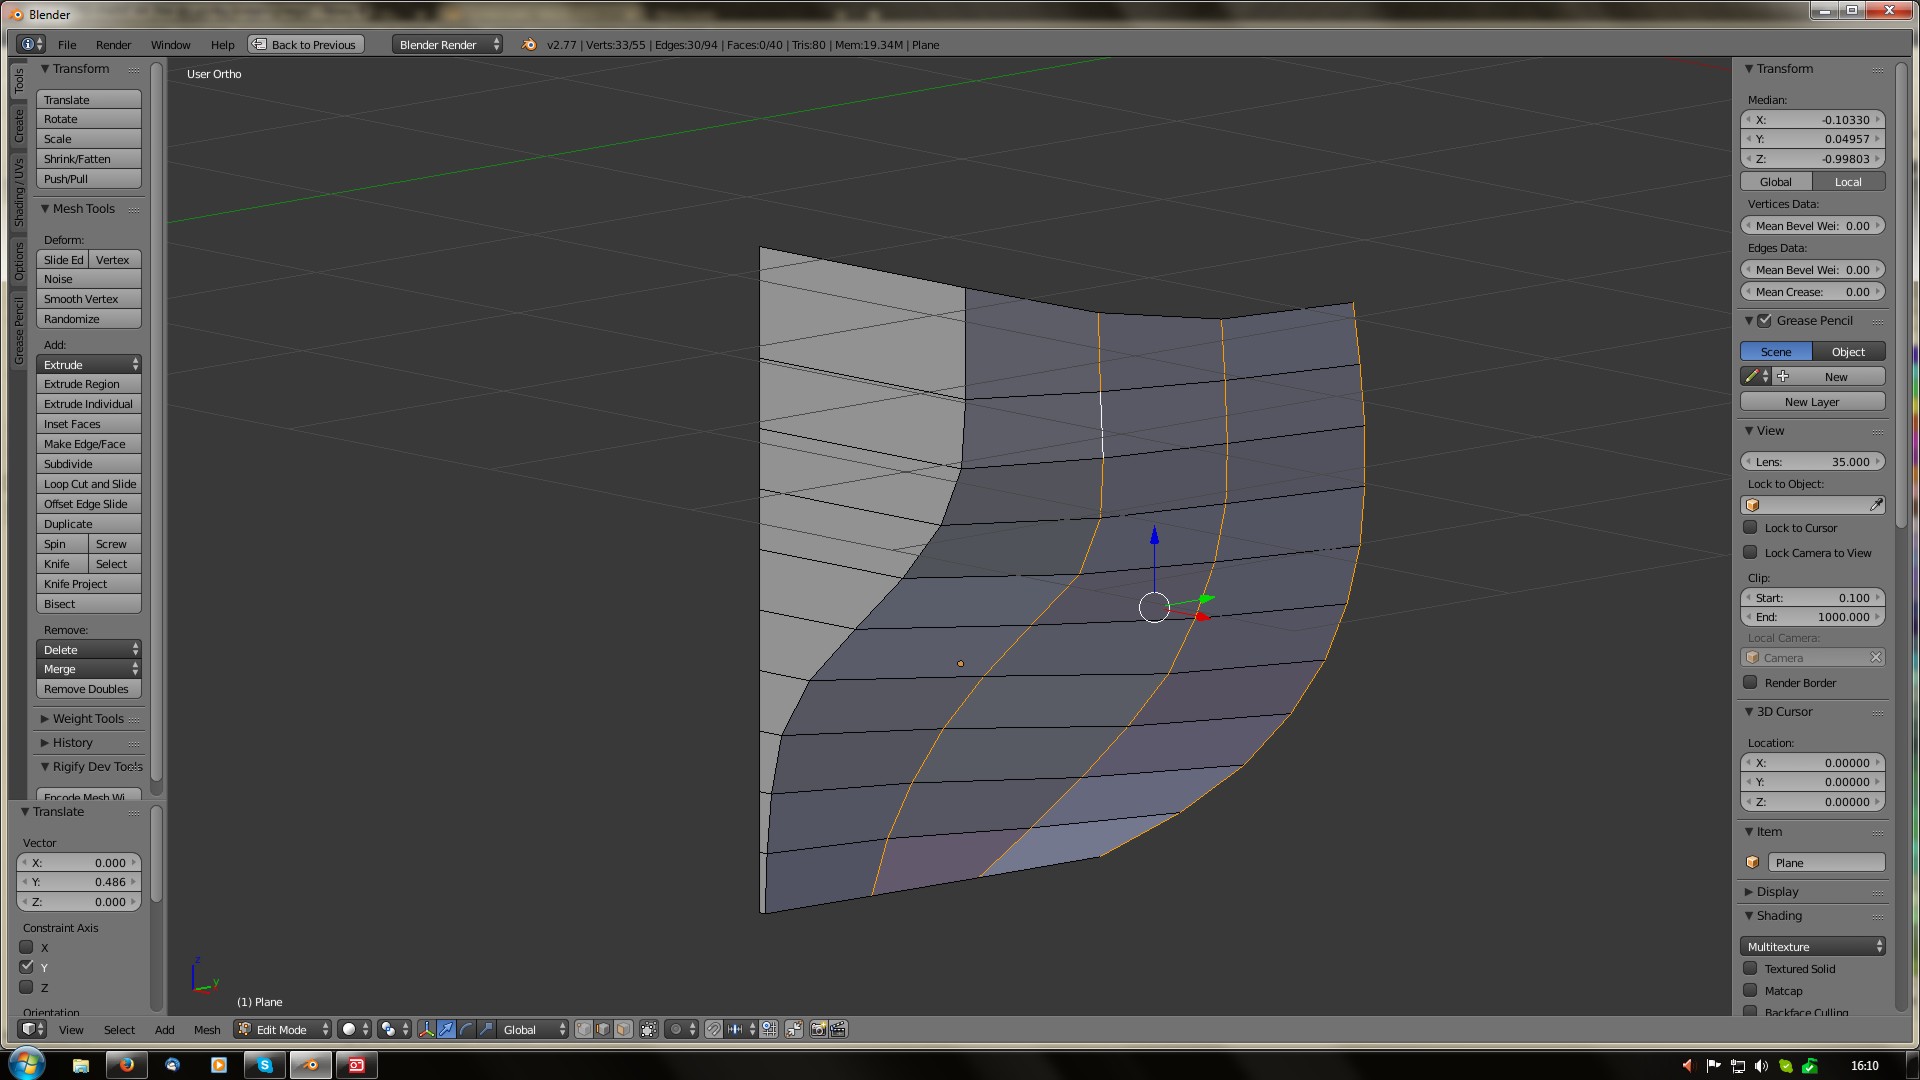
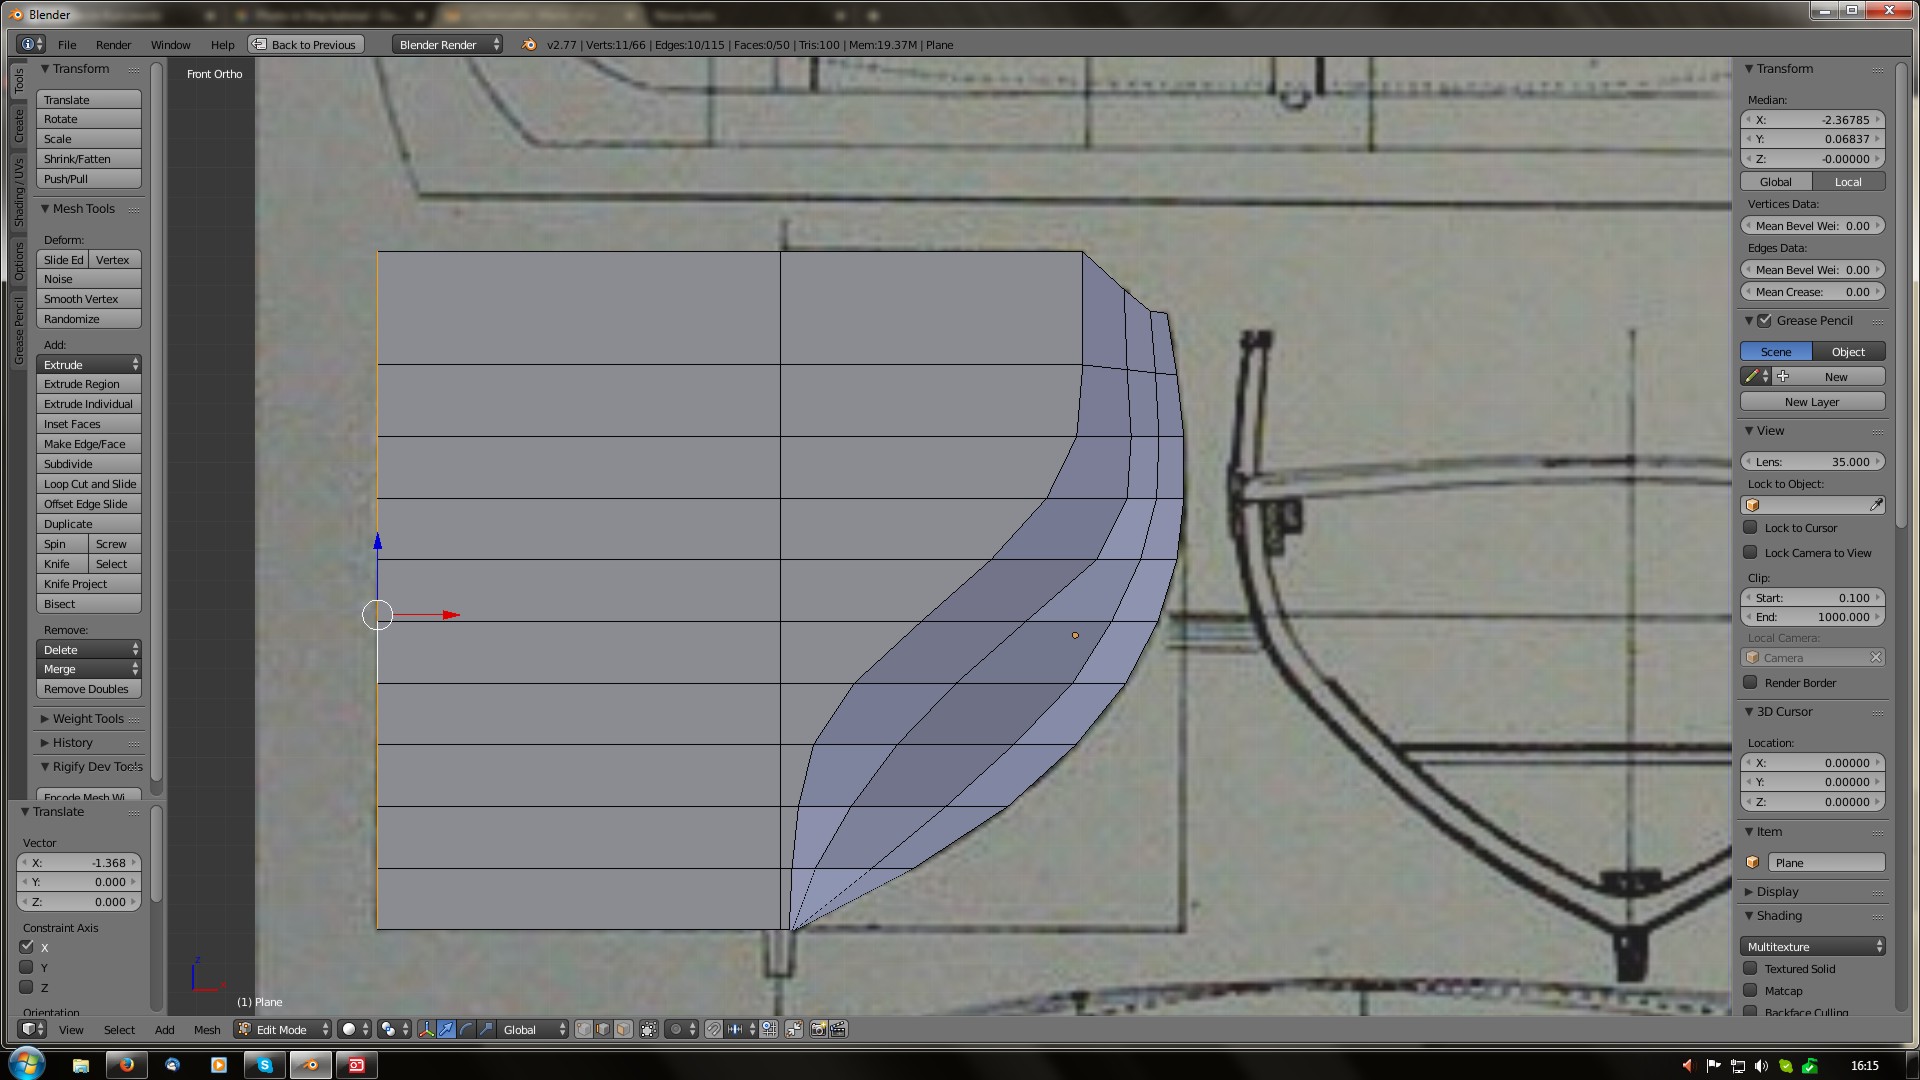
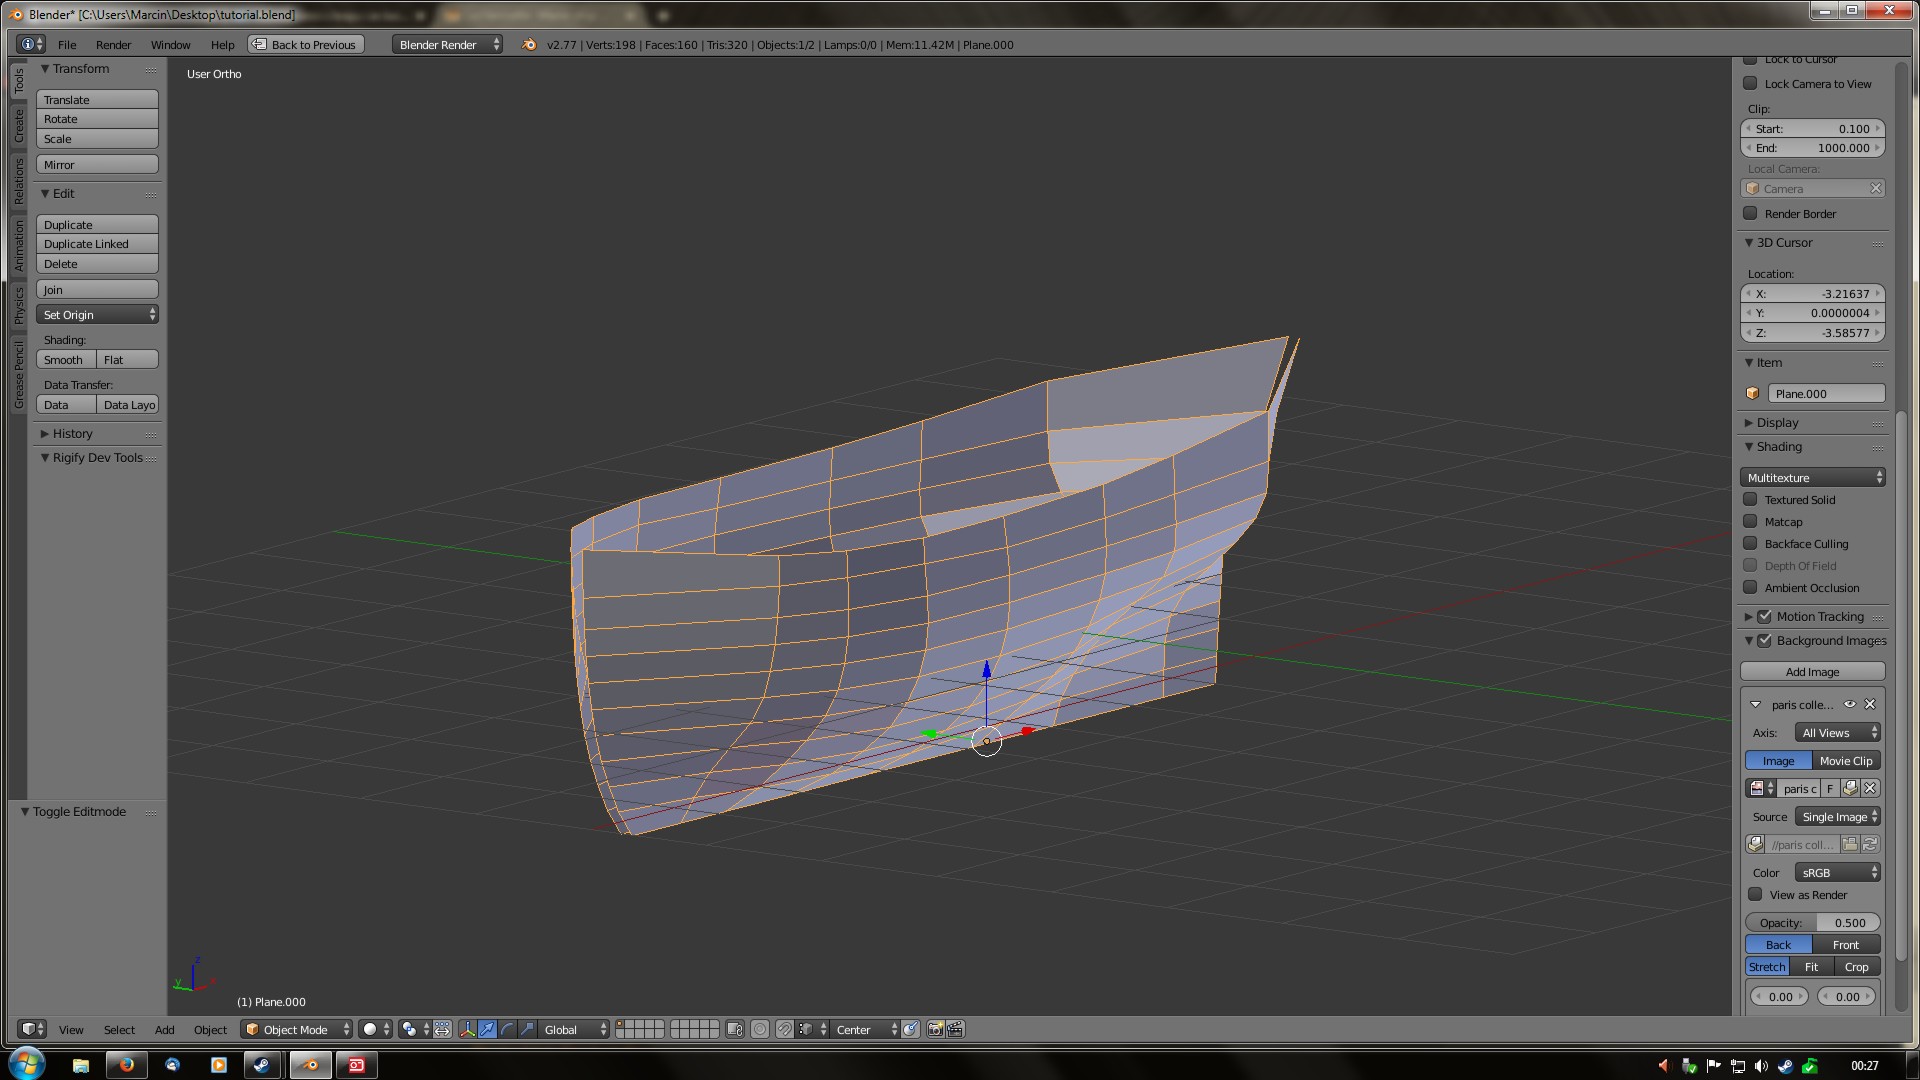
Now- spread cross sections again (along the length, as before) to separate them. You should start seeing general shape of the boat by now. Adding a mirror modifier can help a lot. Again- that’s how it looks on mine. Please, notice, that I have left a gap between the two on purpose- that’s an area between two widest cross sections that will need to be filled later on. Anyway: it should be something similar to that:
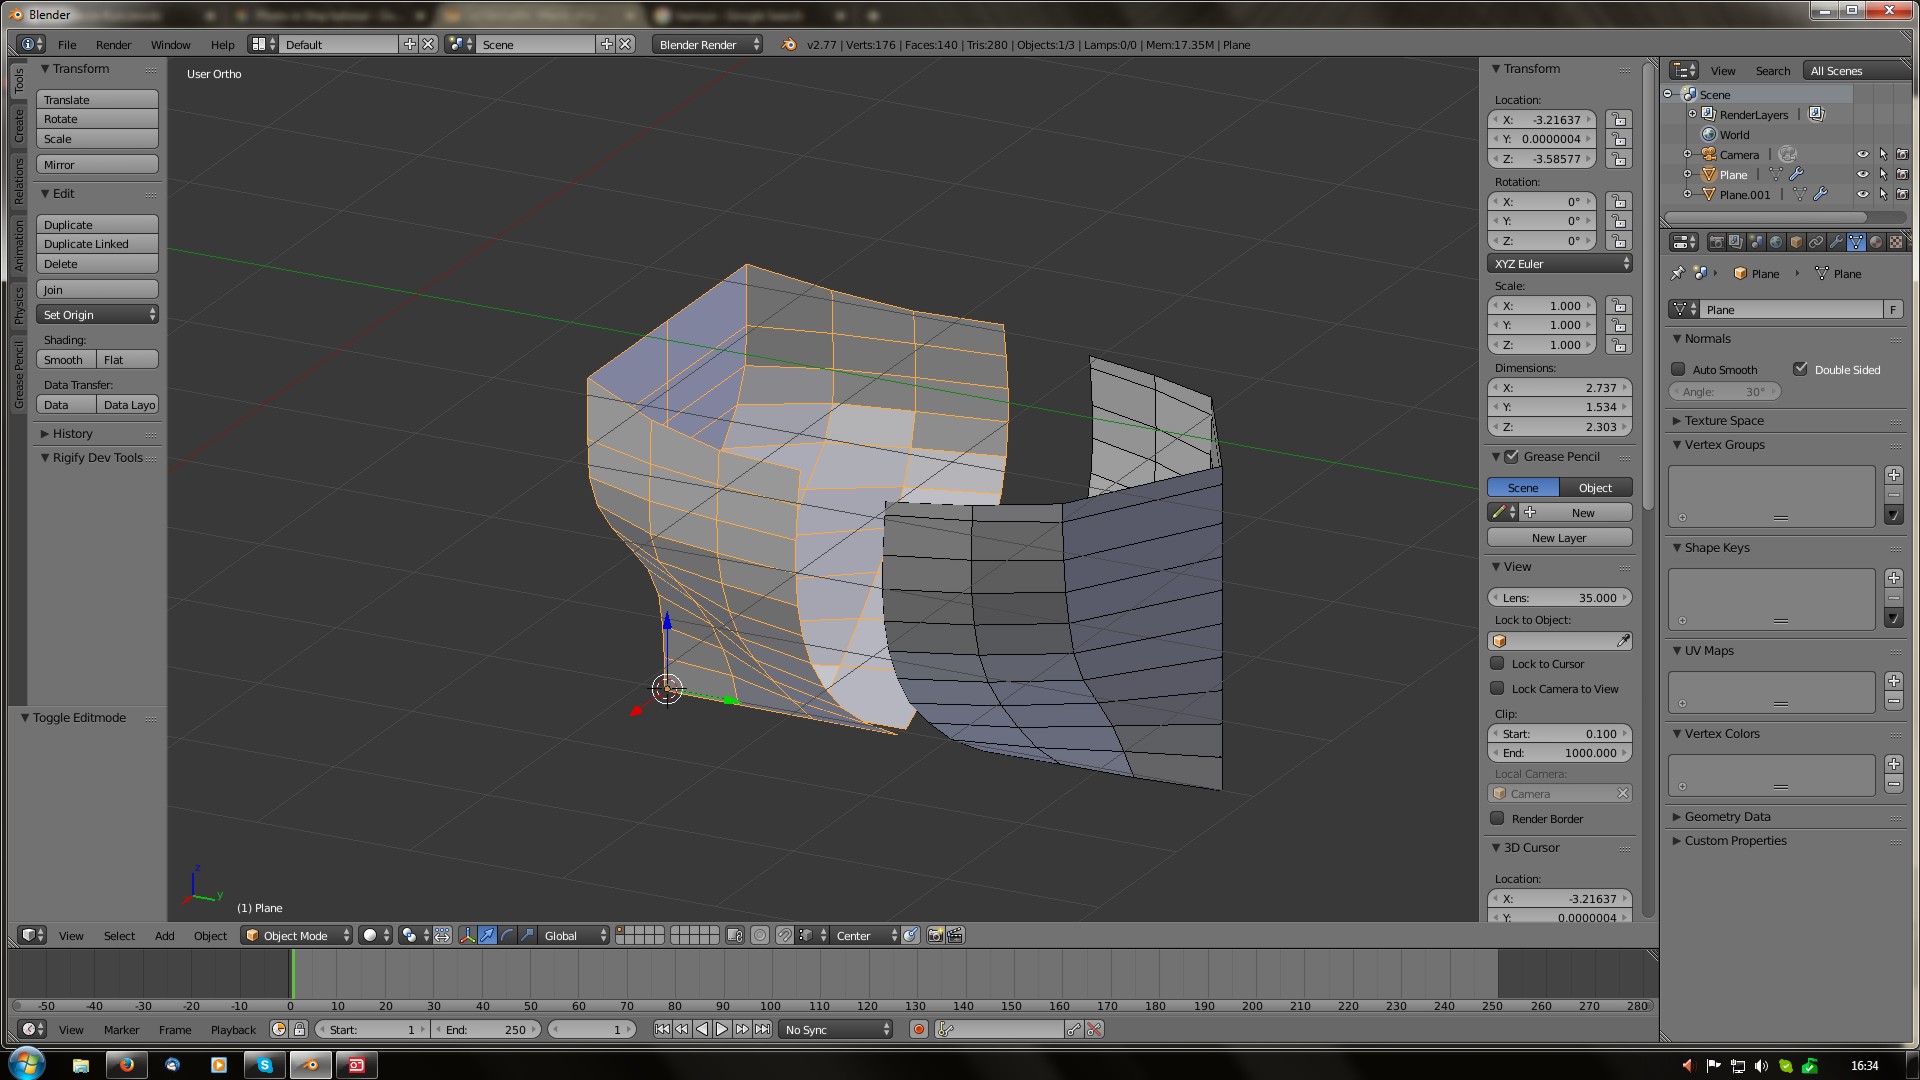
I have combined two parts (ctrl + j), then switched to top view and placed them precisely in top plan symmetry line and… I noticed something is not 100% right. It happens quite often with old plans and sooner or later you would stumble upon that kind of glitch anyway so it is a good chance to show how to deal with it- they are not exactly synchronized.
Since all my cross sections are one mesh and I have them in uniform scale- I will just size down, until width will match upper view. Then, selecting them one by one, I will start placing them where- according to plan- they should be.
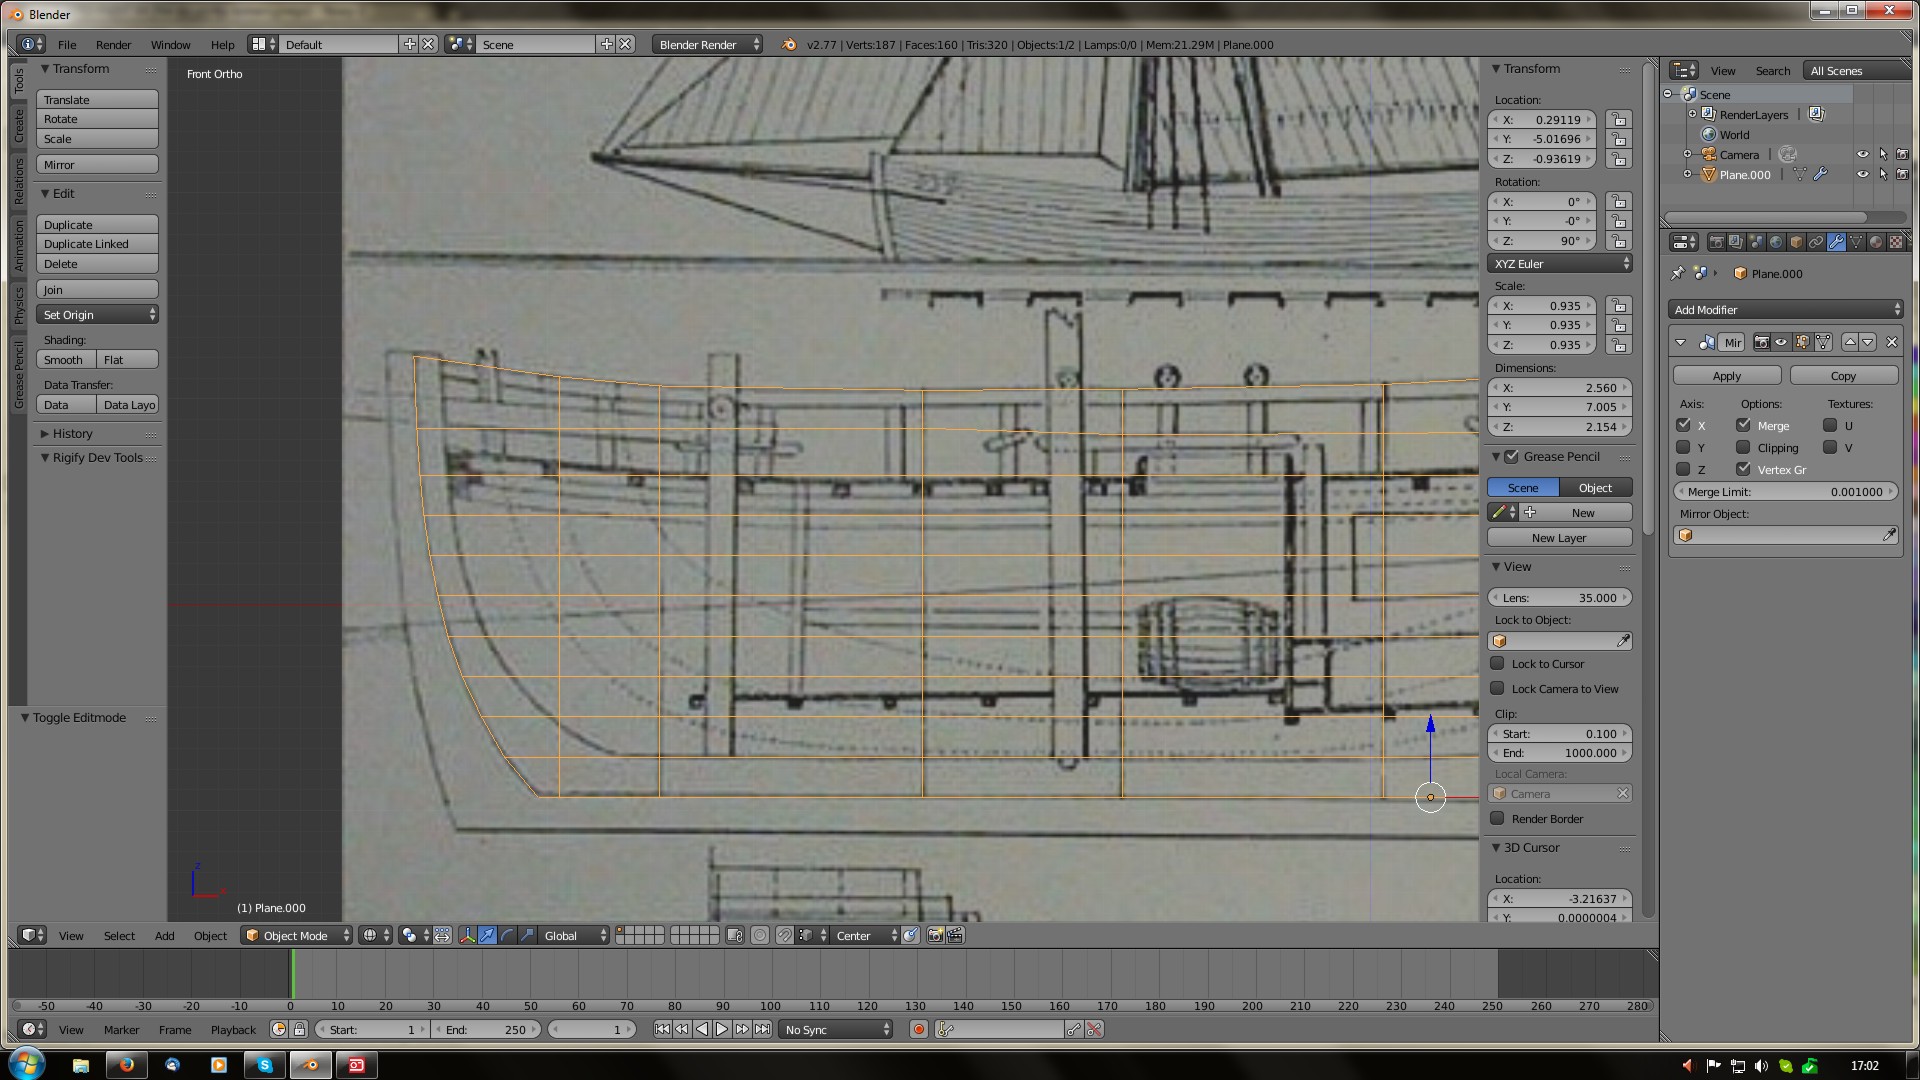
So- we are in side view. First things first: grab vertices on upper edge of the hull and move them to the edges of board on plan. Just vertically- as shown below:
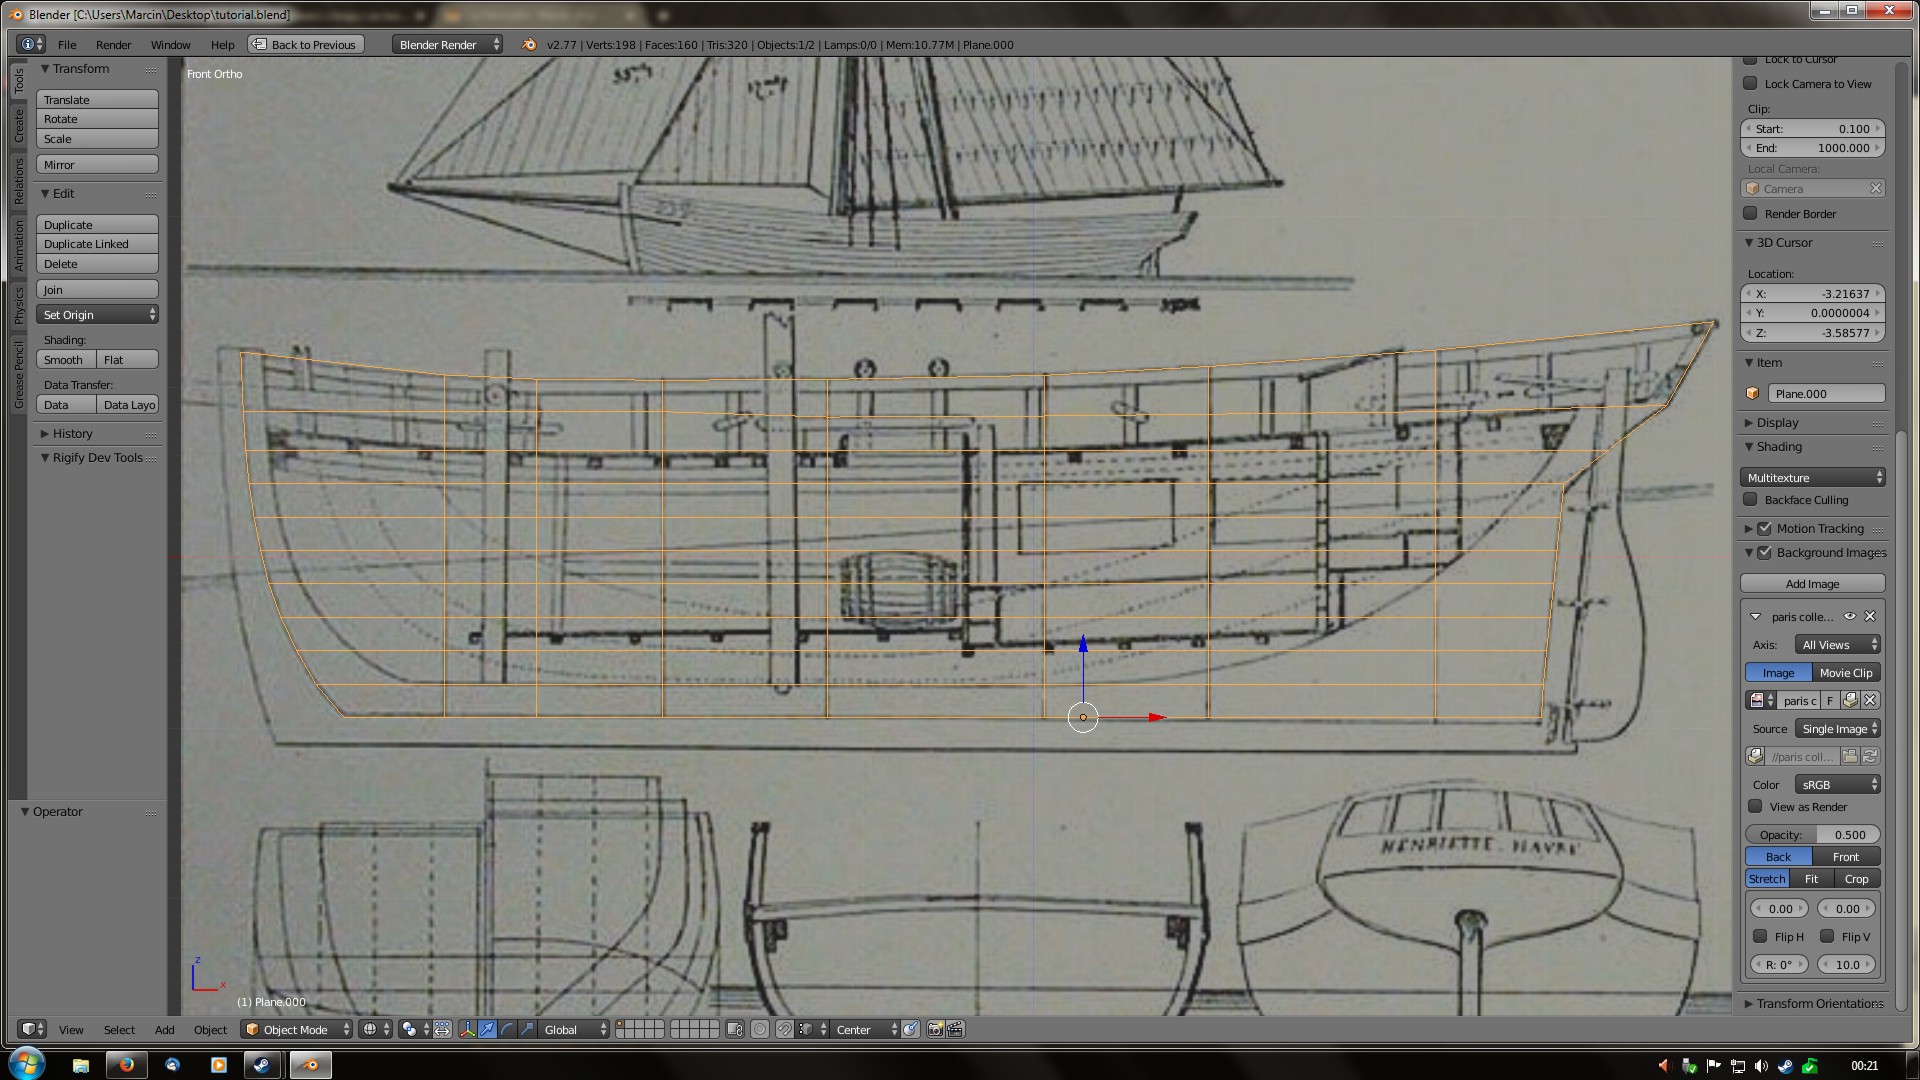
Now it is time to do the bow. Thanks to way in which we have constructed mesh it is very easy- we will just move vertices horizontally (and ONLY in one axis)
Ricky Blender- I do not agree but then again- everybody has his own set of tools and his own methods. I am far from trying to convince anybody mine is the bestest (in fact yours might be excellent) - it is just the one I am using, so I am showing it
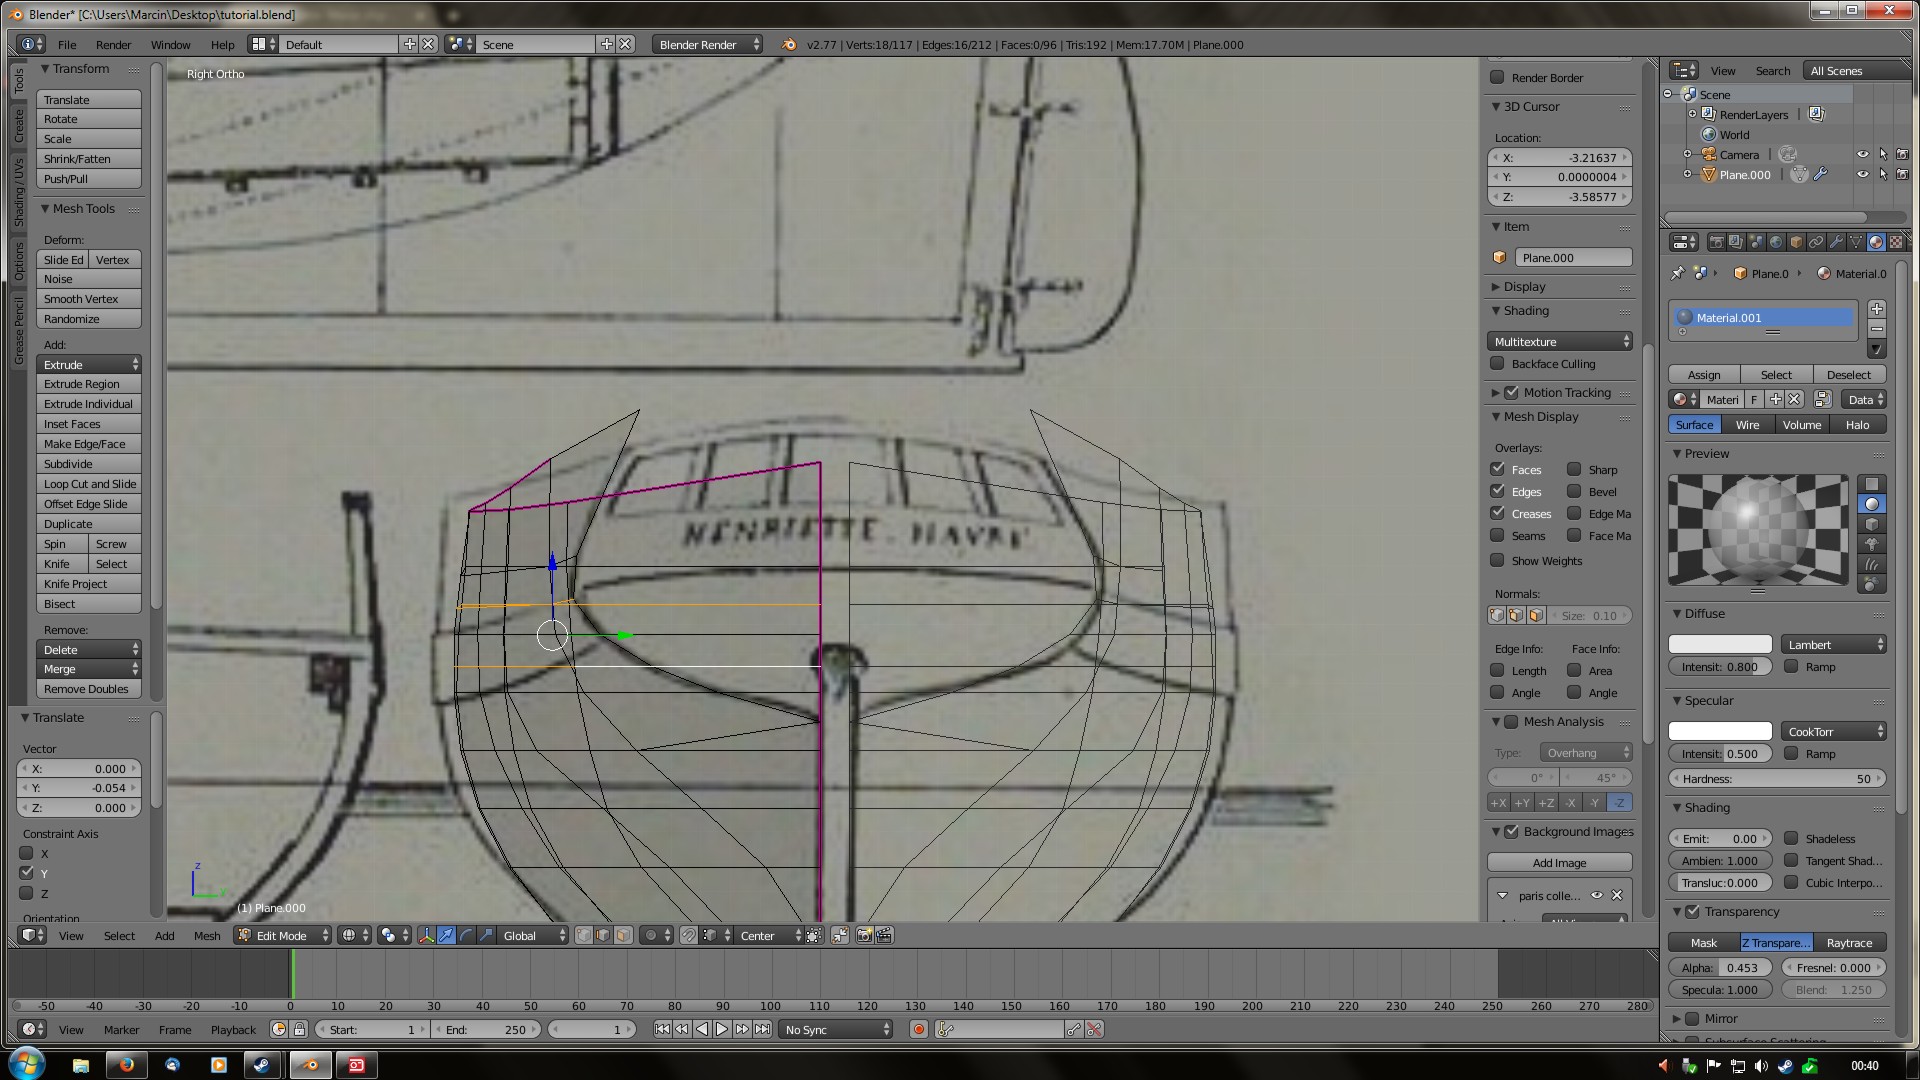
So- I have re- watched drawings and problem with bow section profiles is caused by wrong marking. Moving them back solves the problem. Having said that- time to take care of stern section. First step is exactly the same as in case of bow- moving vertices horizontally, in single axes, to get right profile:
So- result should be something like that: a boat- like shape, with sharp bow and stern. Now- any ship built after 1600 will surely have such a bottom, but it will also have a flat stern gallery. This one is on exception- so it is time to work on that one as well…
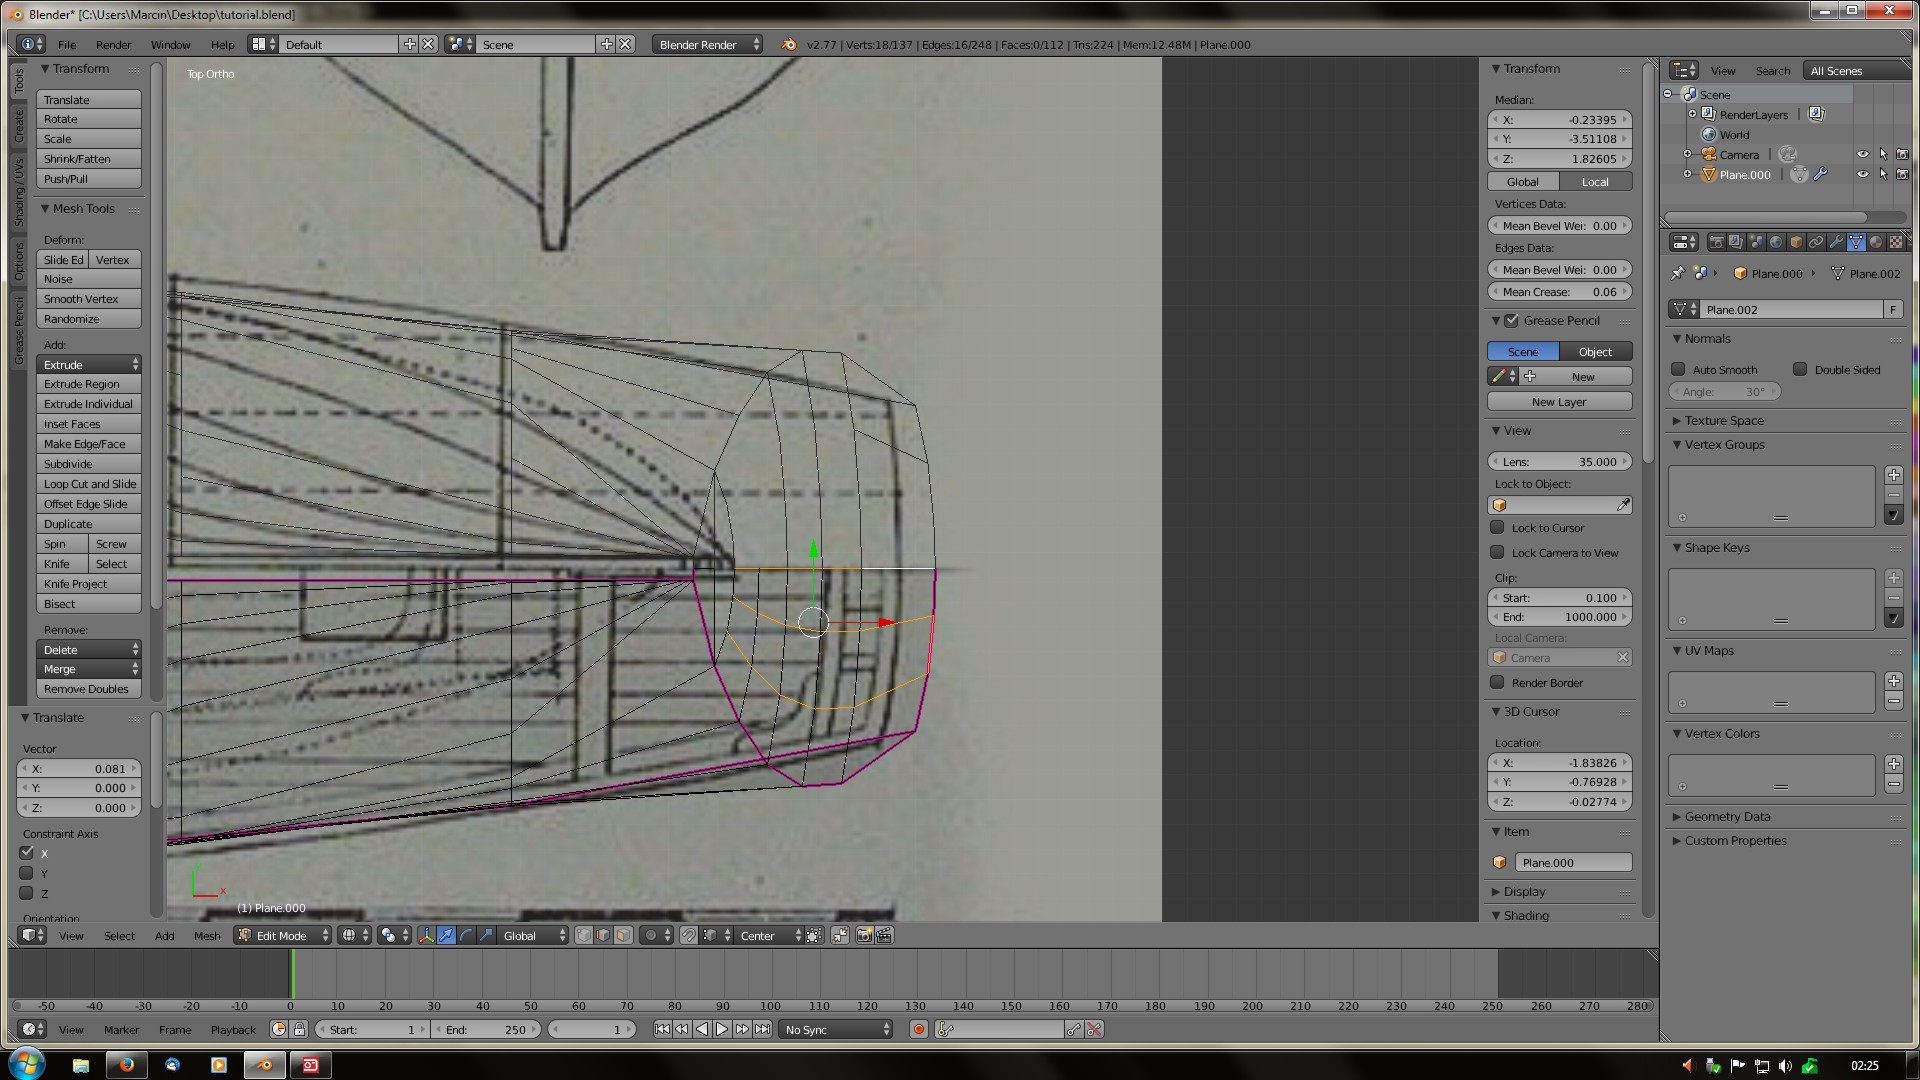
to solve that problem I am moving my model to lower section of draft, where stern is clearly drawn and- again- I move vertices of last cross- section horizontally. You can observe few things. First? This plan is not an excellent one (although pretty decent, considering age). Second: I moved one vertex vertically (one where stern beam reaches face of stern gallery). Third: to make cross section correct we will need few more loops.
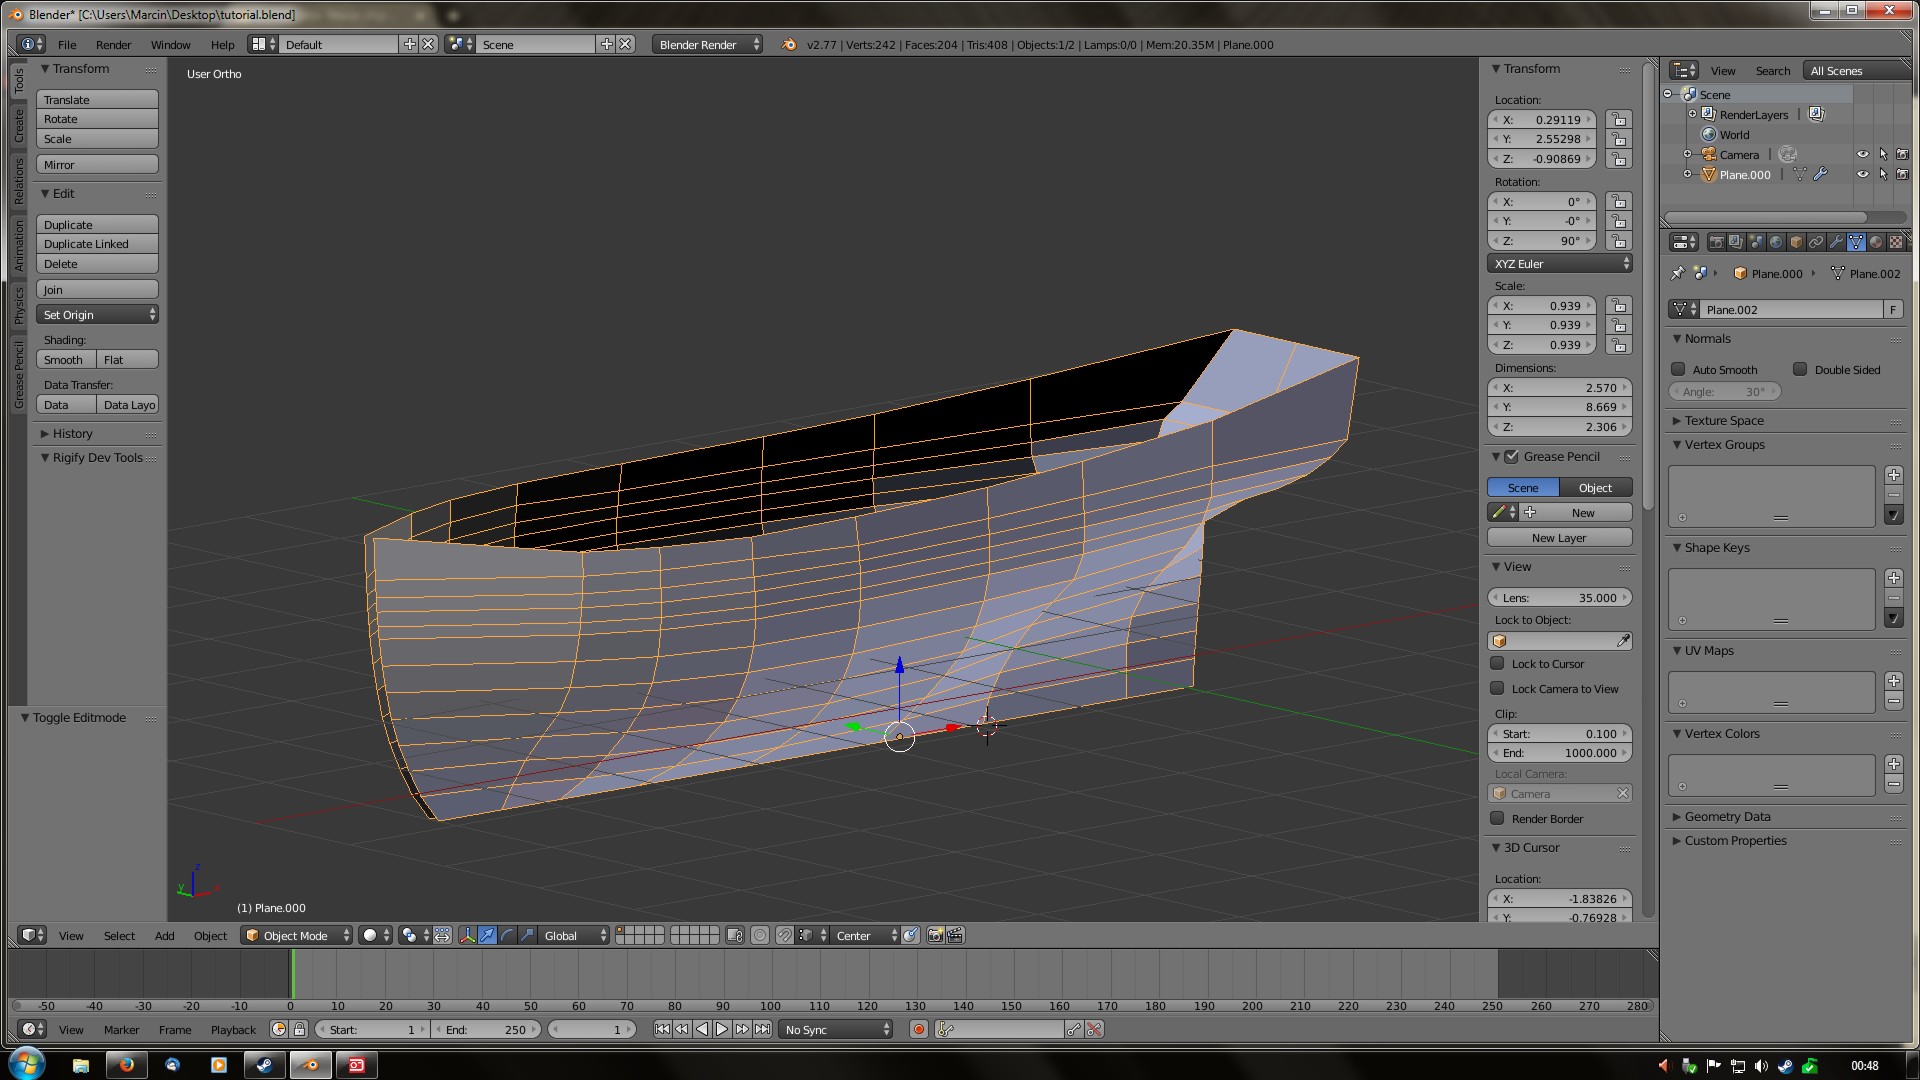
After moving vertices to match the shape, all that was left was extruding the edges to close the shape and… voila. Basic and crude- but correct- shape of our boat is ready. We will re-fine it tomorrow.
I like your general approach. It’s the way I started doing things when I was briefly playing with ship modelling. Obviously it depends on having a reasonably good lines plan to start with, but it’s basically how a boatbuilder would approach the problem. Having built a few boats myself, I naturally applied the same ideas when playing with Blender.
I prefer using a cube and loop-cutting the cross-sections and then adjusting their edges. I’ve tried various methods, and I found using planes to be more awkward and time-consuming, but each to their own.
By the way, what I usually do for this sort of error is split the plans in Photoshop, and rescale the bits until they all match in all views. I’ll also correct for any distortions of axes if they were scanned from a paper drawing.
Admittedly this is more messing around, and it depends how fussy you want to get, but it can save more messing around later, IMO.
This is very good RK, thank you for sharing. I’m glad you stress the importance of moving vertices along a single axis at first. I’ve seen many beginners quickly run into problems when they are moving verts every which way to match them to a reference.
Thank you for all warm words, gents. Let us proceed. Time to start adding details. In view from rear I have added two edge loops. As you can see we are killing two birds with one stone, by 1. adding much needed subdivision and 2. preparing division for a window.
After those are in place, upper edge of gallery can be corrected. To do it properly it is good to use a top view as an additional help (to get proper curvature. It pays off to do it as early as possible, since at earlier stages there are way less vertices to bother with and… less chances for something to go wrong.