Anyone create a tutorial how I can achieve this photo?
https://www.dropbox.com/s/y02xuxqtqg22h18/Howtodothis.jpg?dl=0
Only the 2 objects on a table with the nice reflection.
Thanks 
Anyone create a tutorial how I can achieve this photo?
https://www.dropbox.com/s/y02xuxqtqg22h18/Howtodothis.jpg?dl=0
Only the 2 objects on a table with the nice reflection.
Thanks
Please use the appropriate support forum for support questions rather than just take the lazy approach and post in Blender Discussion forum.
Thread Moved
Just set up your camera in such a way that the other objects are out of view I suppose.
My attempt to replicate the scene:
For the ball in the middle, just glossy works fine, no roughness!
For the ball on the right, I think it has no fresnel, but just a little bit of roughness in the glossy.
And I think you have to do a little bit of composition to get the shadows right. it has ambient occlusion, and if you put a distant ligt like a hemisphere, so that you don’t see the light in the reflexion, you get a nice shadows to work with in the compositor. (go to render layers, and activate the options you want, I also activated the glossy pass, so I can adjust it better)
I’m not an blender expert so I take this just like an exercise. it may be all wrong.
And my english is pretty bad…
renders:
Just clean from cycles:
With composition in blender:
Compsitor:
I hope it help
Wow that looks amazing Tonatiuh.
How did you do that? Did you create that yourself?
What sky photo did you use for the reflection and how did you add that?
Did you record a video when you created it?
Can you create a tutorial how to create this?
Yeremyah: If you want the reflexion, folow the tutorial that made finalbarrage, it is just perfect for that. The only thing different that I did, was in the compositor, but for the reflexion you don’t need it.
Yours is nice and shiny, the tutorial is blurry reflection.
I am still not sure how to get the main sphere nice ans shiny like yours?
he literately did the same as i did in the video, no difference. same setup, just play with lighting and such.
the blur is due to lack of samples. if i let it render for a bit longer you would of got this:
only thing i changed was the material on the dark ball.
i didnt make the video to show you how to get the perfect result, only the tecnique. your question has been answered, you have to figure the rest yourself.
Well, I’ll try to make you a tutorial, if you really wan’t to replicate what I did (actually I erased the blender file, so I’ll redo-it.
First, you need to add a plane: Sift + A
You need to scale big time: Sift + S
The material the plane has is just enough for the image you are looking for.
Then move it so it is place like the image:
Now to the enviroment: you need to downlowd an HDR image, mine is from http://www.hdri-hub.com
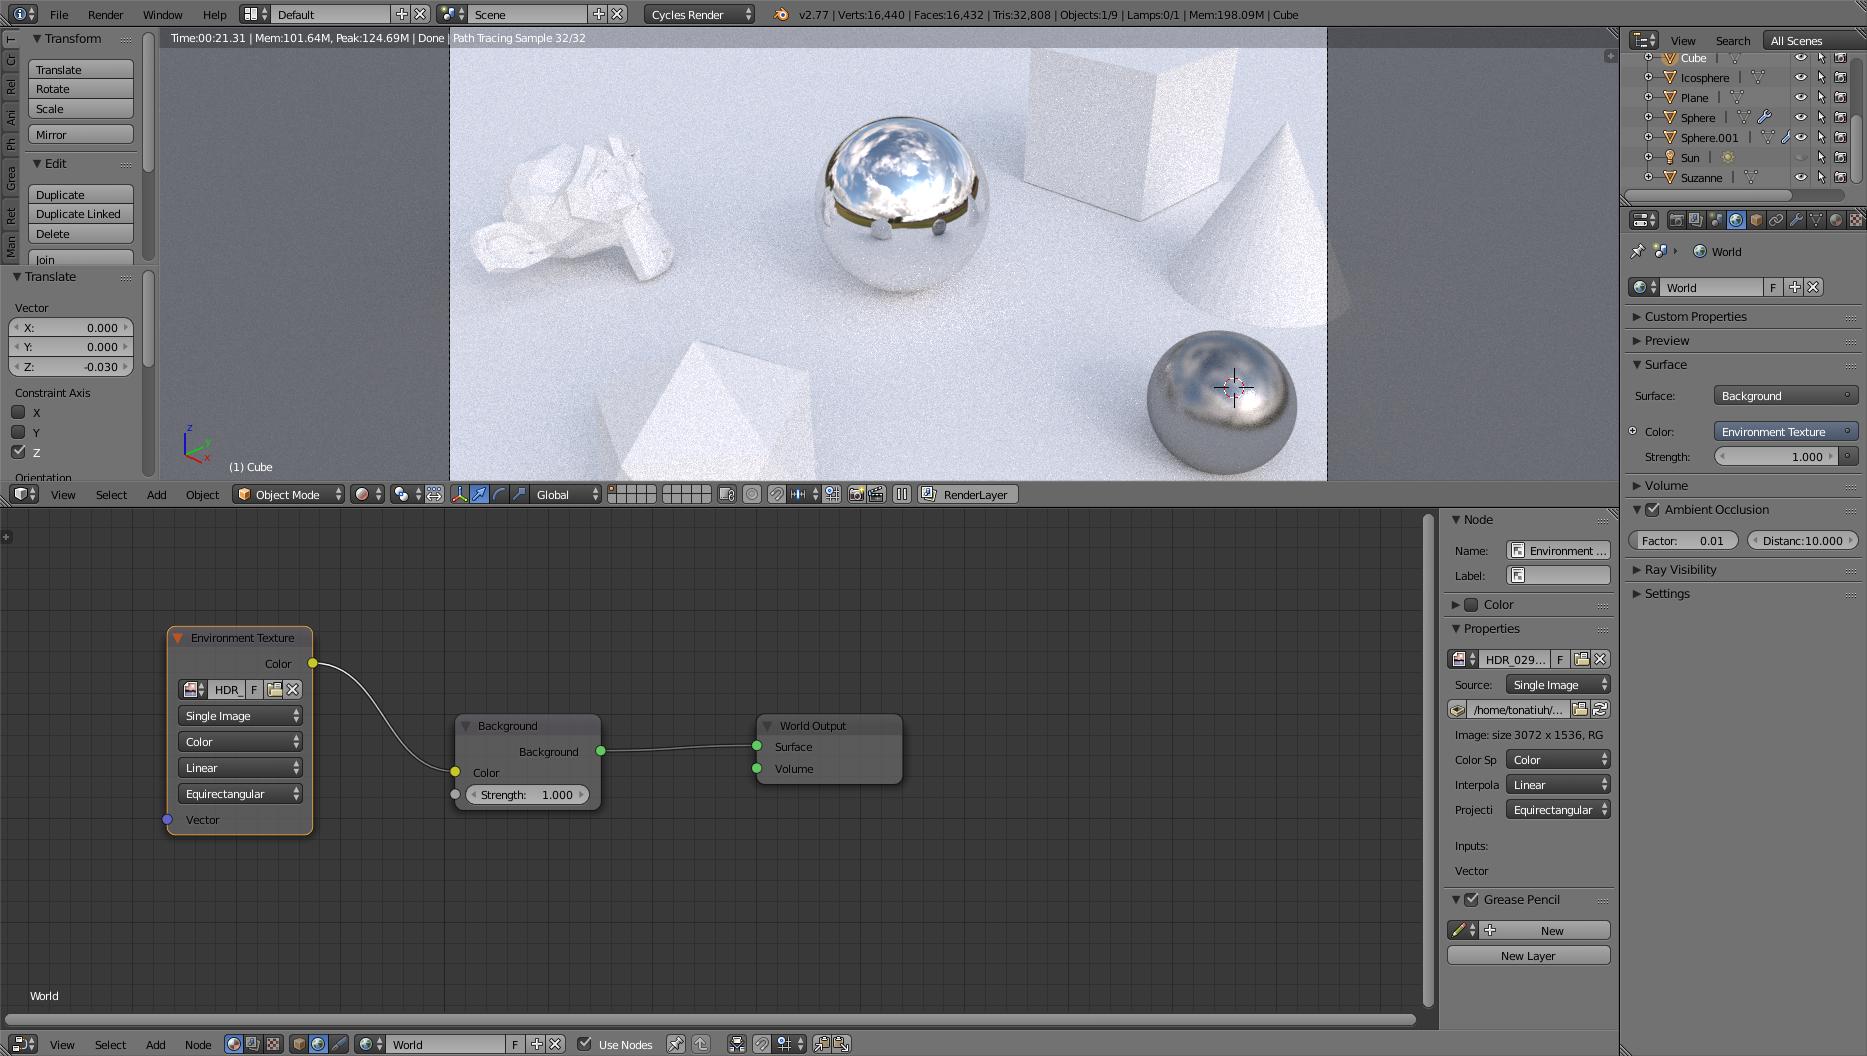
go to the world tap, pres in use nodes.
In the node editor select the world, and with shift +A add an environment texture.
Press open, and select the image you donwload (an .hdr)
Connect the color pin in the environment texture, with the color pin in the background.
Now in the world tab press, Ambient Occlusion, and factor to 0.01 or 0.03 see what works for you.
Go to the renders layers:
In passes select Shadow, AO, and Glossy direct, indirect, and color.
Make a Render F12 I use progressive render (in the render tab in performance) you can stop the render when you think it is enough
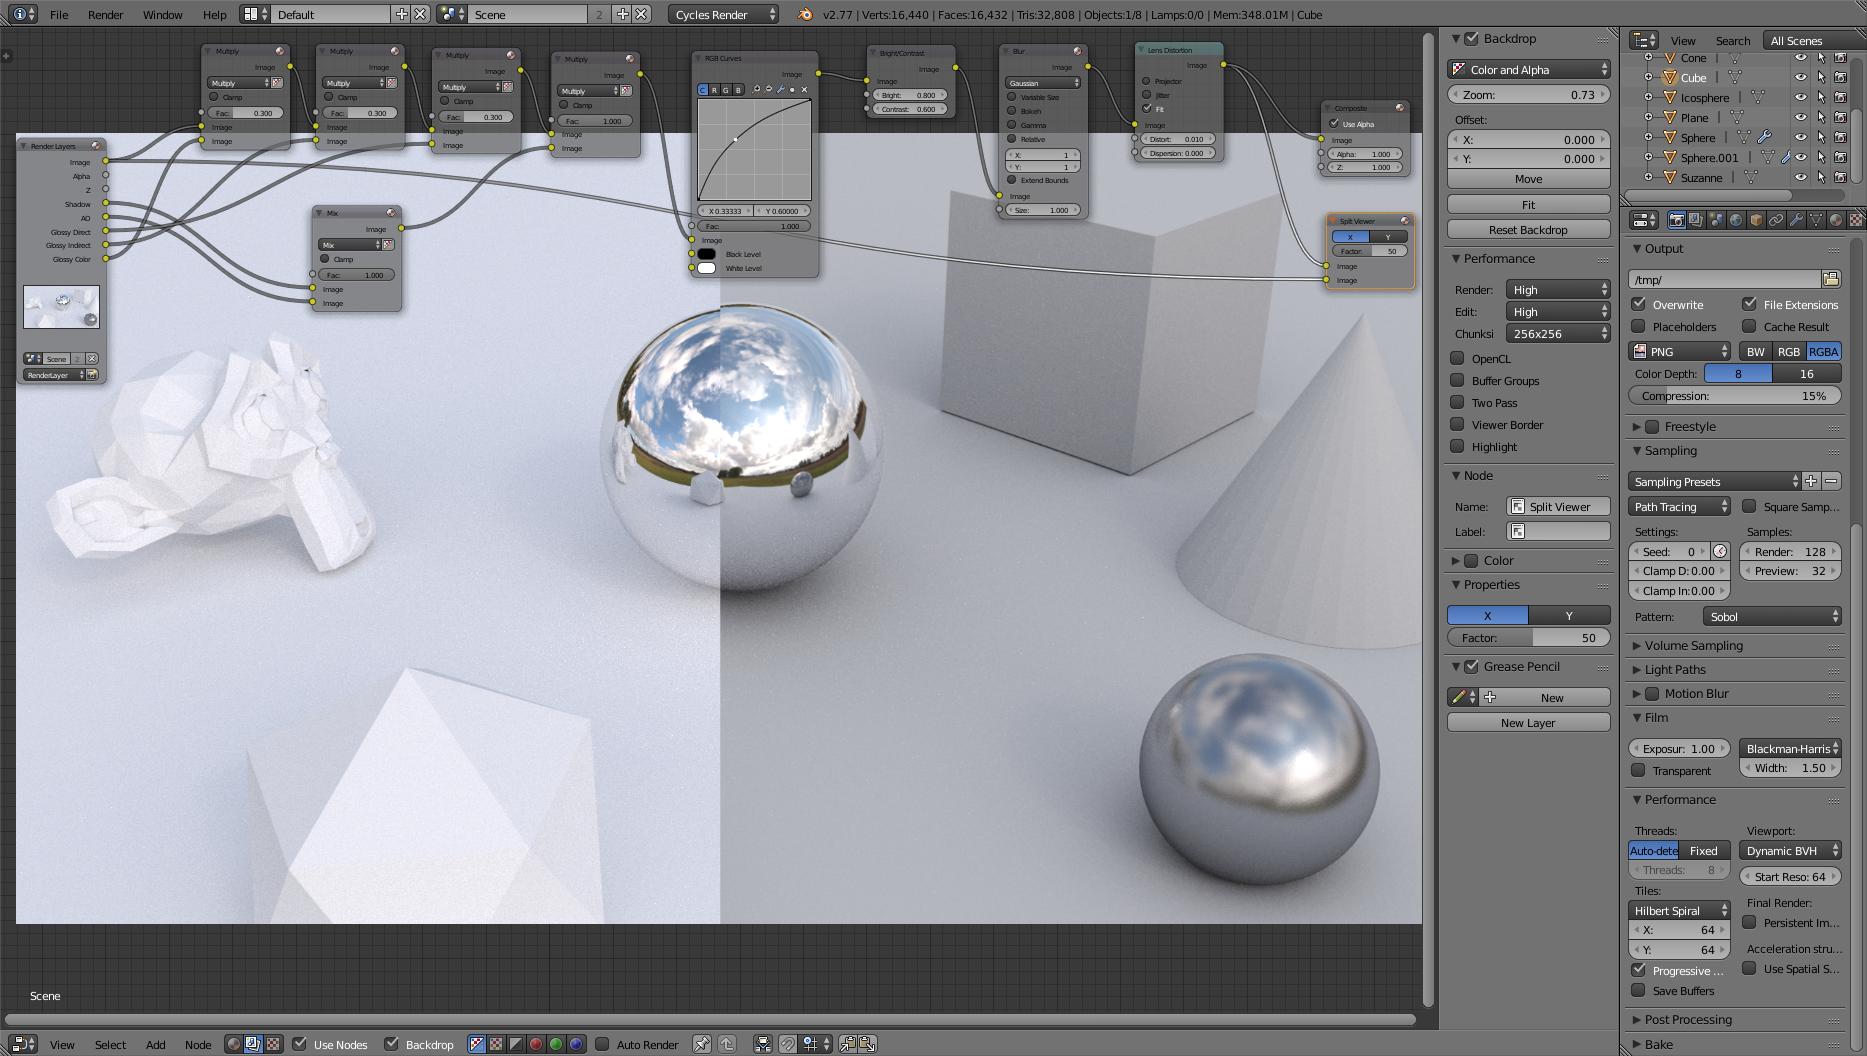
To make the composition, go to the node editor, go to compositor, press use nodes, and backdrop.
Add a viewer (shift + A) and connect Image to the image in the viewer node. or you can use split viewer
I end up whit this:
Well…I just emphasize the glossy, and the shadows, to math the original image.
But again, I’m just starting with blender, so many things can be wrong.
Hope this is what you want.
I totally agree with you.
Now I know why the blur make my image better after the composition! it removes some noise thanks.
A big thank you to finalbarrage and[ Tonatiuh
](https://blenderartists.org/forum/member.php?267381-Tonatiuh)I appreciate your help and guidance, and as a result, I created these, what are your thoughts?


I think you get it!
Now, I think you need to do it more realistic, and for that you need to learn how to apply Fresnel. In blender guru there are a reeeeely good tutorial:
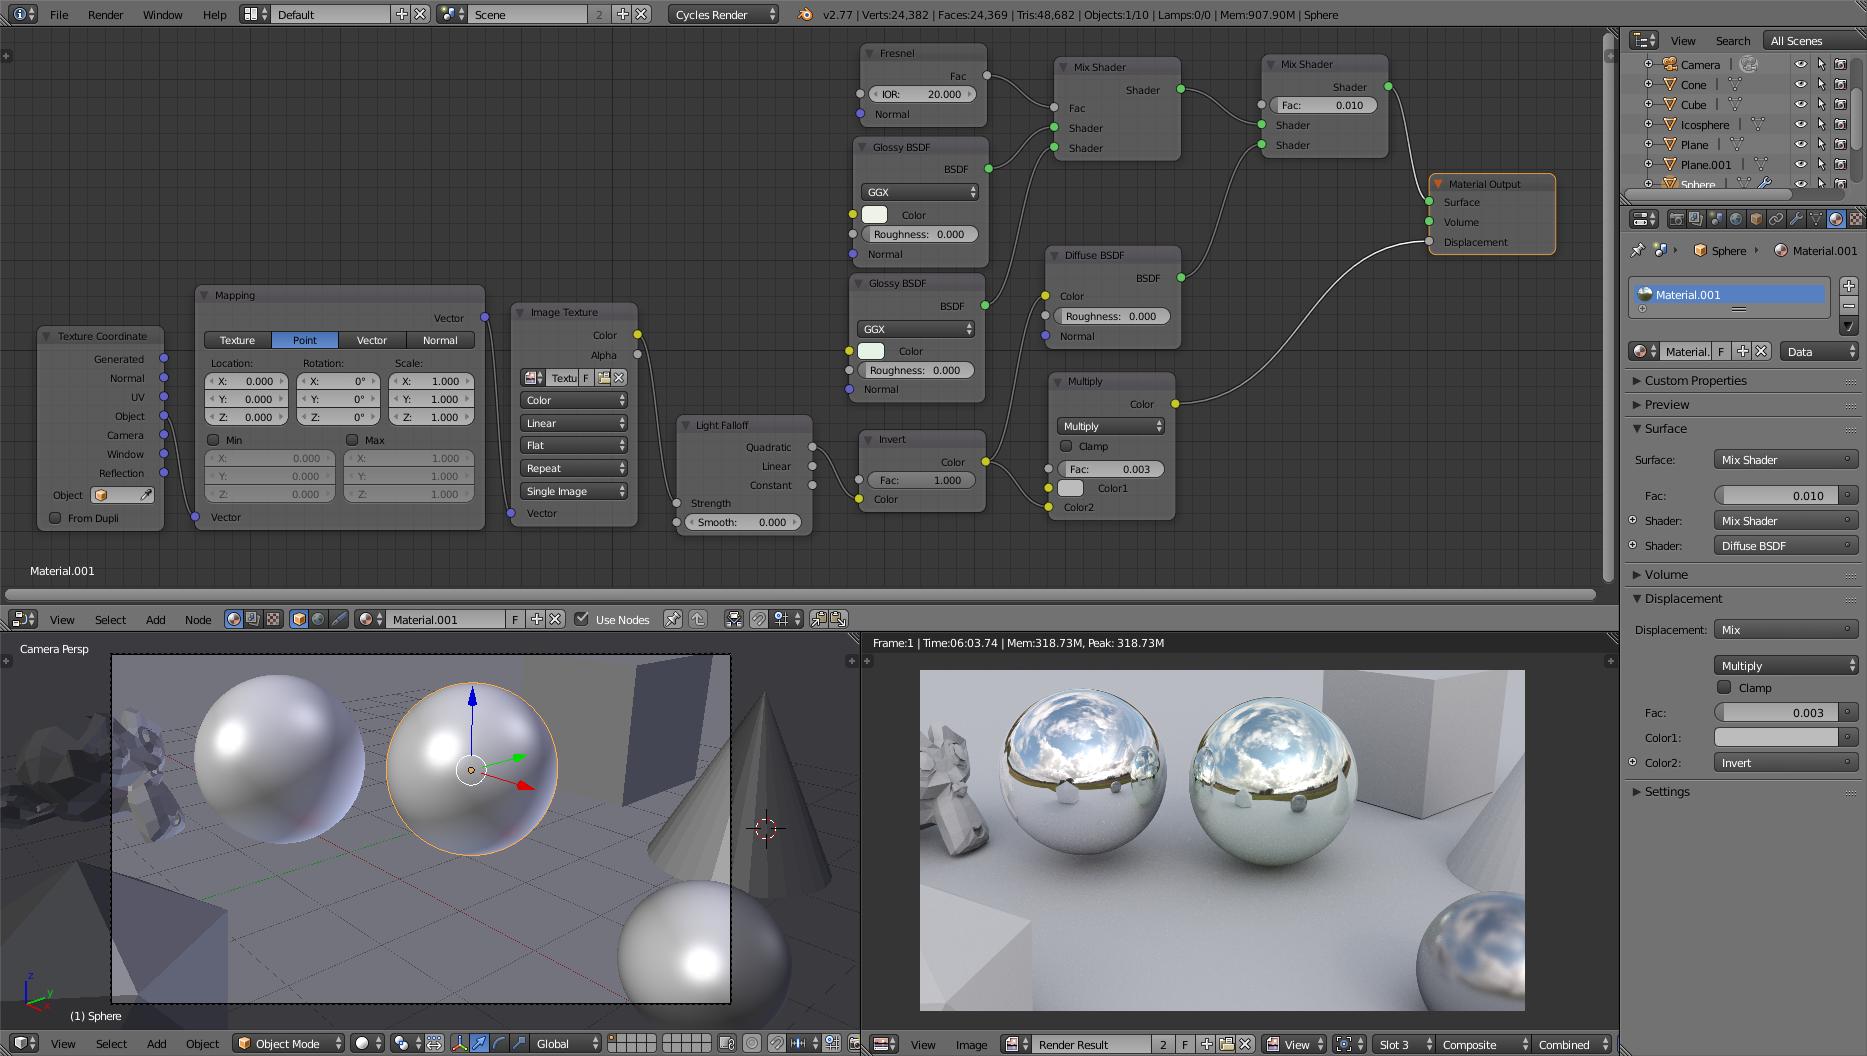
Just for my test, I think mirrows are not perfect, They tend to give a small color to the image, normally green. And the have imperfections, so they need to have some fresnel.
And you can put some scraches…
I made an example, on the left is the same, in the right with the changes:
I use this texture for the scraches:
Ok thanks 
SO you like what I did so far?
Well I think it is well done, but I’m not in to this art, I more like a human body student. But i think you have some interesting renders, I prefer more realistic things, because it is what I like. I saw your post and I thought " well that is something I should probably know how to do"
I don’t know how much you know about blender or art in general, but I see that you put effort in the composition, and they look pleasant to the eye, so in my point of view, they are rely nice renders.
And anyway, I’m learning, you should know that.
I hear ya. And thank you for your kind words.
I look forward to seeing what finalbarrage thinks what I did.