This is probably going to be complicated to explain as it does not involve just Gimp.
I’m trying to to cut parts out of an existing blueprint and then isolating them (front, top, side views), my main problem is that some parts of the blueprint is rotated and in some places it does not match up to the actual vehicle. I want to know how to align my blueprints properly and to fix any problems by using real reference images very similar to what Witold Jaworski is doing in his thread:https://blenderartists.org/forum/showthread.php?370606-SBD-Dauntless-(US-Navy-dive-bomber)
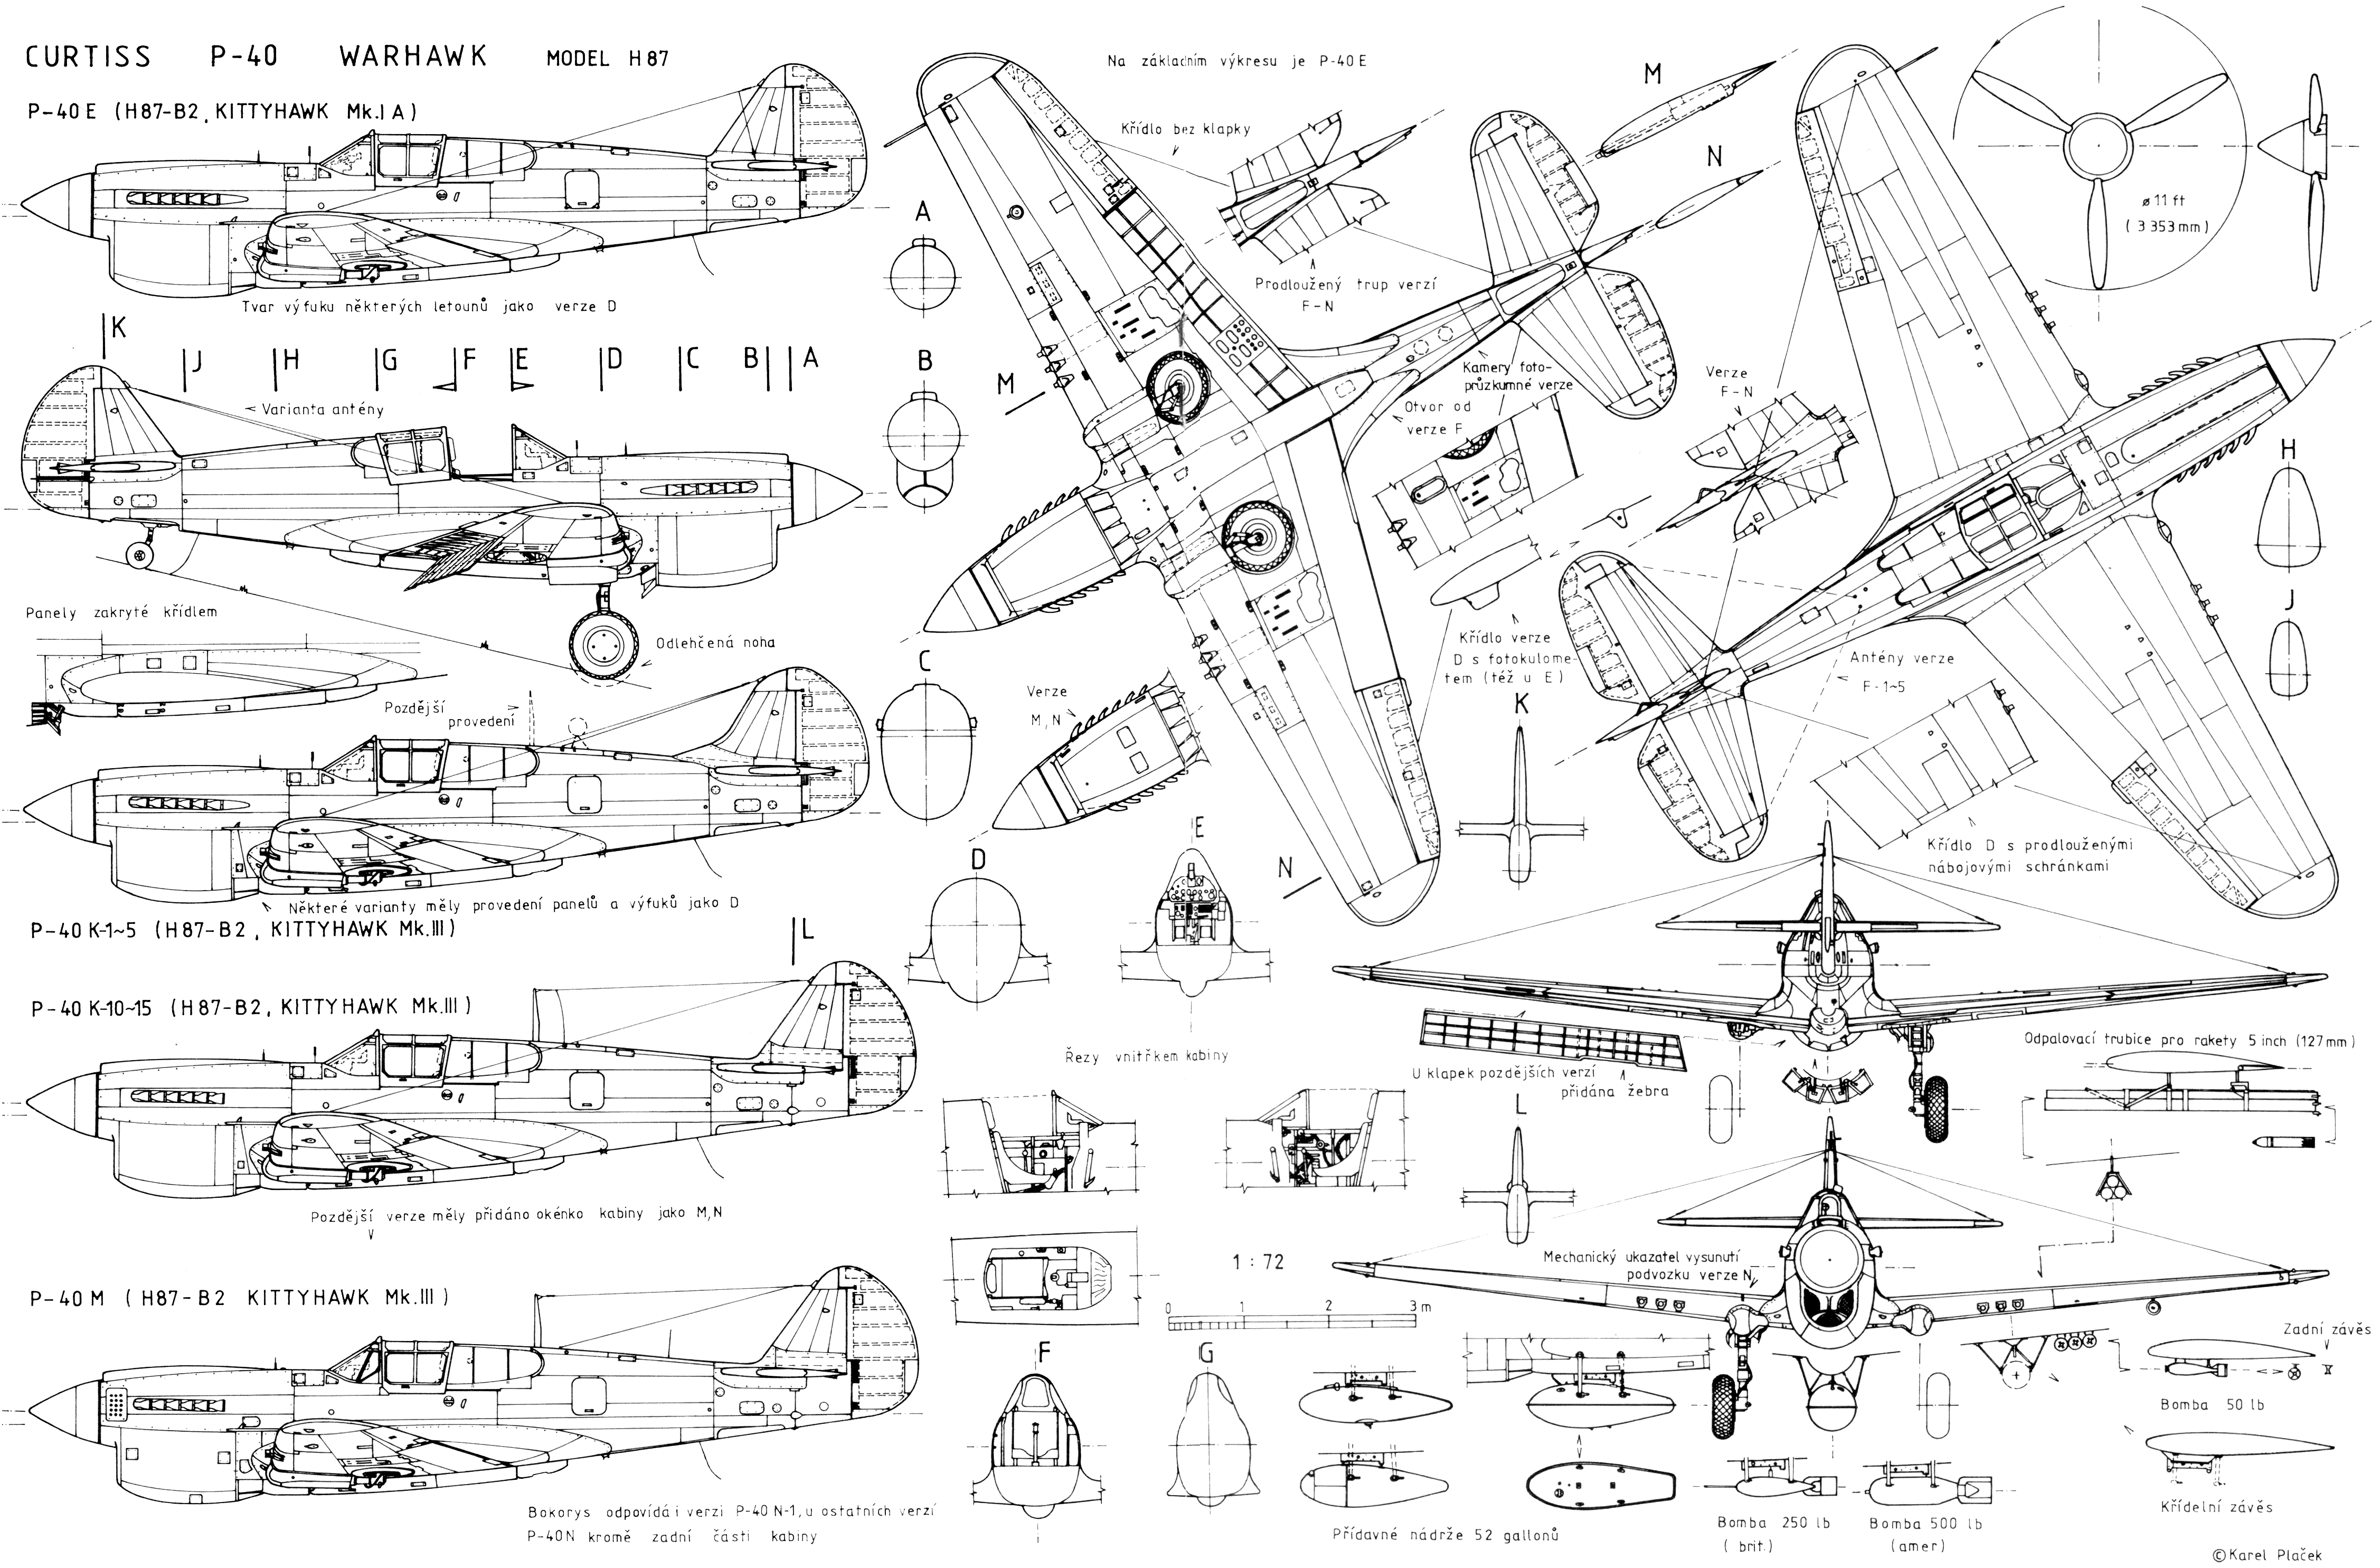
This is the blueprint i am currently working on as practice:
I am a bit of a nooby when it comes to Gimp but any help is greatly appreciated.
Bottom view on that gif is quite distorted.
All the rotated parts - select using lasso from the original, copy, paste as a new image.
When you use Rotate, there is a “2d cursor” in a middle - move this to the place where you need a centre of rotation.
It’s better to drag down guide line from a top and place so that your imaginary centre is on this line before you move 2d cursor there. Then grab anywhere on the selection and rotate while other end of drawing’s centre line is on the guideline. Write down angle from the box to apply to other parts you want to rotate.
After rotations, make sure to check Image - Fit Canvas to Layers.
You can trace cut lines in Inkscape; when imported, place all curves on before imported image and scale up using 3d cursor as a pivot, according to the image.
Here’s a quickie http://www.pasteall.org/blend/42886
Yeah, it looks like the page may have been folded during scanning. I found a few bleuprints that are in much better condition.
All the rotated parts - select using lasso from the original, copy, paste as a new image.
When you use Rotate, there is a “2d cursor” in a middle - move this to the place where you need a centre of rotation. It’s better to drag down guide line from a top and place so that your imaginary centre is on this line before you move 2d cursor there. Then grab anywhere on the selection and rotate while other end of drawing’s centre line is on the guideline. Write down angle from the box to apply to other parts you want to rotate.
After rotations, make sure to check Image - Fit Canvas to Layers.
Thanks, is the “guide line” part of a tool or just a normal line? Is there some way to snap it to the middle before drawing?
You can trace cut lines in Inkscape; when imported, place all curves on before imported image and scale up using 3d cursor as a pivot, according to the image.
Here’s a quickie http://www.pasteall.org/blend/42886
Very cool, thanks for your time.
I’m still trying to figure out how inkscape works, first time using it.
There is this … what the heck was the name… measure tape on the top and left side of the drawing in Gimp … oh, rulers: if you click on a ruler and drag into the drawing area Guide line is created.
Rtfm puts this better anyways - http://docs.gimp.org/2.6/en/gimp-concepts-image-guides.html
Inkscape is a special tool indeed but proves as being useful on a lot of occasions for Blender’s projects. Luckily, there is a bunch of tutorials for it.