I currently have an object with shape keys being driven by drivers. I have this only because I can’t animate the shape keys after I bake sound to them. So i baked it to an empty and the empty’s position drives the shape keys. Now, how do I animate the shape key after the driver stops doing it’s thing because I can’t change the value. Can I “disable” the driver when it isn’t needed?. I’ll include the blend file.
I REALLY don’t like your chosen upload site - full of sh**y adverts and misleading “Download” buttons, please use pasteall.org (under blends tab), or something else that doesn’t get my protection systems twitching…
Once you have done that I will look at your file. You might however, be better to use a Transform Constraint rather than a Driver as you can keyframe the influence of the constraint. I do not know a way to “turn off” a Driver, maybe someone else does.
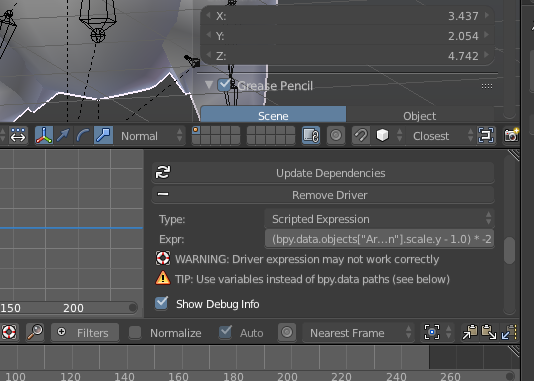
In the Graph Editor, select the Drivers window, and on the left where the driver’s name is listed, should be a small speaker icon with tiny sound waves emanating from it. Click on this, and the sound waves vanish and the driver should be disabled. I say “should” because I have not checked this (I rarely use drivers) but every other animation channel I know of has this on-off feature.
Follow-up: I just remembered a file I have with an active driver and yes, you can switch it off this way. But this cannot be animated and so may not be of use for you in this situation.
However, it does allow for having the driver in place but disabled, so if you can animate the sequence in two sessions (driver on & driver off) it may offer a solution.
I checked this out Chip - you cannot insert keyframes with the driver in place, even if it is disabled, as far as I can see on one of my own files.
So I think it will be two blend files, one with the driver and one without as one “fudge” solution. I still think that the best way too go is to use a Transform constraint on a bone used to move the mouth instead of the shapekey, since you can keyframe the influence of the Transform constraint to 1 when you want it operable and 0 when you don’t. Keep the sound baked to an Empty and use this as the target for the Transform constraint.
We should compare files, as I could lay on a couple of Shape Key keyframes with the disabled diver in place. Just rechecked the file & they work as expected. I wonder why the difference in results?
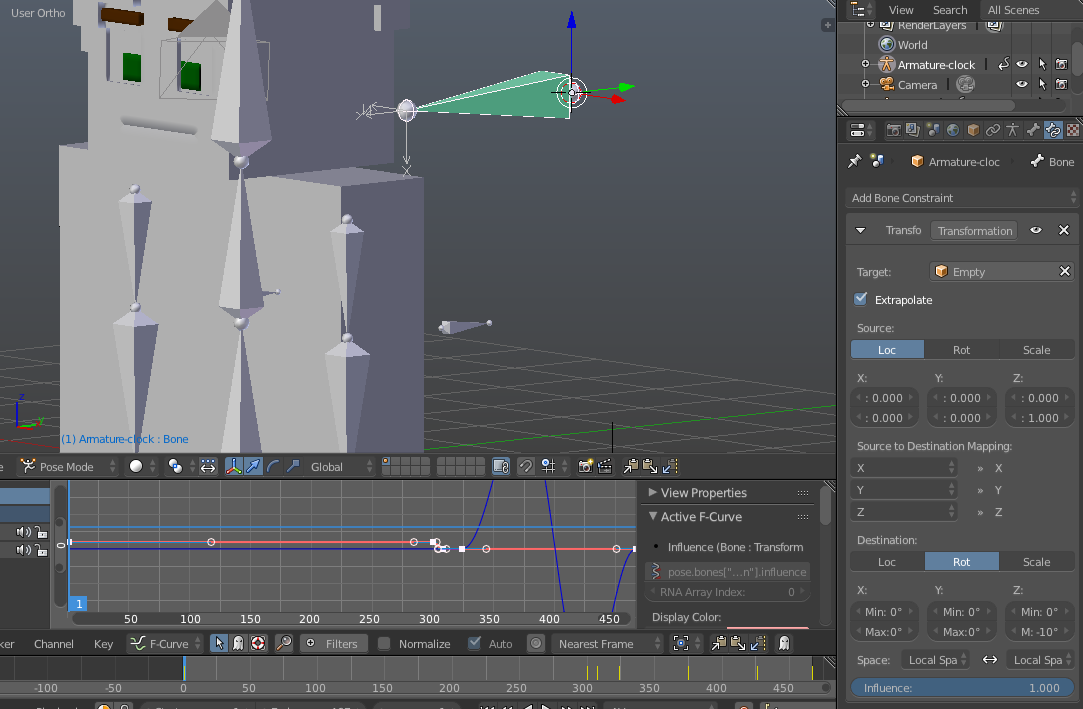
The figure’s fat belly is shape keyed to get thinner, and portions of the armature are relocated, when the bone Fat2Thin is scaled in Y. Transformation constraints move the armature elements and a driver changes the Shape Key value.
With the driver disabled I was able to put in two test keyframes to activate the shape key and thin the belly. These do not work with the driver in play.
Aha! I think I have it, it does not work for me when the driver is on a Transform box, like Y rotation, but does on a shapekey - that is even more curious, thanks for the heads up on this.
Revised with working keyframes, a 90deg rotation of the screw object in Y. If this won’t work for you then it is indeed likely a difference from one version to the next. Make sure you switch the Graph Editor to F-curves to see the new keyframes.
So basically either use another armature to control the mouth instead or a shape key or make my blend file into two different files with either driver on or driver off? Just making sure I understand. Also, check the OP I changed it to pasteall.org
ryan, I snagged your file, and from what I can see, you can activate the shape keys with both your driver and keyframes, just not at the same time. This is in version 2.76.
When I disable the driver in the Graph Editor/Drivers window (speaker icon), the two keys you have placed on the Open Mouth Shape Key become active, however the file had the same value for both keys, .001, so no movement is apparent. By keying in 1.0 for the second key, the mouth opens.
@ clockmender: I disabled the driver using the speaker icon, then set keyframes as usual. If you switch the Graph Editor from Drivers to F-curves you can see the new keys. Also note that with the driver disabled, its F-curve in the Drivers window turns pale white (disabled), a useful visual clue.
Thanks for that Ryan, If Chip can let us know what he did to your file, you can proceed as you are, but you cannot keyframe turning off the Driver, so you would still have to do two animation videos and then join them together in Blender, I think…
Or it’s back to adding another bone to your armature to move the mouth, then adding a Transform to that with the Empty as the target, then you can keyframe a change. I will make a mod to your file this afternoon and let you see what you think.
Aha - now I have worked it out, D’oh - you can’t RMB Click the Transform box and “Insert Single Keyframe” the option does not exist if you have a Driver in there, but you can key I in the 3D window to insert keyframes - now I am happy I have the answer!
If ryan’s animation plans suit, it would be more efficient to simply render two different frame ranges, the first covering the driven Shape Key fames, and the second covering the keyframe Shape Keys. It’s not only more efficient but also safer to render to an image sequence (PNG is a good choice for image type), as that allows for discontinuous rendering, helpful here and when something unexpected interrupts rendering (for me, that’s a thunderstorm/power glitch lol). If rendering to video you lose the entire rendering session; with images you can pick it back up at the frame where it glitched out. Loading image sequences into the Video Sequence Editor module is a simple task, same for in the Compositor.
Same limitation in the Graph Editor F-curves window, but you can do it from the menu. This sounds like a bug to me, minor & inoffensive for the most part, but sly & misleading at times.
So Ryan, I added a new armature, just to show the principle, with a single bone with a Transform Constraint to rotate it in time with the Empty up to the end of the sound file, then keyframed a 0 influence value and added some more keyframes to rotate it by hand so to speak:
So here is your file back, just press Play to see what I did. I hope this helps you a little, I am not sure if you can drive the shapekey from a bone or not… :eyebrowlift2:
Thanks Chip, I really must spend some more time getting to know shapekeys better, the are so useful and so under-utilised by me! I am going to take your blend file apart this evening as my homework.
So if Ryan drives his shapekey using a bone in his armature, which is fed from a Transform Constraint using the “Sound-baked” Empty as a target, with influence values set, he can do the whole thing in one go… I hope this is not over-complicating things…
I am going to sit in my Jacuzzi for a couple of hours to absorb all this!