I just wanted to do a quick test of the microdisplacement of V2.78 and ran into a (probably) little problem.
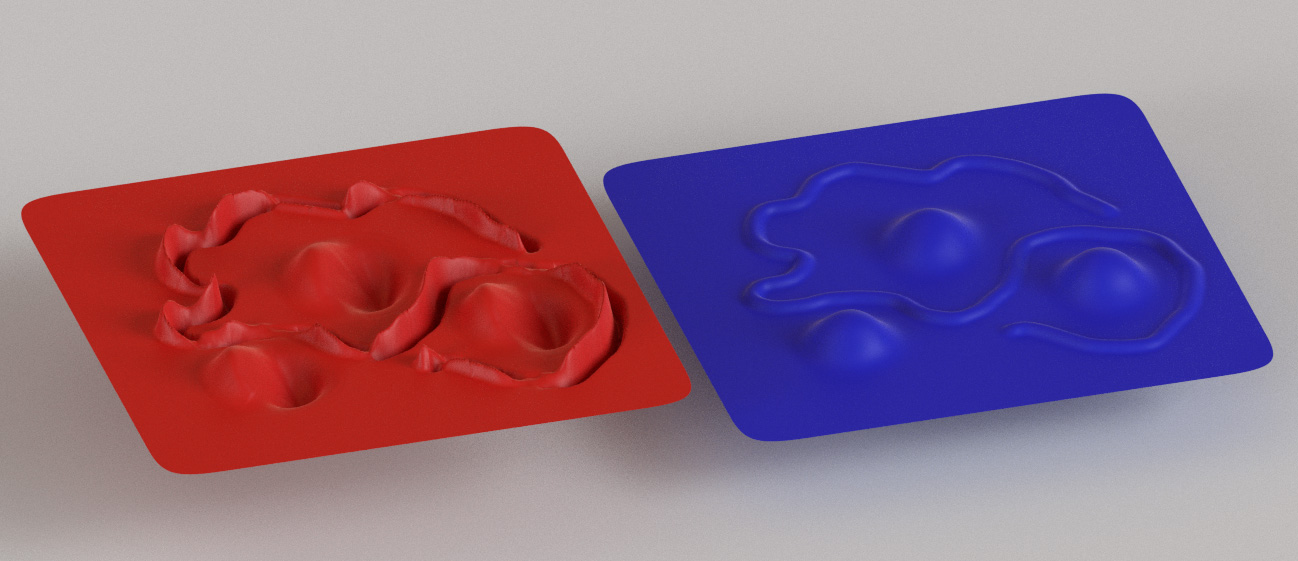
I sculpted some quick shapes on a plane using multiresolution and baked a normal map from it (blue object in the image). When I apply the map to a plane via displacement (red object), the bumps extrude on both sides of the plane and the whole plane gets lifted on the Z axis as well. Looks like some weird offset issue.
Don’t think a normal map will be read correctly by a displace modifier. Should be a bump / depth / Z map (greyscale). Experiment with the Strength and Mid Level sliders in the modifier.
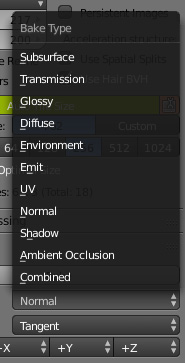
if so - how can I bake the sculpted changes of the multiresolution modifier into a grayscale image. The only option that I have is “Normal” which results in the colored version.
There is no direct option to bake displacement map in Cycles, there is in internal. Anyway it is possible do it in Cycles with some tricks (for baking to a plane/camera). You read this very long thread, there is explained how to bake displacement map in Internal and Cycles:
Here’s an example:
You note that there are two scenes in this file (in the Blender top bar). One called “Bake displacement” where I have the scene ready to bake displacement map to a plane. You need go to edit mode to bake (sometimes error occurs in Object mode with ‘not find image’ message error), and the other scene “Cycles displacement” where I use the generated map.
Edit:
Before Bake displacement map you need to create the new 32-bit image in UV/Image Editor, and then save it to disk. After bake displacement map, you remember to save to disk again the image (displacement map) that you obtained. And as I said before, after selecting all your objects and last the plane as active, is better make the bake process in Edit mode to avoid weird message errors. Anyway, if you get an error related to not found an active texture also in Edit mode, you try too bake in Object mode. I could never find out exactly when the error occurs.
Thanks for the reply, YAFU, but I’m getting nowwhere here. The 79 page thread is a horror to browse through and after a few pages I haven’t found any concrete solution.
I downloaded your blend-file but don’t see what I can do to get to a proper result.
So - we now have that amazing micro-displacement feature and no straight-forward option to bake sculpting into an usable map. Makes the whole feature a lot less powerful. You basically can only use already created displacement maps or fool around with procedural textures. That’s a bummer. I guess I will have to wait for an implementation of that.
thanks for the info about the switch - never had to use it and so I didn’t even know there’s an option for that. Your approach works, but it’s to fiddly for general purpose. It might work well with planes but will become tedious with 3-dimensiosional object that you sculpted on.
I’ve searched for “bake from multires” and watched several videos. But they all baked to normal maps and not to grayscale maps. And the normal baking is so easy and it works. Just the connection to the new microdisplacement feature is broken.
I guess I’ll keep googling for that one very hidden video that closes the link to this problem.
Add “displacement” word
“displacement” “bake from multires”
I edited my first post to add some tips.
I agree that Baking displacement map is somewhat confusing in Blender, you can even get some random errors that you do not know well why they occur. Even I’m not sure what will happen with Bake Displacement feature in Blender 2.8 when Blender Intrenal render engine be discontinued/deprecated.
Anyway, you read a lot and look about these tutorials.
thanks for your help. Adding the word “displacement” results in no usable results (at least as far as videos are concerned).
However - I managed to get the displacement map baked in “Blender Render”. For a quick moment I was happy until I saw that there are dark halos around my elevations, which should not be there as the sculpting never dug into the plane. When I use them with microdisplacement, there are ditches around the bumps now. Once again - dead end.
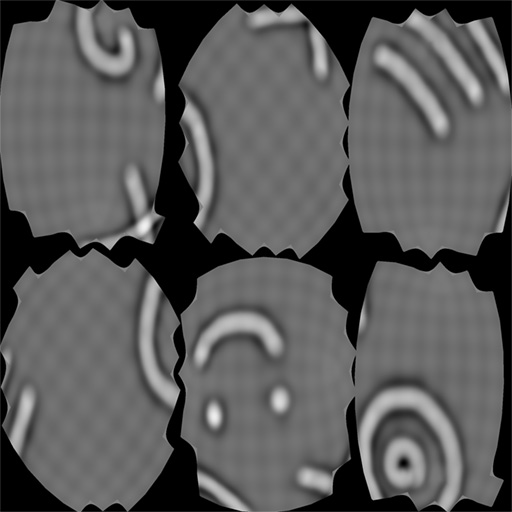
Here’s the baked displacement - you can see the dark halos around the bumps.
Another method is to convert your normal map to a bump map. Many normal map generators can do this if not Blender itself. Bear in mind that microdisplacement is relative to camera at the moment. Unaware of plans to map it to distance between baking surfaces.
@AndreasResch. I’m not sure what the problem in your example. Just in case I clarify that set the correct distance from your active plane is important. In my example the two planes are separated by 0.5 on Z. And I set distance 0.51 in Bake menu.
Regarding backing displacement from multires, at this moment I do not remember how I had done. I remember that by reading something on the internet I had been able to achieve it.
Edit:
Some tips here that may be useful for Multires:
There is no other plane. I’m baking the displacement on the plane itself, which (somewhat works) but leaves me with those halos. And I don’t see any setting to specify an offset for the grayscales to dial that in somehow.
thanks for your suggestion. I tried to find a workaround like you described. Of course it has to be a free or cheap option, cause I don’t want to spend a few hundred bucks to convert a normal map to a height map.
I tried GIMP (with the normal map plugin), I tried the NVidia NormalMapFilter Plugin in Photoshop and I tried a program called AwesomeBump. None of them delivered proper and usable results.
For example - the NVidia plugin for Photoshop results in a strange gradient over the bitmap area and banding along that. No idea how to get rid of that.
Try this tutorial, it’s applicable to complex objects also. Baking stuff starts at around 8 minutes in.
Banding can be from bit depth reduction introduced by some formats and or programs. Use the highest bit depth you can and save it in a format that preserves it, EXR for example. Not sure about the other error.
so here’s the bottom line of the issue and how I worked around it based on this demo object.
Cycles
The only option is baking to a Normal Map, which works great. The (unsolved) problem is, that I haven’t found a way to convert the Normal Map into a Height Map without issues. Unfortunately the created Normal Map cannot be used as a direct input into the Displacement Node for Micro-Displacement (not a Blender issue - doesn’t work in 3DS Max either).
Blender Render (Bake from Multires)
Not really usable for my purposes. For one the faces of the low level polygons are visible in the baked Displacement Map. Unlike when baking the Normal Map in Cycles, I have to reduce the level of the Preview value in the Multi Resolution modifier to 0 for the Displacement Map to show. On top of that, there are weird halos around the sculpted parts.
Blender Render (Working Option)
The only way that I got it to work is like this. I duplicated the sculpted sphere, deleted the Multi Resolution modifier and applied a new one with the same amount of levels, but no sculpting. Then I selected both spheres (having the unsculpted one as the active one) and baked the Displacement Map with the “Bake from Multires” option OFF and “Selected to Active” ON. That’s the only way I got it to work so far.
What would be great: With the powerful Micro Displacement in development, I wish I had the option to bake the sculpted changes of a Multi Resolution modifier into a Displacement Map directly from the Bake section. Another option would be, to have some filter node that would convert a Normal Map into a Displacement Map right before I plug it into the Displacement Node. With one of these two options available, the workflow from highres models to lowres models with Micro Displacement would be nice and fluid.