Hello,everyone,
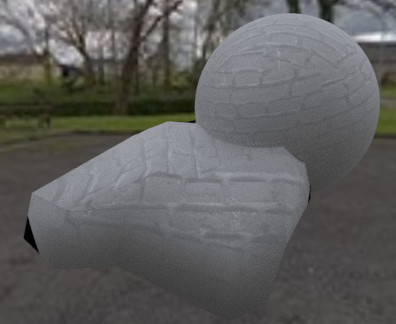
I have made this tutorial, but when I make my Reflection more (to 1) with slider, it blocks the Diffuse map and object become white. With Roughness all works all right.
Here are materials:
tutorial:
Thank you a lot for help, I changed wrong factor, but the problem is still there. And actually I do not see any reaction from Normal map or Glossy/Spec map.
Today I downloaded all provided files, textures as well, and put them into file with my object and with a sphere.
bad result photo - in attachment.
tutorial: http://www.blenderguru.com/tutorials/pbr-shader-tutorial-pt1/
blender file (with textures and PBRdielectricNode imported from Andrew Price blend file):http://pasteall.org/blend/index.php?id=43755
screenshot
It’s not a good idea to crop images like that, it hides information from the interface like blender version and viewport settings, which affects what you’re showing.
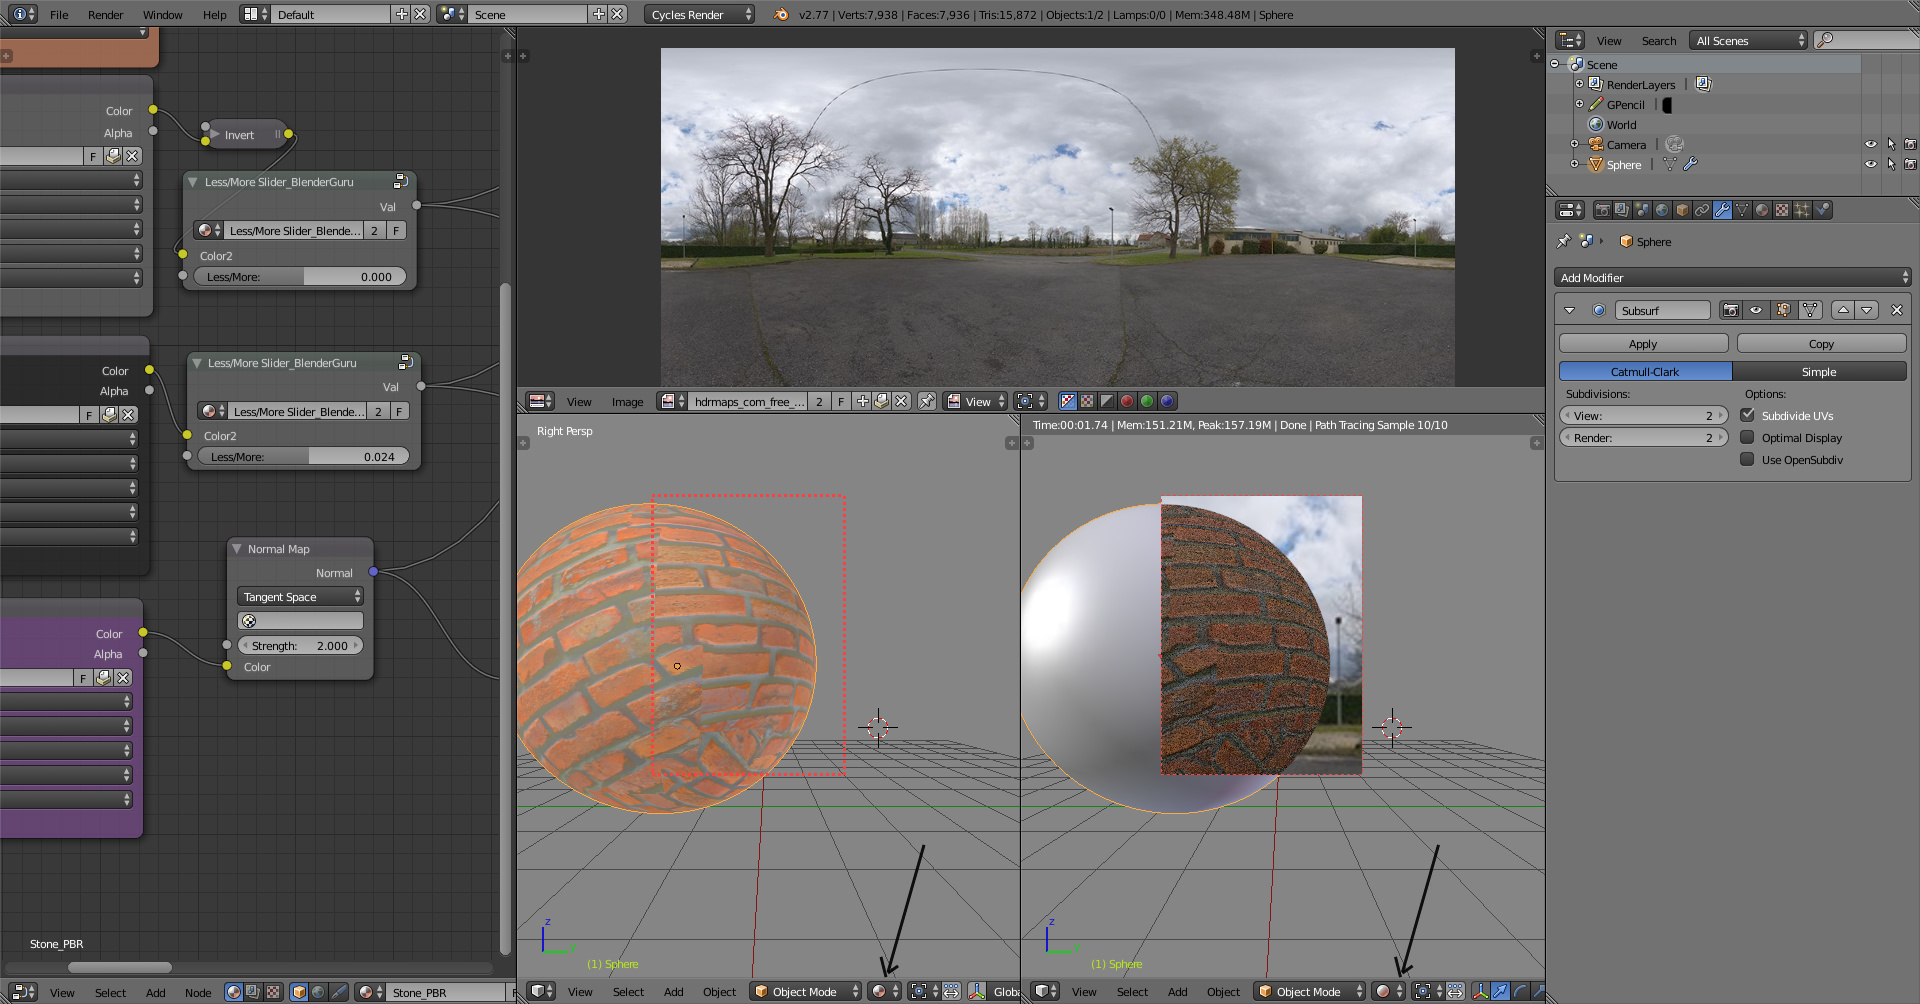
Normal map node strength is set to 0 so that’s why it’s flat. Also when adjusting the values, use the rendered viewport shading mode just to be safe that it actually shows good preview of the node setup.
The less/more nodes seem to override the overall effect of the map. So when there’s no roughness (less/more 0) and reflections are 100% (less/more 1), you get a mirror ball which is completely reflective. Because it affects the overall reflections, it will be completely reflective with any roughness value, and only colors it would get would be from the environment.
Add a point light nearby, the attached “hdr” has filename .jpg suggesting it’s not really hdr, and the “theme” of the environment suggests it might have a hard time producing nice highlights in the first place.
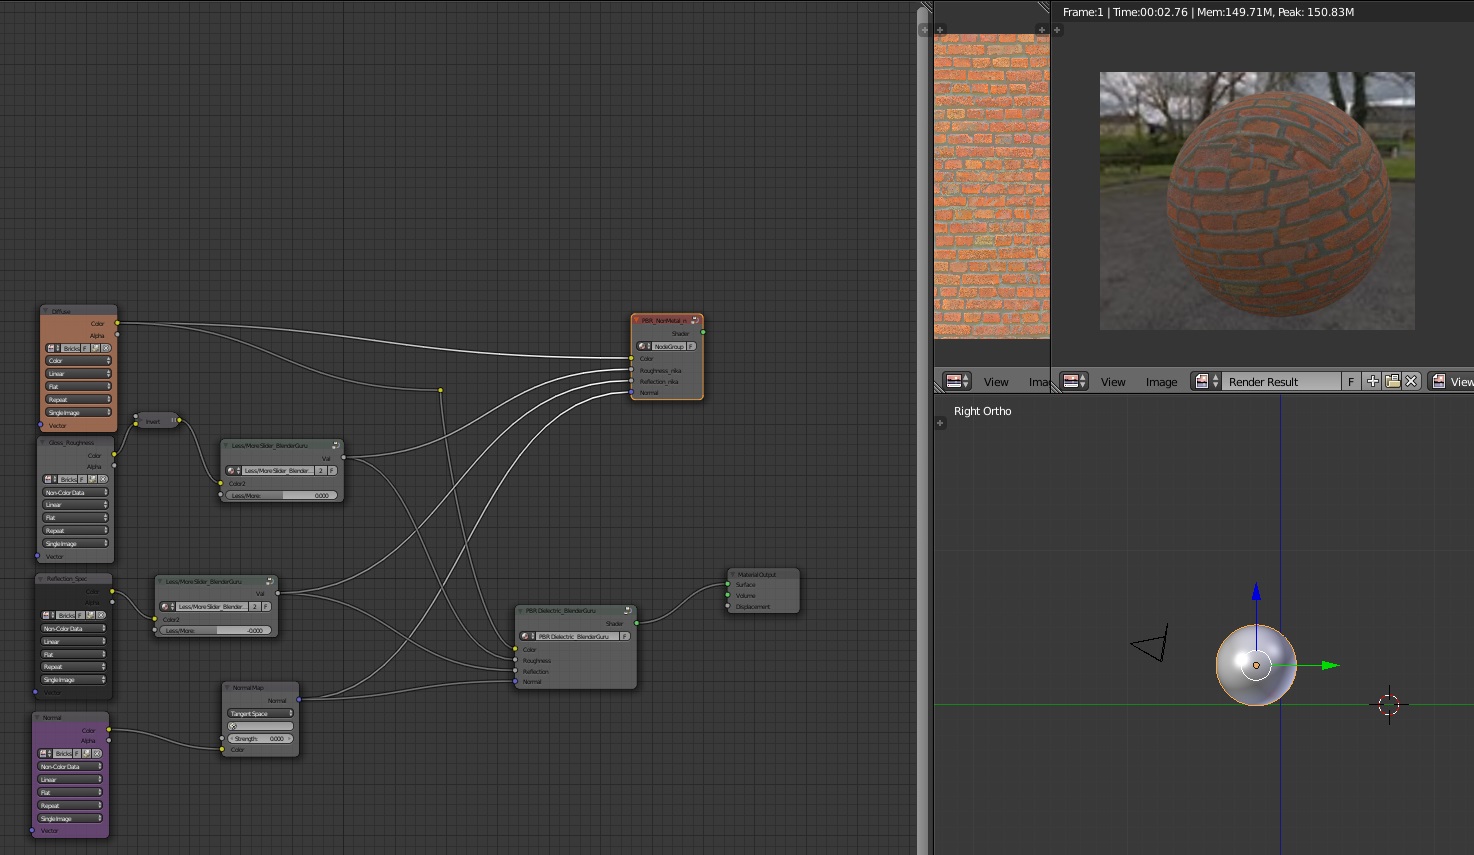
Unmute your PBR_NonMetal_nika group and connect it to Material Output.
Set Normal Map strength to 1. Or something more than 0 at least if you want the effect to show up.
Set Gloss_Roughness Less/More to -0.5 to make the effect more pronounced.
Set the Reflection_Spec Less/More to +0.5 to make the effect more pronounced.
Setup camera so that you can see the reflection of the point light and render.
Reset the less/more sliders to 0 once you’ve confirmed it working.
Comparing the two outputs the only difference I get is from the color difference in the color mix and glossy in the reflection group node. Andrew uses 1.0 (tweaked) whereas you use 0.8 (default). It is generally advised to not go above 0.8 (can increase noise in some cases), but it could lead to self confusion if not (“why the heck can’t I read out fully white?” while debugging something i.e.).
I would also suggest multiply with itself rather than power of 2, as multiplying for PC is supposed to be an easier task? I’m not sure if Cycles optimizes this properly, so you may want to do a speed comparison.
Thank’s a lot for your answers, they helps a lot! Ifeel like a noob, normal=0, just fantastic!
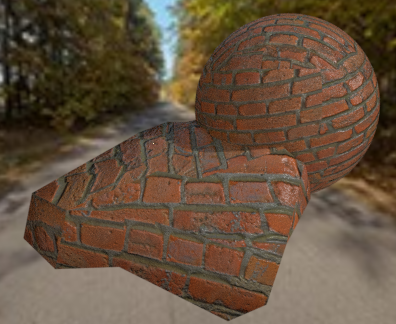
at the moment I have positive results (only with your help)
JA12, I will follow your advices, thank you!
CarlG, at the moment I engaged in sorting out all the items that you have written, later I’ll show what I acheived.
“normal=0, just fantastic!”
Yeah, pretty stupid But stupid things like that happens to all of us. Quite frequently even.
Looks good, no need to go through all my steps, just wanted to make the effect more pronounced and easy to see. Didn’t see JA12’s answer until after I posted.
use the rendered viewport shading mode just to be safe that it actually shows good preview of the node setup.
or you talking about that?
Normal map node strength is set to 0 so that’s why it’s flat.
Normal map is set to 2 but in material viewport shading mode (left 3d view) doesn’t show it. Rendered viewport shading mode (right 3d view) shows the actual result of what is set in nodes.
Note that sometimes the viewport render preview shows artifacts on objects when it’s set to orthographic viewmode, it also doesn’t show the background.
JA12 , thank you!
Actually, I always use quick render to see the result.
All works normal with textures from polycount (used in tutorial), but when I put my own textures/normal/specular…maps object does not look well. I think my problem is in workflow and in a way, how I bake maps. I’m trying to educate myself in this direction. CarlG, JA12 thank you, for your advices!
I could say the problem how it was in the beginning is solved.


 But stupid things like that happens to all of us. Quite frequently even.