I’d really appreciate some advice on how to improve the realism in these car renders.
For example, how to make the car match the backplate in post process better?
Some of my renders feel a bit like the car was glued on top of the picture as a seperate sticker.
The focal length has been matched and there’s a similar HDR already.
I think my post process is lacking something.
I’d love to hear your constructive feedback on this.
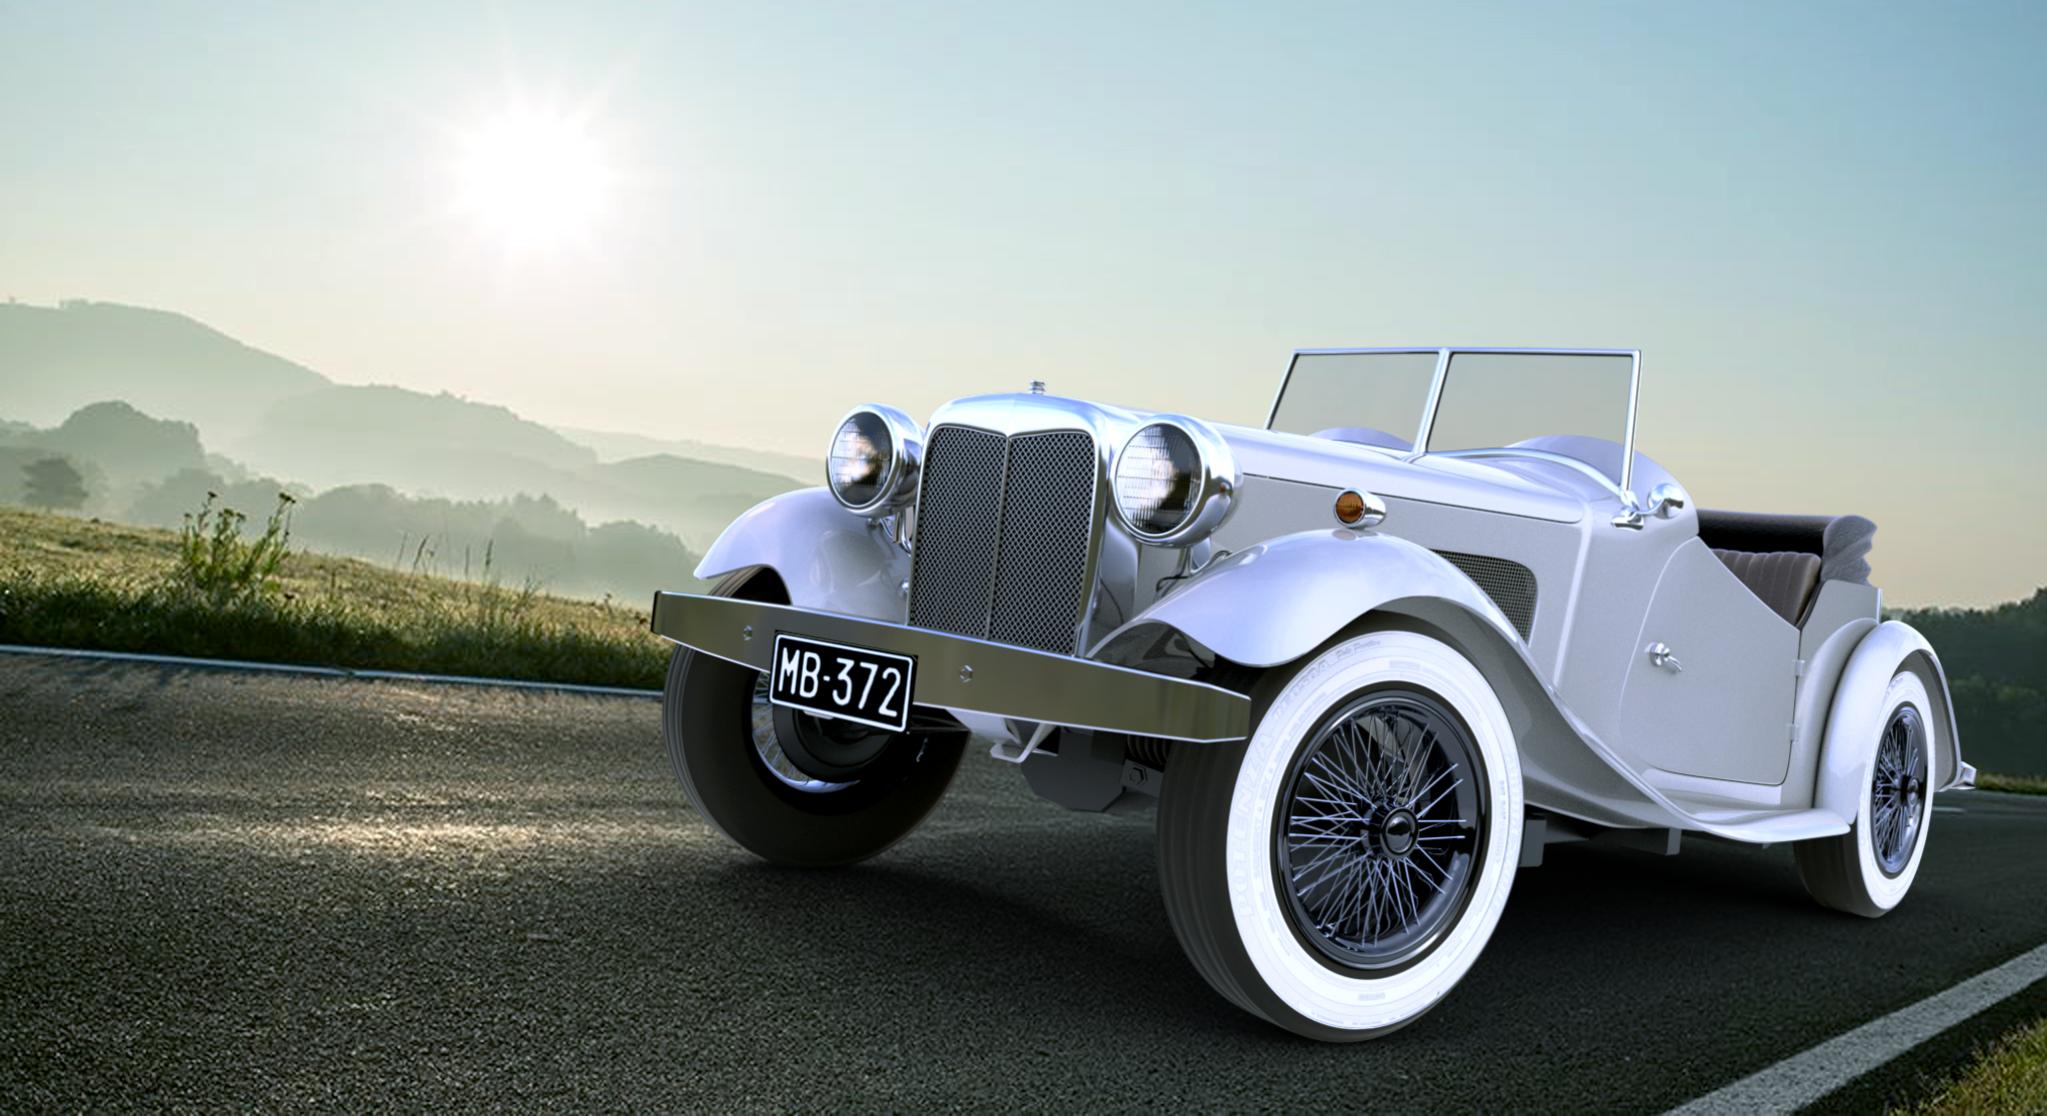
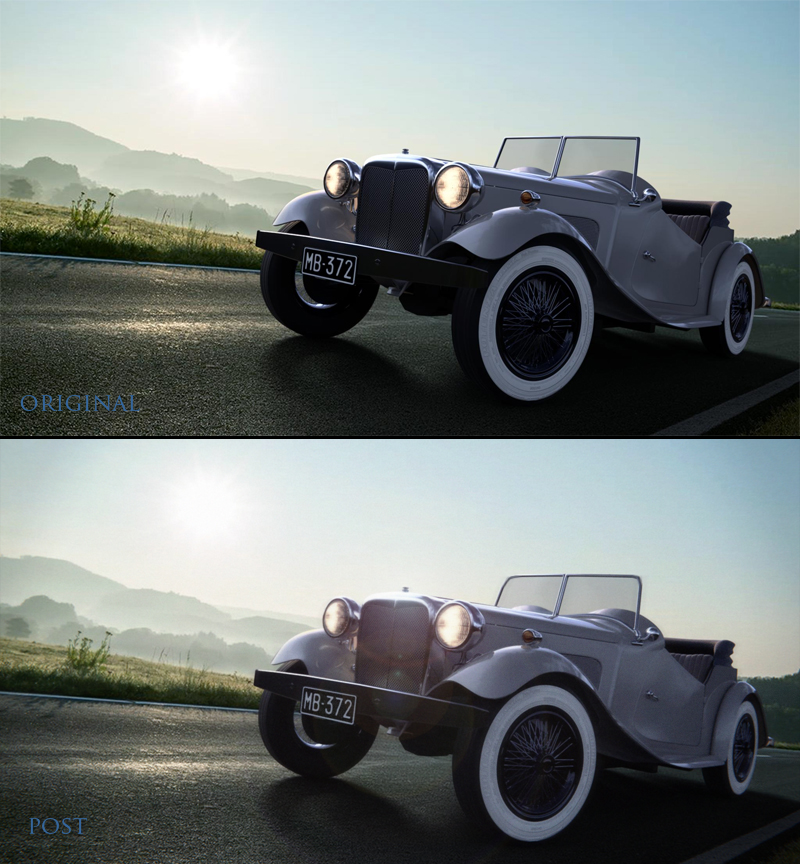
About the first render:
(1) adding dirt and scratches would make it look more real
(2) color temperature of the car probably should be closer to the environment: in your case tha car is too “cold”
(3) is this car moving or standing still? the car is in the midle of the road so it probably should be moving?
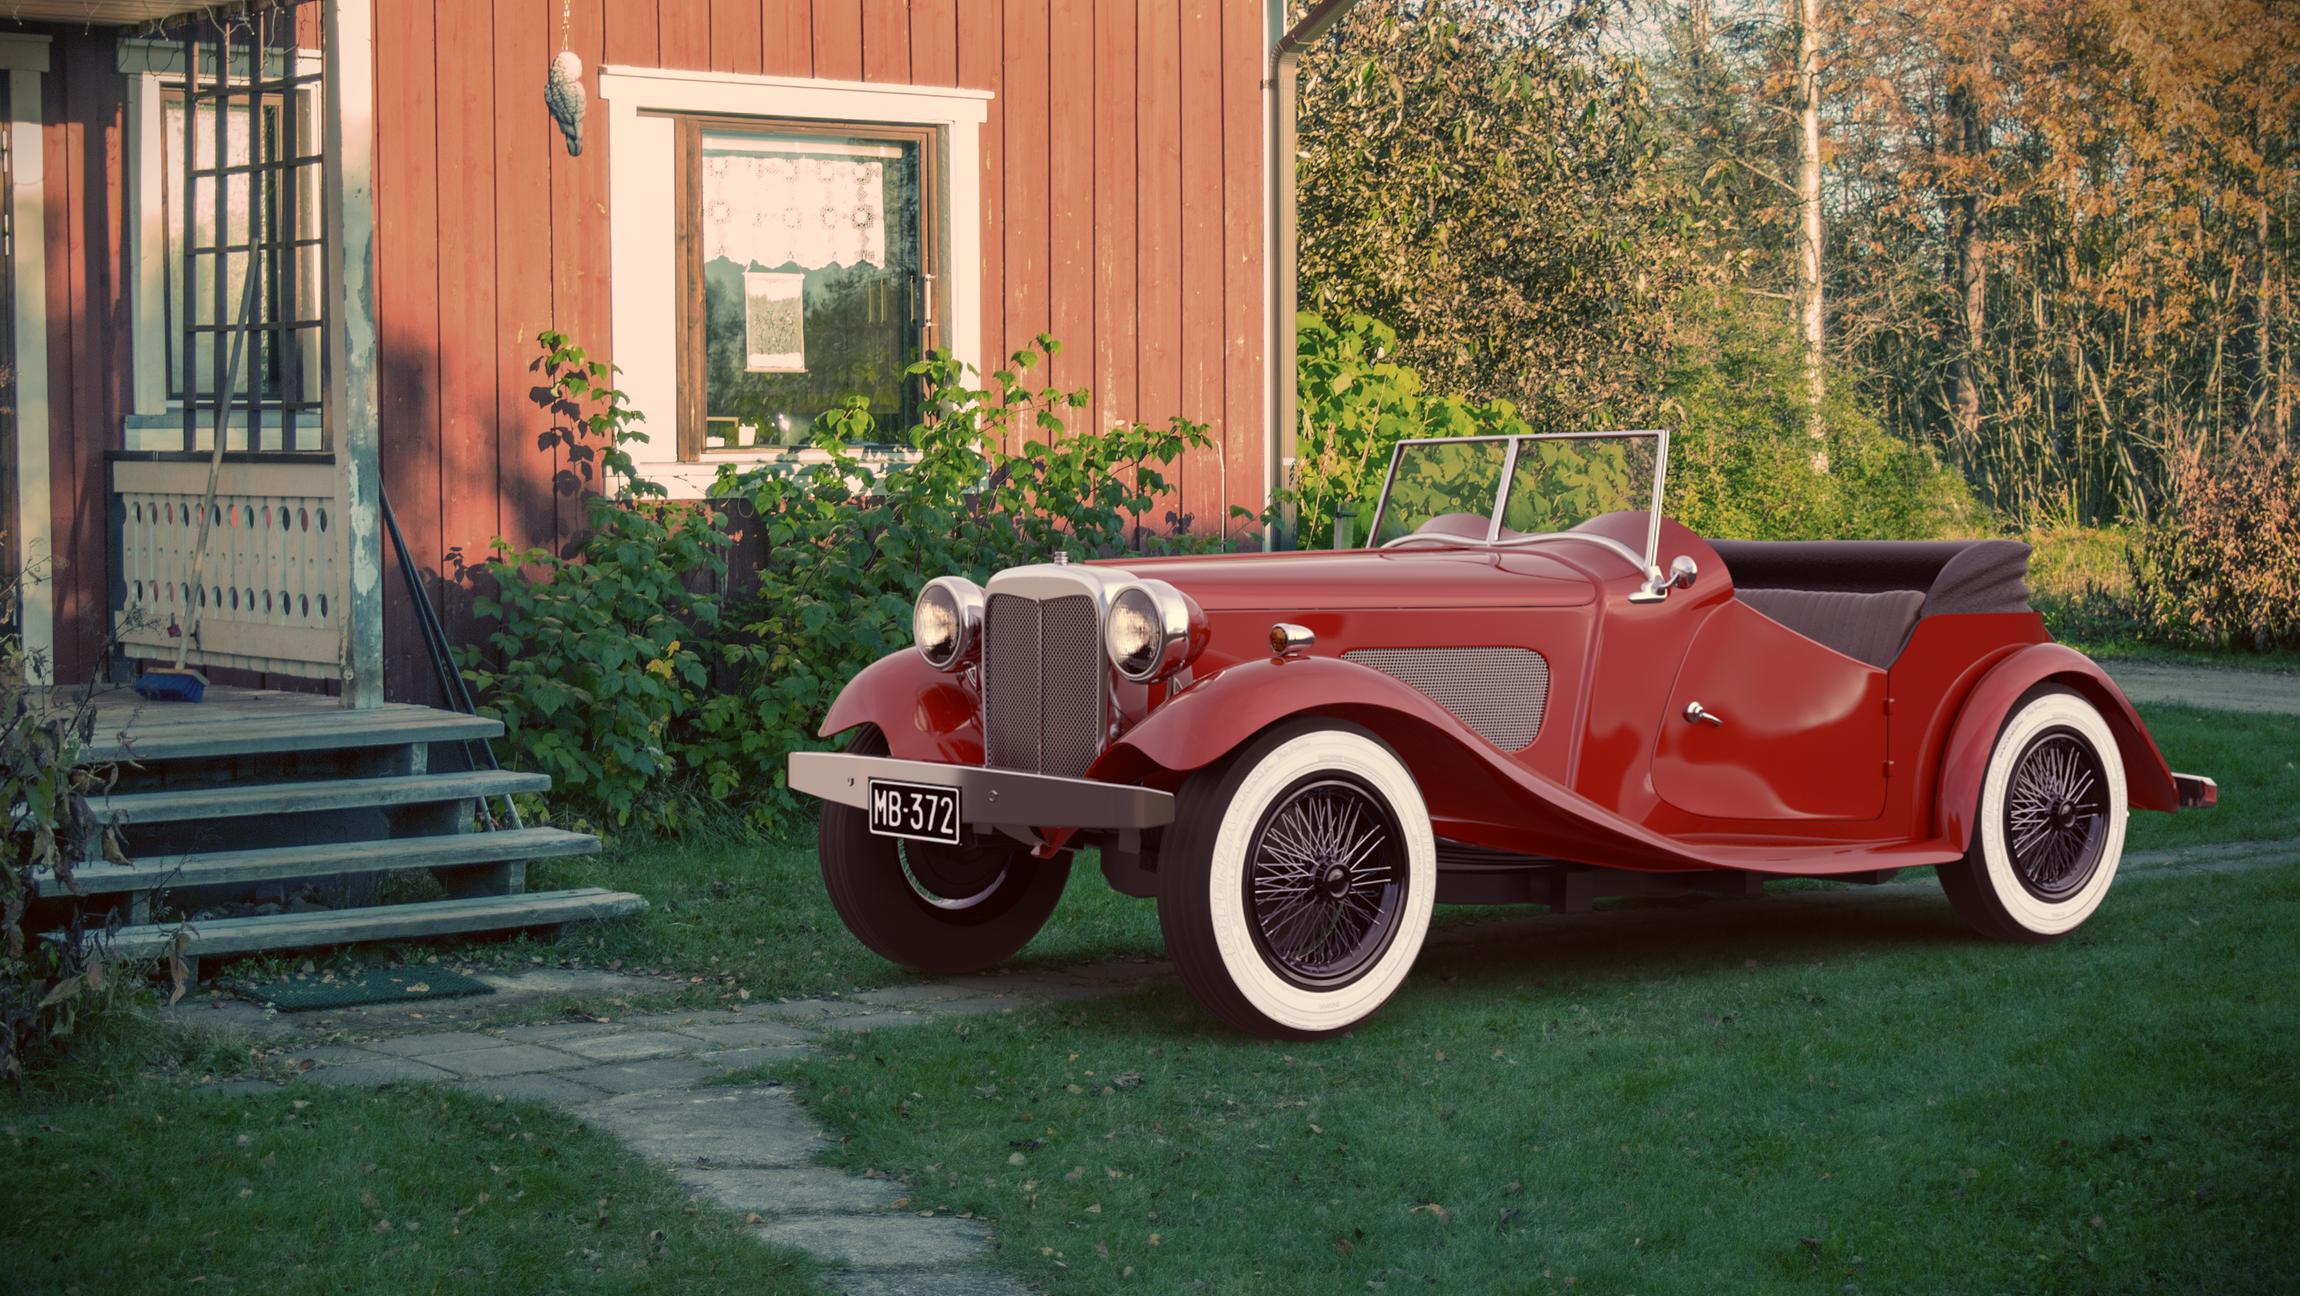
About 2nd render:
It looks natural excluding bright part of the bumper. Do you have blend file of your environment where you rendered this car? I think this environment simply should be more detailed so mirrored details would be more corresponding to the background image.
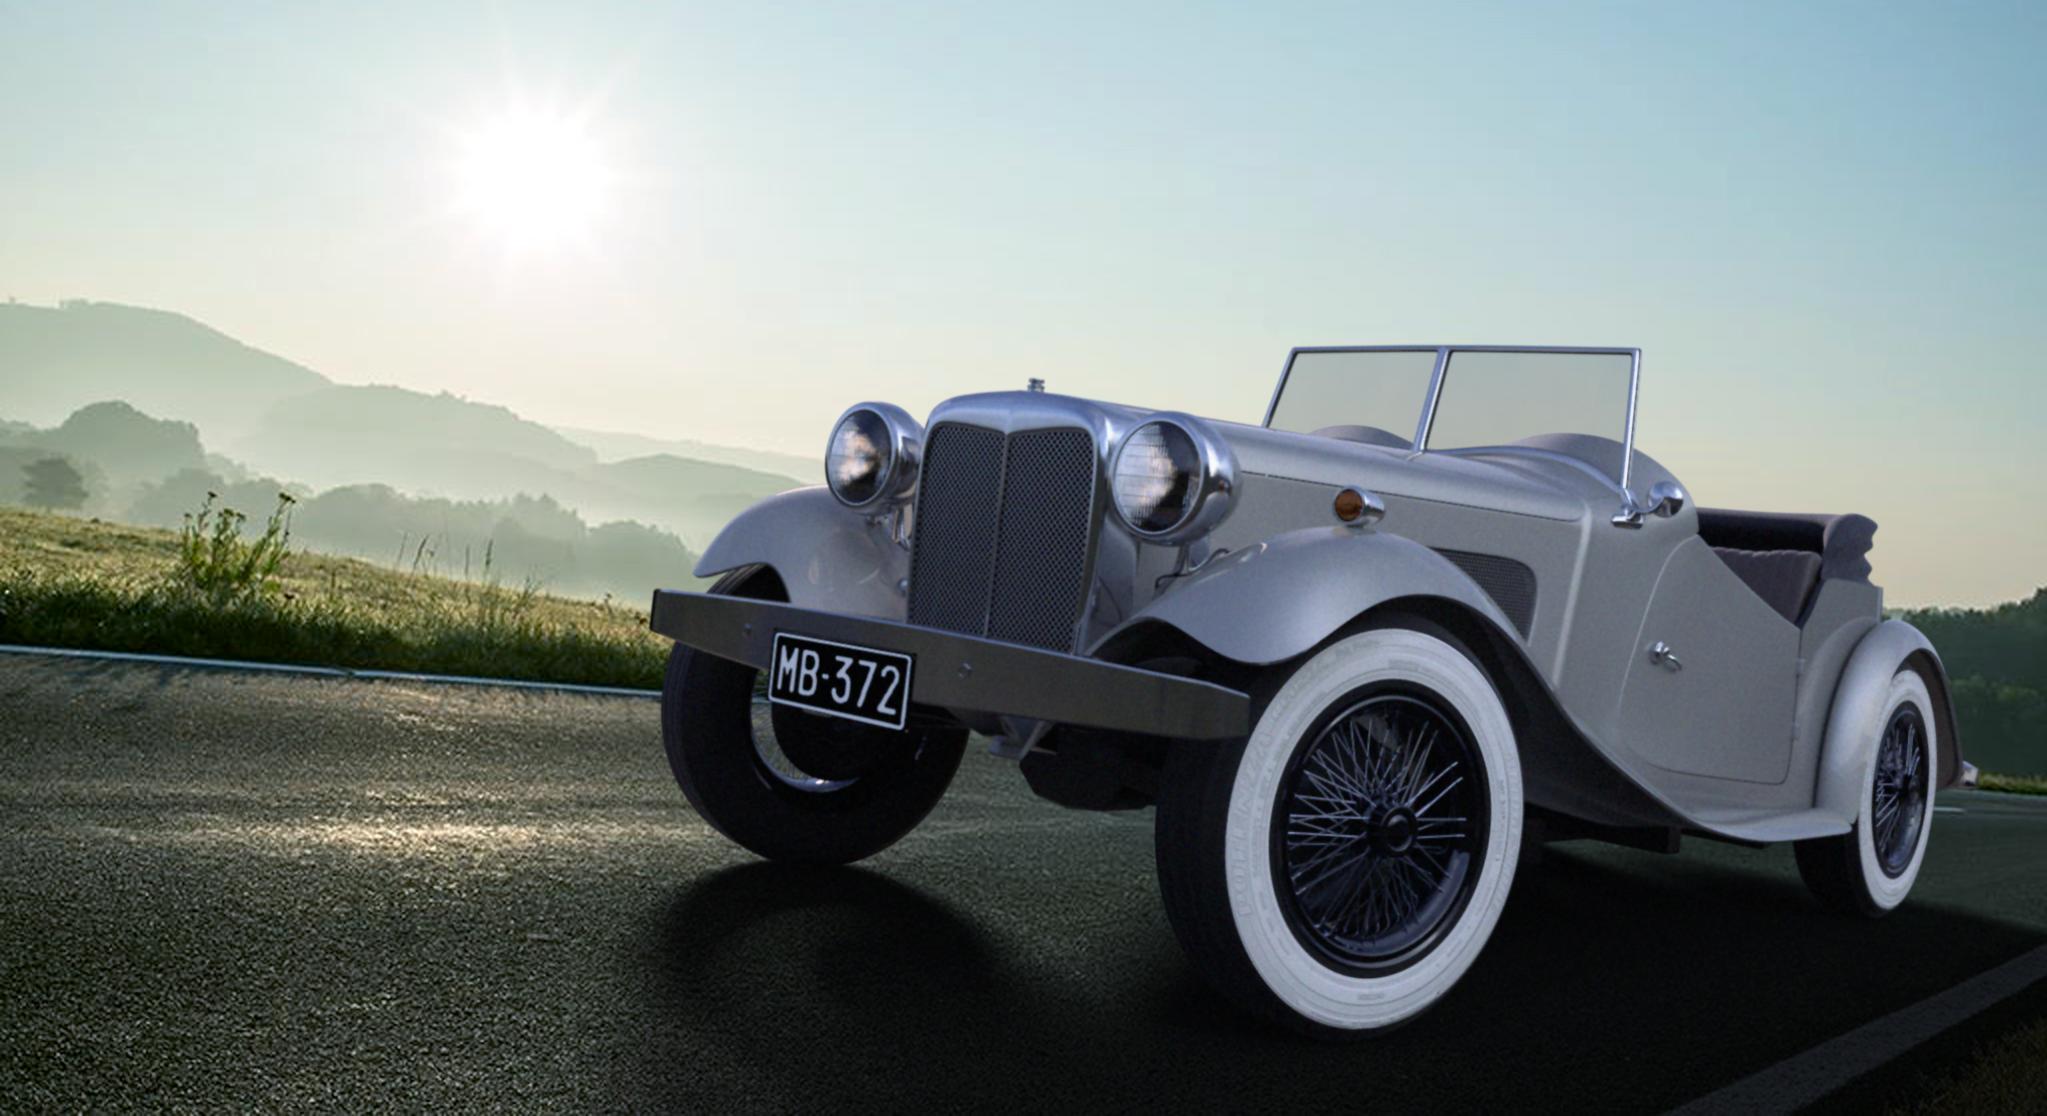
On the first one, it looks as if you used a white plane for the ground, invisible on the final composition. But you can see the diffuse light bouncing off this plane on the underside of the car, and, especially, on the underside of the tires. You need to match the color of the ground plane to the scene.
as thorst suggests, model a small low poly scene around the car to match the backplate, because the material is so glossy it needs to match the big primary bounces.
The the white car the backplate has the sun coming from behind as more of a rim light, while teh car is more globally lit. Just because the hdri matches more or less make sure the hdri angle is correct. You can clearly see there is a strong light source coming from top right.
increase the filter width to better match the photos. The backplates are both softer and slightly blurred. Render settings, film, width, change from 1.5 to ~2 - ~2.8
add some post noise to the car render wither in compositor or is photoshop, filter add noise, then despeckle, layer opacity ~10%.
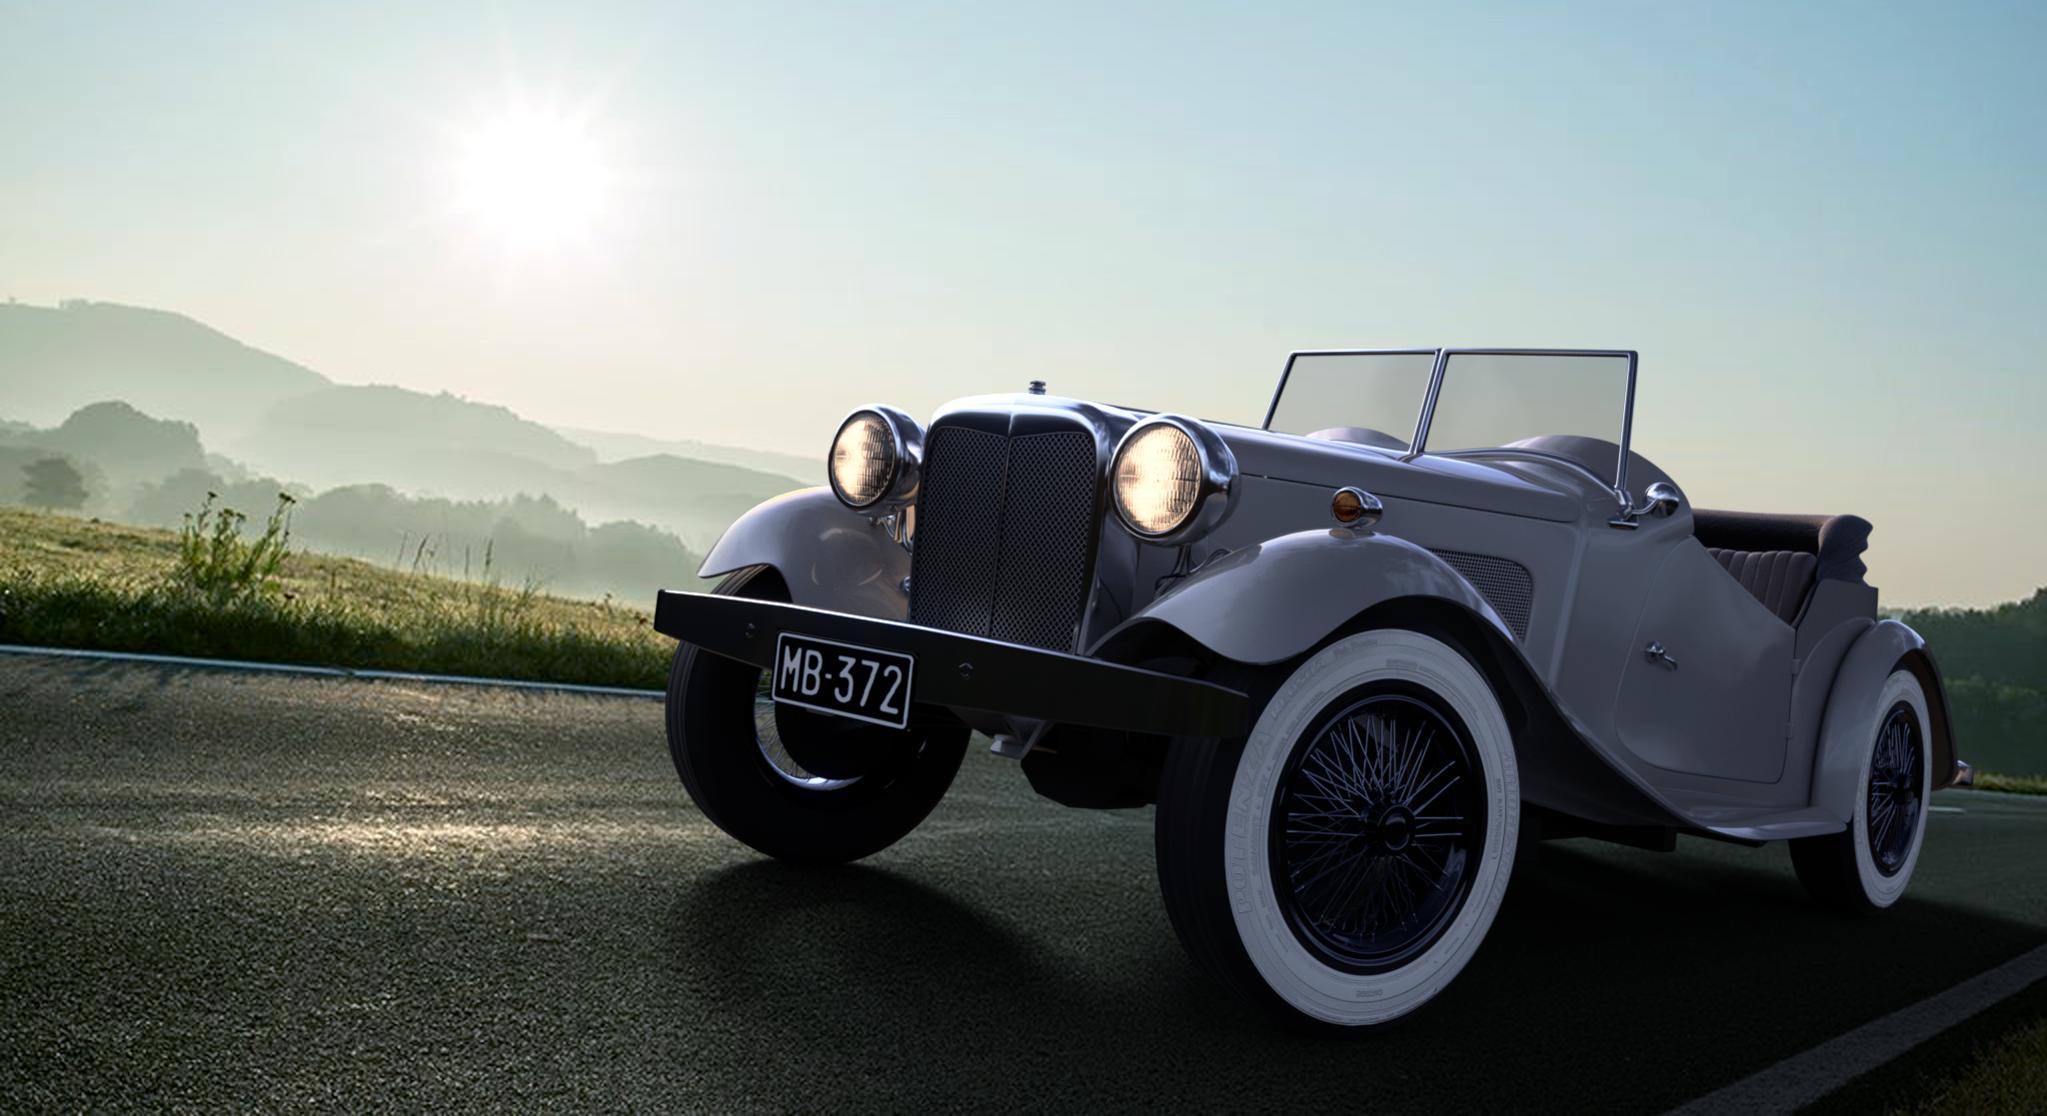
Definite improvement – although the lighting is holding this amazing car and composition back. If we are to believe that the sun is where it is in the backplate you need to rotate your hdri so that you get much more of a rim effect. The visible are of the car should have much lower values as there isn’t any direct light hitting it. Look at these two suzannes, and experiment with your enviroment nodes. Once the lighting is believeable you will get a big jump.
Part of the issue may be that you have this desire to light the car and show it off, that’s natural. But in order the match the existing backplate, you will need to use some non standard lighting, namely no real key light. So you could always just chose another backplate with the light source coming from the front.
In my opinion the lighting is a big improvement in matching it to that plate. If you showed it to a non CG person they wouldn’t immediately know it was a fake. I’d play around and experiment a little more with lighting levels, and get a slightly better match and then just post it. Some post ideas (as always less is more)
More noise on the car
Blur on the car, motion blur (barely perceptible is best)
Tiny bit of lens distortions like .008, and .006 dispersion. You should not be able to tell it has been added, too much and it’s obviously CG.
Some post lighting effects (photoshop filter, render, , lens flare or lighting effects. By adding effects to the both the car and plate you can fuse them better. You can see flare between headlights.
One of the oldest tricks to increase realism is to desaturate it, the less color info a person has the less obvious it’s CG.
Maybe it’s just how ot is but the corners of the windshield seem really sharp. I might smooth that slightly.
And there’s another big thing missing: A hot chick driving it!
Really nice work, I’d like to see how this progresses!
That have been some great improvements! As Photox suggests with his post processing, some glare to the final composition would bring it more together. The most obvious remaining thing which comes to my mind, telling that it is fake, is the total perfection of the surfaces. Perhaps add some slight dents and wobbles here and there on the larger pieces of metal, to make them look a bit more realistic. A tiny bit of dirt (perhaps just a bit of variation in the top coat’s glossyness) may improve it, too.
I’m definitely planning to add more detail into the interior and modeling a character. (I even made a texture for the shift knob, just like the original MG TD shift pattern, took some research!)
That’s why I rendered this one parked on the side of the road, so it wouldn’t be so obvious that there’s no driver yet
My windshield isn’t 100% accurate, but the original MG had really sharp edges on it too, but I really like those bends you made on the top!