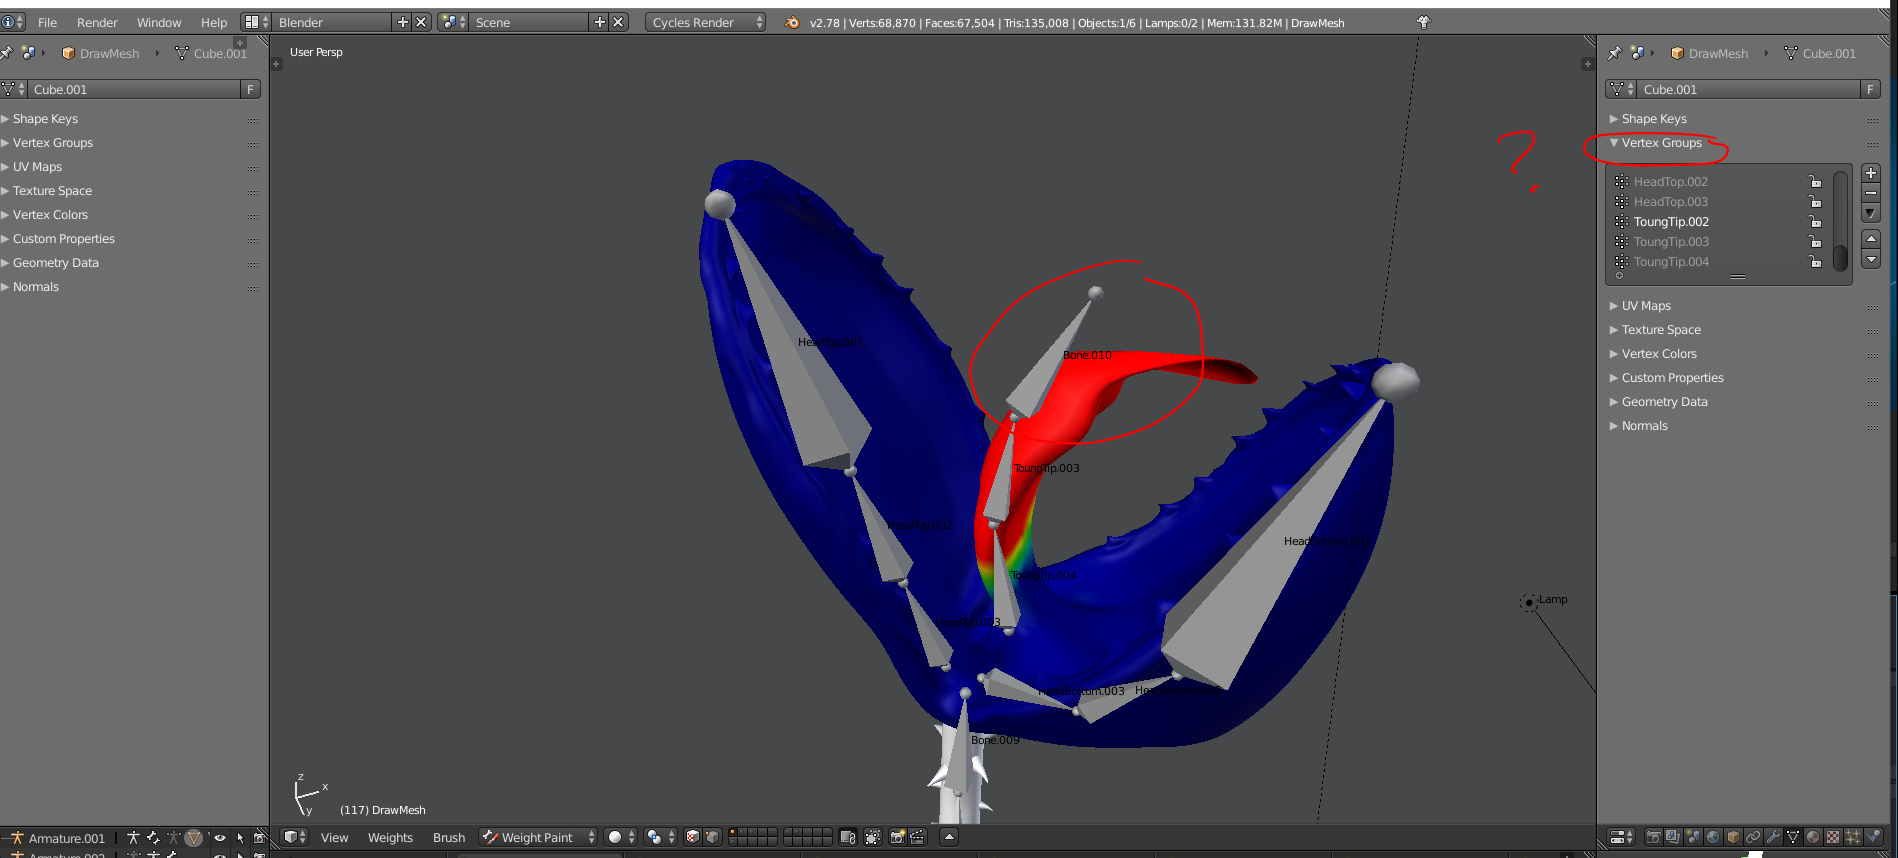
Is there a way to add a new bone (after I’ve assigned previous bones to a character) into a vertex group?
I’ve added the bone, and it (sort of) controls the character in Pose Mode, but I’m hoping to be able to actually assign the vertices in pose mode to the new bone. However, the new bone does not appear in the list of bones in the ‘Vertex Groups’ whilst in edit mode.
In my experience you have to create a whole new armature to make it perfectly consistent and then regroup it. You could either shift-click-delete all the current vertex groups and then reparent the mesh to the new armature, or, export an obj of the mesh, import that new obj and it will be a clean slate, so you can parent that to the new armature. In either case you’d have to redo the weights, but you can start with automatic weights.
There is one cheap shortcut however. You could go into edit mode for the mesh, select the desired vertices, then hit ctrl+h and do “hook to empty” and that empty would move the vertex groups as a bone would. You can then select the empty, then select a bone of the armature in pose mode and parent that empty to the bone in pose mode to make it follow along with that other bone.
if you already have your bone created…
Select your Mesh > goto Properties Panel > under “Object Data” (the little triangle Icon) > Vertex Groups > hit the “Plus sign button” to create a new vertex group… just name the new vertex the same exact name of your bone… Blender will automajically link the bone and group together…
however the new vertex group will not have any vertices ‘assigned’ to it yet…
so now you have to assign vertices to the group… Simply Tab into Edit mode and start selecting Vertices and hit the ‘assign’ button under the Vertex Group window in the Properties Panel… (note that button won’t be there unless you are in edit mode)…
also note that in the 3D view window (only in Editmode) in the Right hand tool bar you should find a ‘Vertex Weights’ box…
again you won’t see this box unless your in Edit mode and have a vertex selected… in that box you can edit the weight of that one vertex (or more than one)…
watch this video on how to use this weight ‘assignment’ method…
start watching at around 9:00… lots of great tips in this video…
Finally there is one other method that some times (and some times not) does the trick…
To Add a Bone to an existing Armature…
post having set up your Armature and done Automatic weights…
Create your new bone (bones)…
Select your Armature and Tab it into Pose Mode…
Select your Mesh > Tab it into weight paint mode…
you should be able to see all your weight colors for your current bone vertex groups…
Select your Newly created bone > you should be able to see the bone in the pose mode blue… and the Mesh in a magenta purple indicating no weight assignments… (if you haven’t manually assigned any already)
hit “W” > select ’ Assign automatic from bones’
remember the Mesh in weight paint mode…
the Armature in pose mode…
hit ‘w’ and select 'assign automatic from bones…
anywayz… some times you can get this to work and some times it won’t…
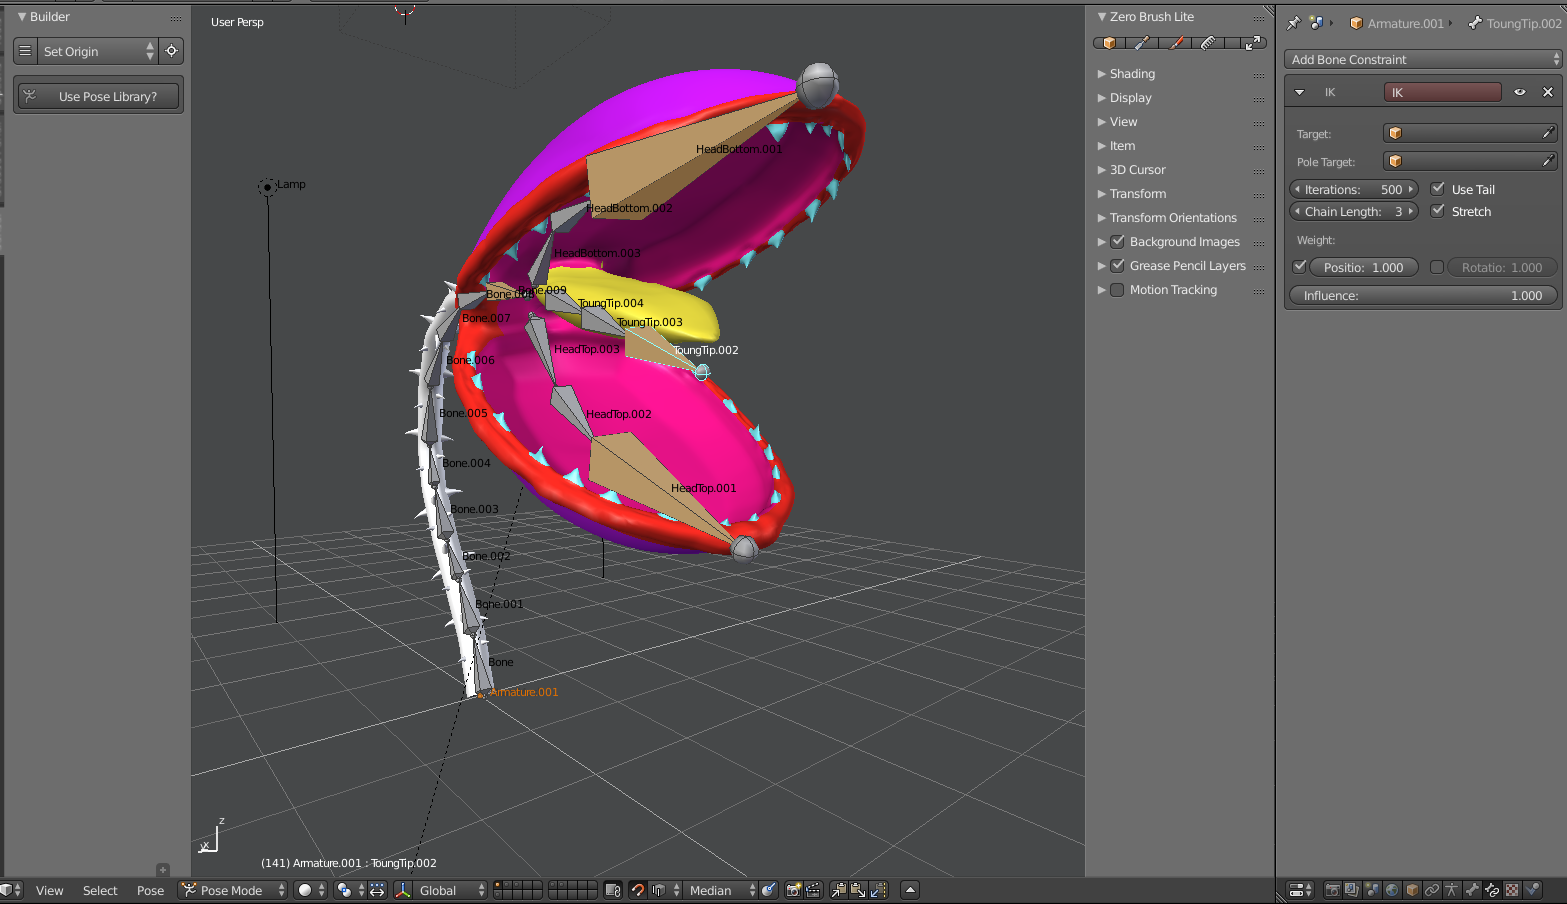
Ah thank you so much! I watched that video and found that I had to select those bones (all three starting with the one circled up top, and then parent them (ctrl+p) to the bottom (main) bone group. From there I deleted my IK in the ‘constraints’ tab in pose mode (properties panel, icon with the bone and chain link) and then put a new instance on, change the ‘chain length’ to three (because I have three bones in this tongue armature) and wala! It works! Sharing here because I hope it blesses and helps some other blender user.