armatures in Blender work generally with normalized weights, which is nice when you have a character, but with a modular mesh like this, you’ll have to change the individual vertices’ weights in the “vertex weights” panel in the n toolbar, or re-enter weight paint mode and redo your painting with “auto-normalize” unchecked.
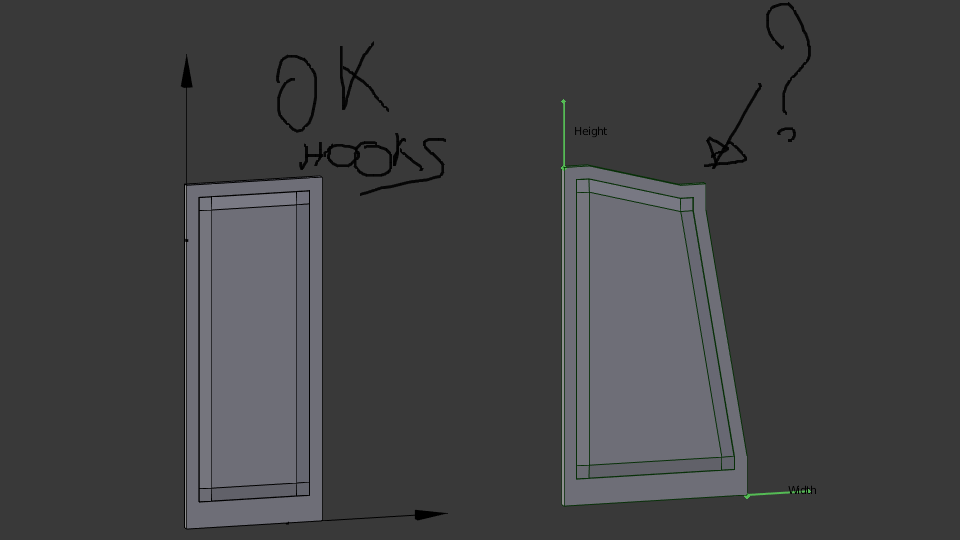
You understand why this is happening ? Normalization ensures that bone weights never add up to more than 1 (100%), but in your case you want the top-right corner vertices to be influenced 100% by both the width bone and the height bone, which adds up to 200%.
My advice would be to use shapekeys though, if it’s just a matter of linear transformation like this.
Thank you Hadrien, that makes perfect sense.
But while the theory is ok, in practice I did not succeed to make it work.
If I paint with strength 1 with auto-normalize on, first the width and than the height, the top-right corner vertices get 1 only to the latest vertex groups. As you point out, that is not what I want (width 0, height 1).
If I paint with strength 1 with auto-normalize off, first the width and than the height, the top-right corner vertices get 1 and 1. Correct!
But the result is always wrong: so a vertex weighted 100% to 2 bones is actually 50% weighted to 2 bones (citation from: https://blenderartists.org/forum/archive/index.php/t-403642.html)
…
Thank you,
Riccardo
ps. I’ll probably switch to shape-keys if I can’t find a better solution with bones: every thing is perfect except for snapping and precise measurement (I need to make some ratio each measure…). Or maybe mixing shapes and bones.
You can use the hook modifier on bones as well as empties.
The workflow is like this:
Select the bone you wish to hook vertices to. (Pose Mode. Makes the bone the active bone in the armature.)
Shift select the mesh object and tab into edit mode. Select the vertices needed for the hook modifier. CTRL-H, Hook to Selected Object Bone.
Done.
Here is your file with a slightly altered rig. I added a main bone as a parent to the height and width bones. The Door mesh is parented to the main bone (CTRL P, Bone).
The main bone will move the mesh to any location, rotation or scale in the scene.
Like DanPro said, hooks work fine. Another thing that would work is driving a shapekey to the position of a bone (it would also satisfy the precision requirement).
Hadriscus shapekeys are fantastic, except they refer to the mesh, so I cannot use instances (probably for the moment I’ll go that way…).
DanPro, your solution is very clever, I never imagined I could hook to bones.
I still need to test this solution as I would like to use like 20/30 linked instances: I link the group, make proxy, but then I still have problems to have multiple separate proxy, each one with a different armature position…
But I think this is a different post… isn’t it?
Attached the simple shapekeys test: in value you set the correct width or height.
Rickyx