What’s the best way to go about creating a laser bullet effect. There’s some good tutorials on how to do a beam which is great but now I would like to do some lasers like you see in B5 or Star Wars where the beam is not continuous. I’ve looked for tutorials but cant find any. Any pointers?
Create a cylinder shape to represent the laser “bullet” - so get the proportions right, long and thin.
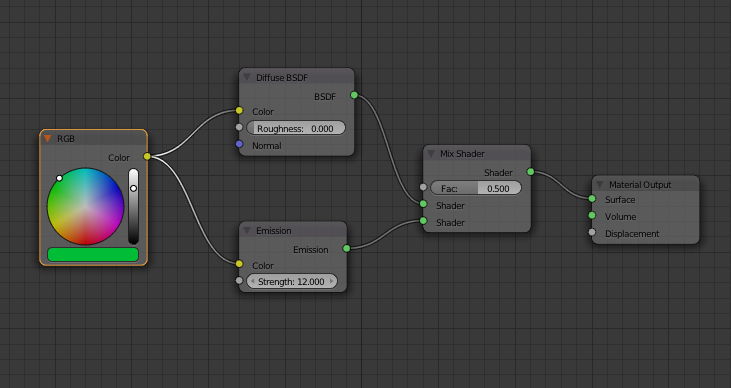
Add a material to it that has not only the base colour (green or red diffuse shader) with an emission shader node added in, so it gives off light.
Animate the “bullet” so it moves from the gun to it’s target in your required time span.
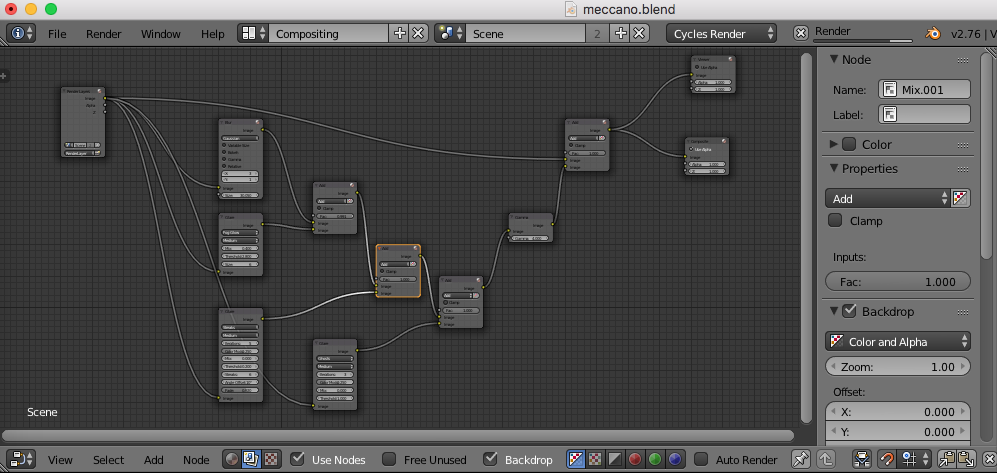
In the Node Editor switch to Compositing mode - you will see the input image node and the output Composite node connected together.
Add Blur, Fog, Ghosts and Streak Glare nodes and feed them with the Render Layers input image. Add them together with Add nodes so you arrive at a single output - put this through a Gamma node so you have some control over the level of glare, etc.
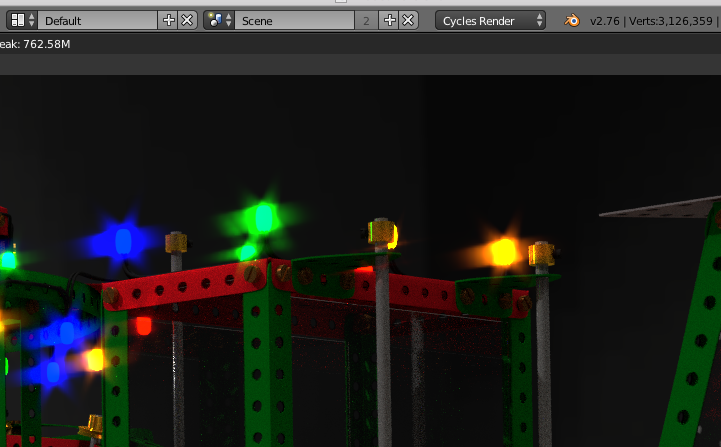
Render from the camera, i.e. NOT a 3D view Preview, and you will see the halo around the laser “bullets”.
If you are shooting from a moving object to another moving object, you will need to get your timings right for when the gun is on-target to the target object., experiment here with this and try to get the speeds realistic. Laser light, like most other lights, travels at approx. 186,000 miles per second, so you would see nothing, in films this is greatly slowed down so we humans can see the effect.
Just another thought. Is this how they do it in shows? What if there’s thousands of “bullets” firing. Like something from the recent battlestar galactica. Thats a hell if a lot of animations : )
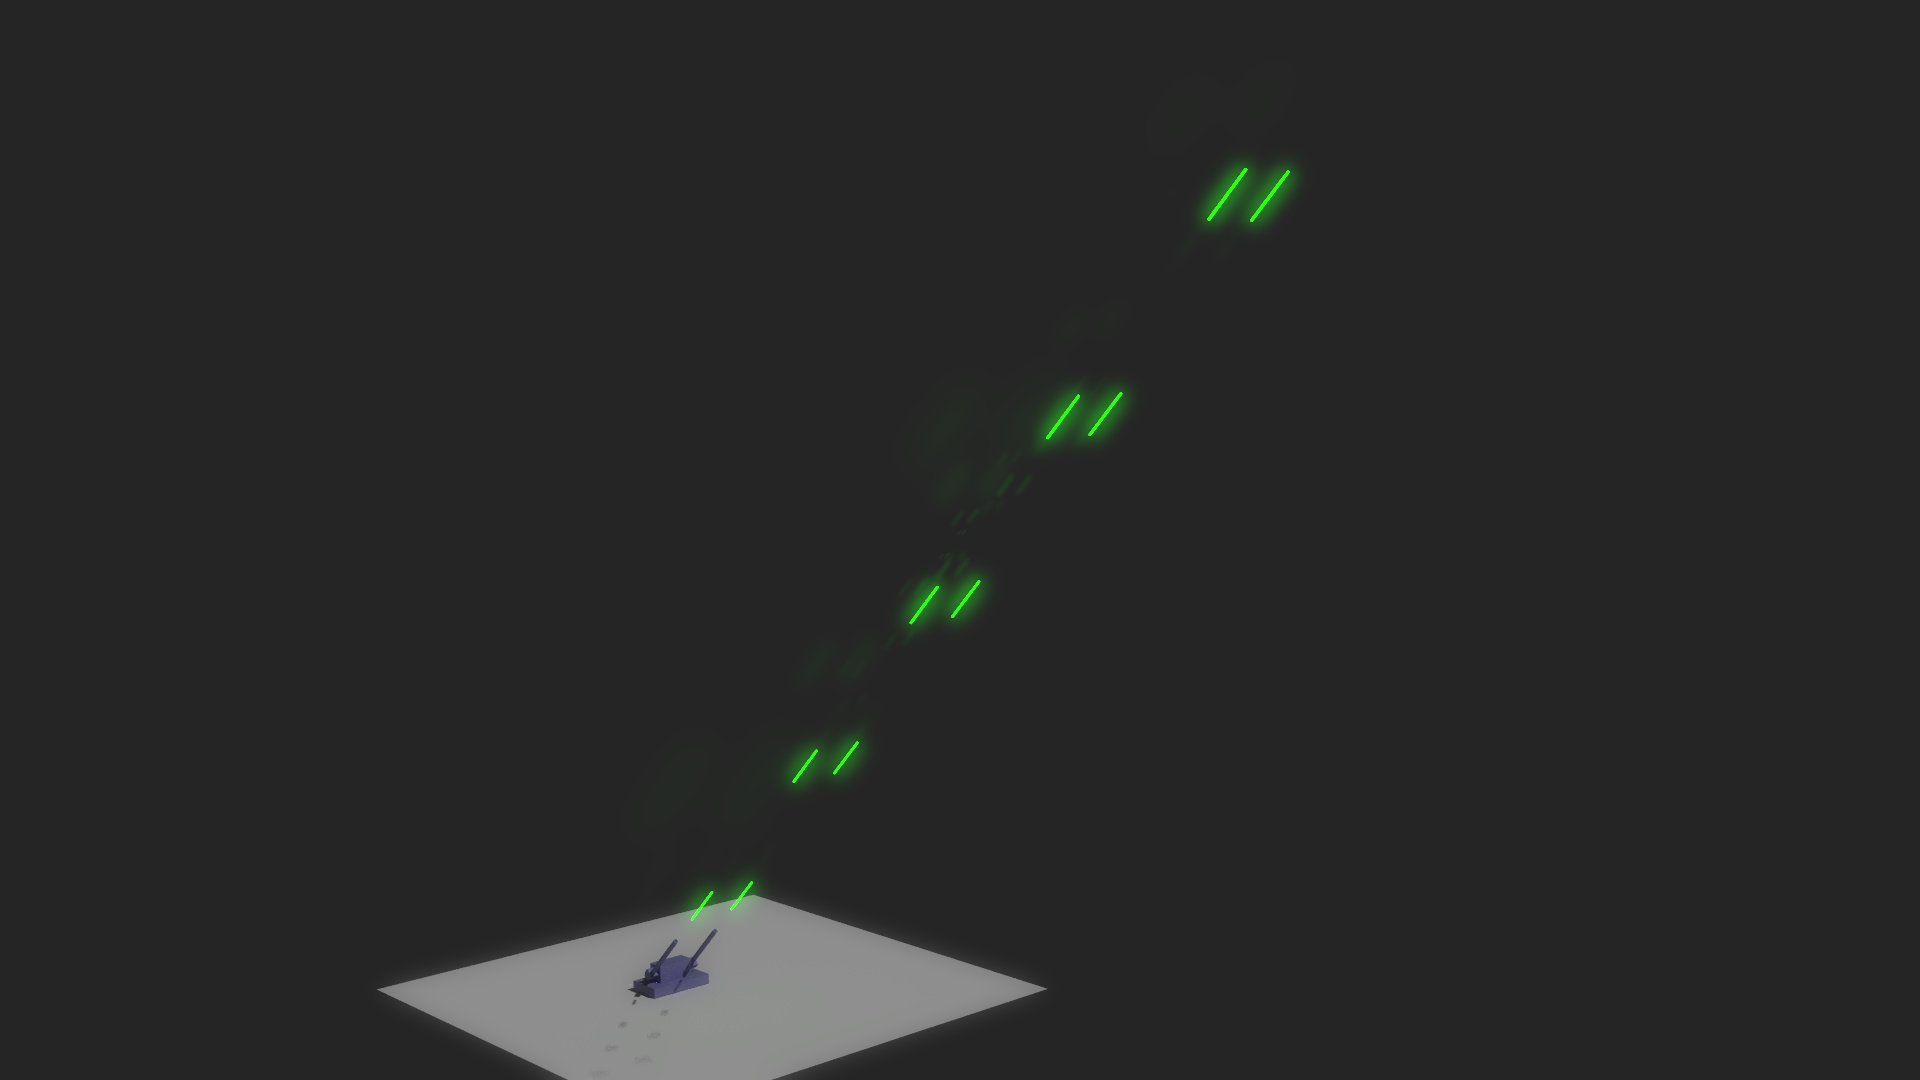
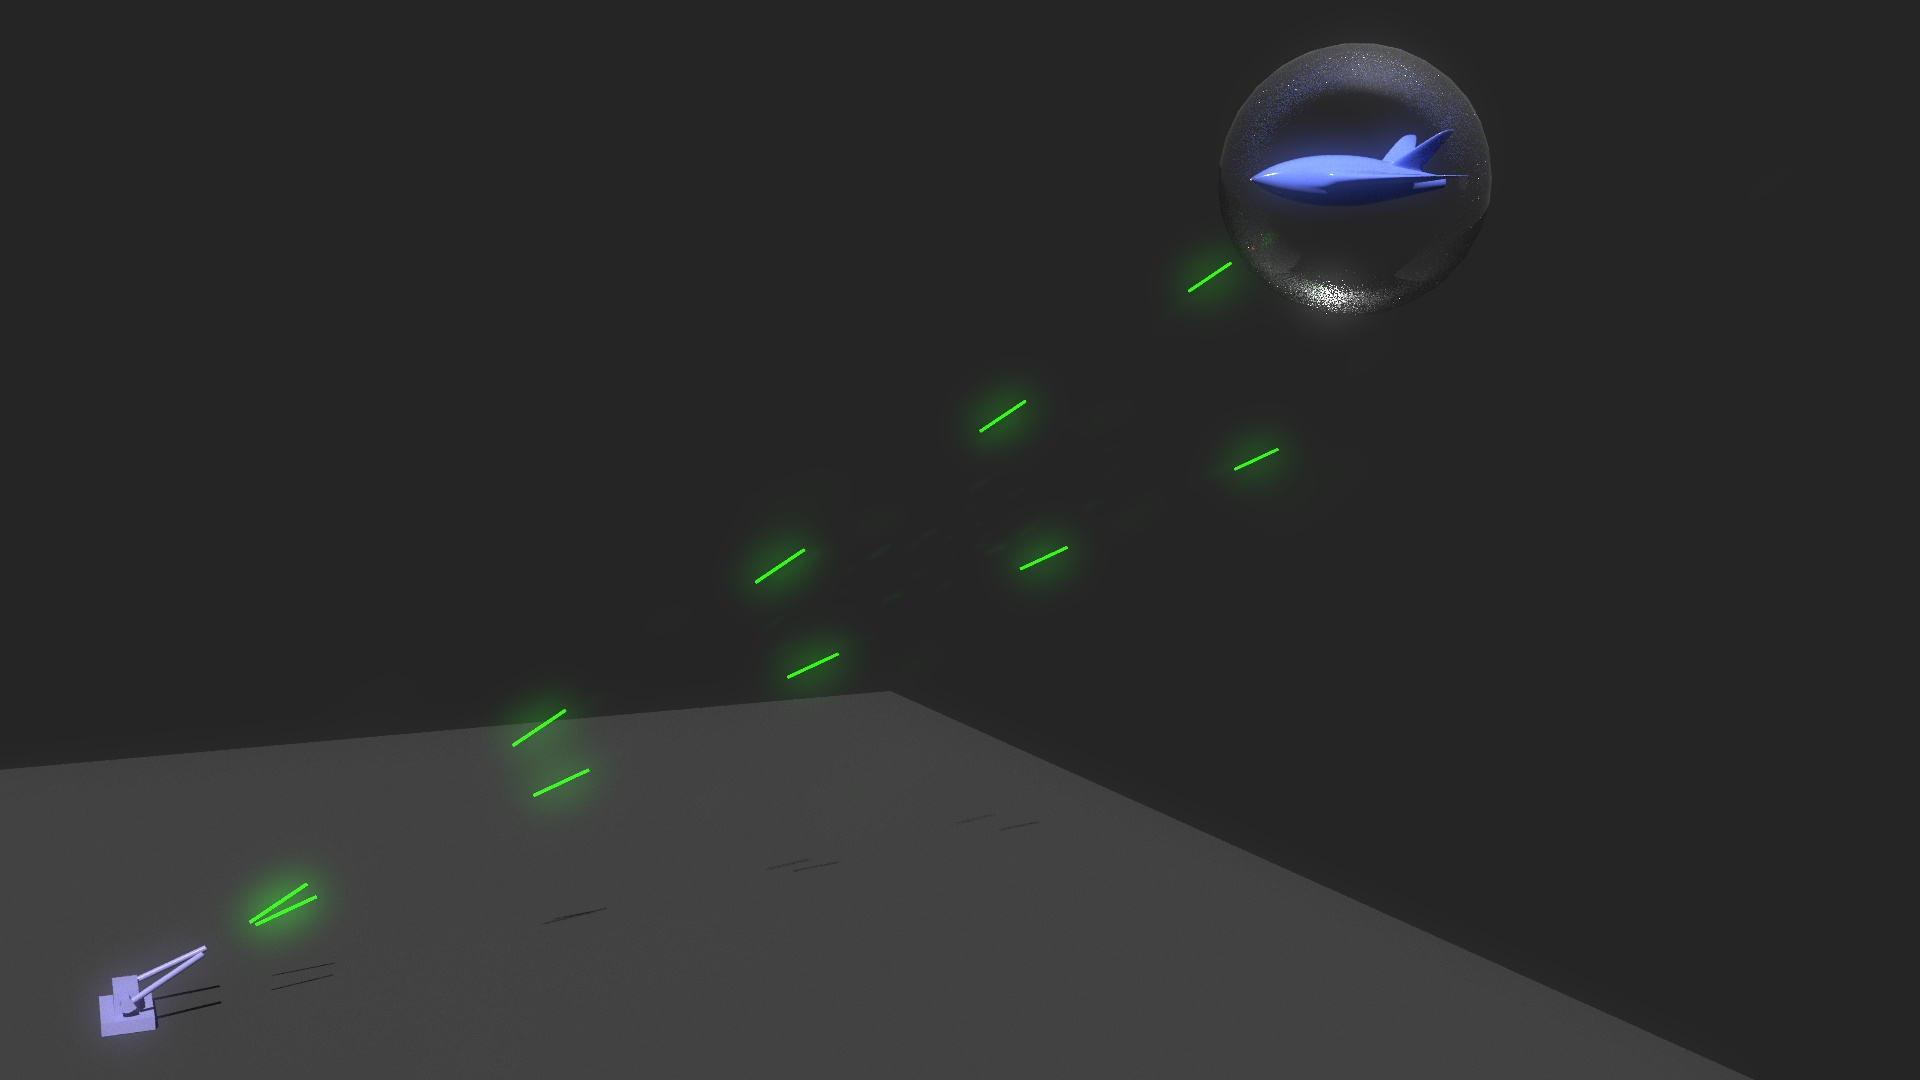
Work out how many shots there will be visible at any point in time from any one gun. Say there may be 5 bullets visible, so you make 5 bullet meshes and keyframe them firing towards the target, once the first one has hit the target and disappeared, you move it back to the gun ON THE NEXT FRAME - that way you don’t see it moving back to the gun then you animate it firing again until the frame after it hits the target, then you snap it back to the gun… and so on. You can easily recycle your bullet animations by using a Cycles Modifier in the Graph Editor, so if you want your gun to fire 100 rounds, you animate the five rounds you need at any point in time, then you add a Cycles modifier to the objects in the Graph Editor with the Cycles set to “no action” before and 19 after - you only need to keyframe one round, then copy and move the keyframes for the next round, etc. for all five rounds. The Cycles Modifier adds the extra iterations. You can then copy the rounds to the next gun, etc. etc.
It is a good idea to use a straight line Bezier curve to animate your rounds. So add a “plane” mesh, delete two vertices to leave a straight line, then use ALT+C => “Curve from mesh” to get the straight line “curve”. Then add a Curve or Follow Path modifier/constraint to the bullet mesh with this as the target object. Its the easy to align the curve to where you want the round firing, then animate the round along the curve, just one thing to keyframe. You can then copy/paste hundreds of these keyframed round/curve combinations around the scene, move the keyframes in the Graph Editor to make them fire at different times. Very easy to get thousands of rounds firing and you have only had to set up one, or maybe a few if they fire over different distances, etc.
So I made a curve object, made a single bullet object and added a Follow Path with the curve as the target, then keyframed the offset form 0 to 1 over 24 frames and back to 0 again over 1 frame. I then added a Cycles Modifier to have no action before and 19 iterations after the keyframed bits. Then I duplicated the bullet and moved its keyframes in the Graph Editor, and did this four times so I have 5 bullet objects firing 20 times each in succession. Then I parented the curve path to the gun barrel, duplicated the whole lot for the second gun barrel and added the gun base. I keyframed some movement of the barrels and added the compositor nodes for the glow around the bullets - 1 hour’s work. The next gun and next 100 bullets are going to take me about 2 minutes - and so on.
To see the compositor set up change the view here from “Default”:
Another idea, if you’re rending in cycles, an particularly if you’re making an animation, is to make a ball and let motion blur create the streak for you. Just a thought. Clock’s KISS method is smarter though…
To make it super accurate I would have to have multiple paths so the bullets keep on the track they were on when they were fired, but that’s a nice to have and doesn’t entail that much extra work. This would mean using Child Of constraints for the path objects to the gun and releasing them (set Influence to 0) at the time the bullet was fired. To be honest you rarely see this level of animation accuracy in a film.
Ok this is good stuff. Way above my head atm but good to look into. Getting ahead of myself here, and doubtful i would do this but would this work with some kind of dynamic painting to make a shield hit effect? Ive been looking for a shield effect to compliment this but all the tuts i can find are pretty old
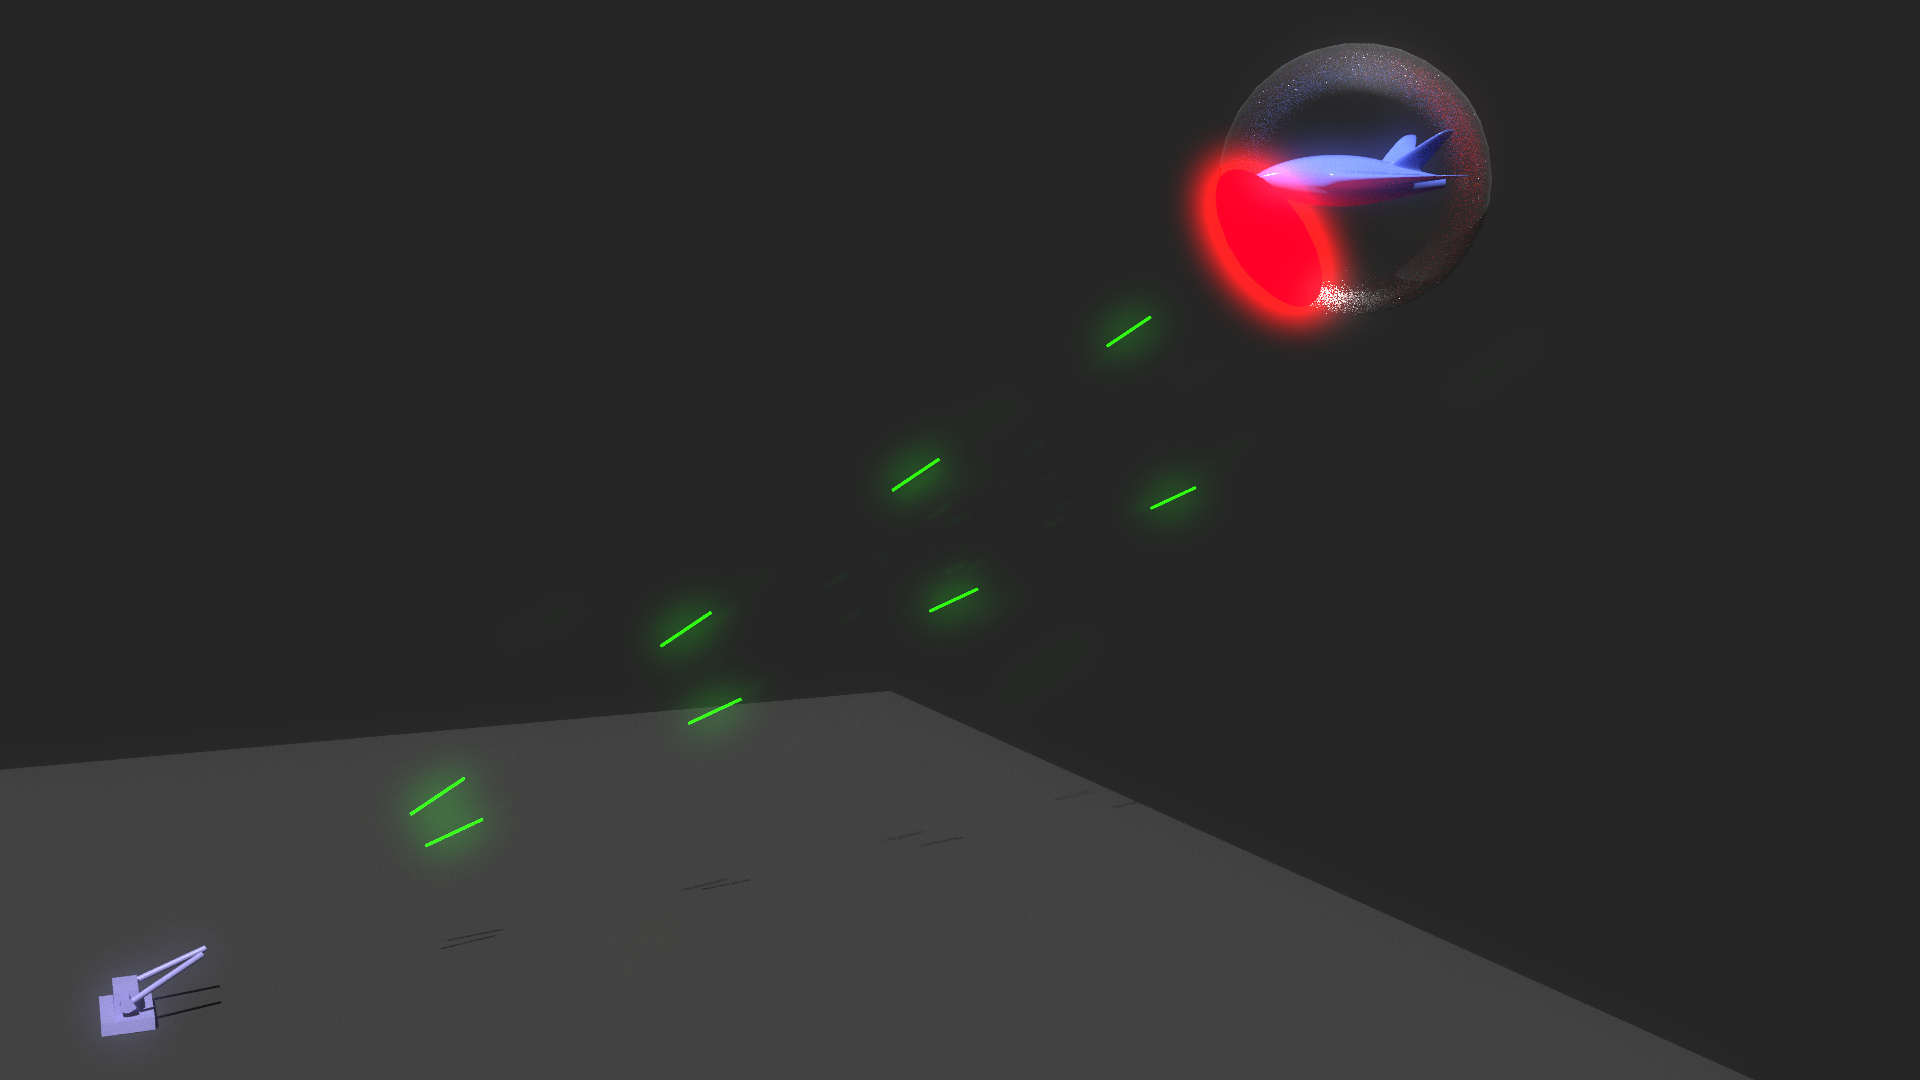
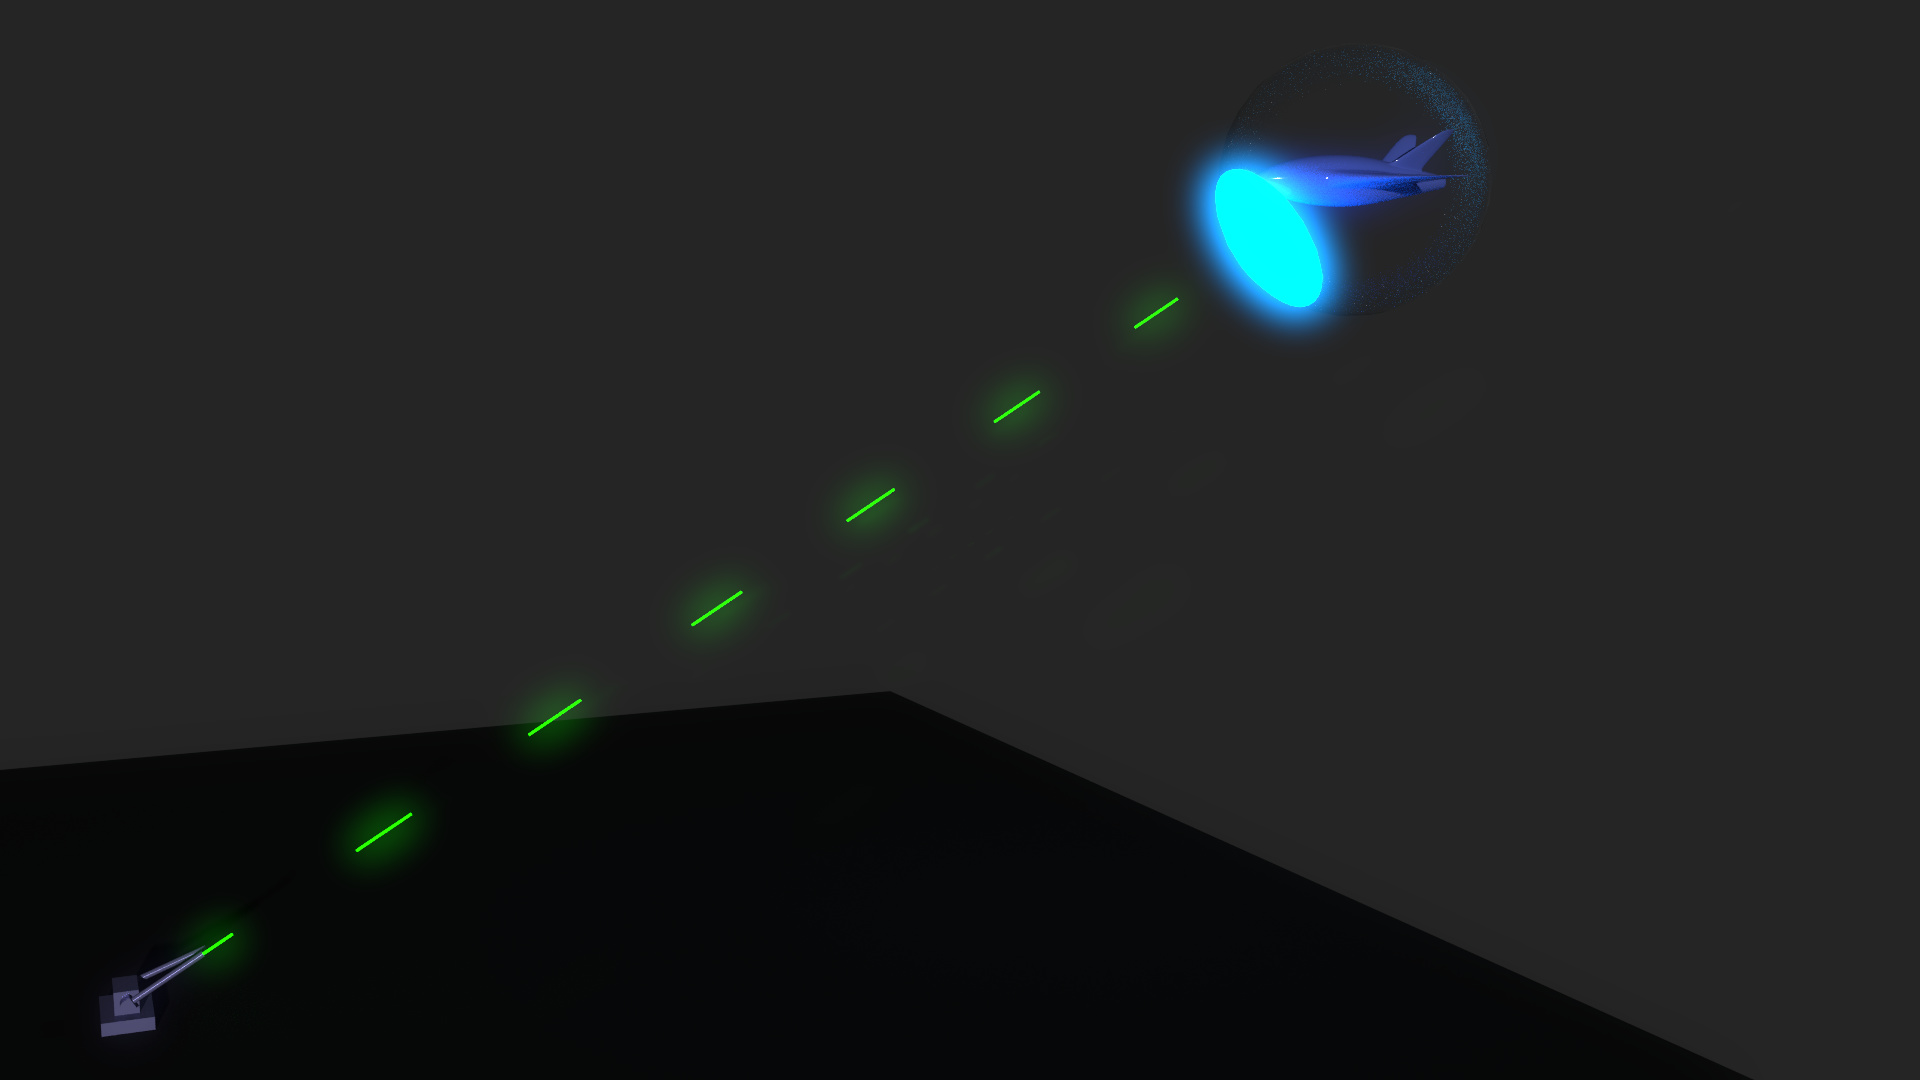
This was done with a simple circle and ES (Extrude-Scale) commands to produce the faces - this circle is given a shrink-wrap mod to the shield sphere - the materials for this sphere are Transparent/Glossy mix controlled by a Layer Weight through a “Facing” to feed the mix. This allows light through to the craft and you can control this with the “colour-ramp” I inserted between the Layer Weight and the Shade Mixer. The red colour is just me thinking what might happen to a laser bullet - could be any colour, just change the RGB Input on the material. it’s all in the file here:
The craft inside the shield is a basic “Made from a Cylinder” model with some extruding and scaling and a sub-div to get the smooth lines, the shader is a Glossy/Diffuse mix controlled by a Layer Weight Fresnel feed.
I’s all relatively simple stuff :eyebrowlift2:, but I accept it needs some time to get your head around what is going on here. Feel free to ask any questions, To run the animation, just press Play as before. It might be worth your while rendering say the first 300 frames of video, so you can see the effect in real time, I may do this when I get back home and post it on Youtube, then link it here. Let me know what you think…
Cheers, Clock.
EDIT:
The problem with many tuts on the web is that: A) they are not very good, B) people tend to massively overthink these things, I start of with “what is the simplest way I can get this done” then work up from there if I need to make it more complex, but I always start “really simple”. You don’t need to learn complex dynamic painting to get a shield effect or a blast of light from a simple collision of a light beam and a shield - think “Simple First, Last and Always” as your starting point, you only have to sell the camera shot, not convince us you have the Physics and Chemistry exactly right.
Quite right - particle systems are good for this type of thing, but a lot harder to setup and control the particles so they don’t grow after they are emitted. Maybe someone else can look at this from a particle point of view??? Other drawbacks seem to be the long time taken to render particle systems.
It’s a bit rough and ready, but there’s something to play with for you - just press Play as usual, the gun starts firing at frame 100 and stops at frame 500 I think. I also moved the sun down.