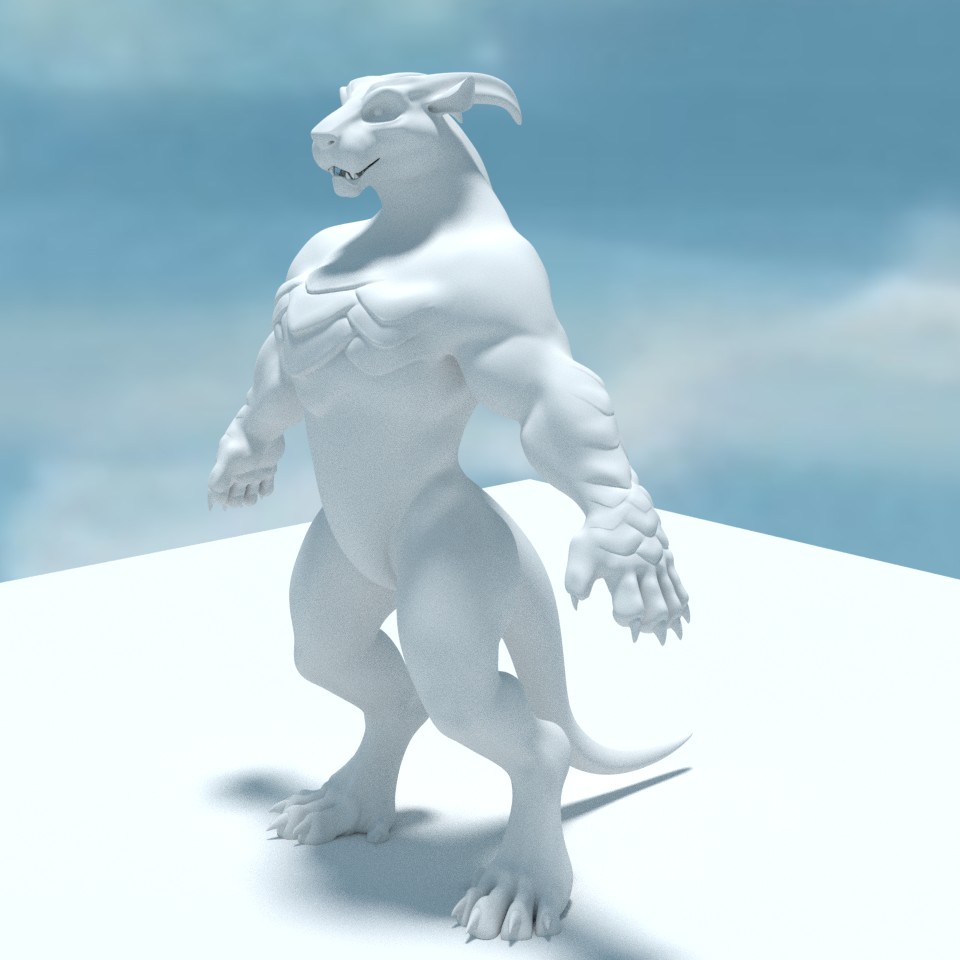
This is a Work in Progress to track down my work so far on a hybrid I designed myself and am eager to get some feedback on him in order to know if I am heading the right way.
For box modeling I feel confident, there are just some parts I am unsure about, and they are the scales on the chest, and arms especially.
I created a version earlier which I did not feel that was right for the process since the subdivisions on the Multiresolution were distorted along with the Sculpting process when I was pulling the scales out from the mesh, so I Smoothed the surface down, and gave it a second go, but then again I am just running out of ideas.
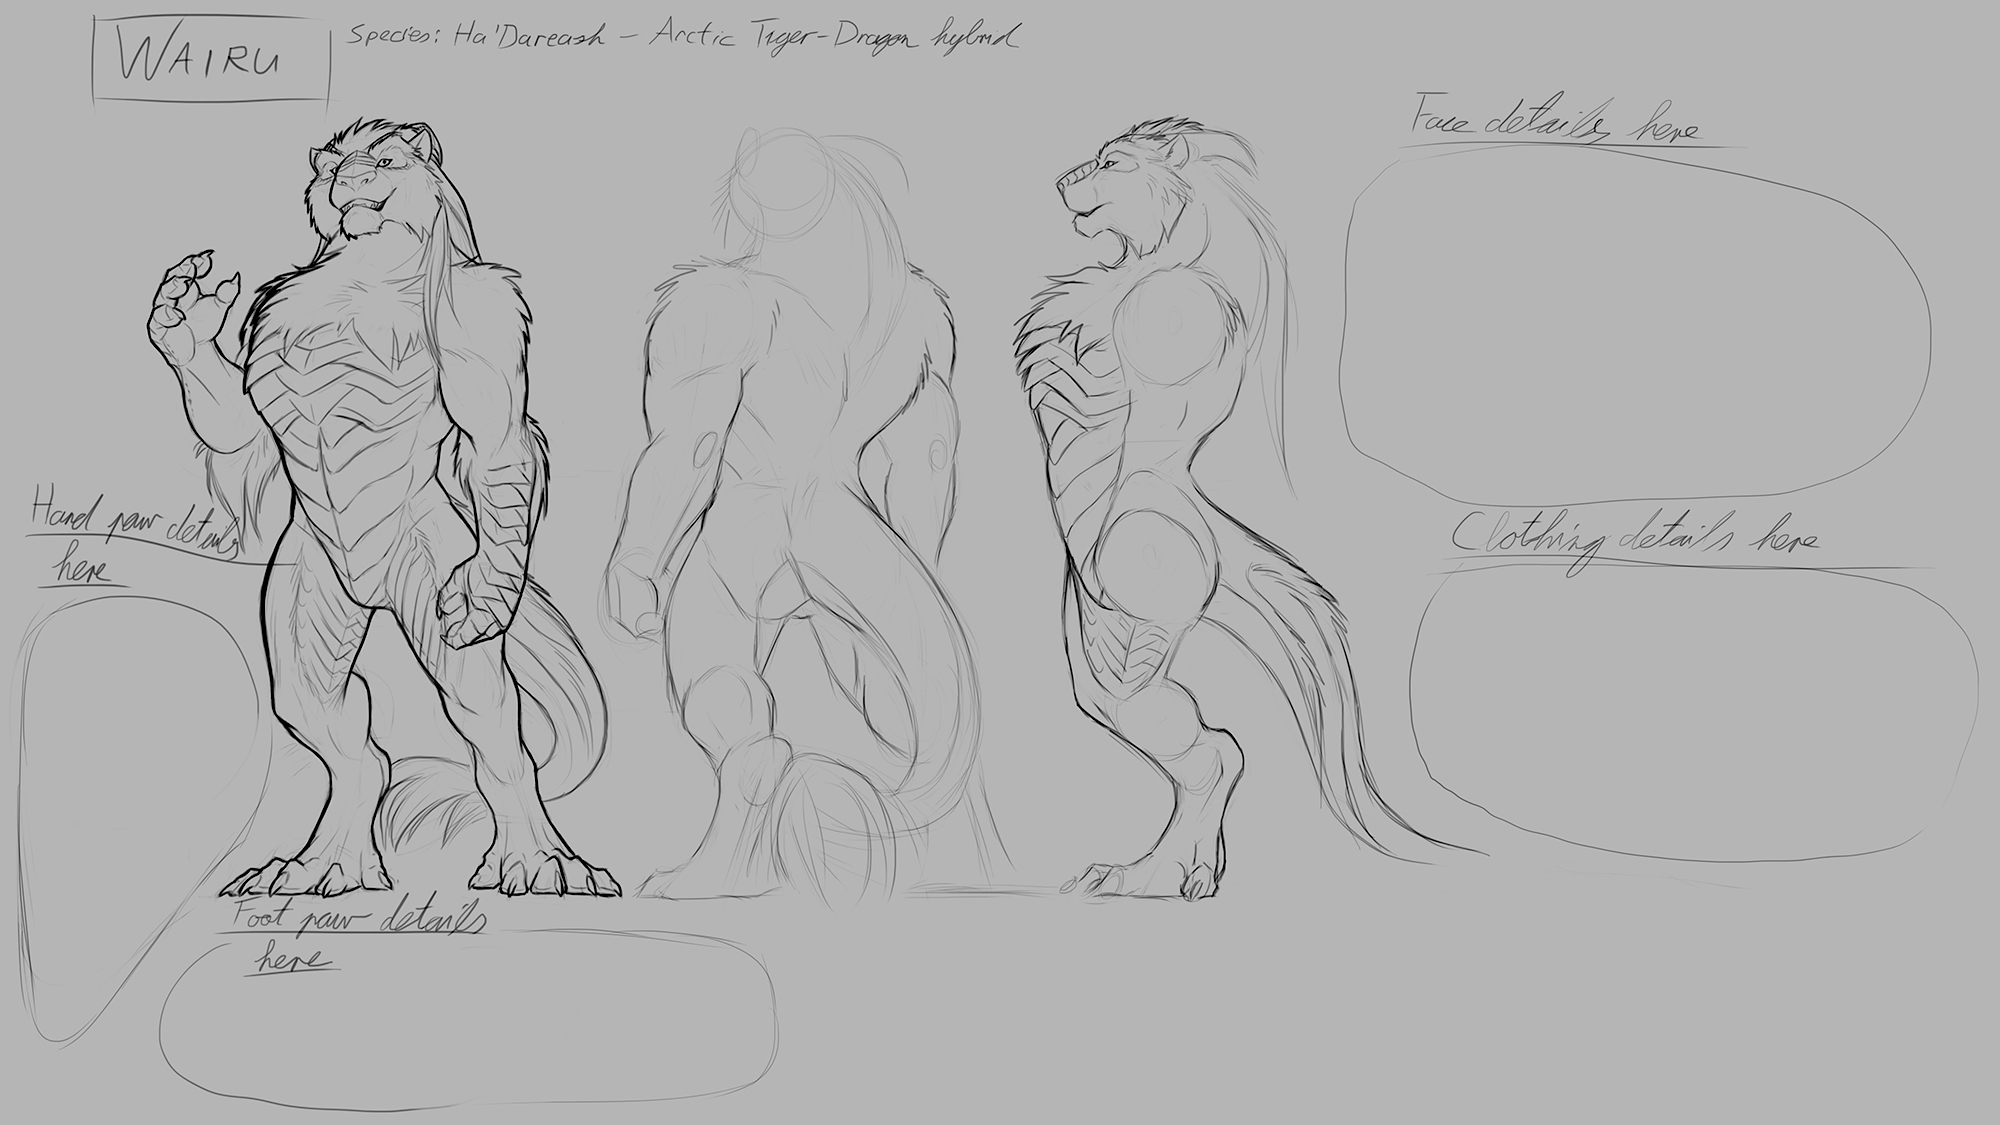
I would like to know if there is any better professional way to achieve such scale plates as seen on the concept wip art?
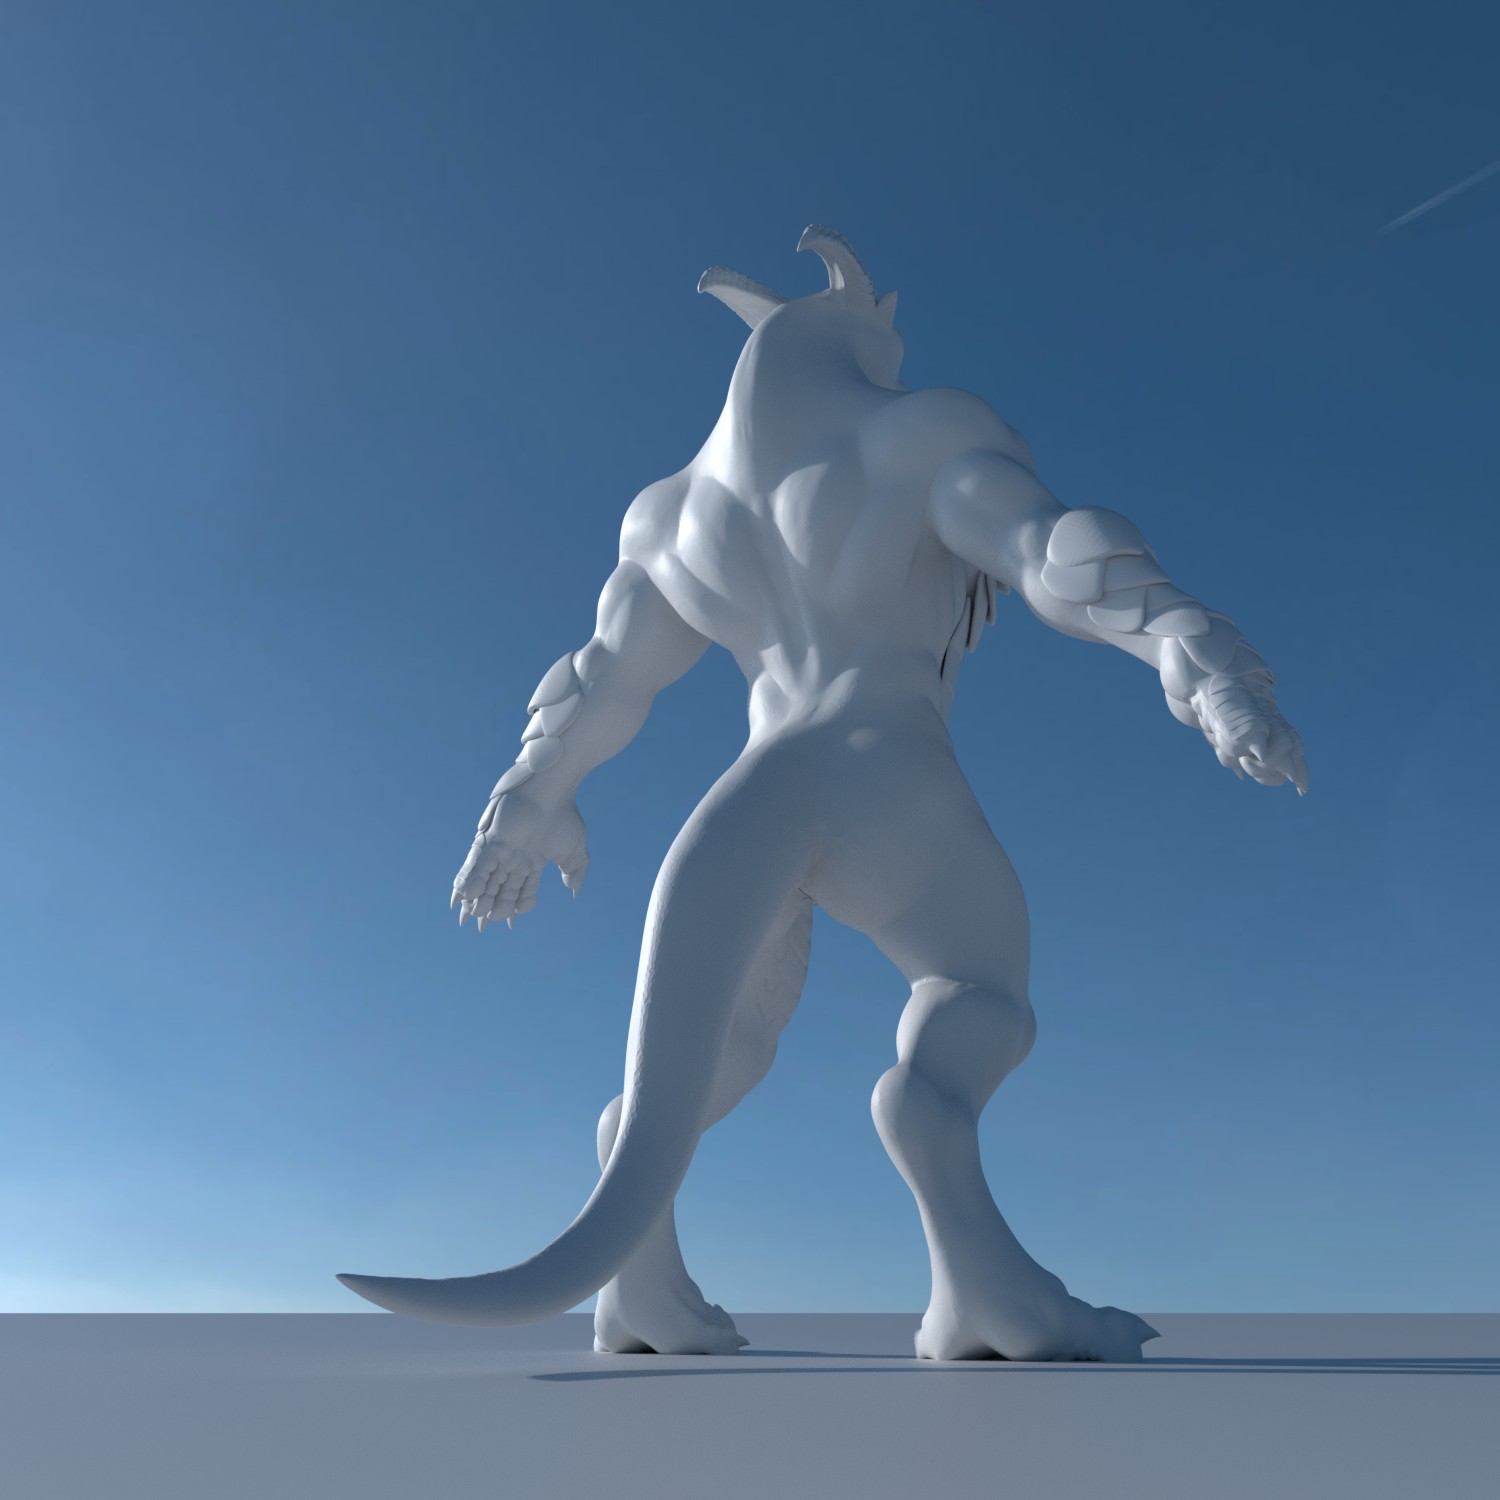
Given the model some time and eventually finding the determination to work on it a bit more over time I came to the conclusion as much as I like having a clean edge flow over my model, it still limits me in order to perform details on the sculpture.
I have tried ZBrush for keeping a nice quad based topology but technically I was limiting myself within the topology, so I thought it would be time to give this same experience of fine sculpting again but with triangles instead of quads.
Note that I highly discourage anyone and eventually myself from performing triangulated meshes, but in this case I did not stand too much choice, but to try it with Dyntopo(Dnyamtic Topology in case someone beginner as I used to be would be wondering what would Dyntopo mean).
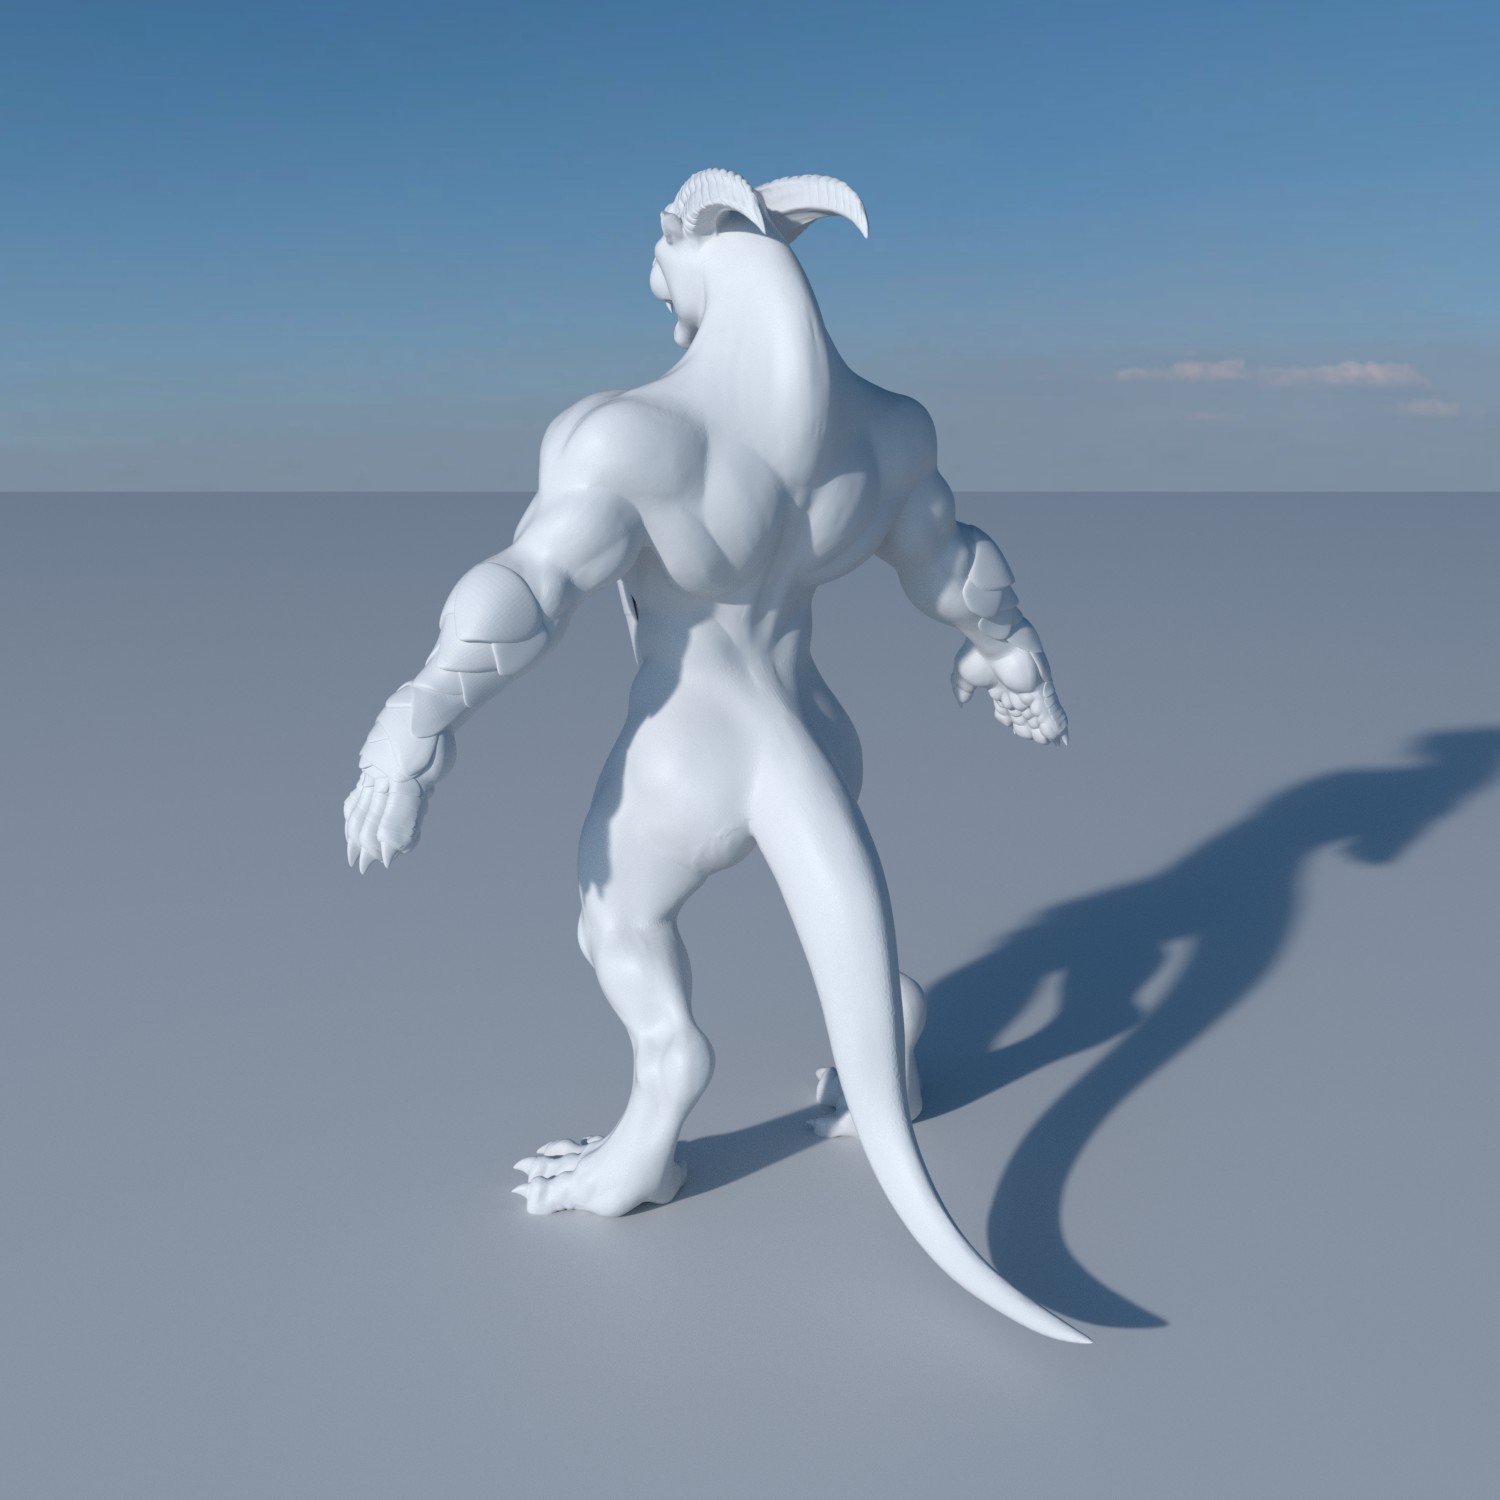
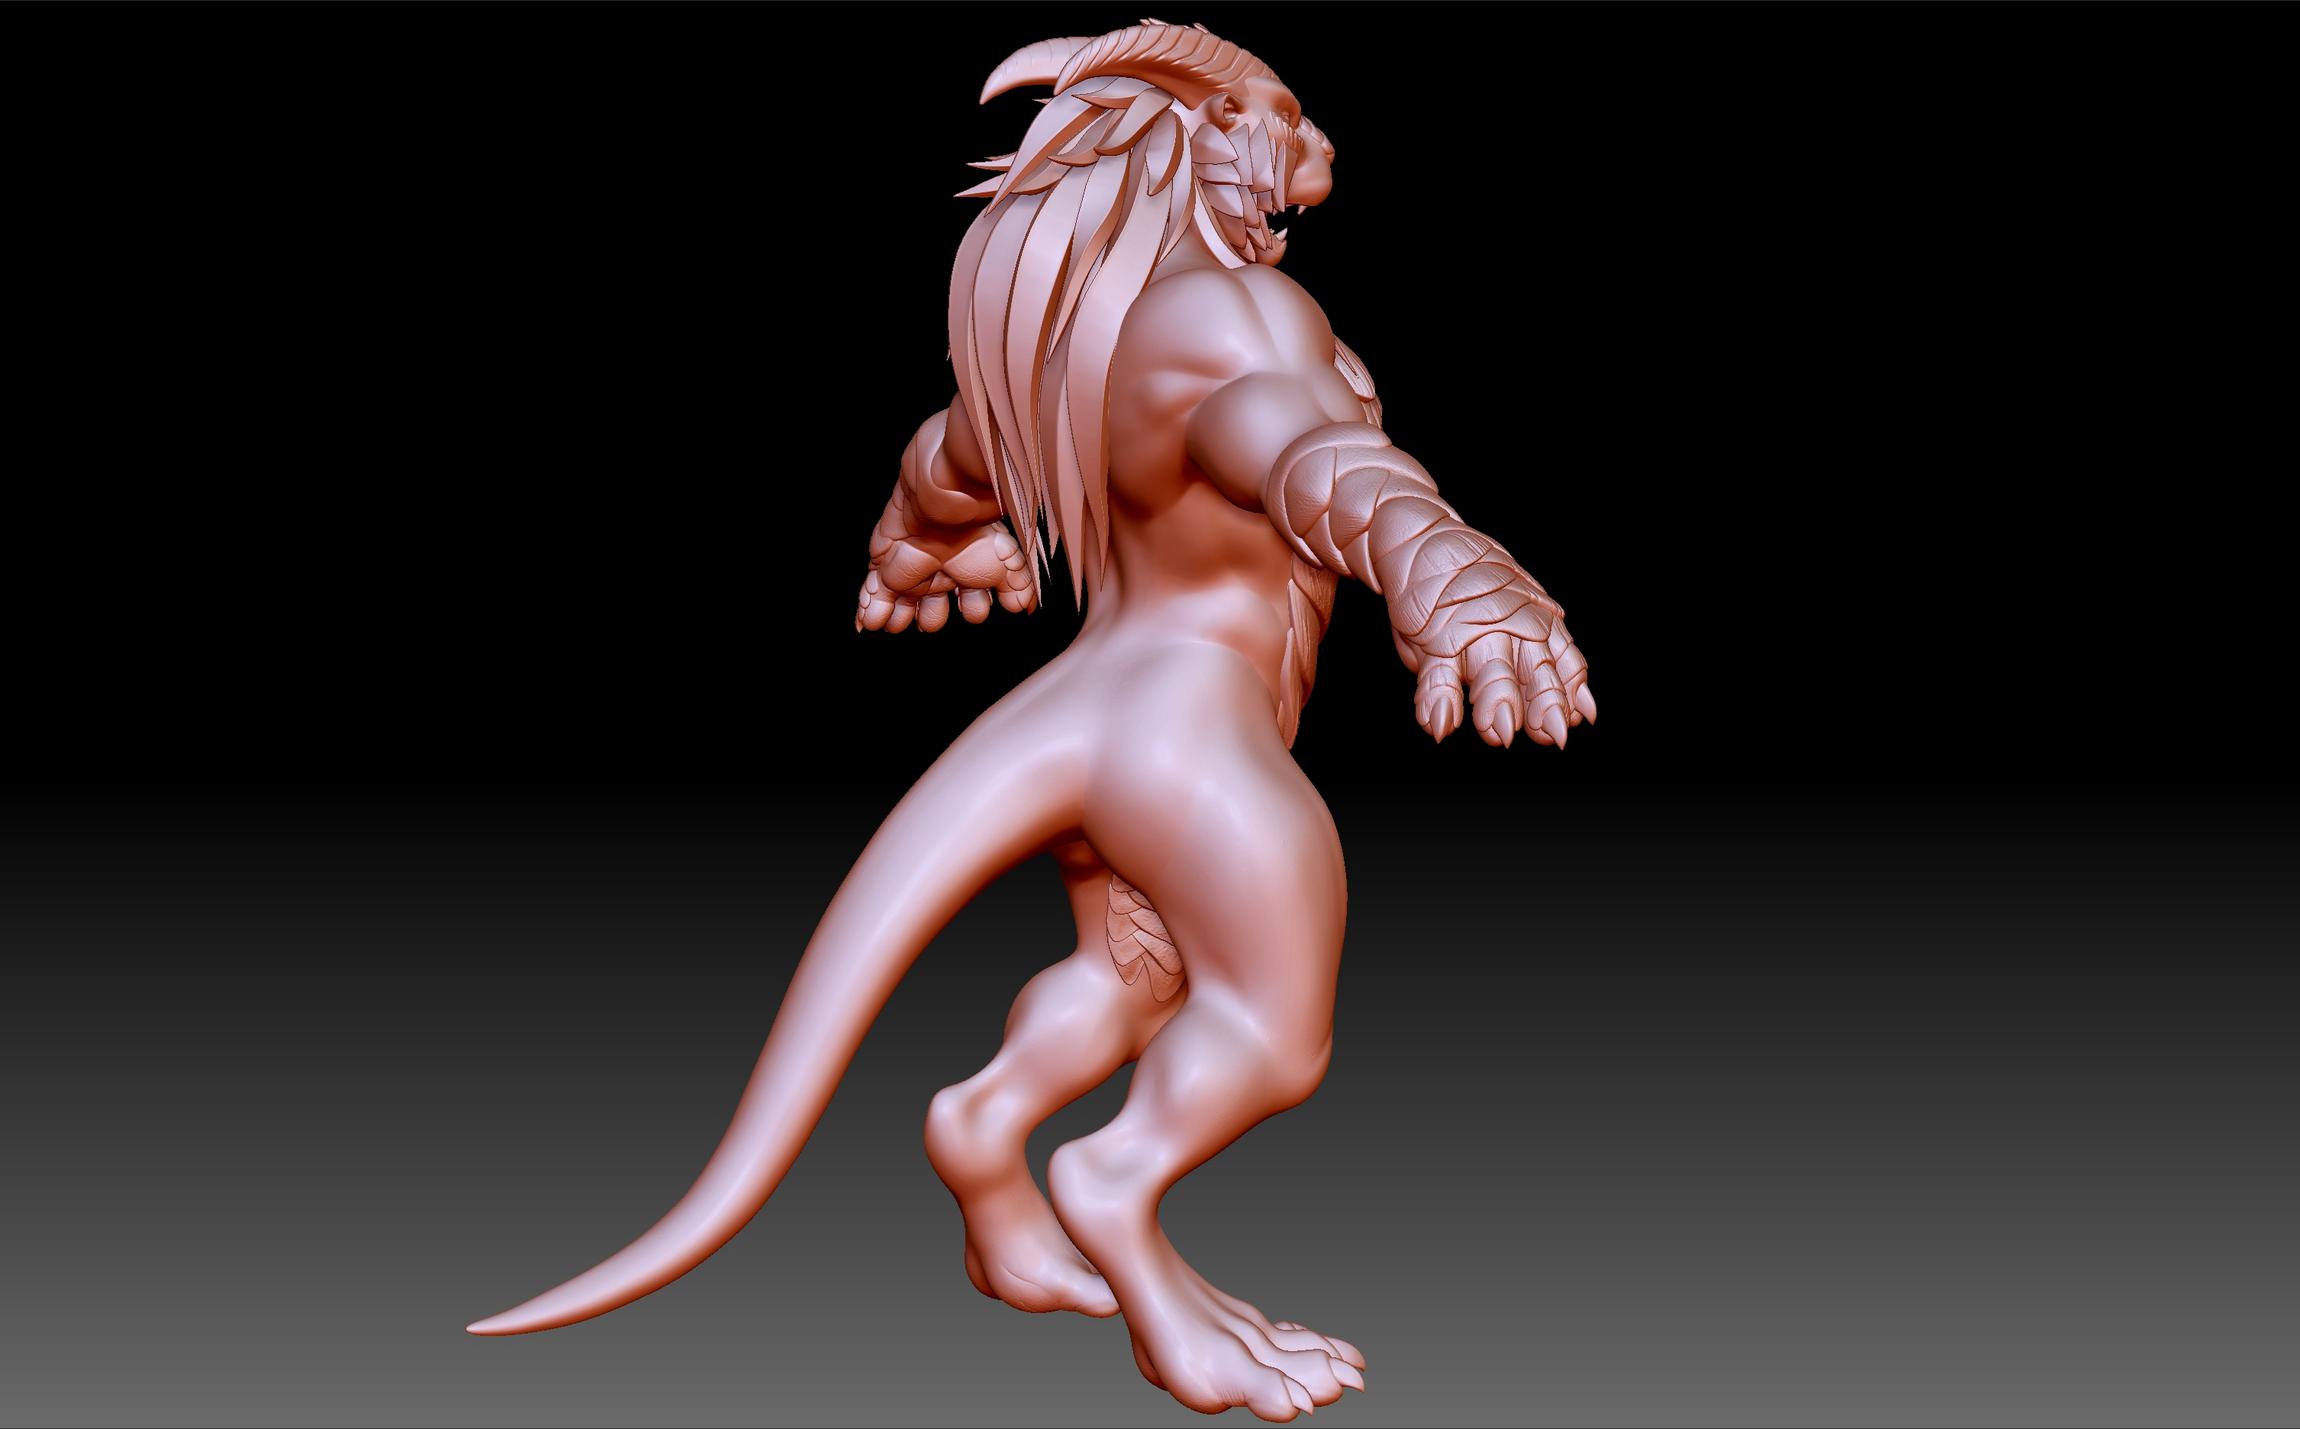
The result so far is surprisingly good, but there are still job to be done over time. Scales, ridges along the tail, and some small tweaking before I would have to go for Retopology.
If someone has any idea of how it would be advised to work on custom scales as seen on the concept sketch for the csulpting parts, it would be apreciated.
I know I am slow in this but right next to my job it’s a bit of a hobby that I do on a calm pace. Additionally I am still experimenting with Blender and ZBrush at the same time.
Blender:
I realized that Blender would be still good for low poly sculpting to keep the art flow within a certain frame so my machine would not freeze that often by changing in between modes, and going back and forth on will in history. Once I would rach 1 Million poly, it starts to get laggy at some operations, and that’s not acceptable in order to keep the art flow.
ZBrush:
I’ve given it a slight chance and it started to be promising, really dynamic in work flow once you get to know what to choose, waht to do in certain steps, so I would mostly change sculpting procedure for ZBrush instead, and leave animations, rendering puroses for Blender.
To be honest, learning to use ZBrush properly was a pain in the butt, but it will pay out in the future, I can tell it now by able seeing the light at the end of the tunnel.
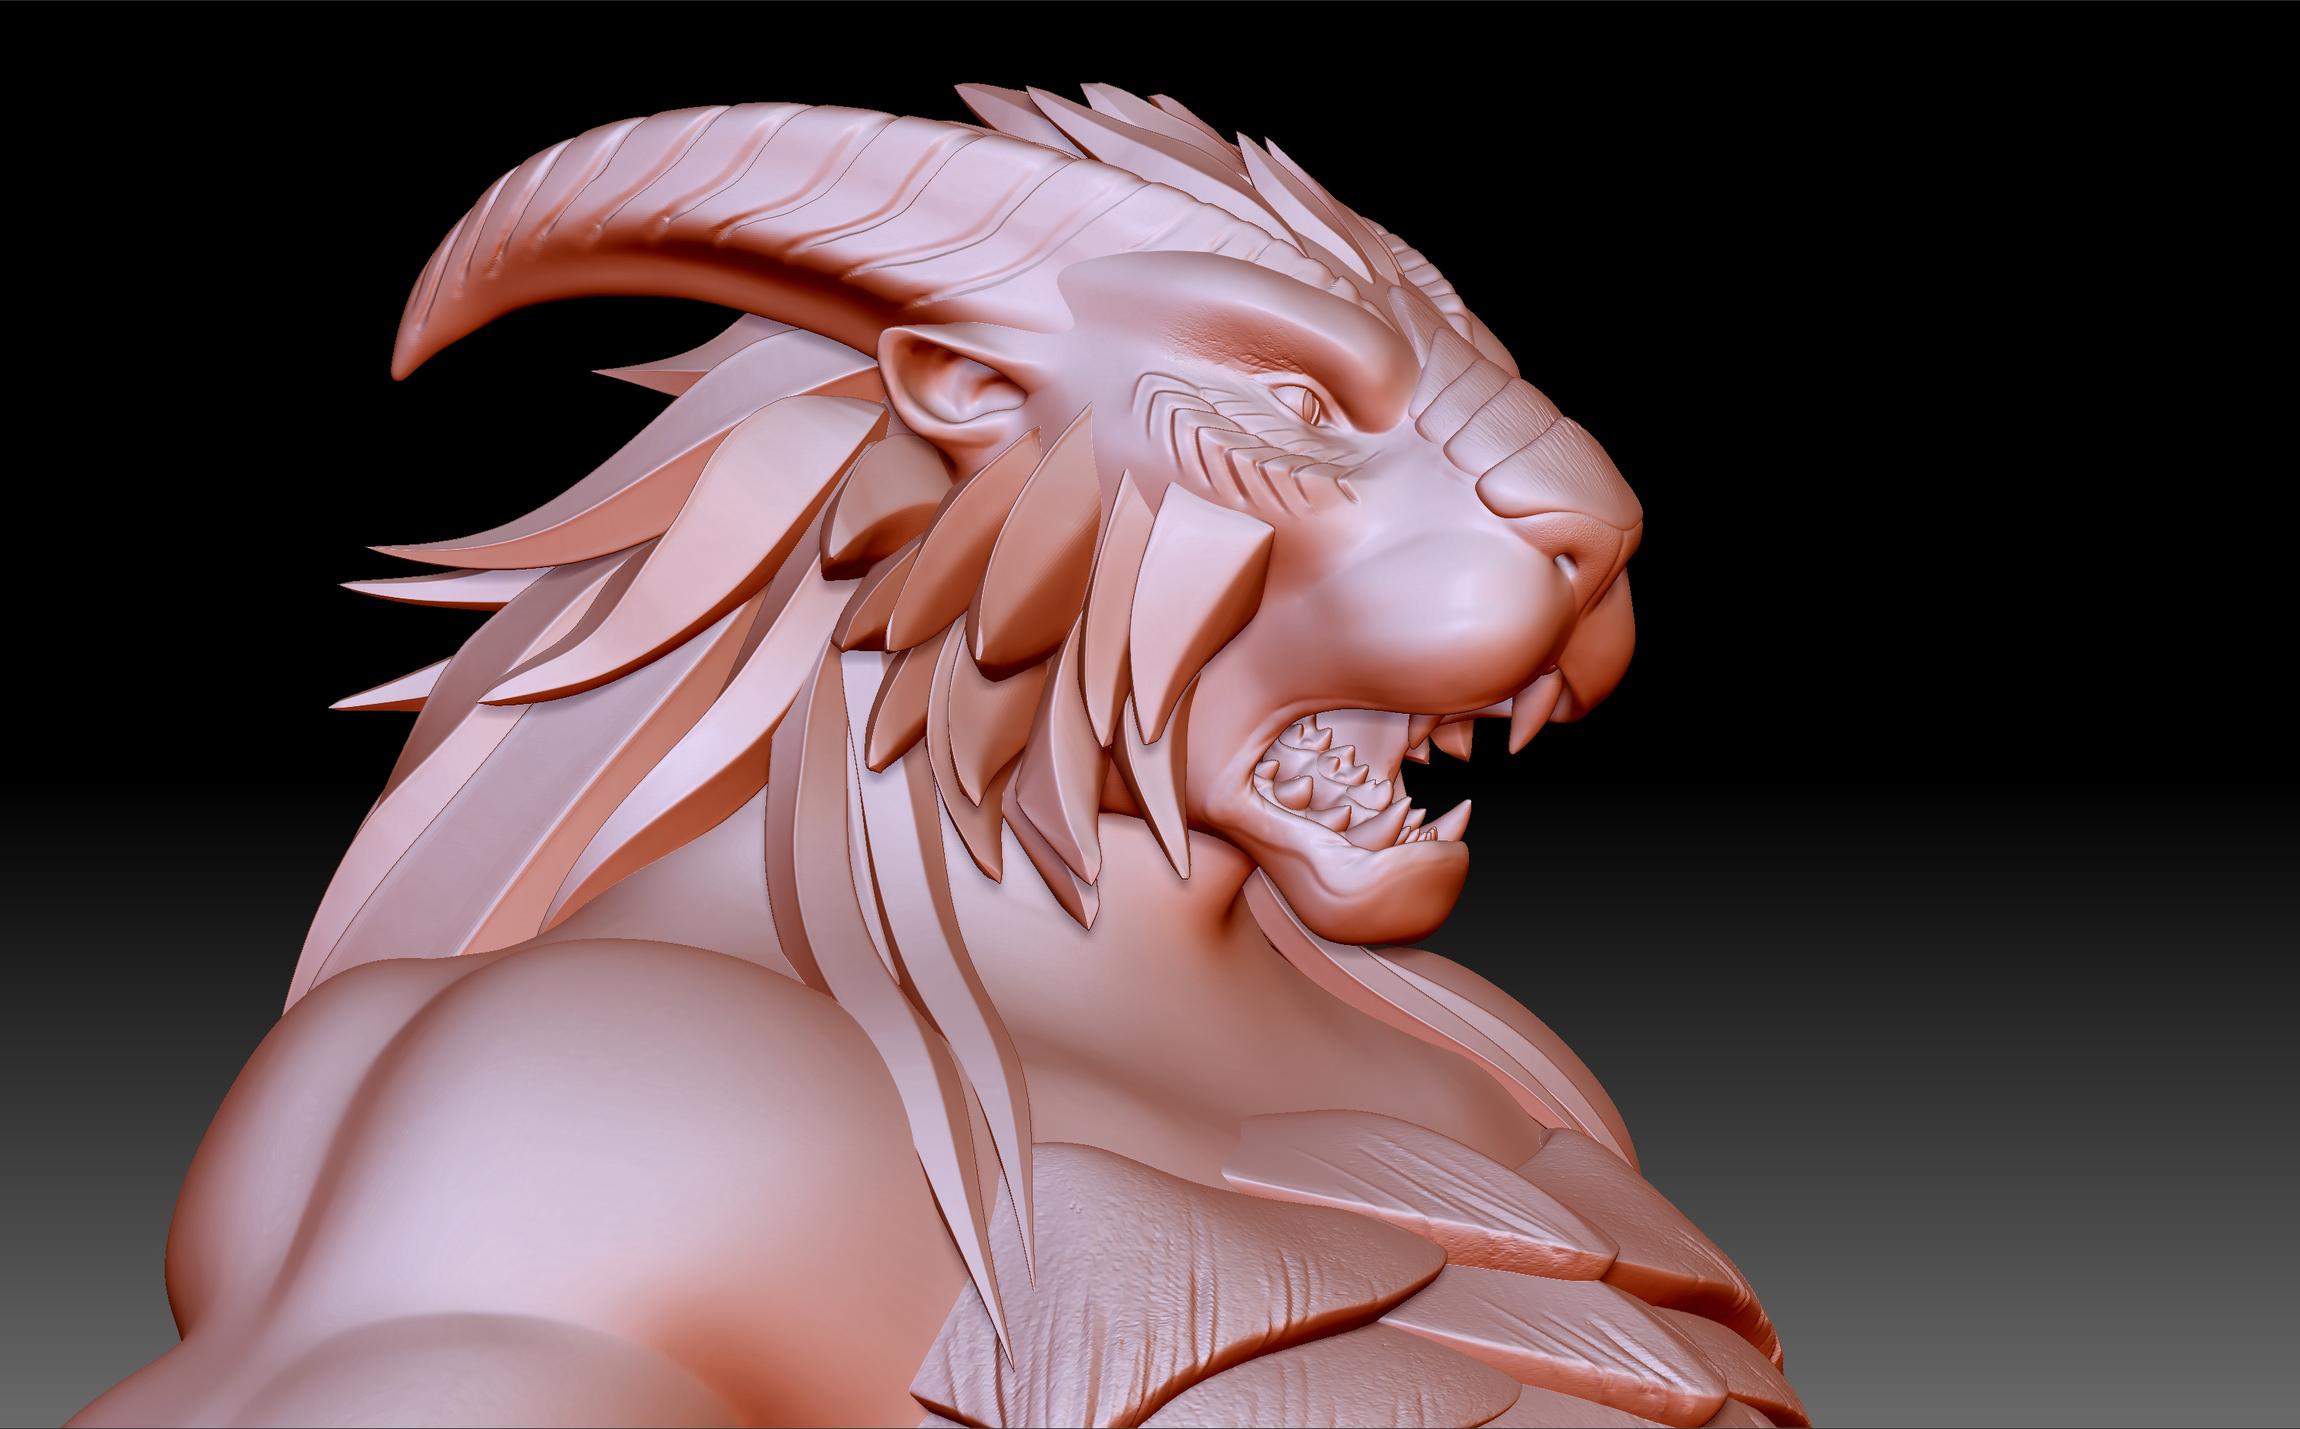
Here are some progress I’ve made in sculpting based on earlier suggestions for the scales.
Looking awesome so far, it truly feels like he has the best bits of both species.
All I can say is to look at changing your tonemapping base from the regular sRGB space that Blender has by default to the new Filmic space now in the newer buildbot builds (you can jack up your light strength to something more realistic without burnout).
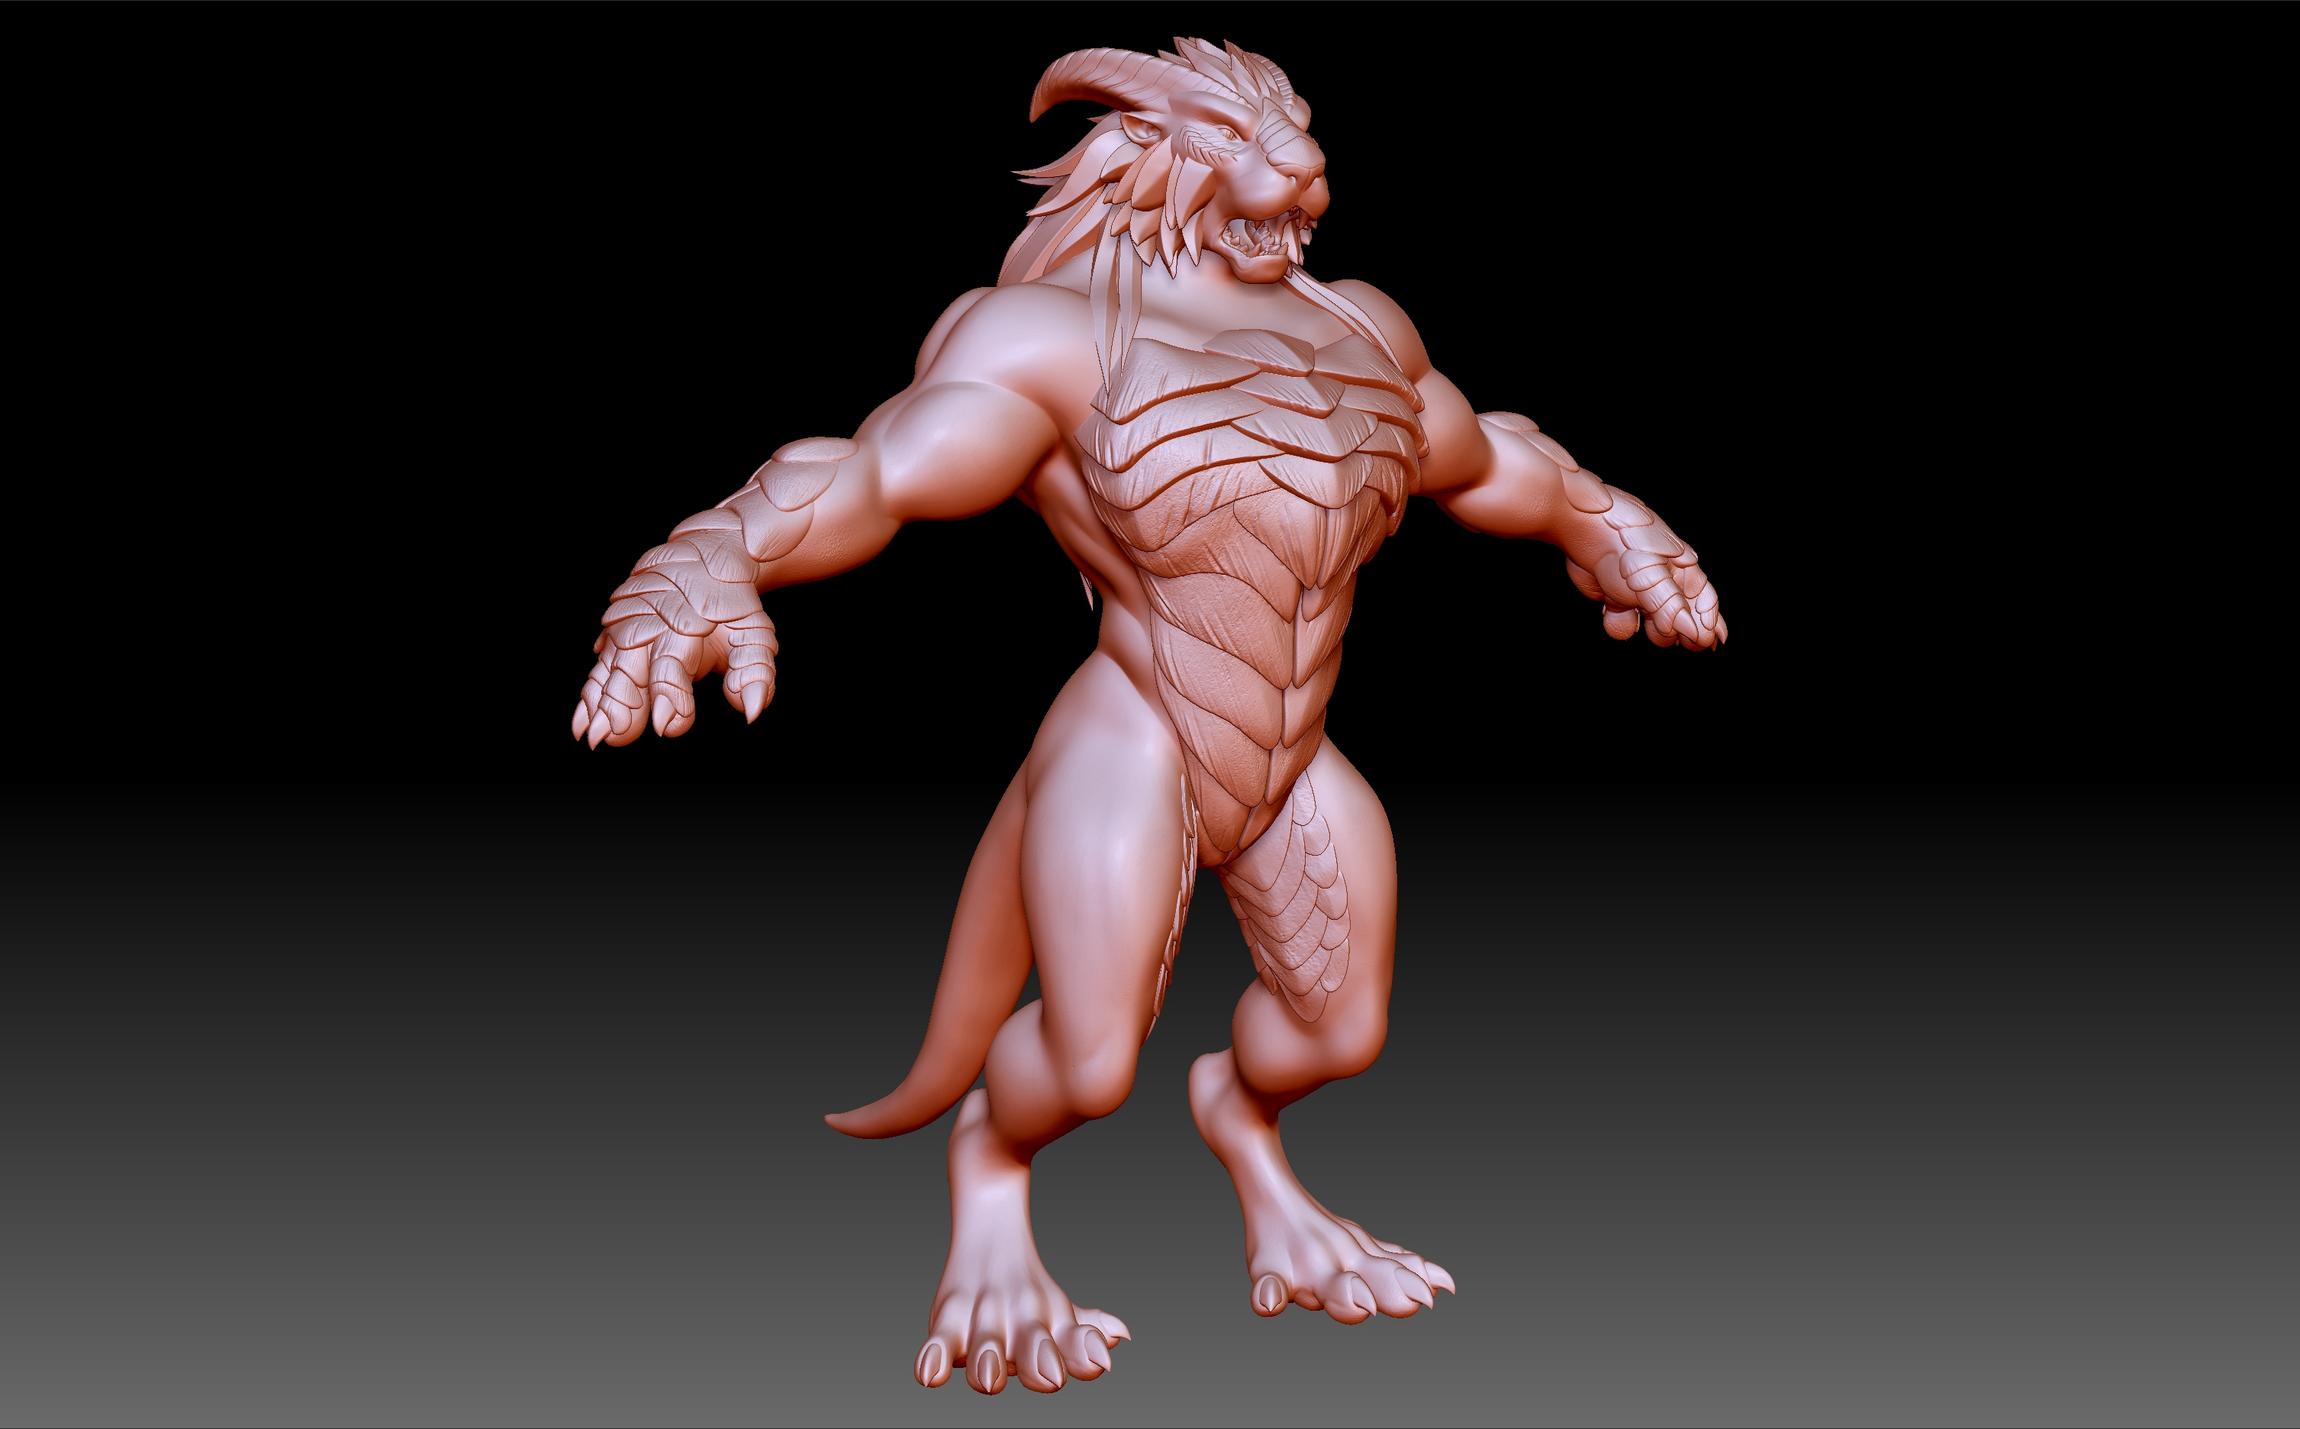
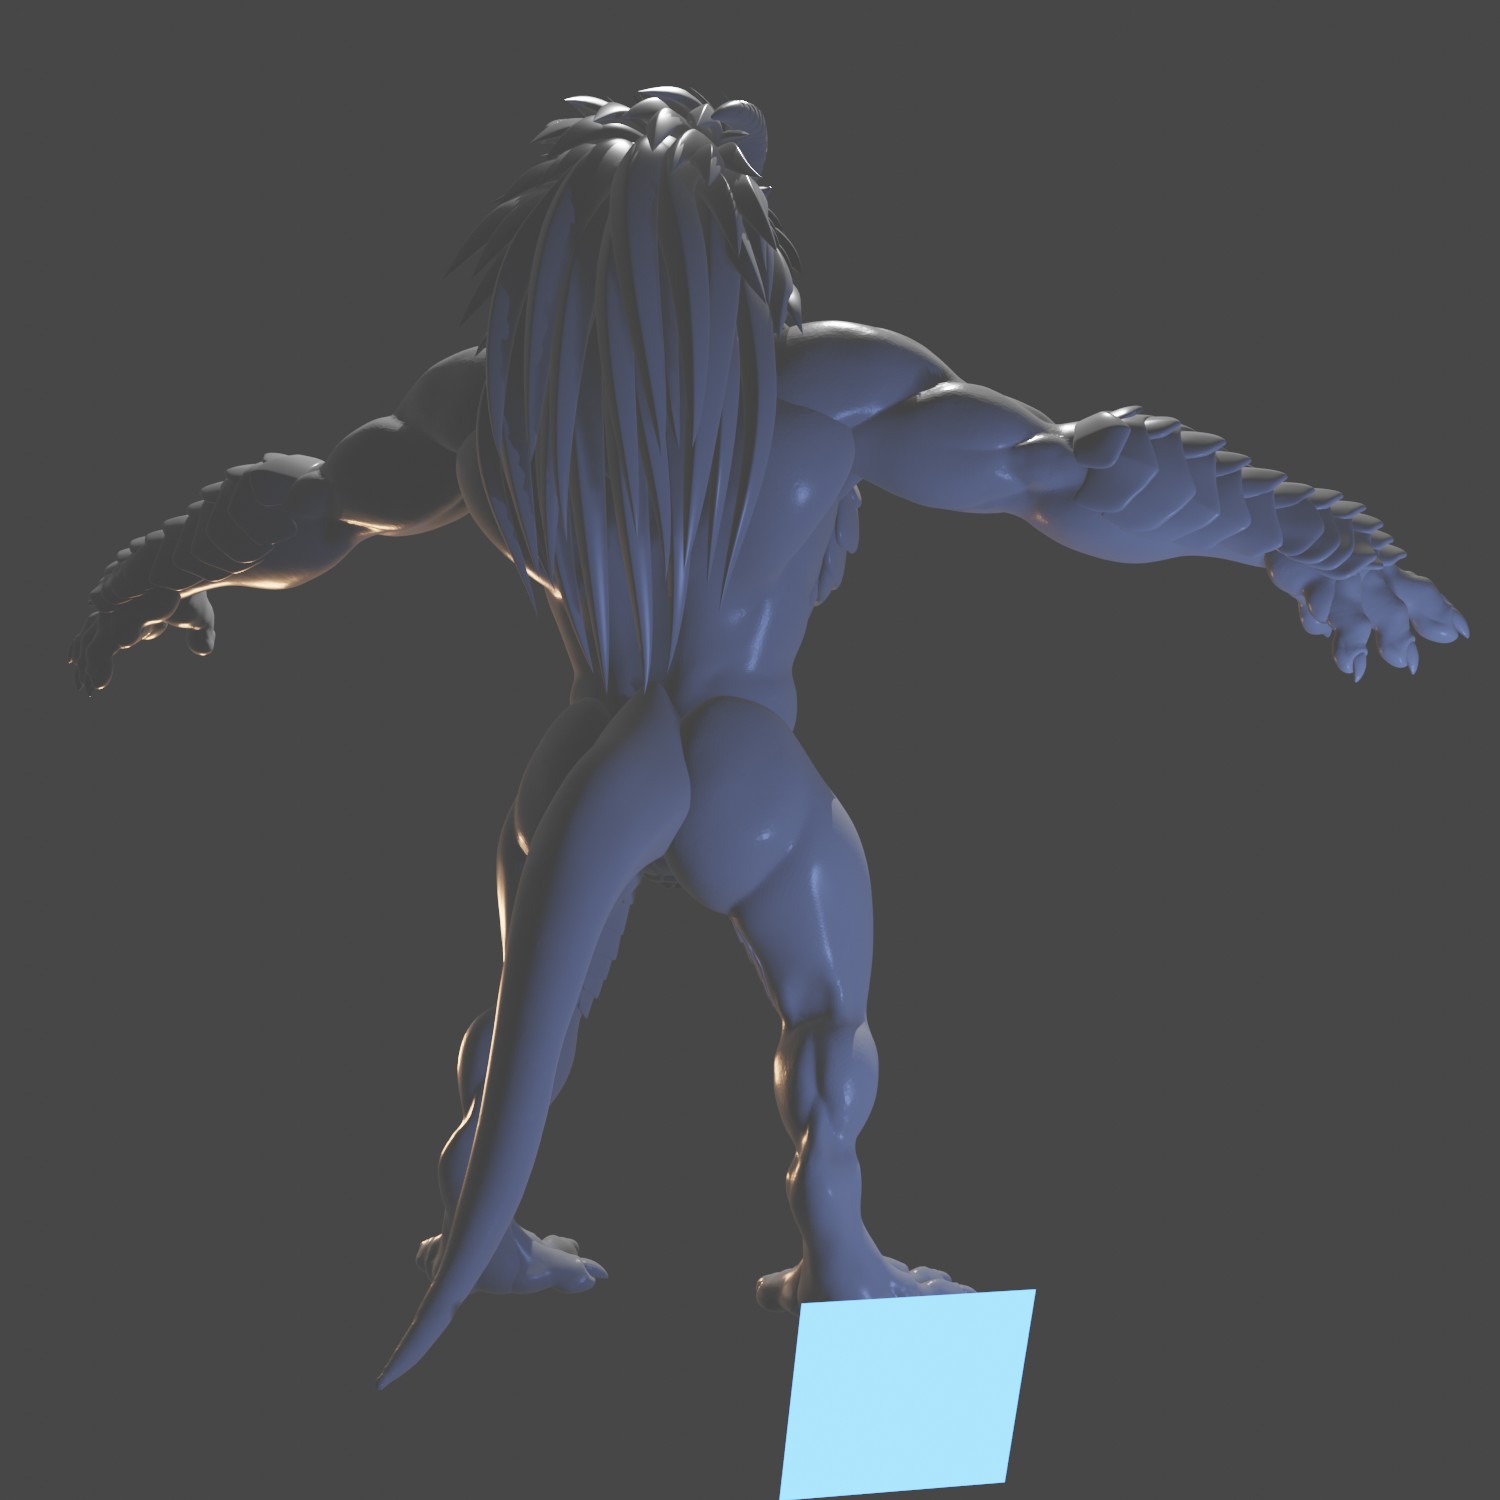
I ventured further in modeling the body. There were some questions remaining in head as I was trying to get an answer when I stumbled in a problem.
The Problem is (In ZBrush) when I try to define some fine details at the model, it just either floods my PC’s capacity and hogs all the resources till it crashes, or just going loose with the details for now.
Objective: I would like to find the ideal way of amp some details on the model: Wrinkles, scales put there manually during sculpting.
Subdivision levels: Dividing too much and it reaches total 20+ Million Poly count.
HD Geometry: Works! …till I am trying to save it which is resulting in crash all the time(tried 10 times, failed 10 times). It’s like you are trapped in a Black Hole, gathered informations that worth gold, and you can’t leak information out with our given technology. So it is not really an option.
This might be a ZBrush related question, but once I have the body done, I can then port this to Blender with GoZ which I have tried already and worked and then I’d be good to go. I’m welcoming suggestions, ideas now.
Yes, they are different subtools.
One subtool for the belly and chest.
One subtool for the nose bridge.
One subtool for the arms.
One subtool for the inner thigh part.
Thanks to Ralmon Meril’s suggestion I did them accordingly.
So this is cool as heck, but i think the problems you were facing seems like a workflow problem.
Many people that think they can only achieve their model by sculpting often close themselves into sculpting only. This is a fine thing to do, and it works great. The only thing is that the growing ever-polycount that comes from it is usually unmanageable from most peoples home PC.
The workflow i would recommend to people that prefer sculpting is only sculpt the body shape and major details. Major details would include anything that sticks out. Now after that, a guy might want to add some fine details like wrinkles, bumps, scratches and things of the sort. This is best done by painting normal maps after the body shape is complete. You can light up a large 4k blank image and get very fine details to your model. Before normal maps are created its usually best to retopologize your sculpted model and UV unwrap it. Unwrapping a dense mesh is crazy impossible.
Conclusion:
Sculpt it using the multi-resolution modifier (Note: enable “Smooth shading” so you dont get hung up on the poly’s)
Retopologize the model to lower poly, and use a subsurf modifier (This more easily allows for animating/rigging)
UV unwrap
do your high detail work on a normal map image using blender’s texture paint mode
This makes for great models on consumer PC’s as well as speedy renders.
Hope this helps some of the problems you mentioned.
After a bit of consideration I decided to retry the whole project in Blender, but in 2.8, quite a bold move, and I wouldn’t have been more impressed with my sculpting in Dyntopo after ZBrush.
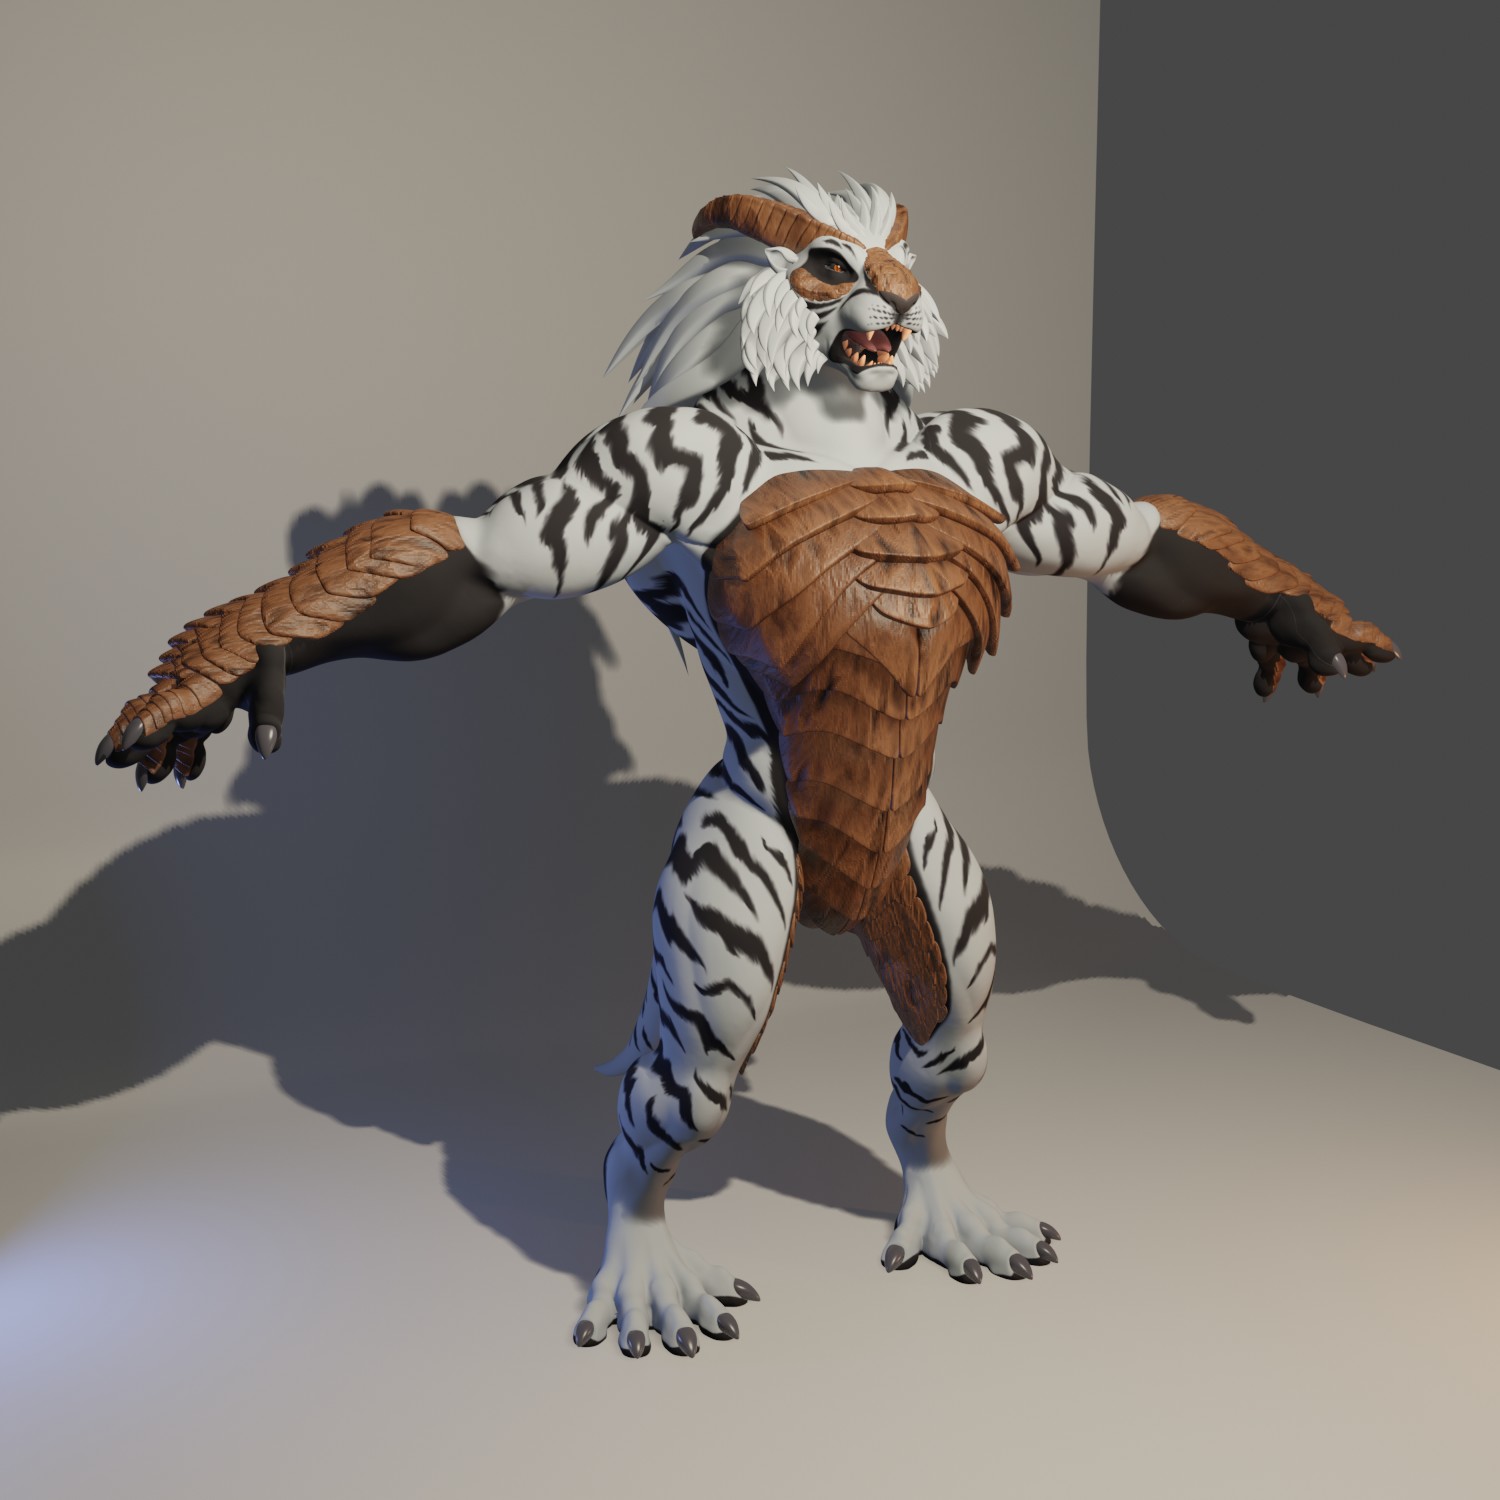
After a bit of fiddling and progressing further with this model, I felt a bit confident and try some techniques combined in the Node Editor / Shaders menu, and I had to realize with a bit of suggestion from fellow artists, friends that i have to UV unwrap the scale plates as well and align them in rather an unorthodox way, but that’s quite alright for the moment to give each and one of it an individual gradient shade from the top.
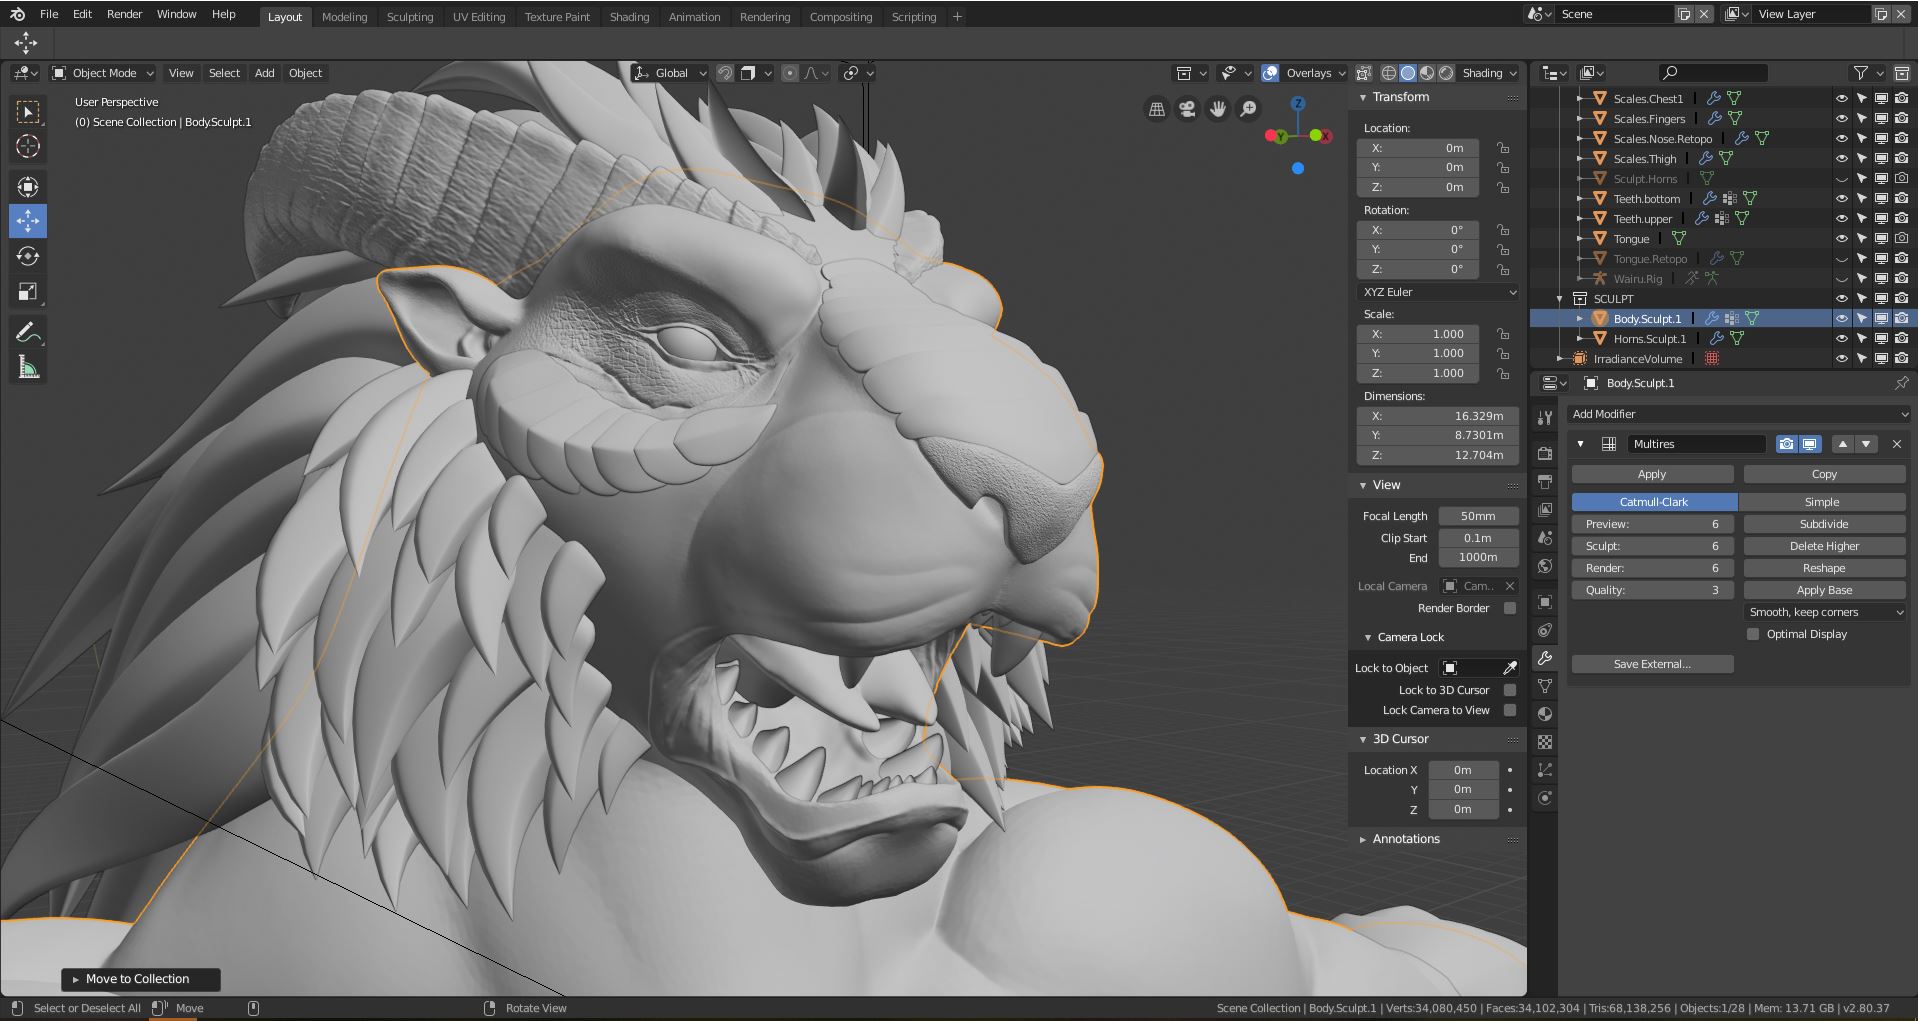
I have came to the decision that the model could use some improvement to give it some details, therefore I made some modifications on the Sculpt-mesh to give some scale-looking textures with alpha brush, that was no problem. My only issue it that I had to amp the Multi-resolution on my Sculpt to level 5-6 to make the creases, cracks, scales, etc look close to realistic, therefore baking Normal-map became a huge burden to my poor PC: Either it crashed, or stopped baking with empty normal-map texture, saying “Out of memory”. I have 20 GB pf DDR3 in my machine, so I’m surprised even that was insufficient.
I would like to hear your opinion on what could be done to make baking possible onto a low-poly mesh.