I’ve created it because I was really annoyed by the fact that everytime I needed a new material, I had to find a texture, and all the maps corresponding to that texture. If I didn’t find the maps, I had to create them by myself, which was just a waste of time. So that’s why I made a Node that allows me to create a material from a single diffuse texture or any photo.
I didn’t have much knowledge in understanding how Cycles works, so I used different sources as BlenderGuru, Reynante Martinez’s tutorials and Chocofur to design this Node. In one Node, you can create some metal, dielectric, and glass very easily. I know the concept isn’t new, but when I looked for a Node like this, whether it wasn’t including every material, whether it wasn’t tweakable enough…
With this one, you can modify the original texture easily, and all the maps created with it inside the Node. You can put some dust textures or smudges or scratches ones.
This Node is far from being finished: I already did a few tests, but some settings may not be right. That’s why I’d like you to critic what I’ve done and tell me what things I should change or keep.
Anyway, thanks in advance! Looking forward to have some advices from you!
I still need to check out what’s going on under the hood, so please take this with a grain of salt - it’s possible you’ve come up with something clever that invalidates this critique…
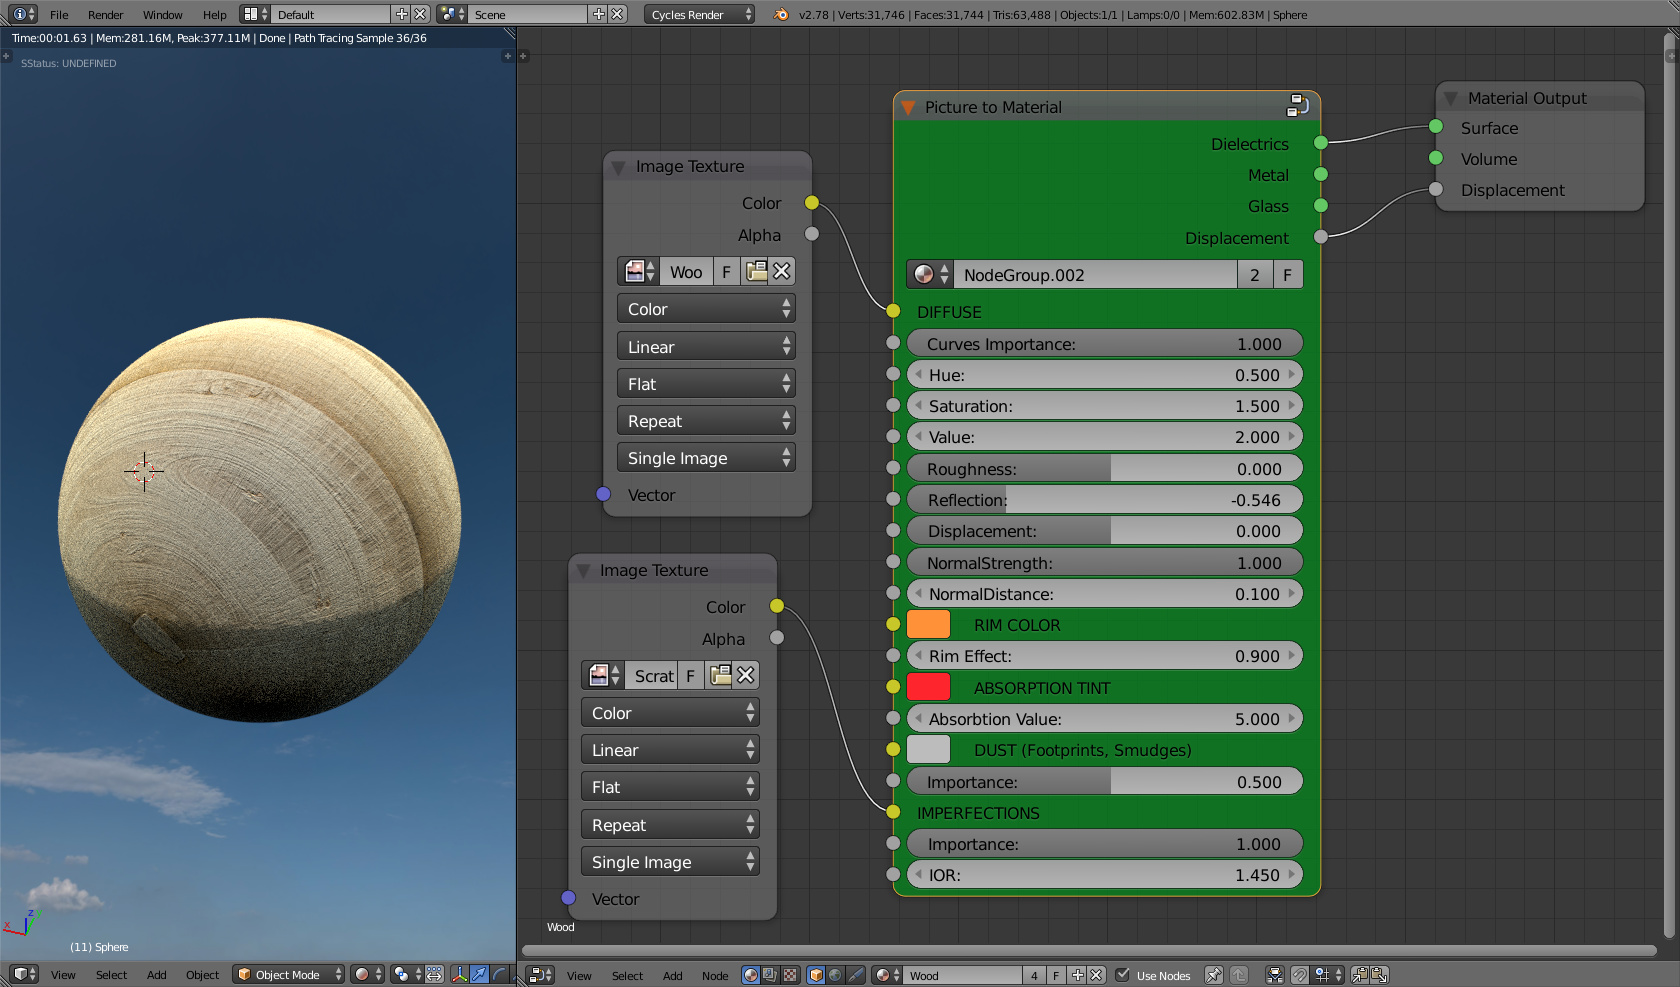
From what I understand, you’re deriving a normal/bump map for a material from the diffuse texture. This should work relatively well for some materials but fail dramatically for many others. E.g., the wood grain material in your post looks pretty good because in wood the surface bump is (usually) directly related to the diffuse value. What about a material where this is not the case? For instance, you might have a tile mosaic with individual tiles ranging from black to white. In that case, the surface bump has nothing to do with the diffuse color, but your node will create a scenario where lighter tiles are higher than dark tiles (or the reverse depending on how you generate the bump map). You would also have trouble generating a material that is supposed to be quite bumpy but uniform in color (like many plastics) from just one texture.
I think there’s value in putting together a PBR ubershader-like node for your own workflow (for proof-of-concept if nothing else) so don’t be discouraged. But you have to be very careful about trying to fake information that’s explicitly separate from the diffuse texture. I remember this as something that often came up as a criticism of DAZ3D/Poser figure resources. The good ones have actual bump maps, specular maps, etc. But many vendors just create a greyscale version of the diffuse map (maybe with higher contrast) and the results aren’t great.
As I say, I’ll test out the node when I get a chance and post some results.
You well-understood how it was working, and I understand what you mean, I hadn’t thought about that… But you’re totally right, I think I’m gonna add a color input to plug in a normal map if the Node fails to generate a proper one, because it is impossible to know the normal map of a material if the texture contains black and white in it, as you’ve said it
I also have another problem: right now, the displacement option that was added in Blender 2.78 in the Experimental Cycles doesn’t seem to work well, so I’ll have to work it out to find a better option I think than using this feature
I’ve updated the Node, and, as it fails to generate some proper normal and displacement maps if the texture has black or white, I added the option to add your own Normal and Displacement Maps.
I have one last problem: I don’t know how to convert the texture from sRGB to linear Color Space… Has anybody got an idea?
When you had a texture, you need to duplicate the Image Texture Node, and to change one of them to Non-Color Data. Then, plug each one into the correct inputs.
if your texture has black or white in it, you need to plug in a normal and displacement maps into the correct inputs, and change “Plugged?” from zero to one