I’m working on an elaborate animation at the moment, which revolves around tiny plastic figures (only a few centimeters tall). For that reason I would like the final animation to show a strong “depth of field” effect. And setting this up in the “Depth of Field” render settings (with an animated empty as camera focus) works perfectly. (My figures are so small that f-stop 32 already gives a pretty strong DOF effect.)
My problem is that I would now like to shift the creation of the DOF to the compositing step to be able to play with the strength, without having to re-render everything. And the Defocus node seems to be the perfect solution for this: The Z-Buffer (from the rendered channels) allows me to precisely focus on the (moving) empty that I set as camera focus.
However, the effect is now way too strong. In fact, an f-stop setting of 128 (the maximum I’m allowed to enter) now looks way more blurred than my original f-stop of 32 that looked about right to me. Is there a reason for this? And what am I to do? I cannot enter a bigger f-stop and scaling the Z-Buffer (e.g. lowering the brightness) doesn’t work either.
Any help would be much appreciated.
Thanks in advance.
Sorry, I can’t help here but I just noticed the very same.
Theoretically (and according to the popover you get when you hover over the f-stop of the defocus node) 128 should give zero blur. But in my case I get a completely blurred result even with 128.
My whole scene is built metrically correct and if I render the DOF with Cycles all looks correct. There definitely is something wrong here…
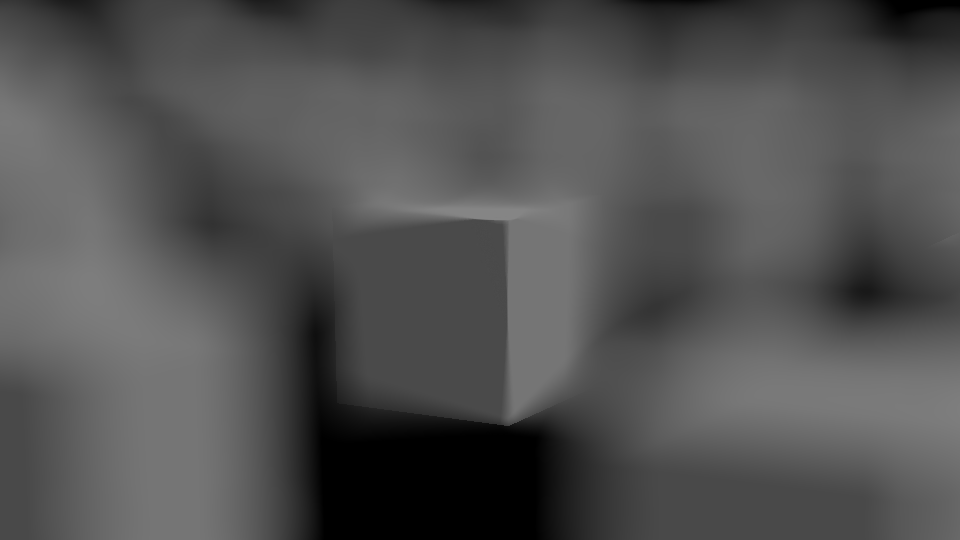
This is the Cycles rendering without any DOF followed by a defocus node set to f-stop 16 using the scene’s camera and focal point. Notice the extreme DOF. You can also set the f-stop to 128 in the defocus node. Still completely over-blurred (although it should show no DOF at all).
Now select the defocus node, press M to mute it. Set the camera’s aperture from “Radius” to “F-Stop”. Notice that it’s set to 16. Press F12 again. This time Cycles renders the DOF while there’s no further DOF done in comp.
This is just a simple example, it’s less noticeable in a scene with larger scale, but it can become much worse when you’re working at a microscopic scale scene.
One “tip” I’d offer with regard to defocus is that you really should apply it selectively to a compositing layer that includes only the thing(s) that are to be defocused. In fact, you might wish to use three: those that are in front of the sharp objects; the sharp objects; those that are in the back.
Another “trick” is to use curves-nodes to allow you to re-shape the “Z-depth” input before feeding it into defocus nodes. Now, the amount of defocus becomes a mathematical function of the Z-distance instead of the literal value. (The “f-stop” setting of course does a similar thing.) With curves nodes, you can shape the amount of blur before the camera, then put a plateau of sharpness at the desired DOF distance, then resume blurring again.
Although the defocus node uses “f-stop” terminology, its use of the term is really somewhat erroneous and misleading: the algorithms are not the same, even when there is an awareness of Z-depth.
The flexibility afforded by defocus is, to me, compelling. To me, it is well worth the trouble to tweak it instead of using DOF in rendering calculations.
The simple scene I attached is not about visual quality or artifacts but only about the impossibility to achieve anything useful in certain situations.
I find Blender’s compositing DOF extremely beautiful if the scene type / scale allows me to use it.
I can live with the fact that I get different results than when rendering the DOF in Cycles, but if even at f-stop 128 all I get is a blurry mess, I wonder what might cause this and how to avoid it (hell, I would even hack the source code to allow me f-stops far beyond 128 if that would be a solution ).
I hope the Blender compositor gets some more love in the future as I think it’s one of the most overlooked features of Blender.
The following affect depth of field. Just to clarify, more depth of field actually means more is in focus.
Focal length, Longer focal lengths have less DOF.
Sensor size, larger sensors(film size) have more DOF.
Focal distance, close focus has much less DOF.
Aperture, larger aperture number has less DOF.
I did some tests on your file and it appears that the compositor does not compute sensor size. You have 32mm sensor size and 66mm lens. A 9mm sensor and 16mm lens should have a similar field of view, but much more DOF. Changing these settings made no change in your file. One of the reasons that you have so much blur is that your scene is miniaturized. The cubes are about the size of a playing die from a board game. The focal distance is 19cm, which is about 8 inches. In real life, a 65mm macro lens would struggle to get very much in focus at 8 inches, even at F32 or F64. If you size up your entire scene to make them the equivalent of a shoebox or so, the DOF will be much less pronounced because the focal distance will be longer.
And my … “fakeit, Ingrid™” … advice is that you should takecontrol of these “certain situations,” in order to maneuver them to become “situations” that this cheap-and-easy node can accommodate!
The fundamental problem is that “the defocus node with a simple z-depth input” is not algorithmically capable of producing … on its own … “an acceptable substitute for a renderer’s DOF.” Well, okay, we know that." We’re just trying to come up with “a fake that works!”
I have found that you can actually get pretty-convincing results if you insert a curves-node into the Z-depth input, so that you can modify the input that the node actually receives. “The curve that works” is one that includes a flat-line within the chosen range of “sharp focus,” and a flattened curve “between here and the camera,” and a basically-unchanged diagonal line on either side. (Although you might at your discretion flatten either approach-line so that the extreme limits of the blur are not too extreme.)
“Yeah, you’re fakingout the defocus node … uh huh … c’est la guerre …”
“Granted, this is an approximation.” However, just as when you substitute “blur” for laboriously-calculated “motion blur,” sometimes an approximation is the best deadline-busting answer.
First of all thanks for all the replies!
Especially the scaled scene helped a lot to show where the problems are.
I think I have to deal with the way it currently is in Blender Compositor then, which is not a problem. I can live with the fact that the results from the defocus node have nothing to do with the results from Cycles. Not even in the same ballpark.
But I still love the results I can get with it.
And I’m sorry if some of you got me wrong. I sincerely LOVE faking things.
Been earning my money in the Vfx industry for almost 20 years now (just quite new to Blender).
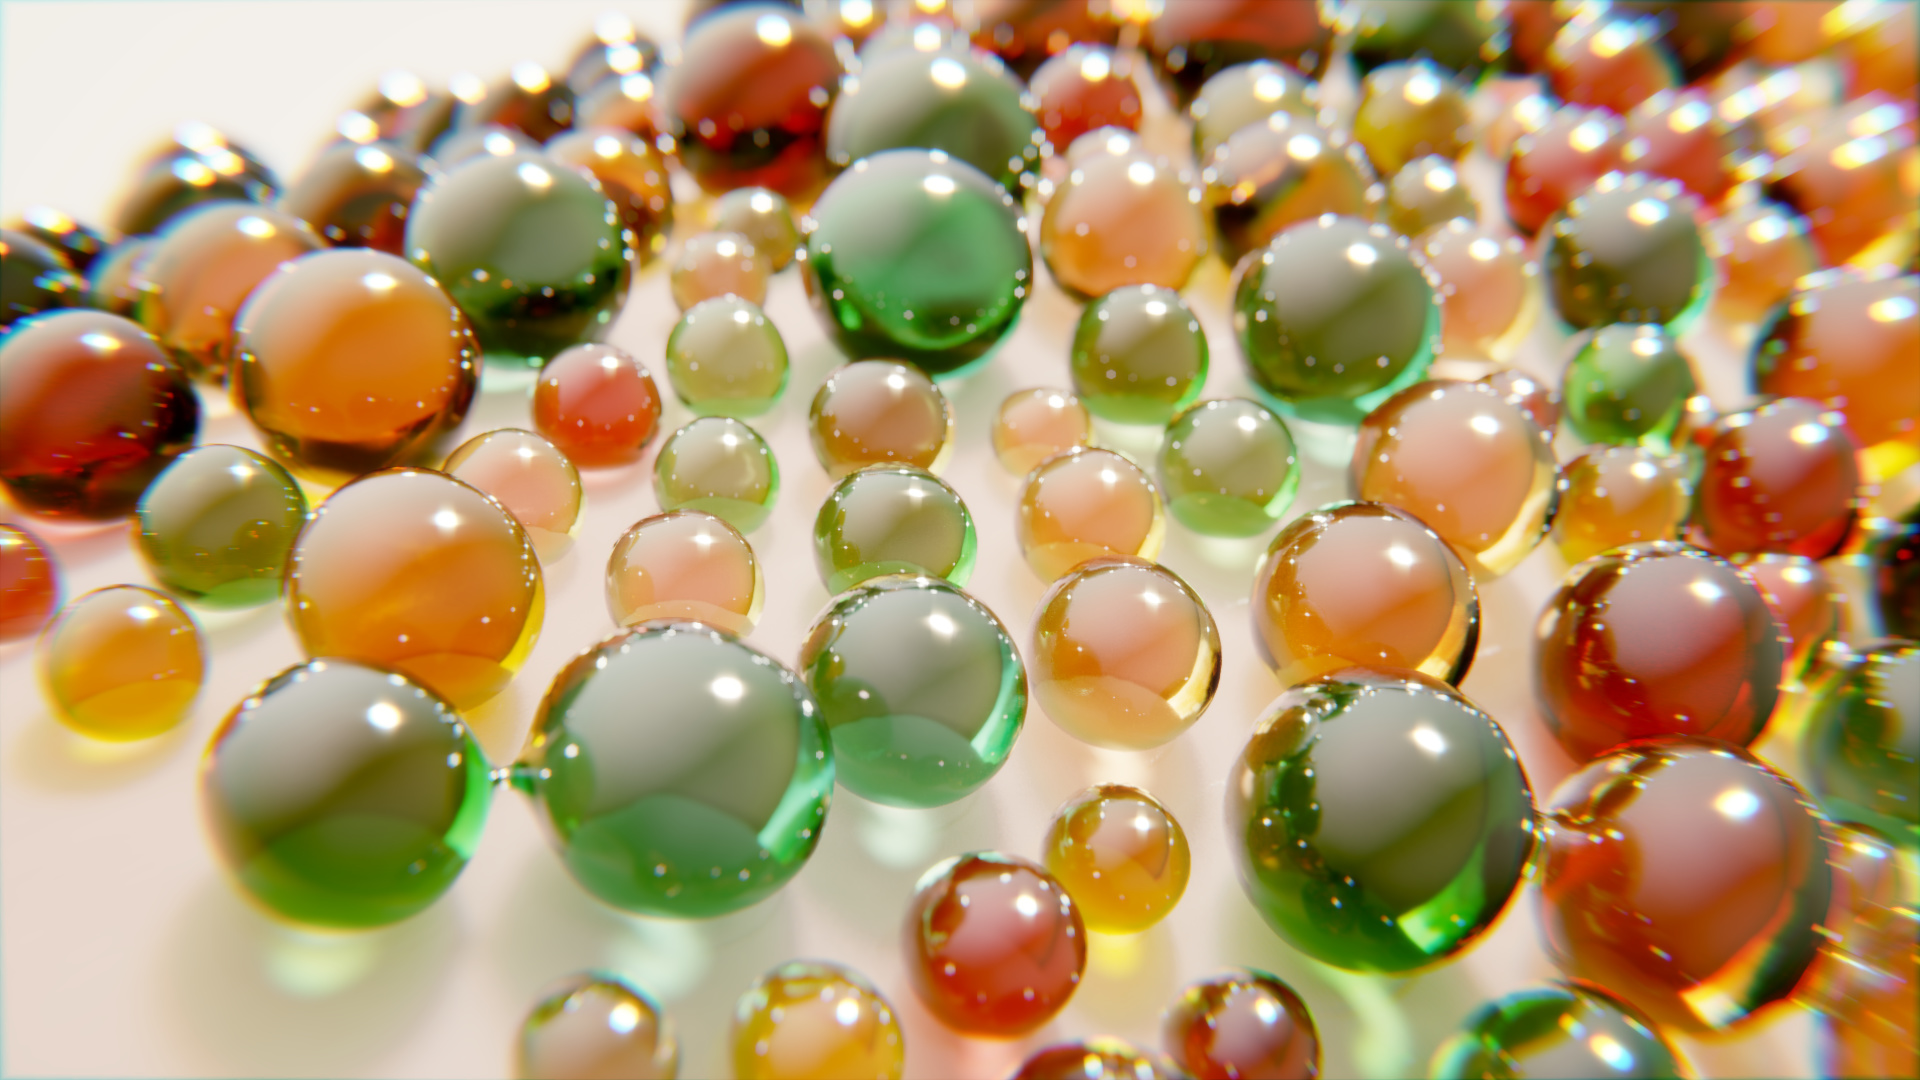
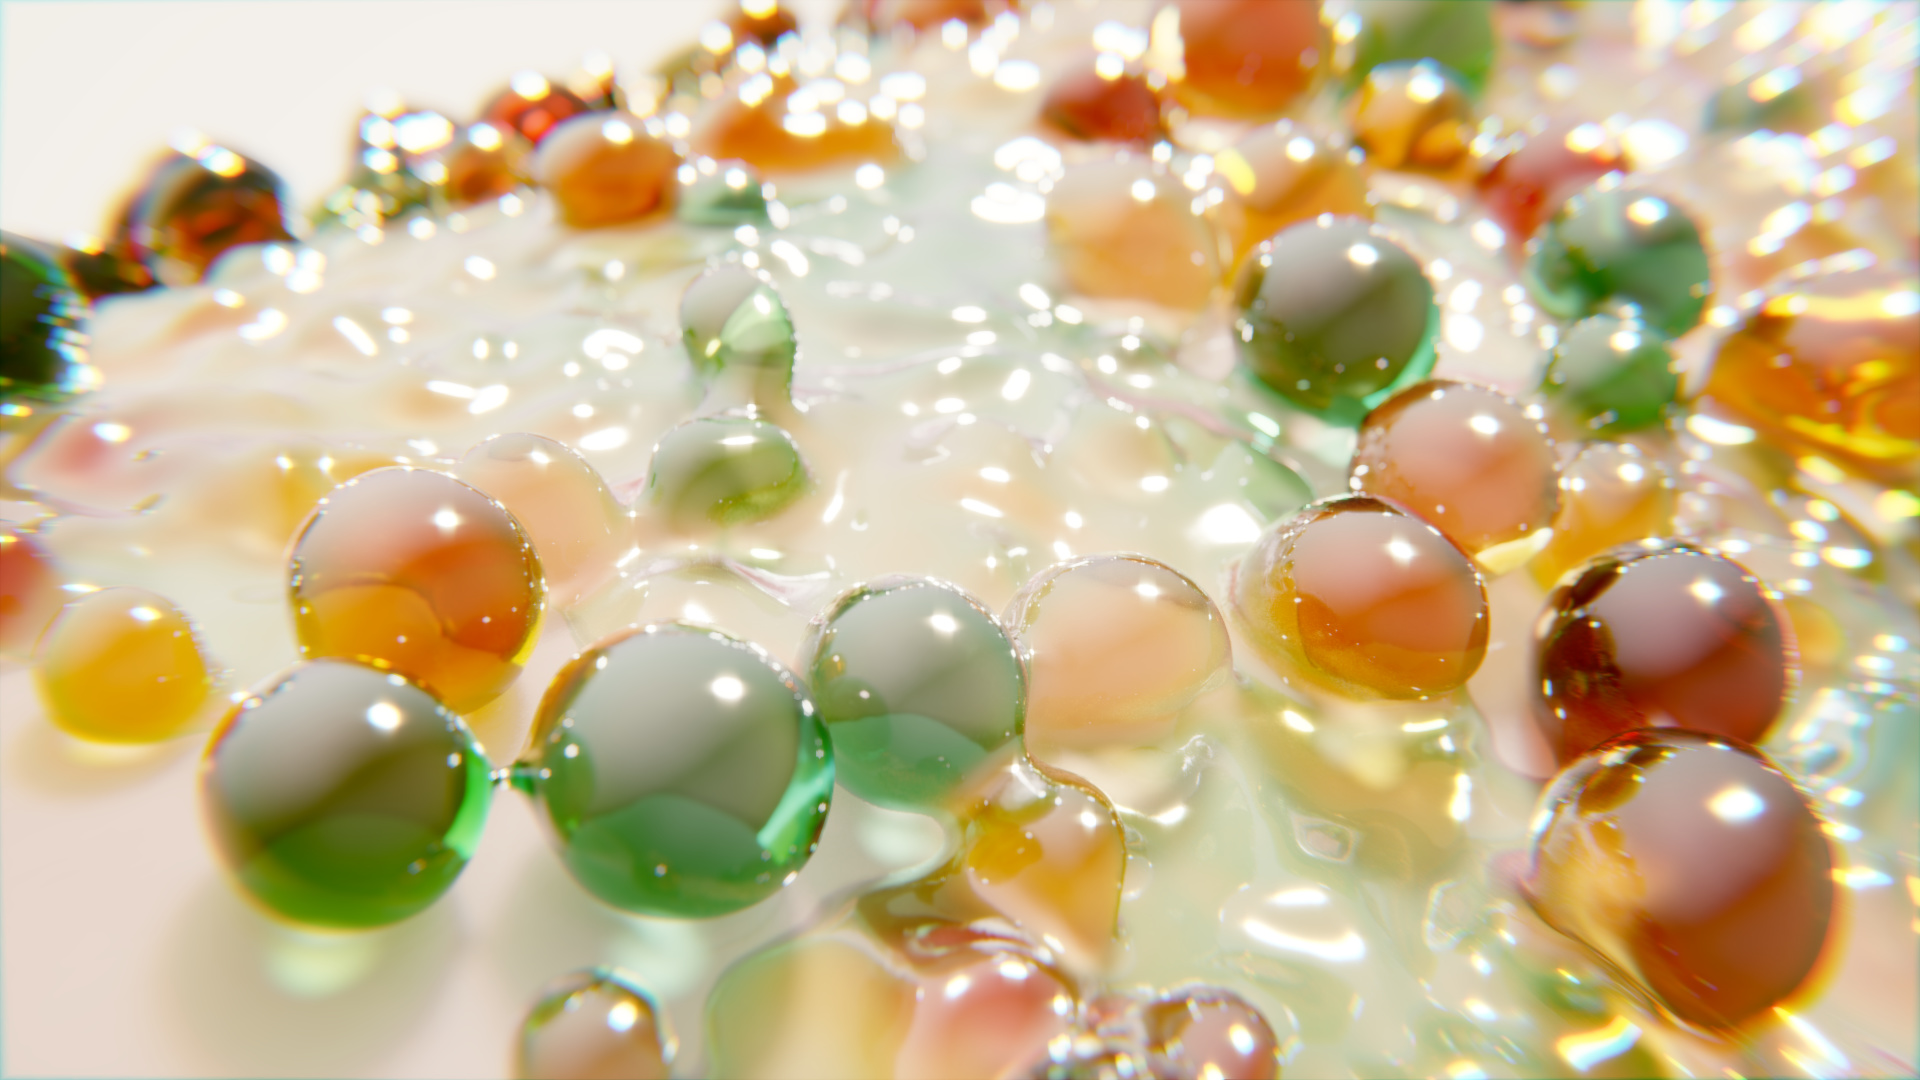
The Blender Compositor and the defocus node are great. These are 2 images I rendered a few weeks ago. All the DOF is 100% defocus node and I quite like the results:
Yeah, and defocus/blur is a really good “fake” for motion blur, too.
When I was rendering a series of focus-blurred frames, I simply couldn’t get over the fact that Blender was re-rendering the same frames several times in a row, just so that it could merge them to produce the blur. I very quickly discovered ways to use various forms of blurring (on a composite layer that included only the moving object in question) in order to slash my render times while still producing “good enuf” results.
It’s quite interesting to see what you get when you composite a tack-sharp (un-blurred) copy of a moving object on top of a very slightly blurred version of the same object, for instance . . . Tricks o’ the trade.

 ).
).